
A FEW RAMBLINGS FROM AN OLD SOUL WITH AN ART BUSINESS
I’m Elaina, the artist and creator of Parks Art Collection. Here on the blog, you’ll find:
-National park travel tips
-Lists of things I wish I knew about running a business
-Honest experiences in various avenues of handmade crafts
-trip itineraries and cost savings
-whatever the heck I feel like
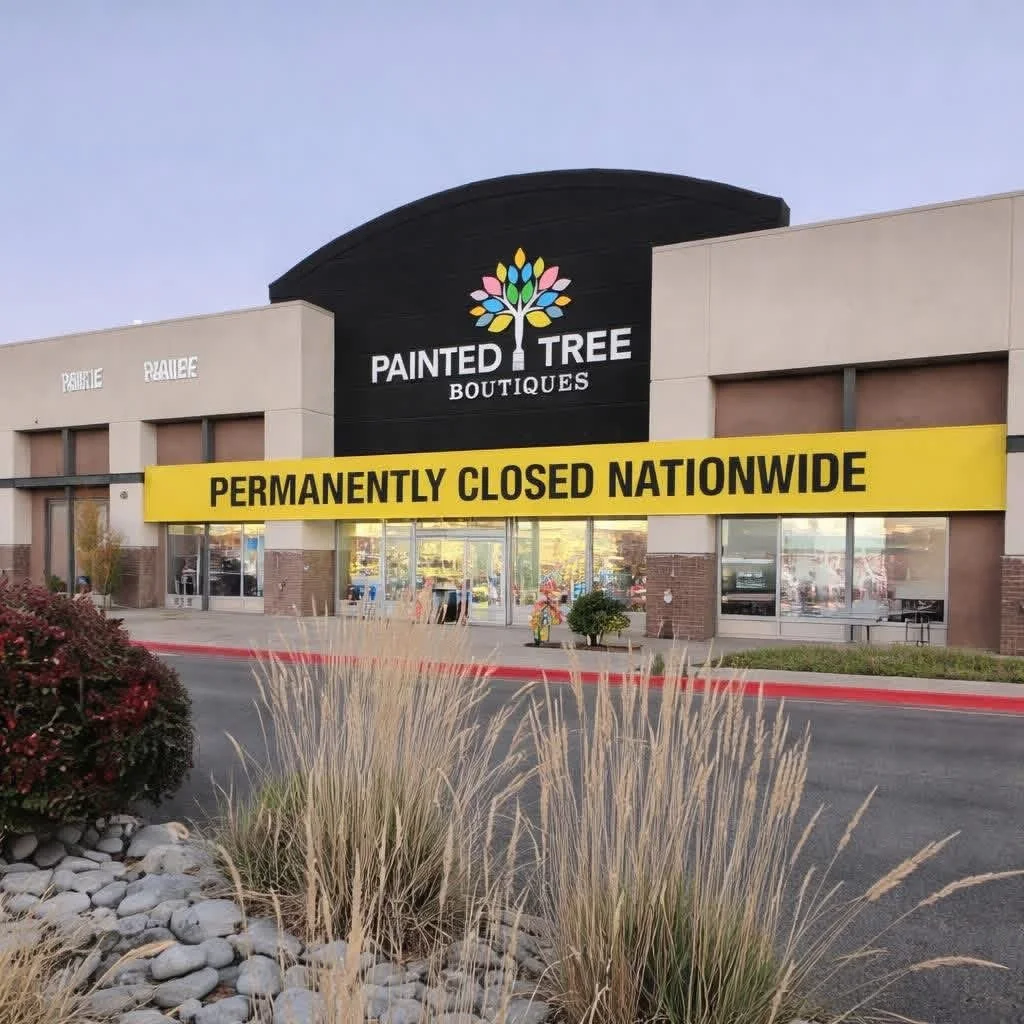
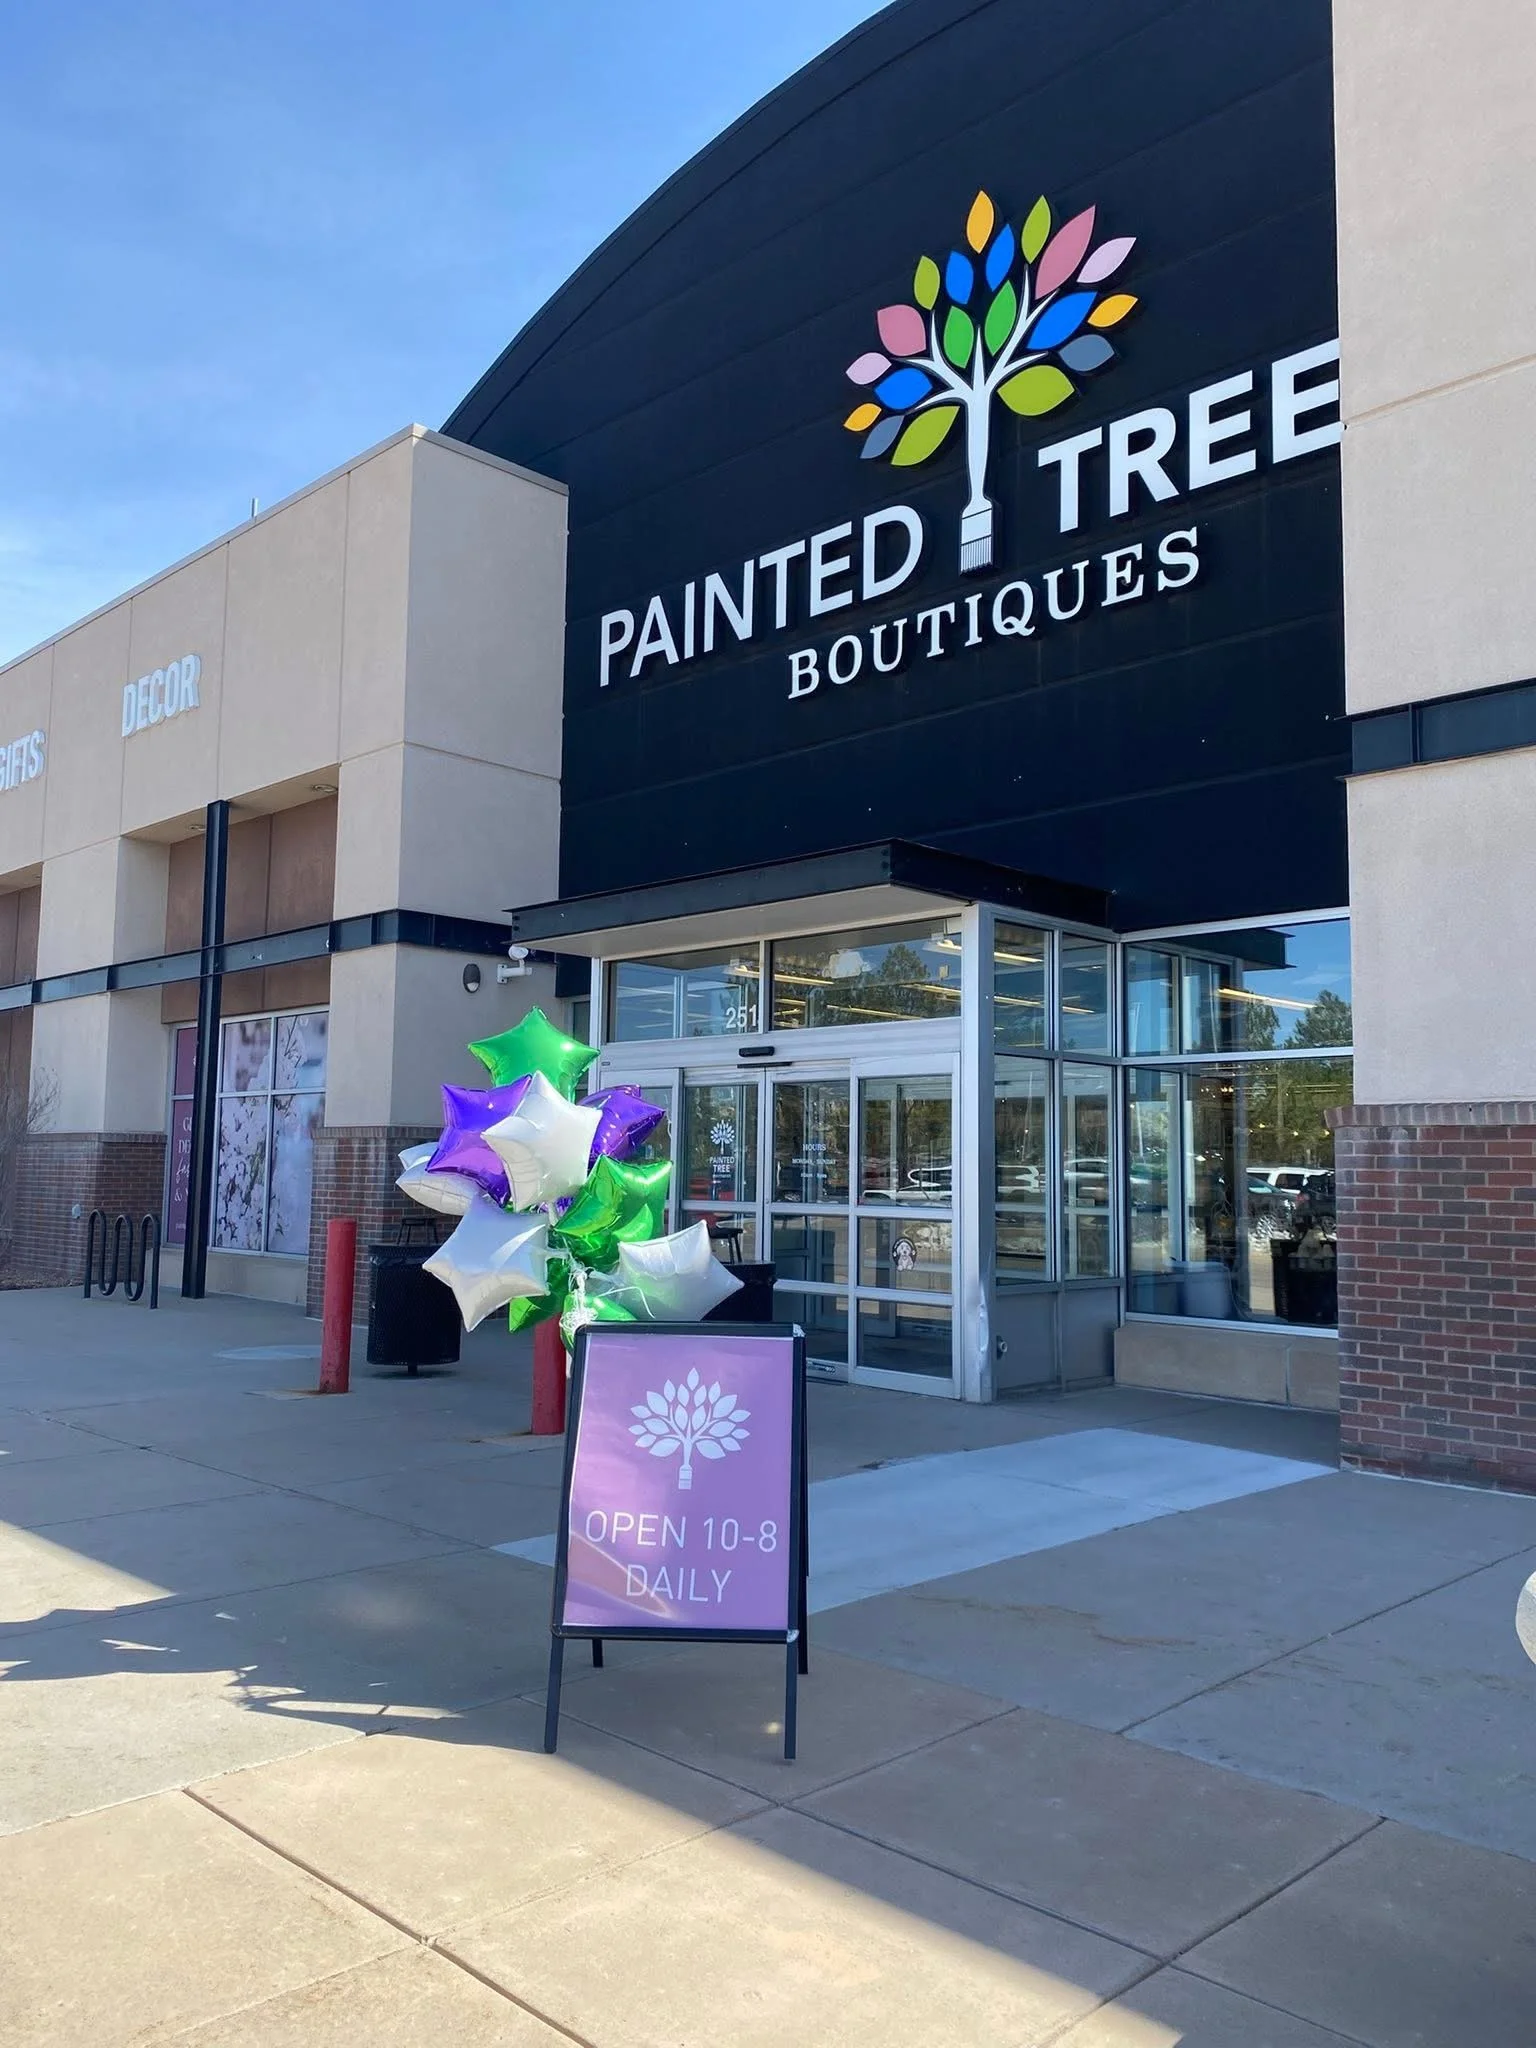
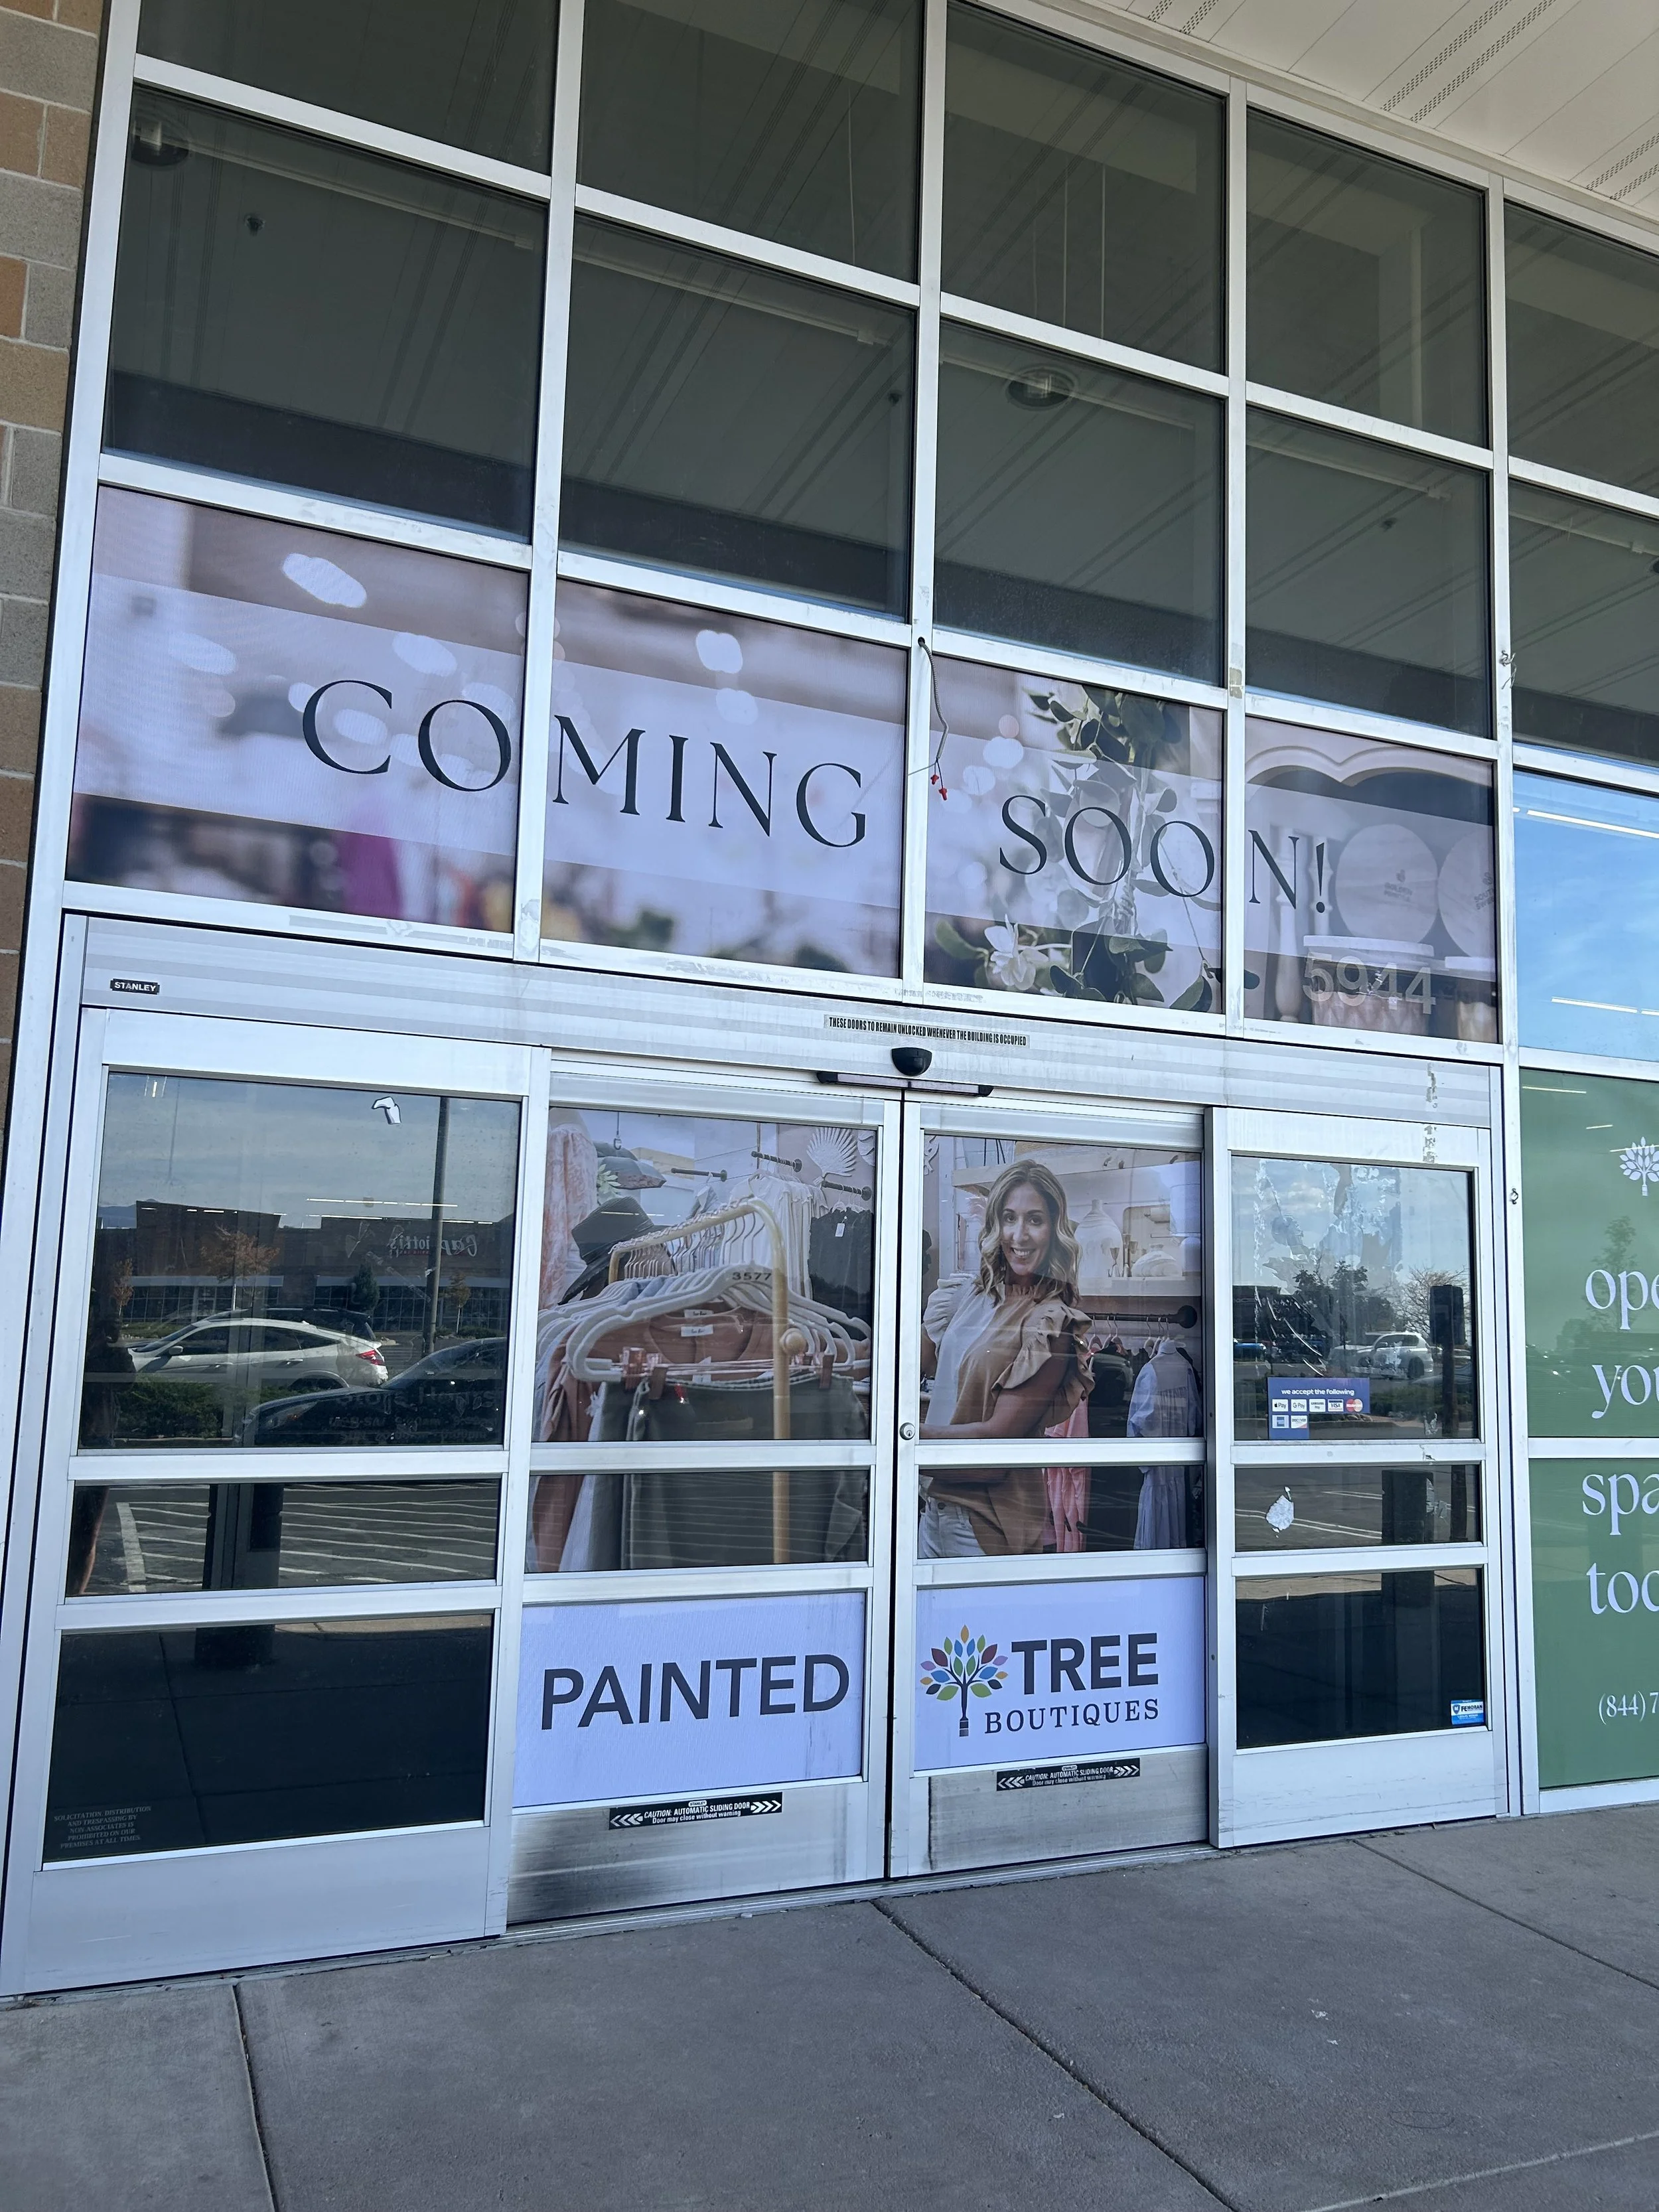
The Fall of Painted Tree Boutiques: A Small Business Owner’s Story of Loss, Chaos, and Recovery
Painted Tree Boutiques abruptly closed across the U.S., leaving vendors with unpaid sales, lost deposits, and just days to clear out booths in a nationwide shutdown.
The Fall of Painted Tree Boutiques or as I like to call it “The Fallen Tree”….
Last weekend, I flew to Ohio to restock my booth because it had been doing so well. I spent the entire weekend working on it, and by Monday I had finished everything—refilled inventory, adjusted displays, all the little details that make a space feel complete. I remember standing there feeling proud of it. It was one of those moments where the hard work actually feels like it’s paying off.
I flew back to Colorado right after that and went into my day job Tuesday morning like normal. There was absolutely no indication that anything was wrong. No email, no message, nothing from Painted Tree.
The first time I heard anything was from another maker who messaged me on Instagram asking if I had seen the news. He sent me a screenshot of an email saying that Painted Tree was shutting down all business operations effective immediately. Vendors had ten days to get everything out.
I never received that email.
Even reading the screenshot, it was hard to believe. The date in the email was wrong, and the messaging was vague and honestly kind of alarming. It said locations might not stay open, that employees would be managing things even though they likely wouldn’t be paid, and that landlords could take control of buildings at any time. The advice was basically to come as soon as possible before you potentially got locked out. So, I called the store manager to confirm and sure enough, it was happening…
Some locations locked within just a few days due to Painted Tree not paying building rents.
I was only in three locations at the time, and I had just moved out of one the month before, which now feels incredibly lucky. But I kept thinking about the people who had booths in eight, ten, even twenty locations across different states. I don’t know how anyone was supposed to deal with that in ten days, especially with no warning.
What’s hardest to process is that April rent had already been taken, and sales were still happening for the first part of the month. I personally had over $600 in sales during those first twelve days, and I’ll never see that money. Security deposits are gone too, which is another full month of rent. When I added it all up, I’m out about $3,000, and I know there are plenty of people who lost a lot more. Some people lost $10,000 or more in business loss.
There wasn’t really time to sit with any of that though, because it immediately turned into a race to get everything out before the doors closed.
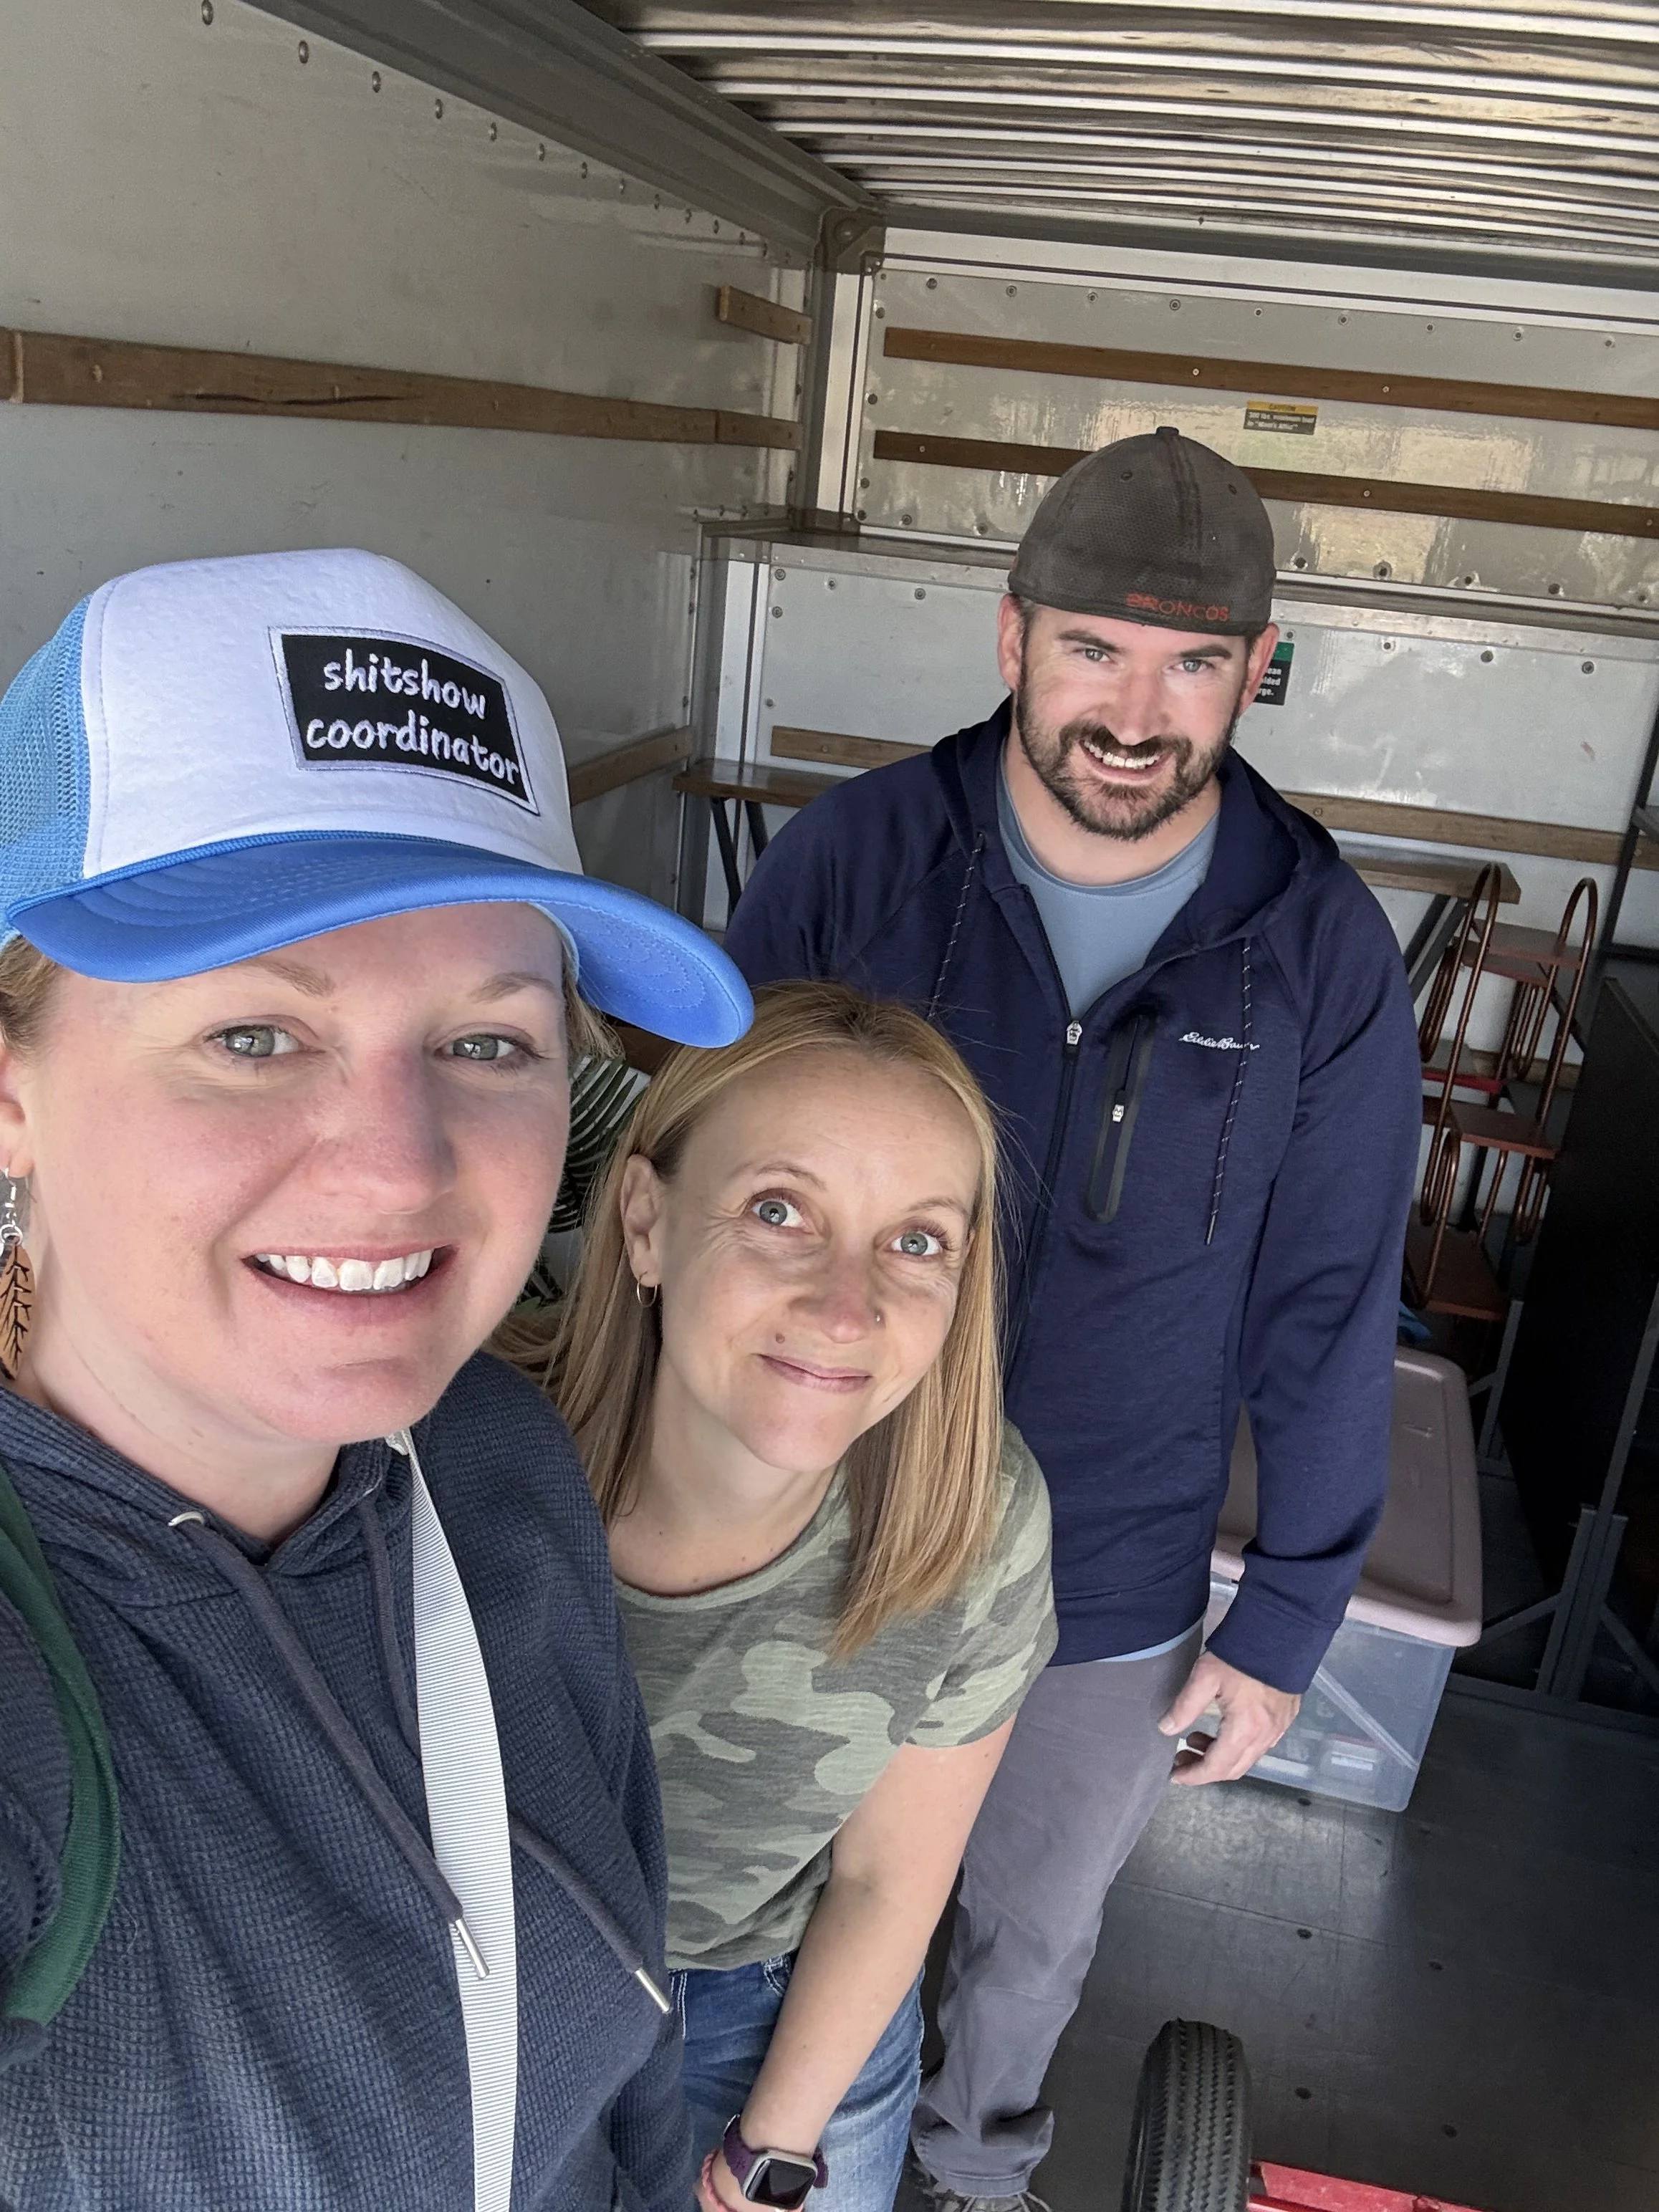
For my Colorado location, I asked a few friends if they could help and rented a U-Haul. It was about a 70-mile drive, and I didn’t want to risk waiting even a day. We just went for it.
When we got there, it was chaos. There were hundreds of small business owners doing the exact same thing—packing up, loading carts, trying to move as fast as possible. There wasn’t any kind of organized system. No one was checking IDs, and it honestly felt like anyone could have walked in and taken whatever they wanted. The employees who were there looked overwhelmed. You could tell they had been put in an impossible position and were just trying to get through it. I apologized to them as I knew they were out of a job and probably out of a paycheck as well. Thank goodness they showed up for us vendors, I will never forget that.
I was able to get everything out that day, which felt like a huge relief, but it still didn’t feel real.
My other booth was in Ohio, which made everything more complicated. I had less than 24 hours to figure out how to handle it, so I started calling family—my cousin, my mom, my uncle, my aunts—and asked if they could help. They showed up and somehow cleared out my entire booth in a single day and stored everything in my brother’s garage. I still don’t know how they pulled it off that quickly, but I know I wouldn’t have been able to do it without them. I still work a day job and had my own stuff to figure out in Colorado!
A lot of people didn’t have that kind of support. I saw people trying to coordinate movers, renting trucks last minute, scrambling to find storage, or just walking away from their booths because they couldn’t physically get there in time.
Looking back on it now, it’s not just the financial loss that stands out. It’s how quickly everything unraveled and how little control any of us had once it started. As small business owners, we take on so much risk upfront—time, money, energy—and we trust that the systems we’re operating within are at least somewhat stable. This situation made it very clear how fragile that can be.
At the same time, the only reason I was able to get through it as smoothly as I did was because of people. Friends who dropped what they were doing to help me load a truck. Family who cleared out a booth 1,200 miles away with almost no notice. Other vendors sharing information in real time so we could make decisions quickly.
So what now?
Right now, I’m sitting on a lot of stagnant inventory. I’m planning to do a sidewalk sale in my neighborhood, which will hopefully help move some of it, even if it’s just a little.
There’s also a strong chance that some of these locations will reopen under new ownership. The buildings themselves are already set up for this kind of business—booths built out, electrical, checkout counters, dressing rooms—so it wouldn’t take much for someone to step in and relaunch a similar concept.
I’ve heard that a company called Copper Mill Mercantile may take over the Colorado Springs location, and that an independent investor could take over the Lewis Center, Ohio store. I’ve made sure I’m on both lists if and when that happens.
In the meantime, I’m looking at other options too—antique malls, online sales at 25–50% off , and just figuring out how to move forward without sitting on inventory for too long.

What led up to this
The reality is, this didn’t come completely out of nowhere.
Painted Tree used to be a very different company before it was sold in 2025. Vendors used to receive physical checks in the mail at the end of each month. It wasn’t perfect, but it worked. Check out my blog here about what it was like initially.
The first real red flag was when they switched to direct deposit in November, right before the busiest retail season of the year, without properly testing the system. Almost immediately, people were missing payments—thousands and thousands of dollars owed to vendors.
Everyone was talking about it, mostly on Facebook groups, trying to figure out what was going on. People were submitting cases through the vendor helpline email and getting no response. There was no phone number to call, and store managers had no control over payments or visibility into what was happening.
I opened a case myself because I had been overcharged rent for five months. I never heard back. I followed up again two months later. Still nothing.
And I didn’t have it that bad. Some people were out astronomical amounts of money.
After the direct deposit issues started, there was essentially no communication from the company. They were overwhelmed with backpay issues, case submissions, and frustrated vendors, and there was no clear way out of contracts.
At the same time, rents were quietly increased without notice. It would just show up on your statement—if you even received a statement.
Despite all of this, they were still onboarding new vendors, still collecting first month’s rent and security deposits, all while, in hindsight, likely knowing they were heading toward bankruptcy in 2026.
One of the strangest moments was just two weeks before everything shut down, when they announced a new CEO. She had been one of the largest vendors in the company, with booths across a huge number of locations. The announcement made it sound like a positive turning point, like things were going to improve.
Then, two weeks later, it was over. Check out my news feature below from KKTV Colorado Springs.
If you want to support my business
If you’ve made it this far, thank you for reading and for caring about what small businesses are going through right now. This situation has left me with a large amount of inventory that was meant for my Painted Tree booths, and I’m working on finding new homes for all of it.
I’ve added many of these items to my website, and for the next couple of weeks I’m offering 20% off with code FALLENTREE.
You can shop here:
👉 https://www.parksartcollection.com
Every order genuinely helps right now, and I appreciate it more than I can put into words.
You can also follow along on Instagram where I’ve been sharing updates in real time:
👉 https://www.instagram.com/parksartcollection
Come to a Pop Up Market and shop many small businesses in person. Shop in person here.


10 Things I Wish I Knew Before Starting My Art Business
10 Brutally Honest Things I wish I Knew Before Starting My Handmade Art Business.
“If you build it, they will come.” That’s cute. When I started my art business, I thought if I made something beautiful, people would find it. That is not how this works.
Here are 10 things I’ve learned the hard way, buckle up!
1. Being Successful Is Only 10% Talent
Talent helps. Secret about me: I’m really not that talented…. I just have honed in on my craft and I’m a hustler! I will out hustle just about anybody, ask around! Talent without:
Consistency
Marketing
Thick skin
Persistence
…doesn’t build a business.
Plenty of talented artists never make money. Plenty of average artists build thriving businesses (I think that’s me, I’m the latter, perhaps in the future… thriving). The difference? They treat it like a business.
2. You Can’t Get Too Attached to One Idea
You might set out to sell candles. But then suddenly your random acrylic earrings experiment outsells everything.
Customers will tell you what they want. They will show you what they value. Even if it’s not what you originally envisioned — pay attention.
Go with what’s working. Don’t cling to what you wish would work, or worse yet, what you’re emotionally attached to.
3. The Internet Is Completely Saturated- Duh, there’s like 5 people reading this blog total.
The internet is full of people just like us, trying to make an extra buck with a little talent and a bit of gusto. So what’s the strategy for being seen?
Start an Instagram account
Start a Facebook page
Collect reviews
Ask for testimonials
Do pop-up markets
Network
Tell your story
Show up repeatedly
Visibility is created. You have to put yourself out there (I still hate this part. I don’t like to be judged!) They are always going to judge you, but you can’t just sit back and wait or expect family and friends to spread the word. You need actual fans and customers that are not your friends.
4. Failure Is Inevitable
Rejection is coming. You will get:
“No” from stores and market organizers
Free advice from strangers
Wasted money on bad markets
Failed product launches
Ideas that flop
Maybe even straight-up insults
It’s part of it. If you’re not failing, you’re probably not trying enough new things. My motto has always been, “try things before you’re ready”. Plan for the worst and set your expectations low.
5. Consistency and Persistence Are the Real Keys
This is the ugly truth. Keep going when:
Sales are slow
Posts get no likes
You feel dumb or like no one cares
You question everything
Most people quit too soon. The ones who don’t? They win, because every year you do this, you get better and more experienced. Think about another career you have had. Maybe you started waitressing in high school. How were you at age 16? By the time you were 21, you had learned a lot and gotten really good at it! When you get good at things, you bring home more bacon too! You are inexperienced in the beginning if this is your first business. We have all been there believe it!
6. Diversify Your Income Streams Once You Get Traction
Do not rely on one thing. I see a lot of Facebook posts from people saying their Etsy shop totally dropped off and now they have no money, or they didn’t get into a pop up show that they had done the last 2 summers and they were counting on it! Do not rely on just one income source.
What if:
Etsy shuts down your shop? (Yes, it happens.) Do you have a website?
You get injured and can’t physically do pop up markets?
Social media algorithms tank your reach?
You started a retail shop ALL IN, and you have 0 foot traffic. Now you’re draining savings to pay bills.
Multiple income streams protect your future. Here are mine right now:
Etsy
My website (squarespace, by the way… if you sell products- use SHOPIFY, not squarespace, anyways…)
Faire (wholesale platform)
In person markets (especially longer holiday shows)
Direct wholesale accounts ordering through email (boots on the ground kinda stuff)
Consignment (why are people so against it?)
Painted Tree Boutiques (meh…. it works for me, see my blog post about it HERE)
Facebook buyers
Custom wedding and business orders
And I’m always looking for more. Some ideas I’m considering:Craft workshops, online classes, rental services, new product lines, in person laser engraving events, investing profits some other way.
Long-term businesses are layered.
7. Keep Throwing Spaghetti at the Wall
Experiment. Test. Try things that might flop. If something sticks — double down. If it doesn’t — move on.
You don’t have to be emotionally attached to every idea. You have to be good with constant change. Stop doing the same thing that isn’t working. NOW!
8. Be Prepared for Crickets
You will launch something and hear nothing. Trust me, people are still watching even if they say nothing. After years of doing this, people say- yeah I saw your post last week! Or oh yeah, I read your blog. I’m like… really? Awesome! They are watching even if there’s no engagement.
No likes.
No comments.
No sales.
Overnight success is incredibly rare. Products going viral is not normal. Quiet growth is normal, slow and steady wins the race as they say. A slight holiday boom is great, and then January hits. This is going to be a roller coaster ride!
9. Obsess Over Customer Service in the Beginning
In the early stages, your reputation is everything.
Respond to messages quickly, fix mistakes immediately, own it when you mess up and make it right.
Consider:
Handwritten thank-you notes
Small surprise freebies
Personal touches
Reviews build credibility—» Credibility builds trust —» Trust builds sales.
10. Don’t Spend Every Dollar You Make
If you make $500 in one great holiday week — that doesn’t mean you’ve “made it.” Sales fluctuate.
I wish I had been smarter in the beginning about:
Saving for slow months
Reinvesting strategically
Planning for taxes
Cash flow management is just as important as creativity if this is actually a business and not a hobby.
Quick side story: After 5.5 years in business, I just had an older man “explain” (cough… mansplain) to me that my business is a hobby, not a business. Thanks man! You have walked up, judged my products, maybe the way I look, my brand, and in 4 minutes told me “you know this is a hobby right?”. I chuckled and brushed it off. This man has no idea. These outrageous and bold comments are PAR for the course. I share them because I want you to know you are not alone. Be proud of how far you’ve come!
Final Thoughts (I feel like Jerry Springer here all of a sudden)
Starting an art business will stretch you. It will humble you & it will test you. Be authentic and be strong in the face of disappointment.
Build up tough skin because you will have to listen to people’s opinions every year.
If you’re willing to learn, adapt, and keep going — you can build something sustainable and rewarding. You will grow as a person, and inspire others too. Most importantly for me: FOLLOW YOUR DREAMS. As Luke Combs says “The dream won’t chase you back.” Yes I did.
I dare you to comment! I’ll know someone read it :)
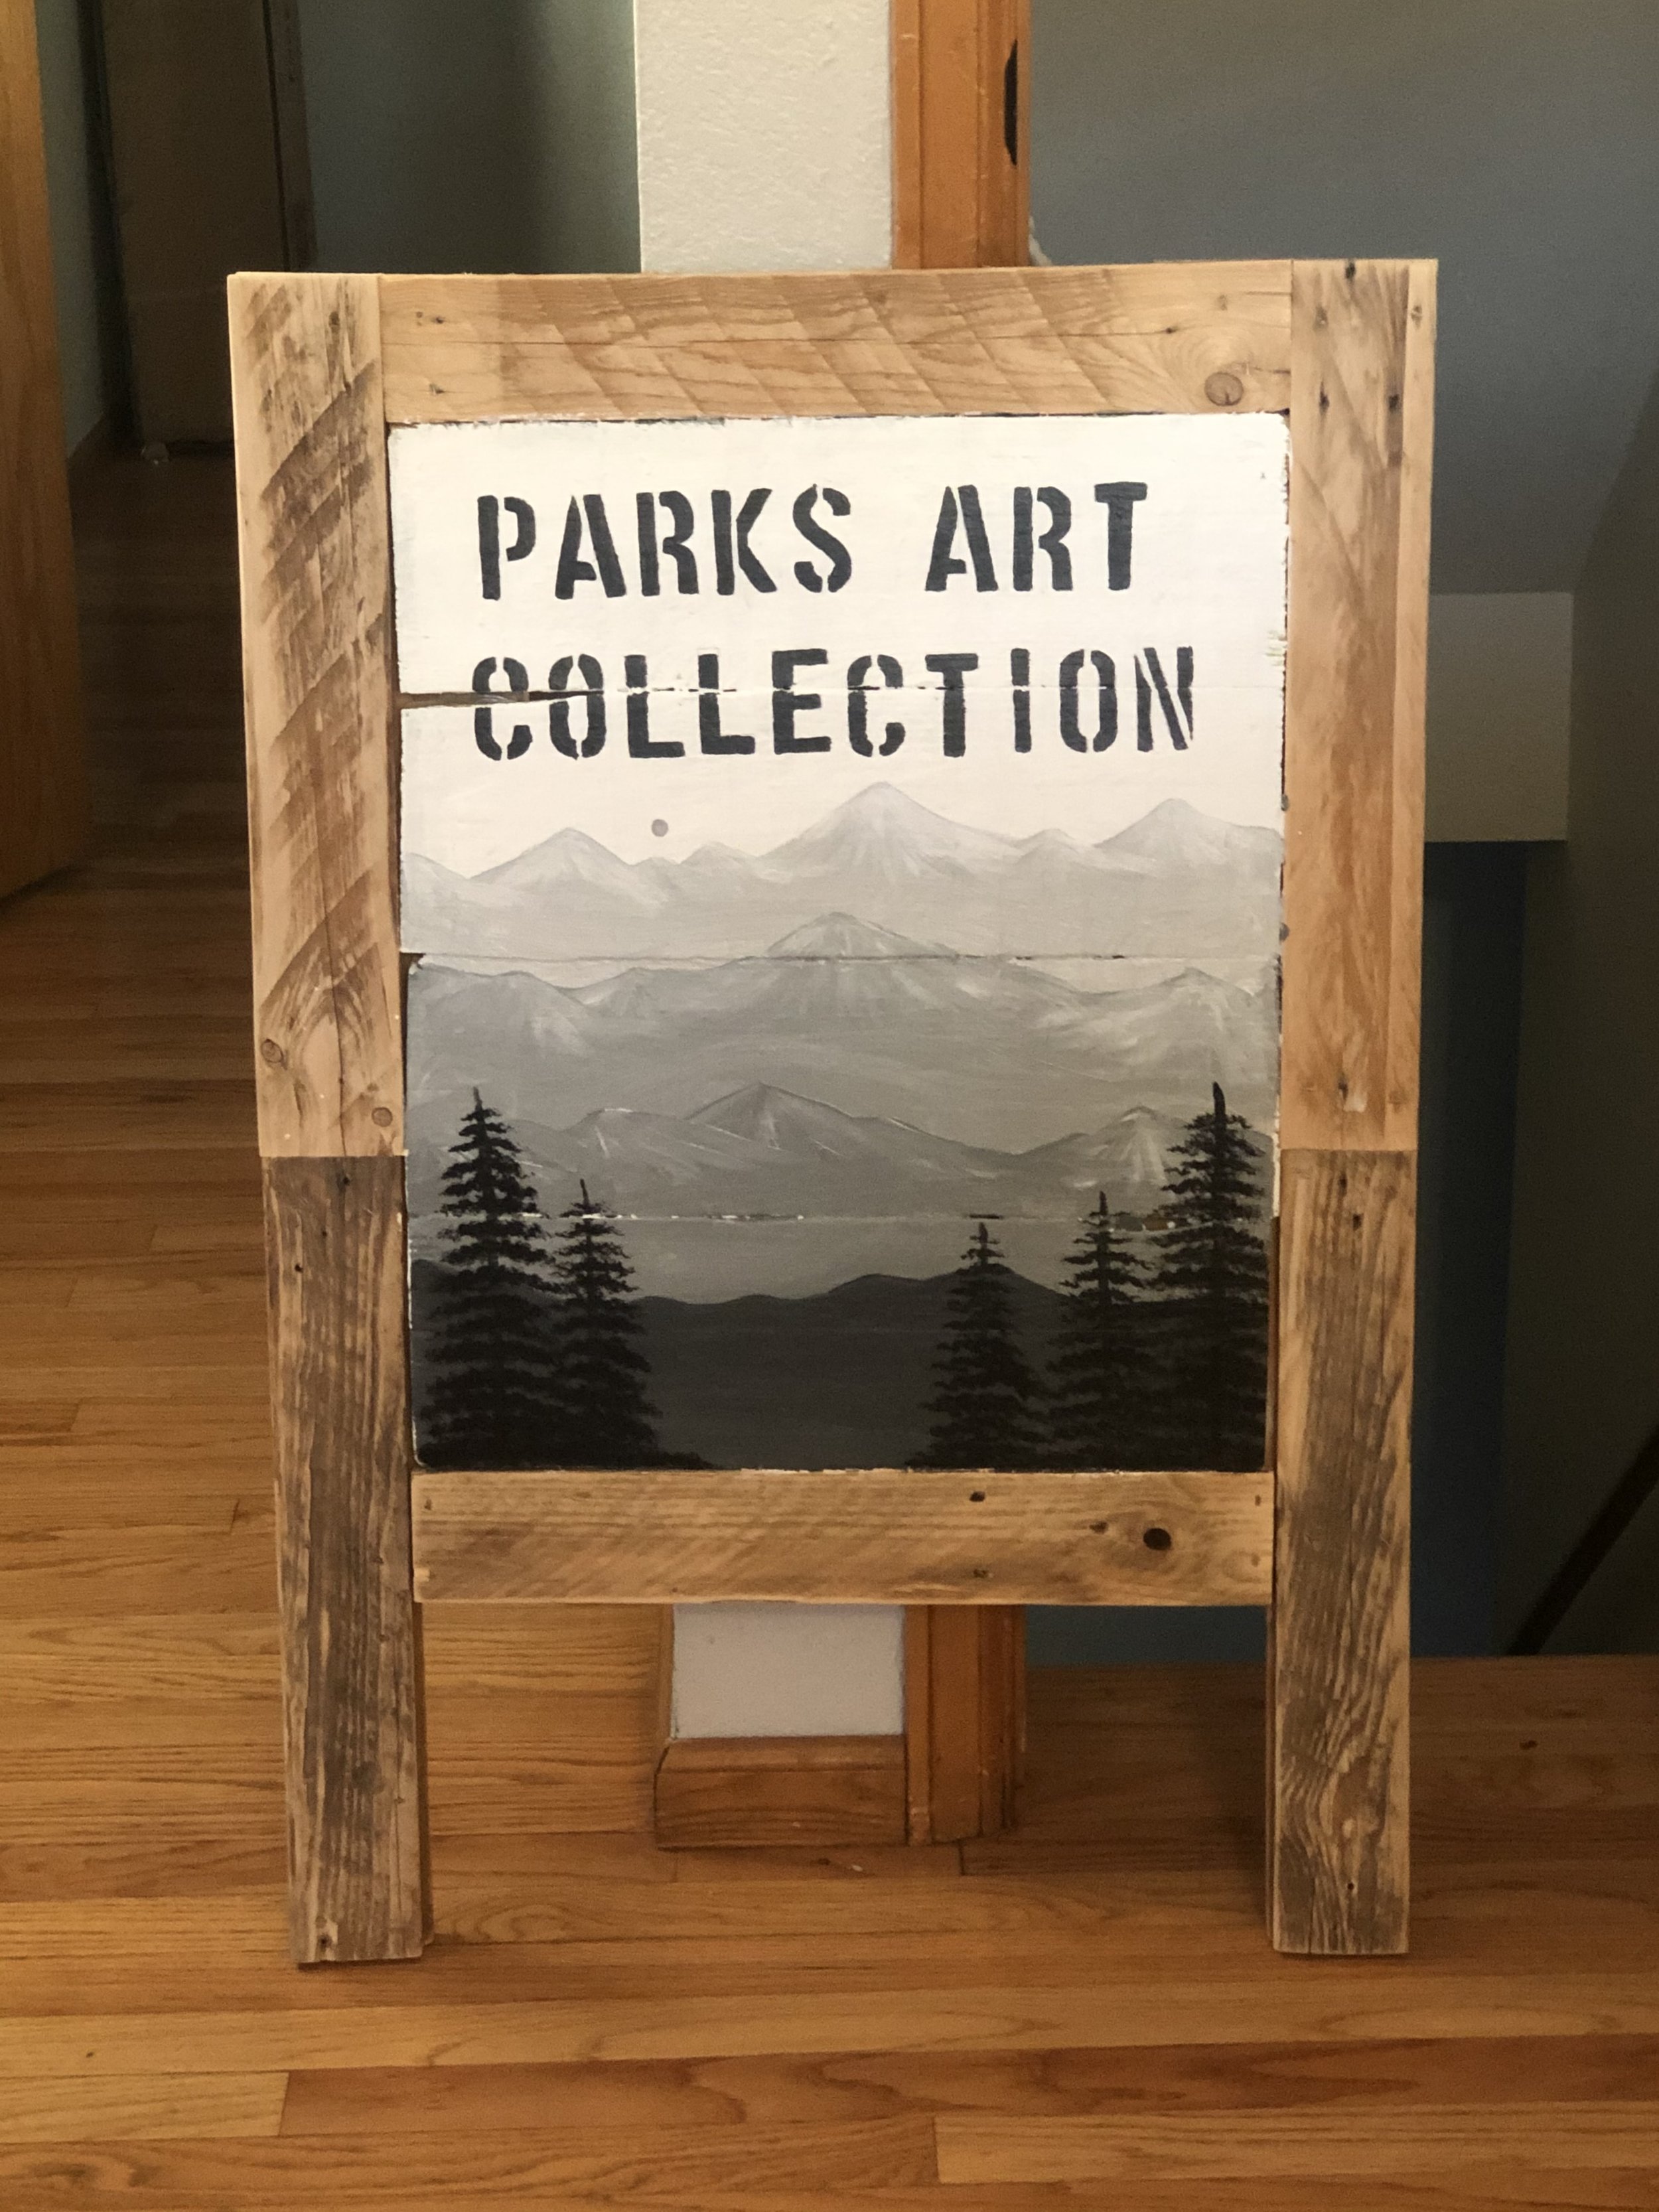
My first ever Pop Up Market Sign when I couldn’t afford banners or signage. I used an old pallet wood sign and recycled house paint. I still have it btw….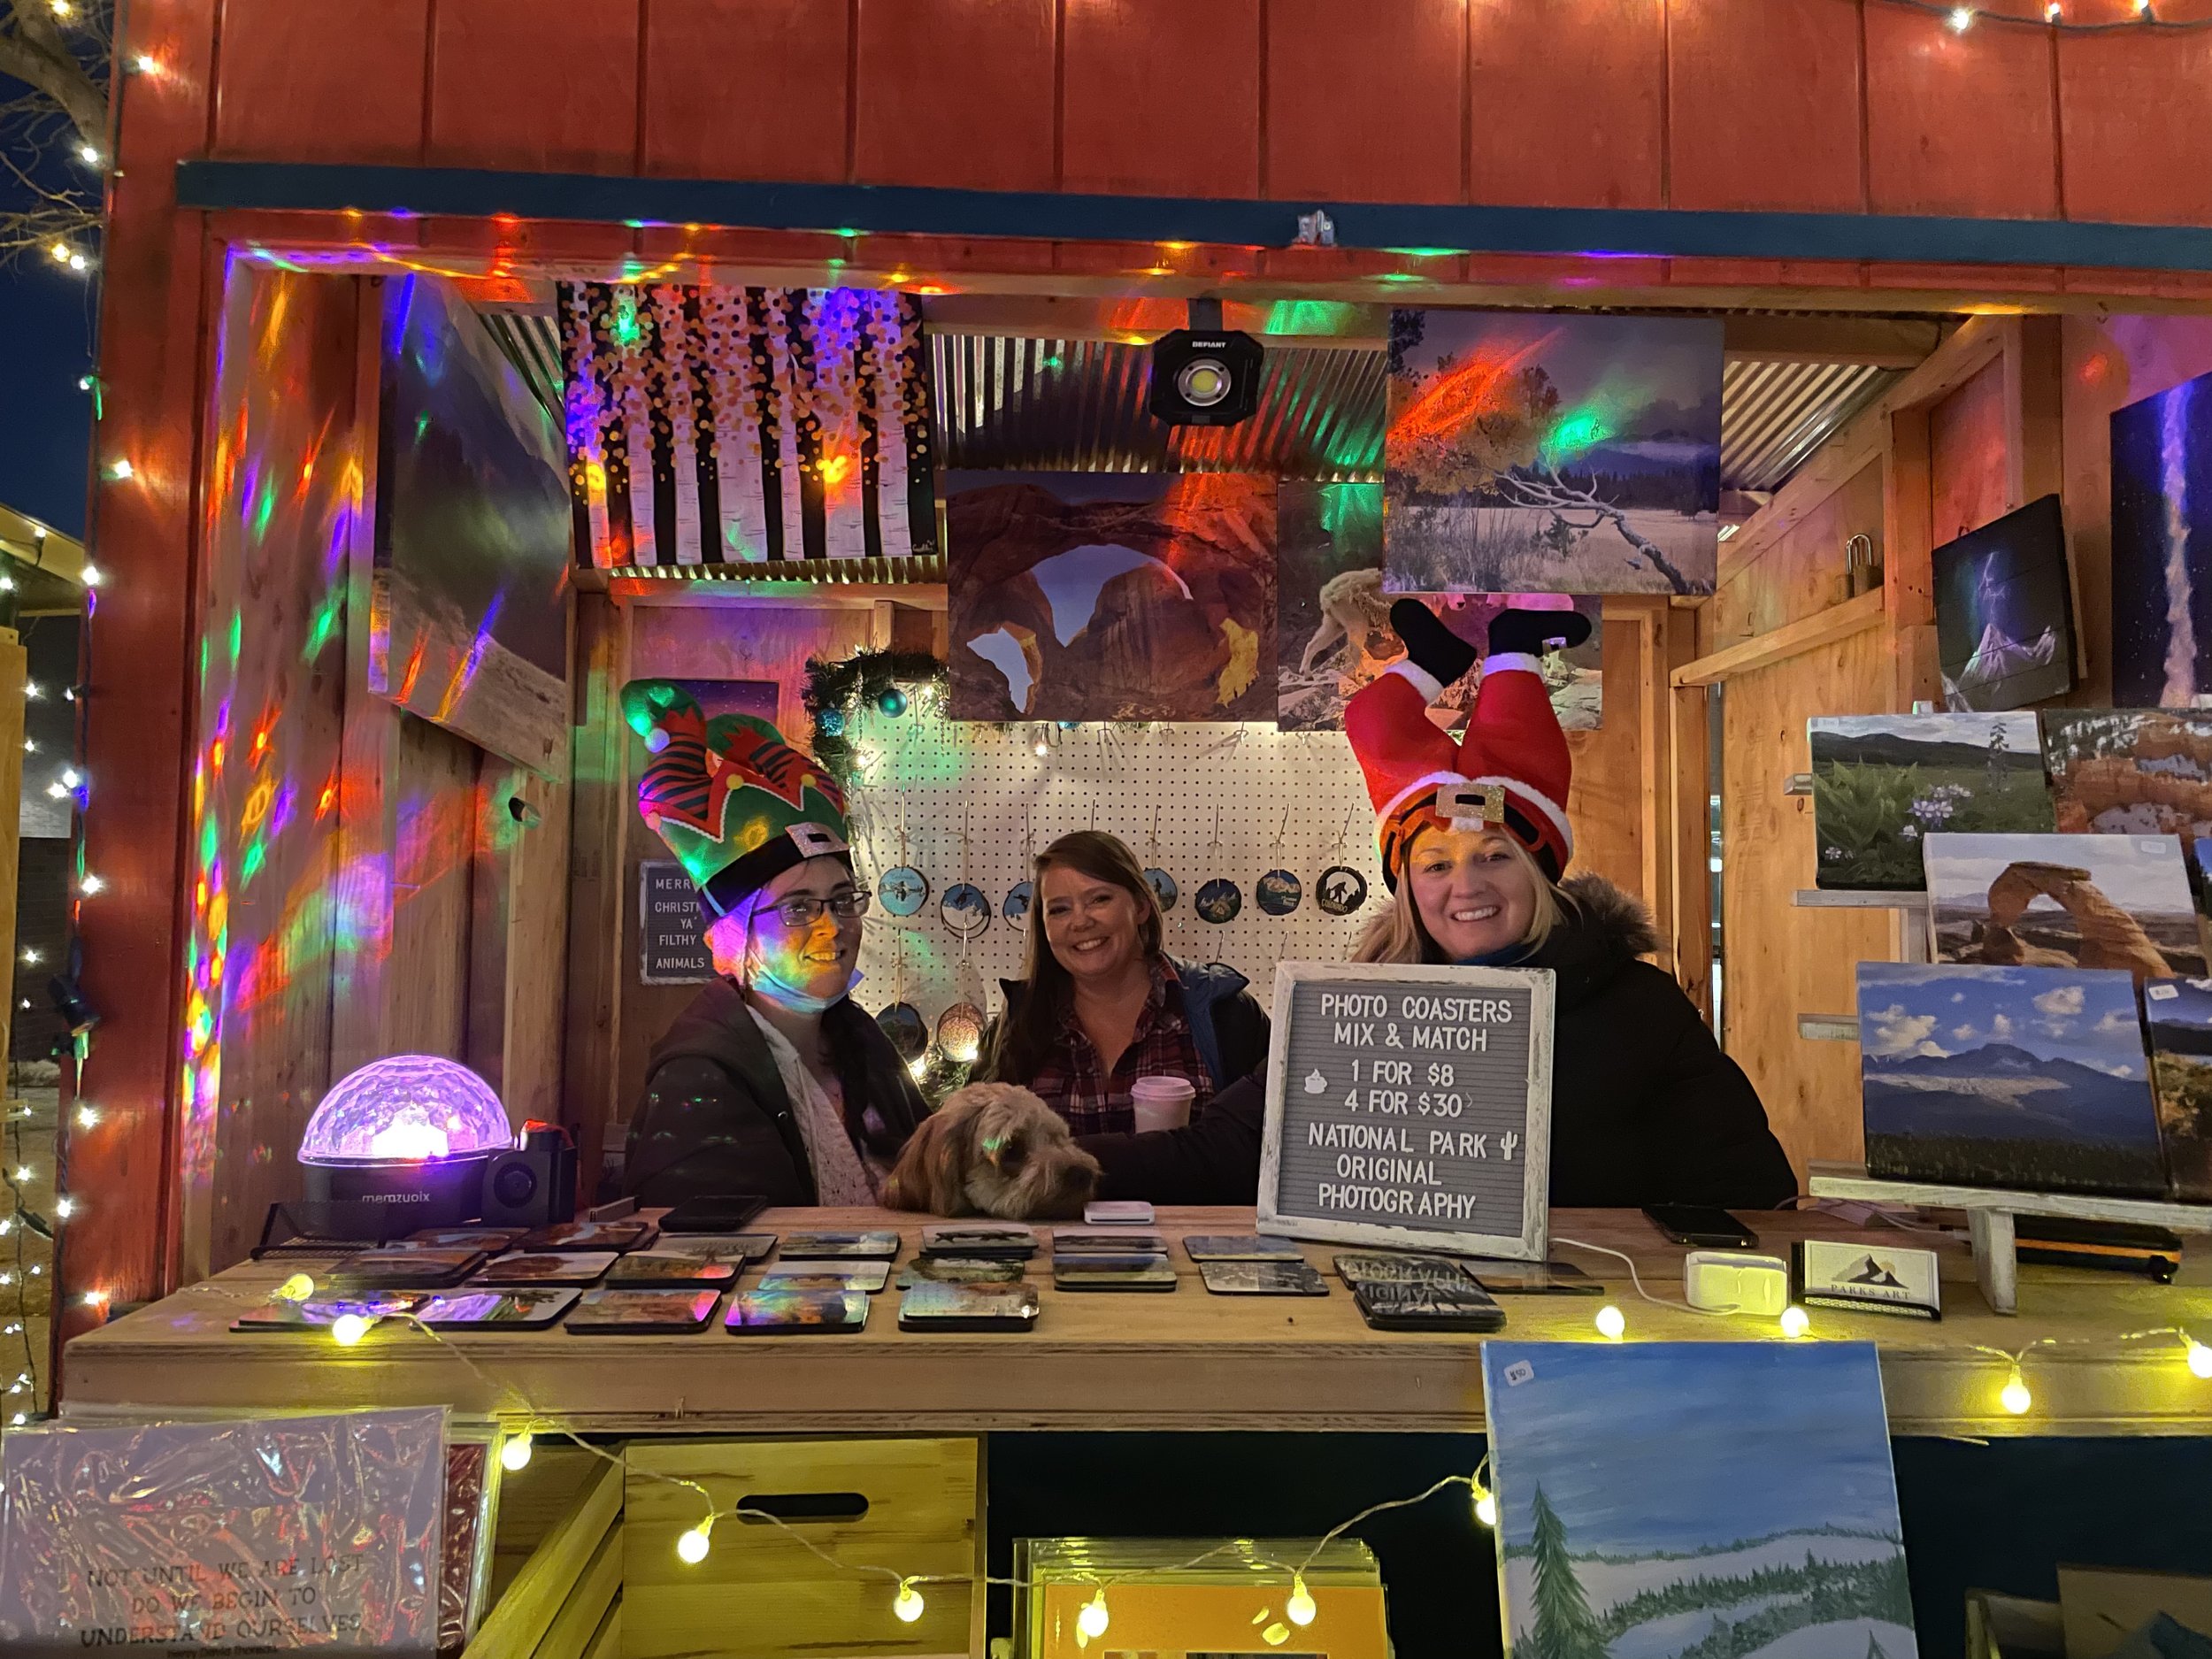
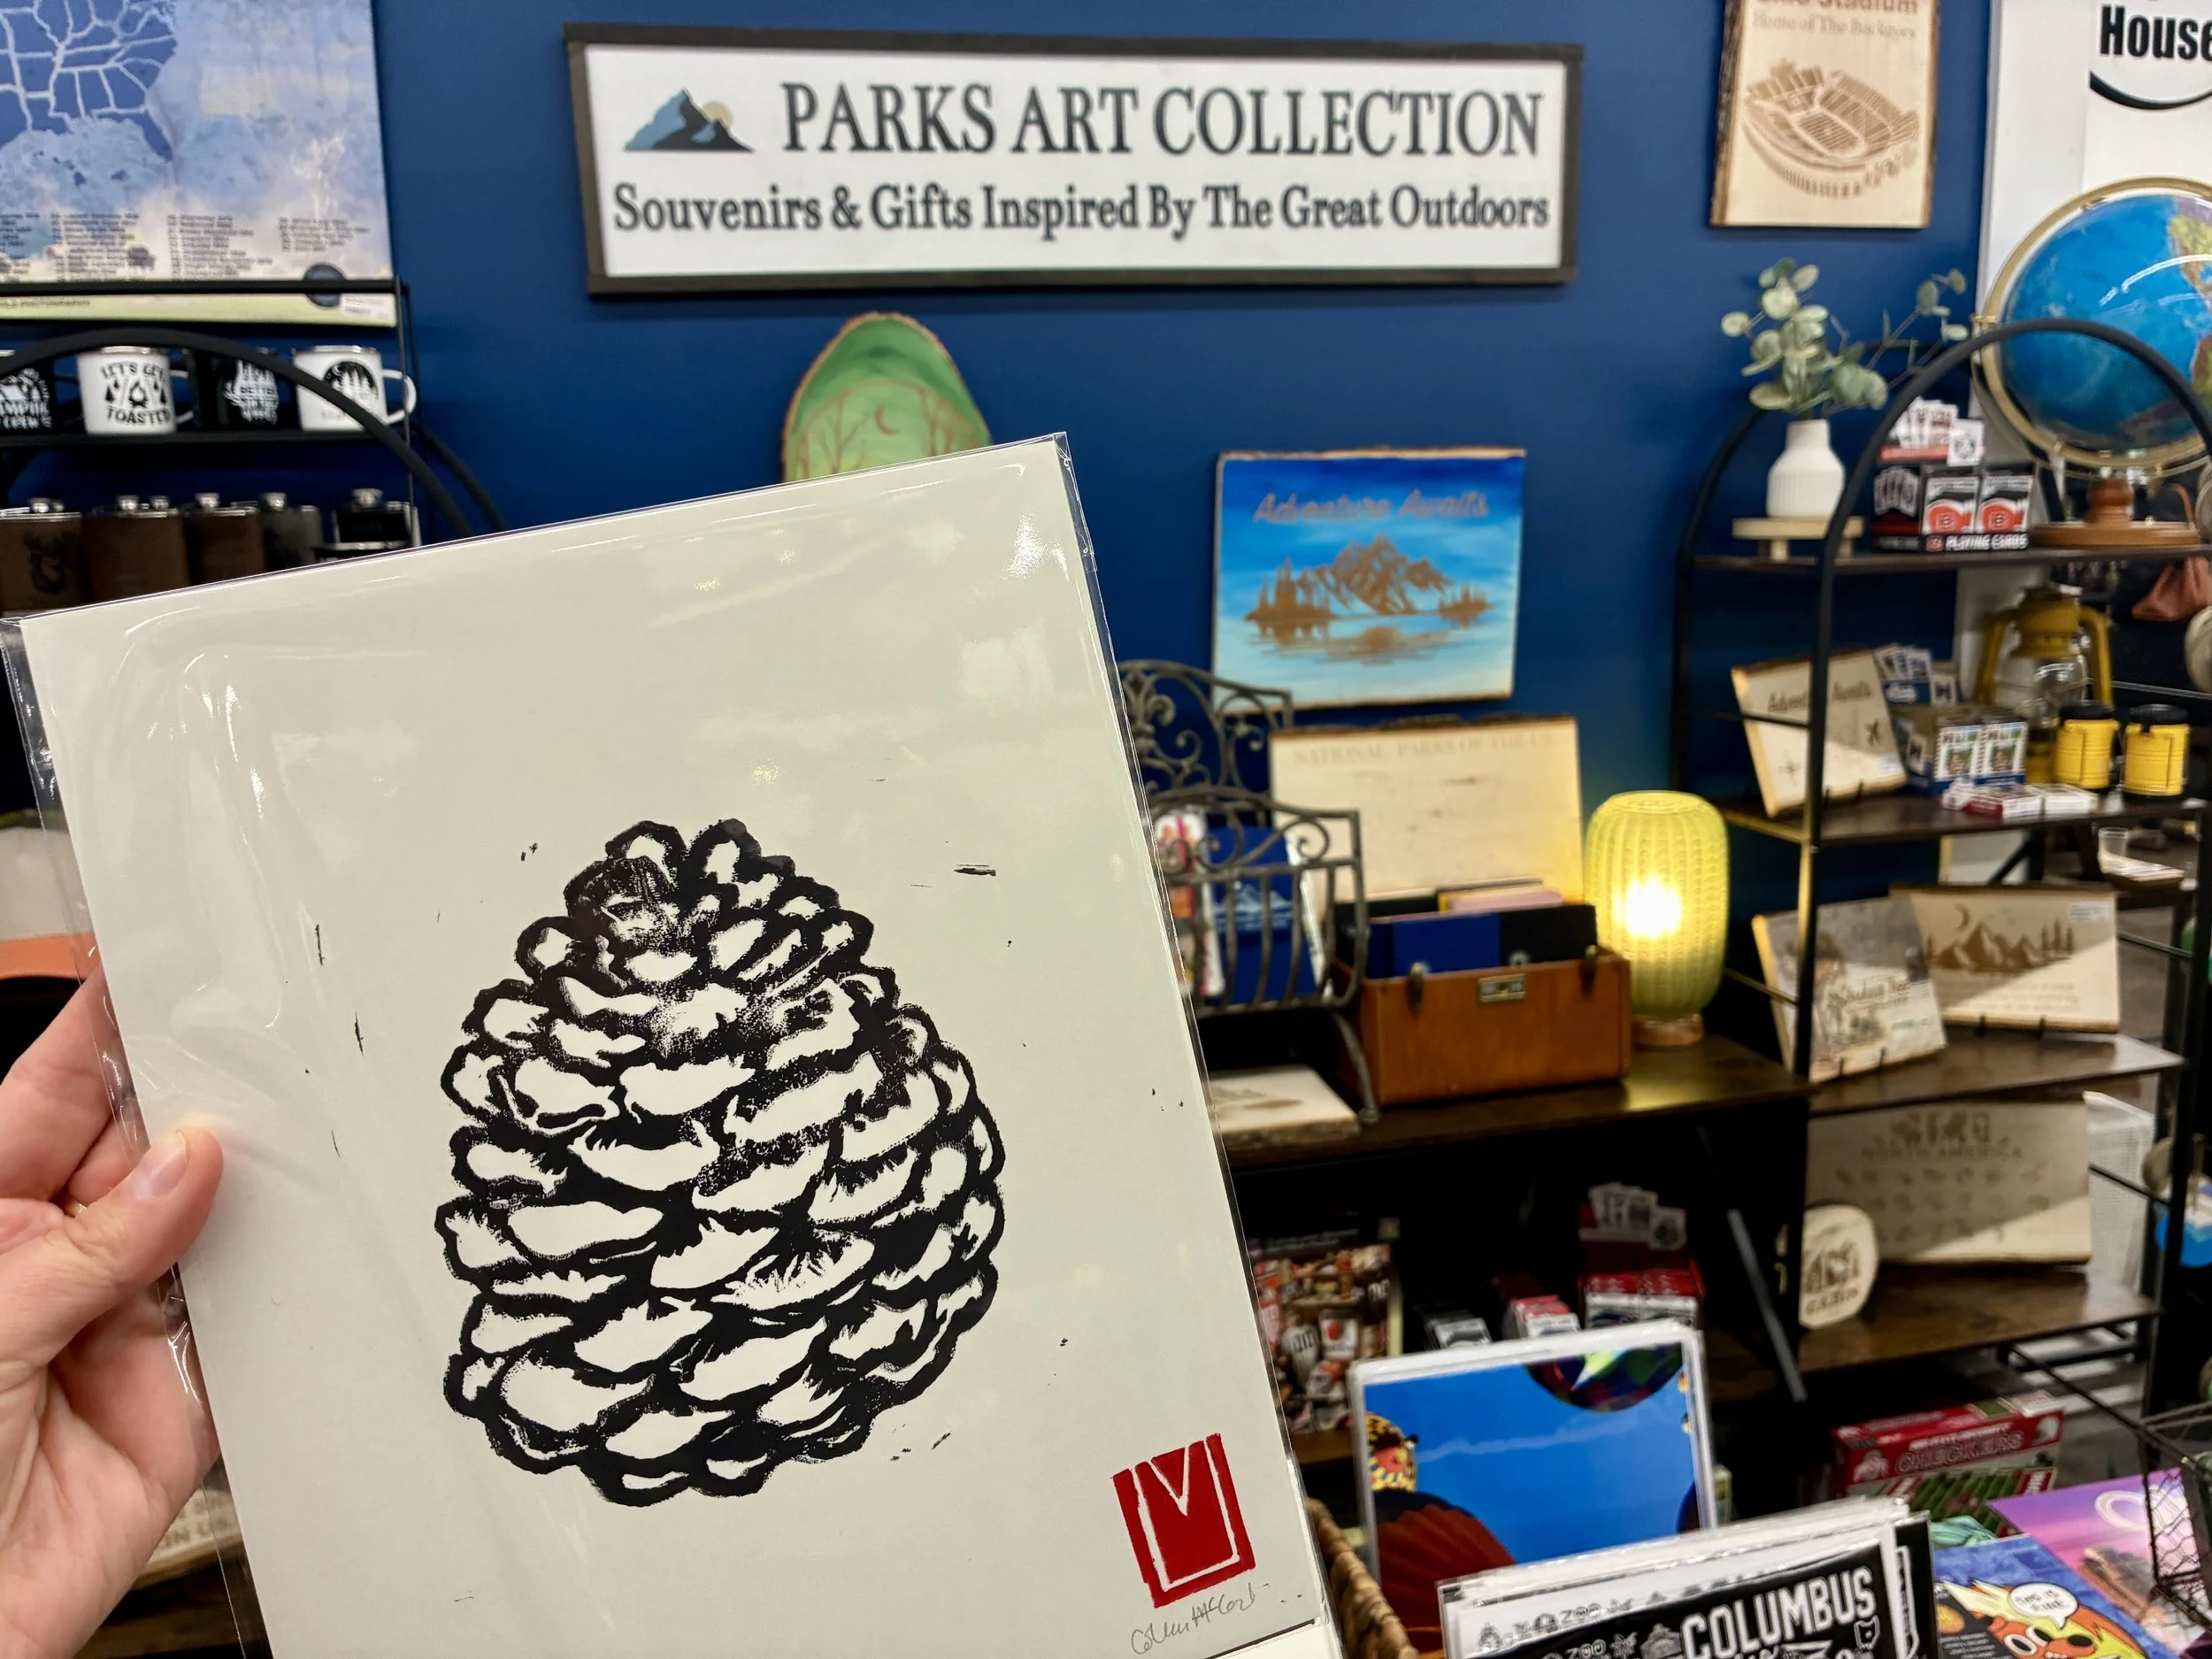
First year doing pop ups, I used to sell photography and share a booth with my friend.
Things changed….
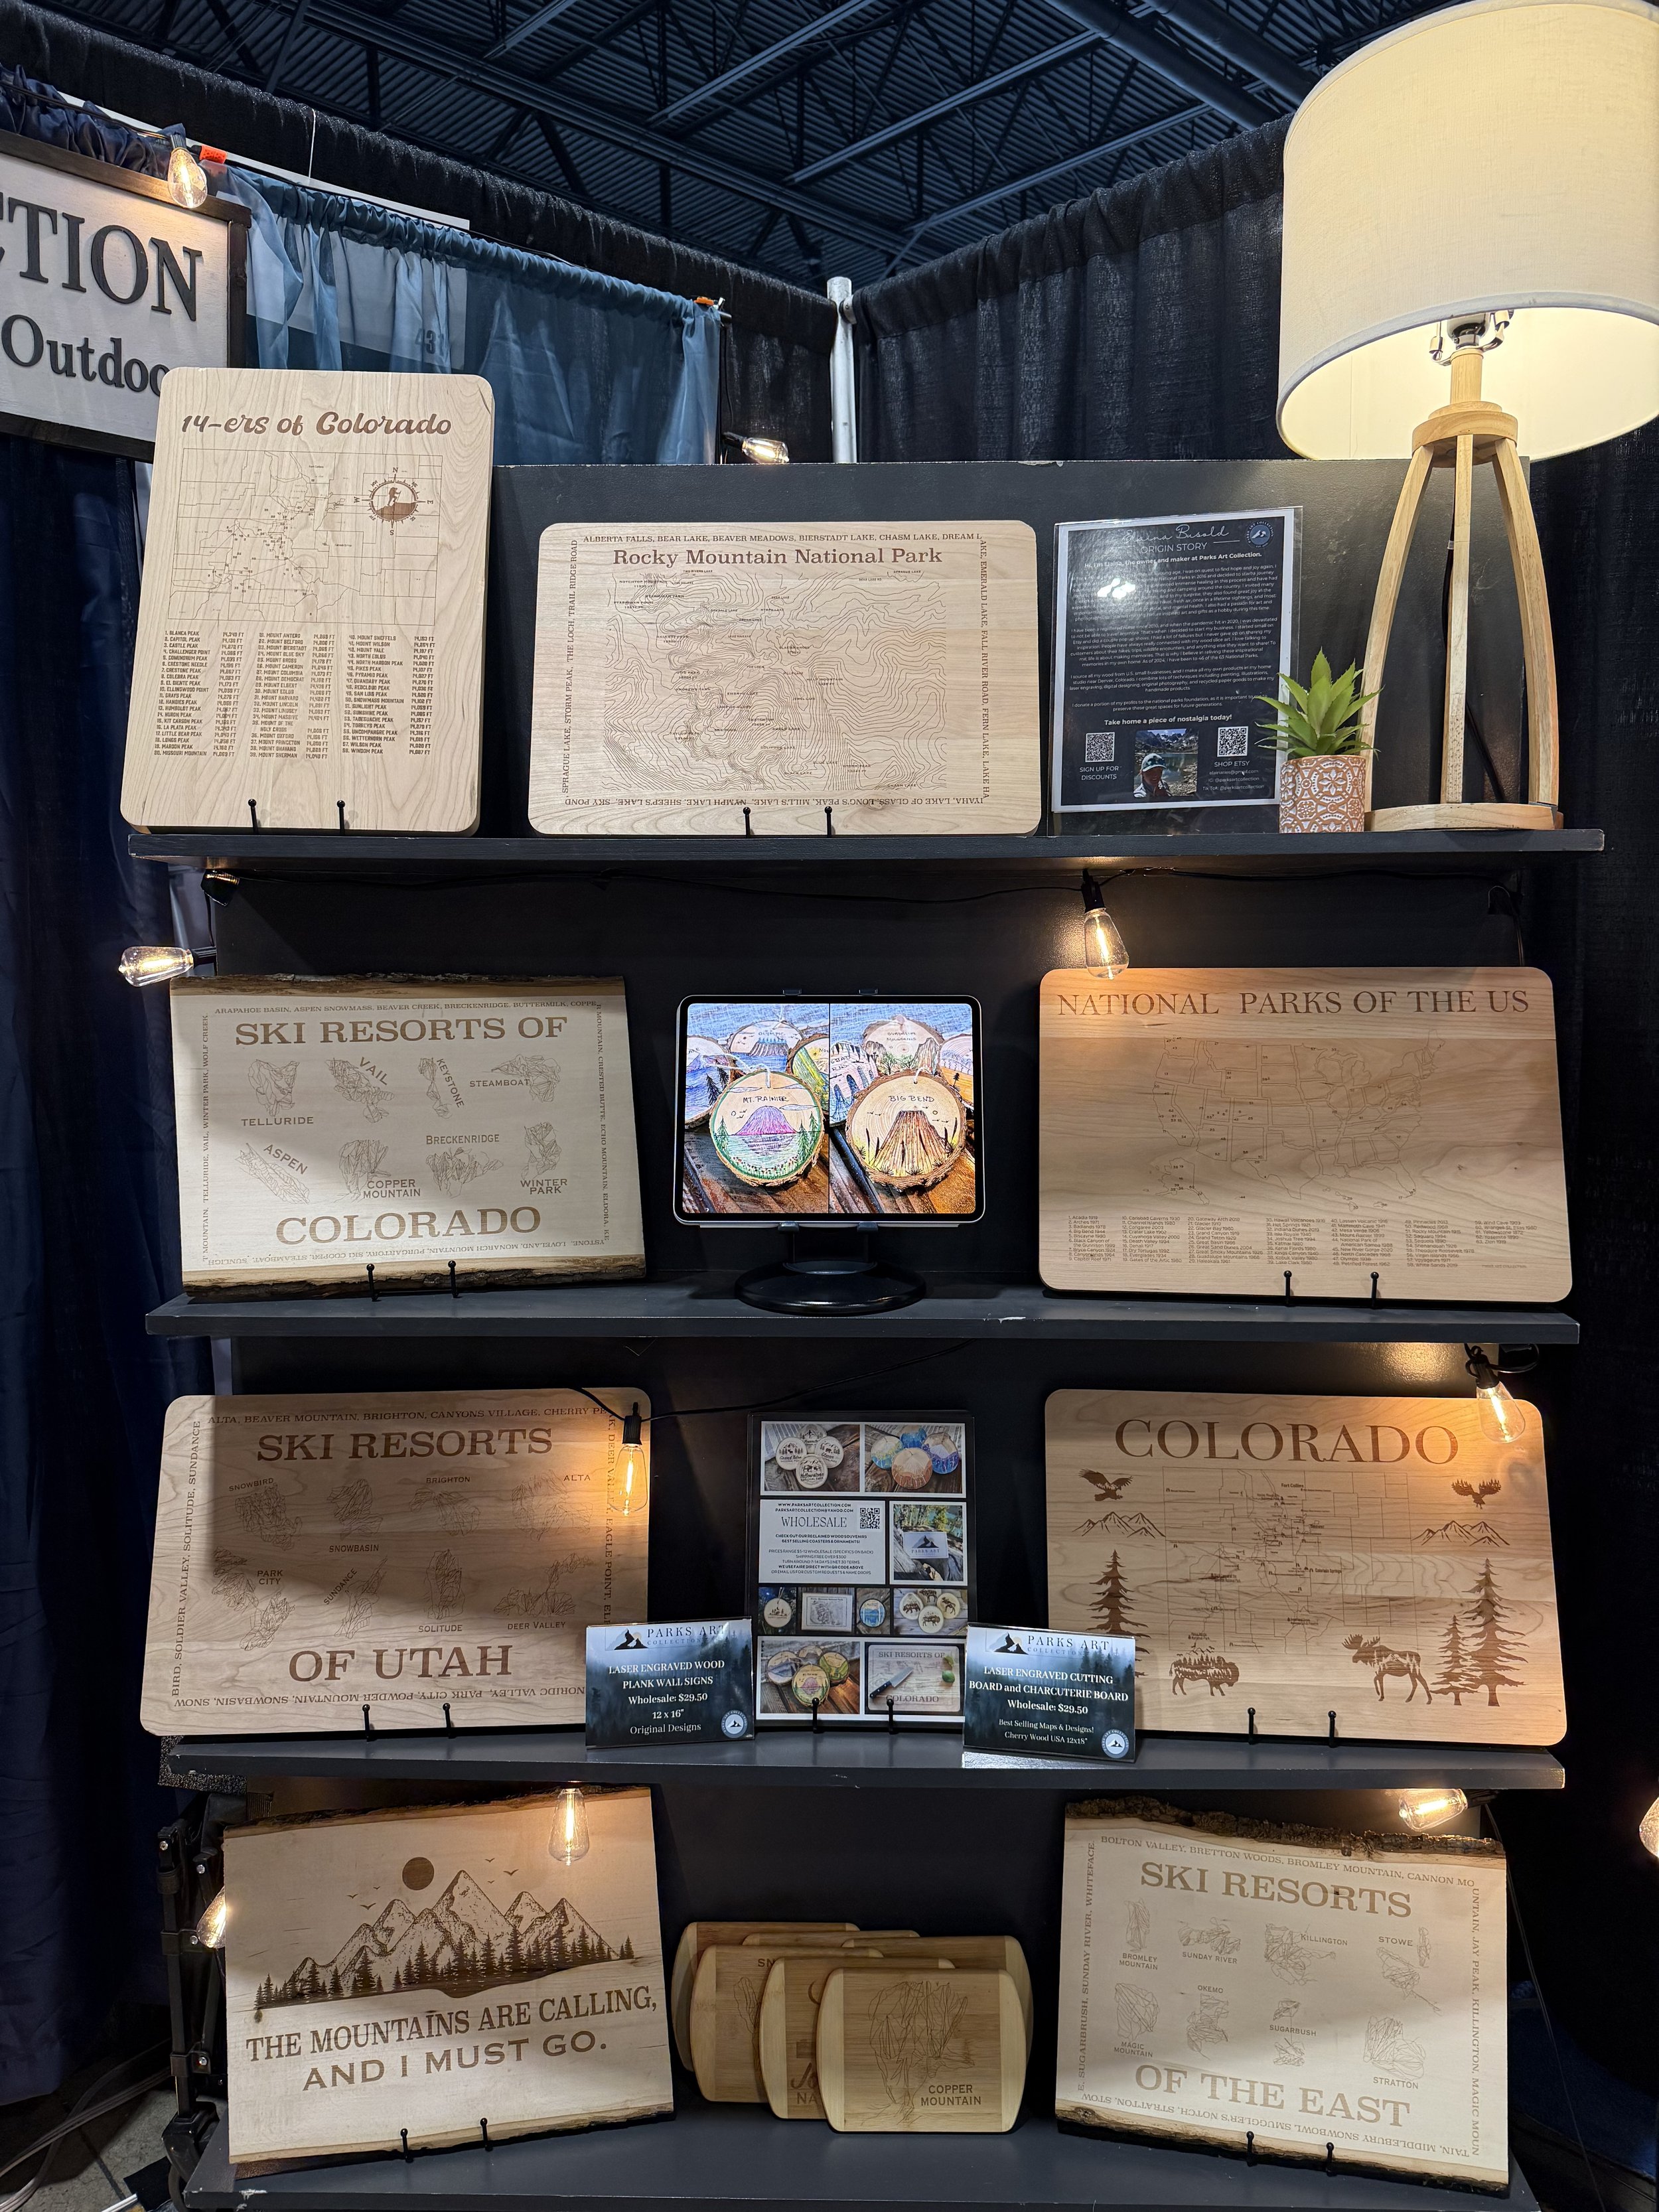
Most recently, I went all in on this custom shelf for a trade show. Do I think it helped with sales? nahh….. but who knows! Maybe it was eye catching enough to bring people in. I did sell a lot of cutting boards….. 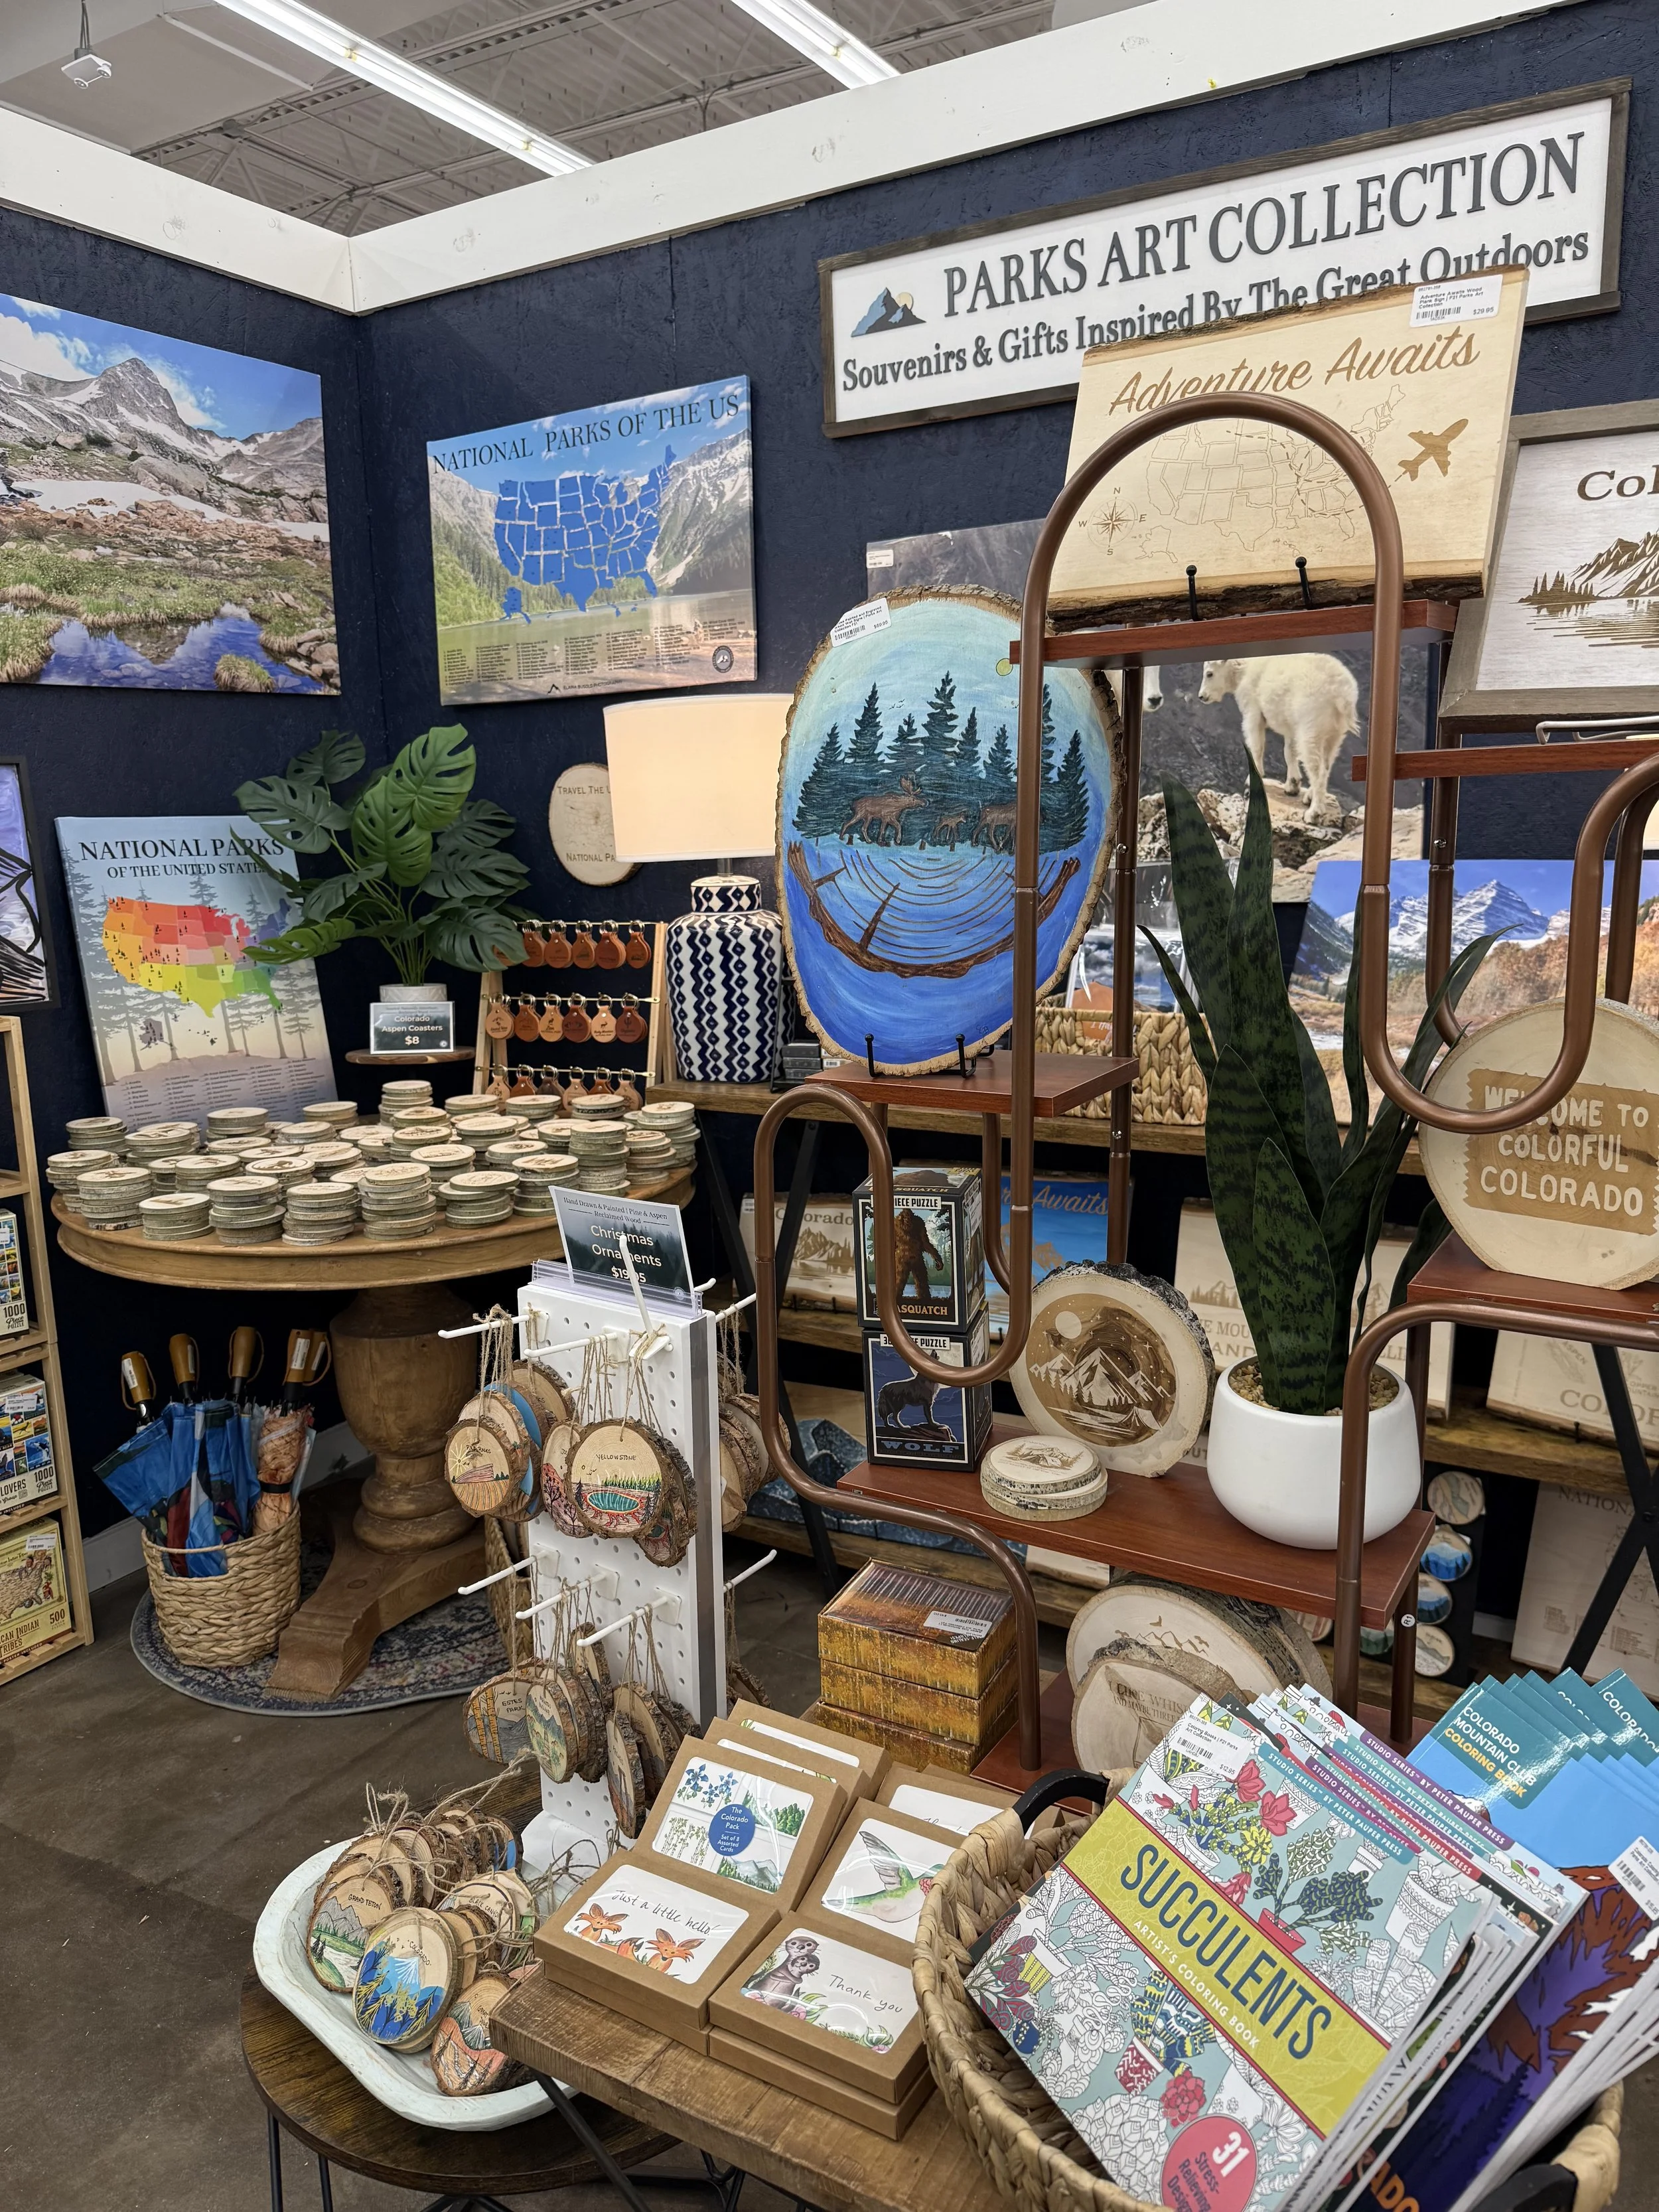
Painted tree BoutiqueColorado Springs- not just selling my own products anymore. 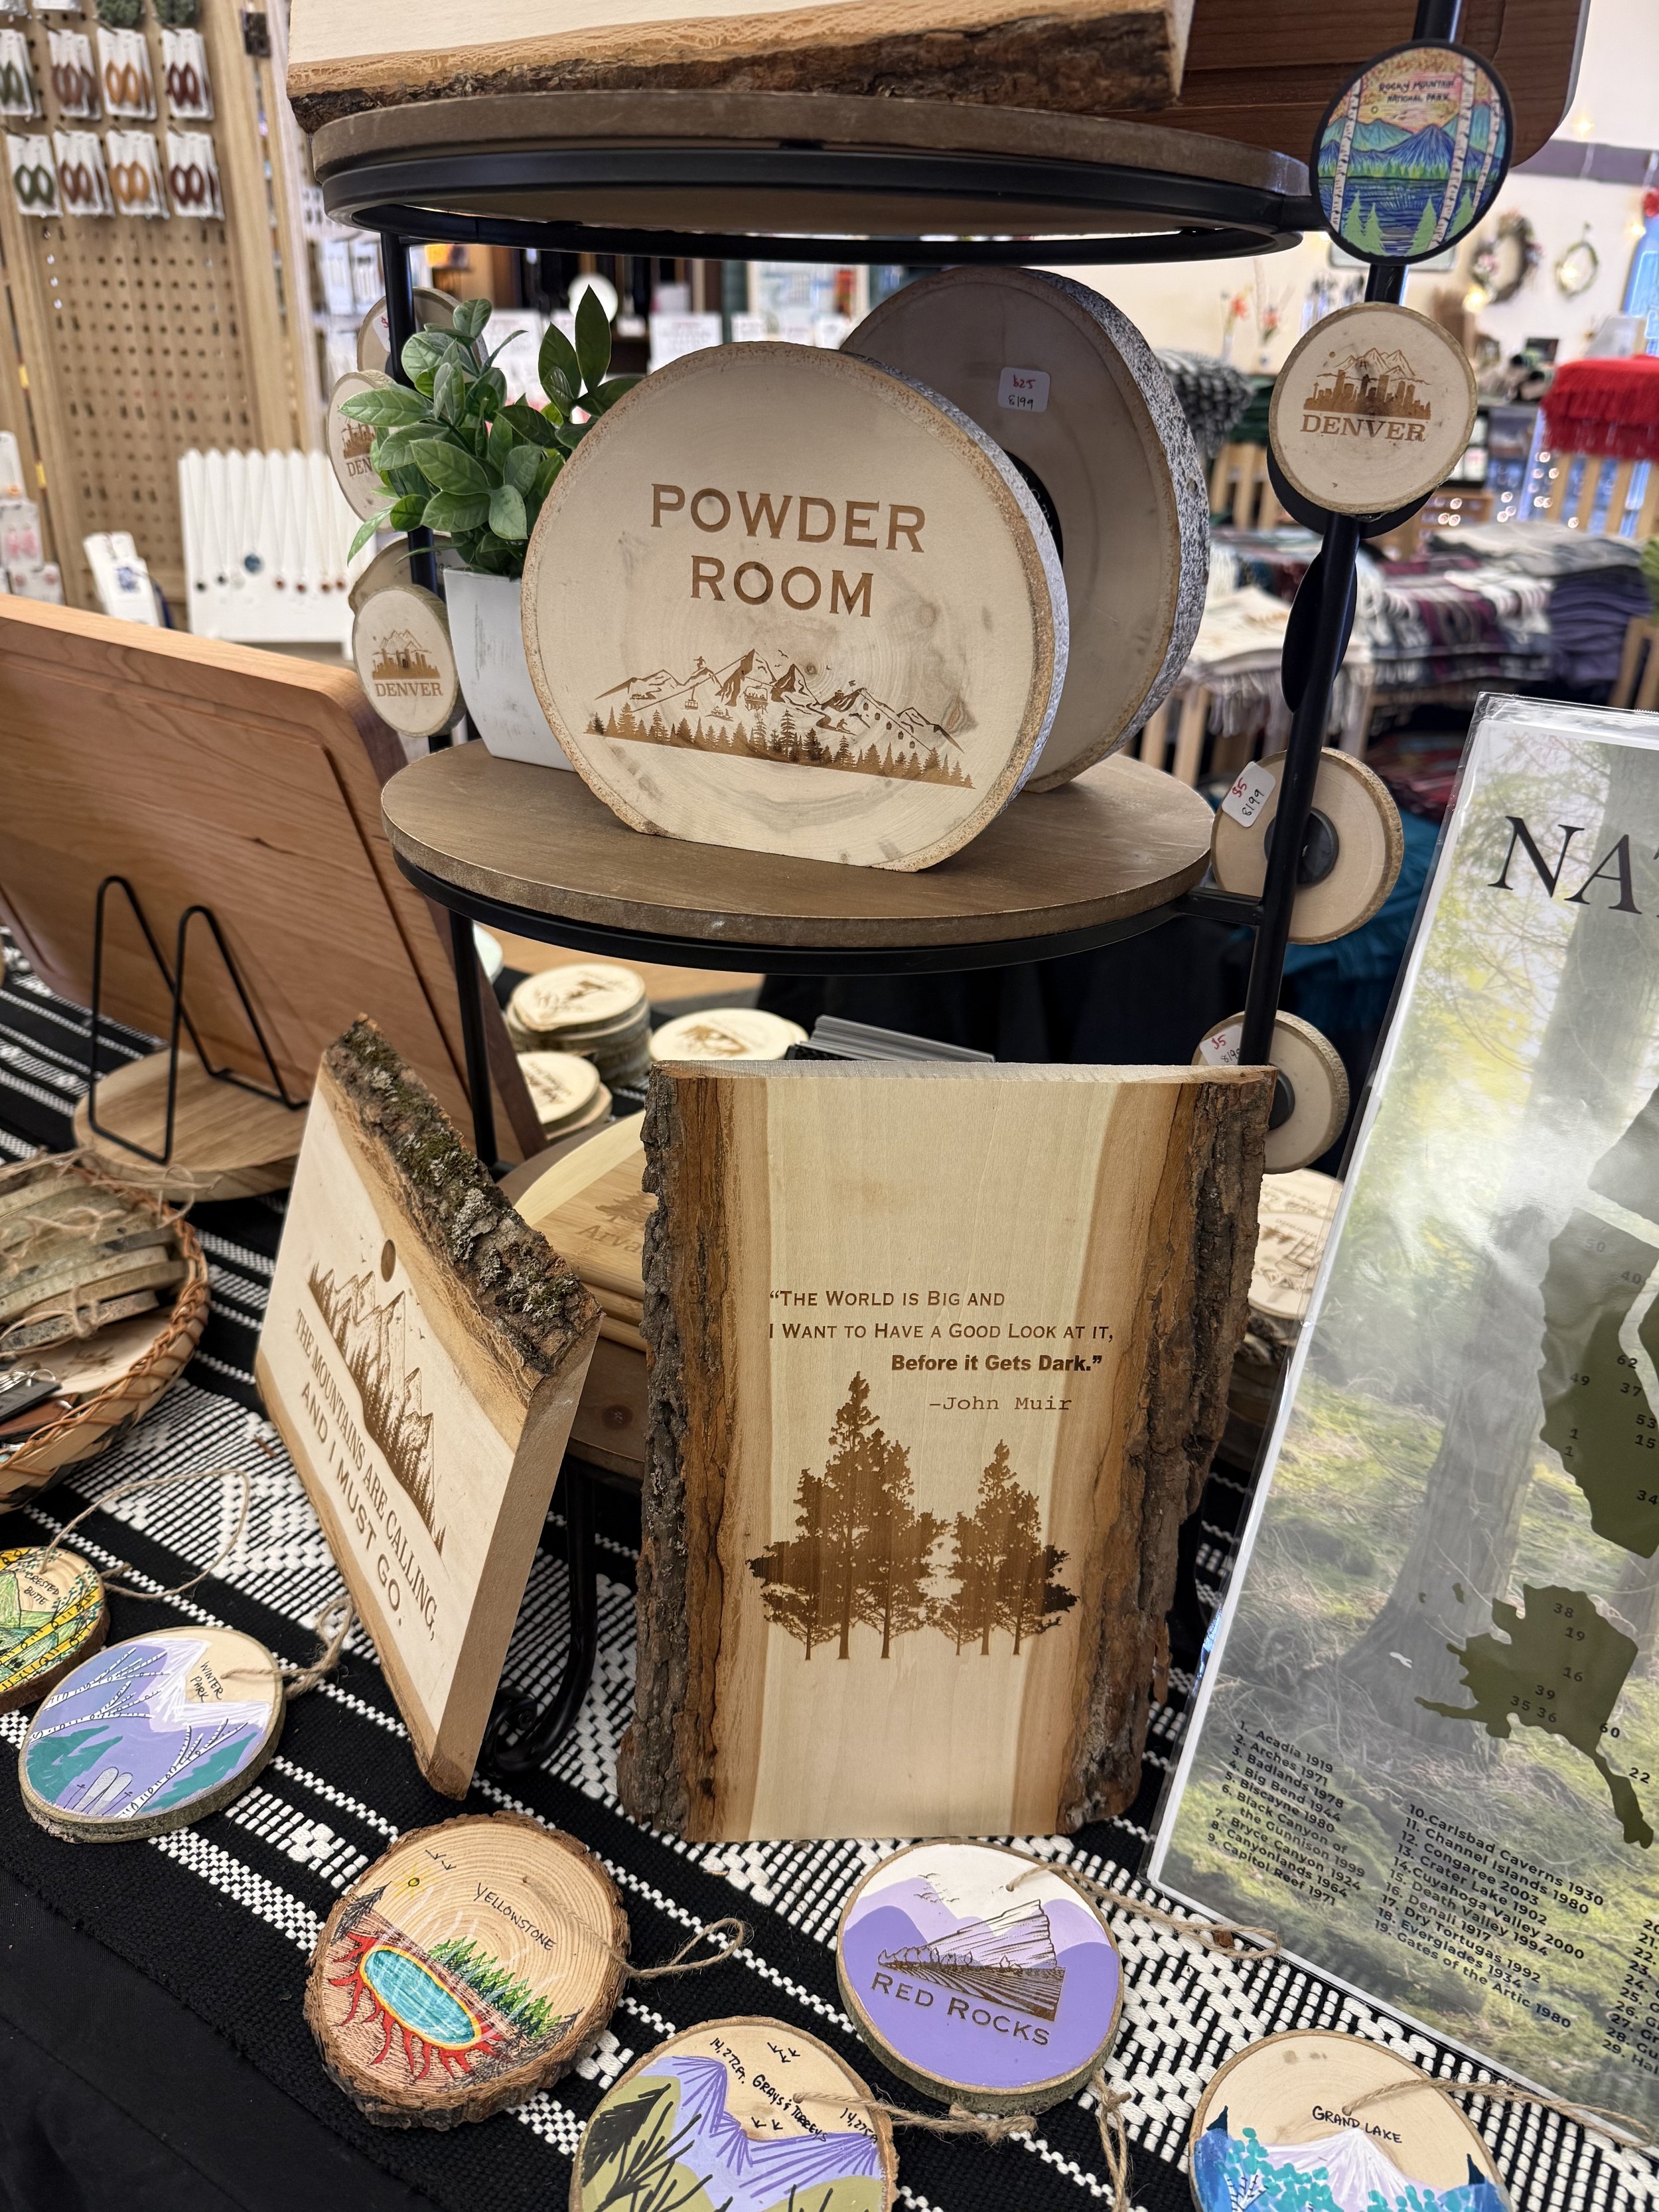
Most recent consignment set up- Arvada Local near my house. Better profit margins sometimes!
It wasn’t all margaritas and sunshine……
Don’t be scared
You got this.

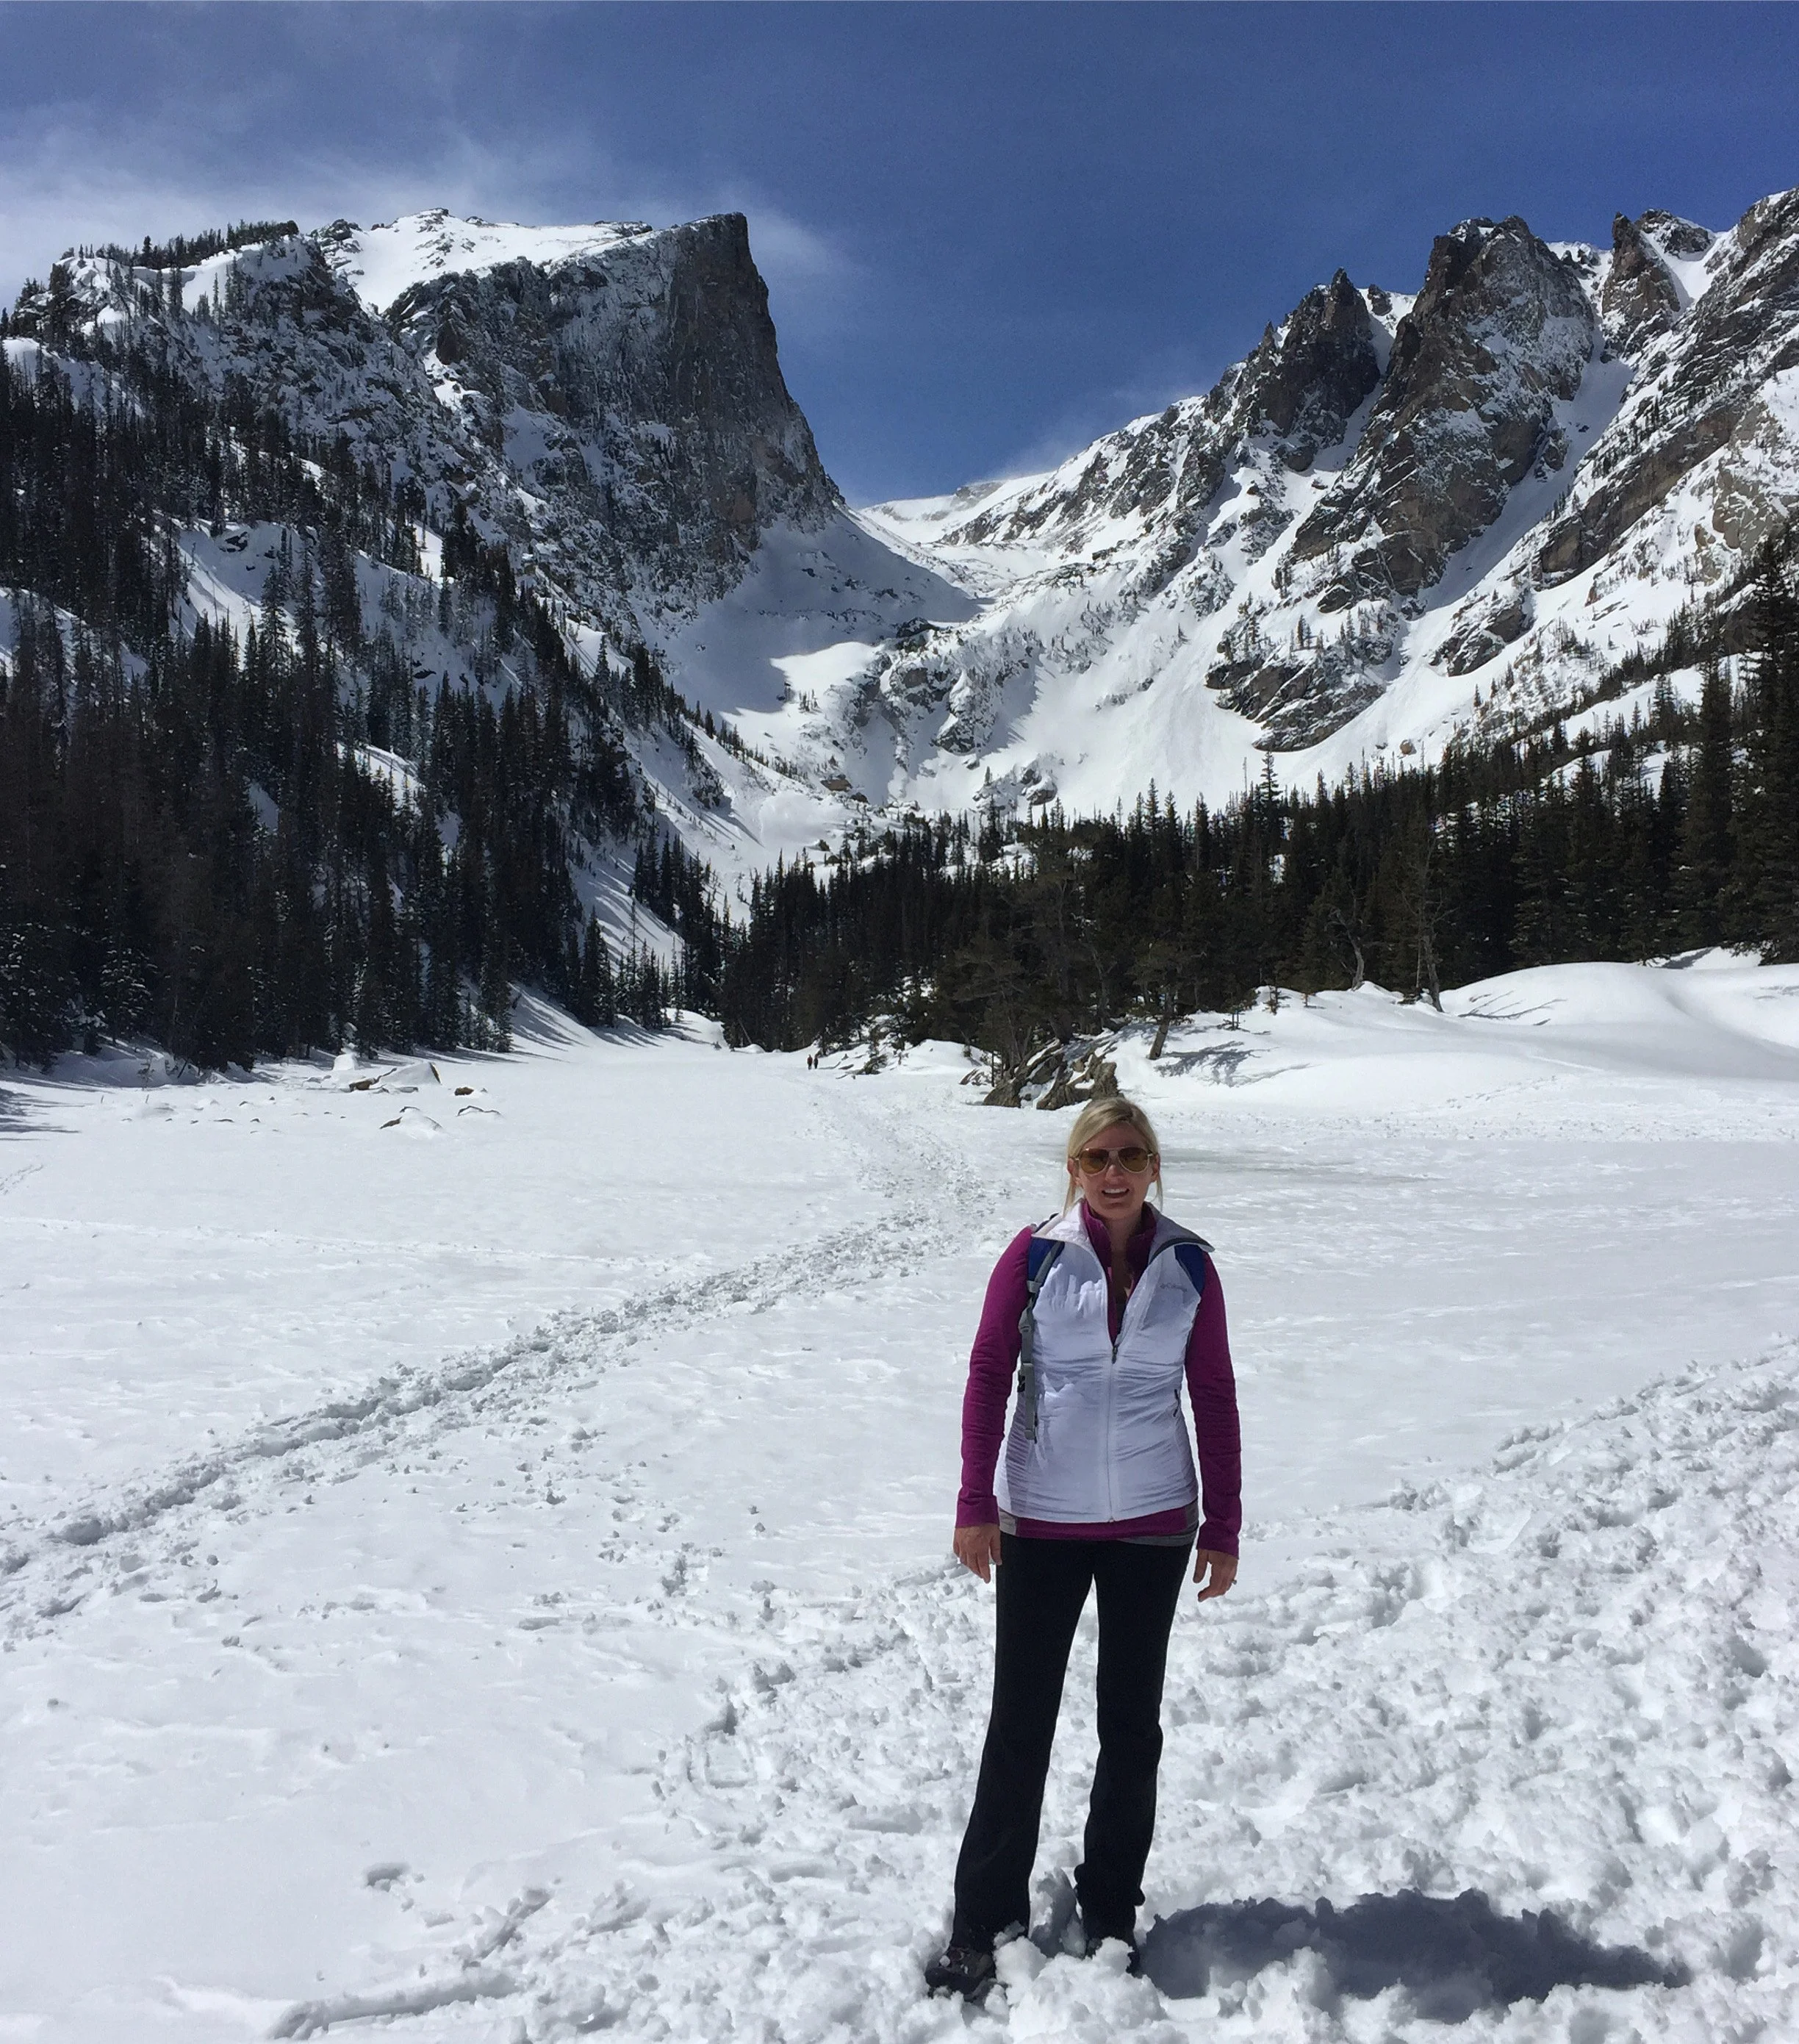
Inspired by Dreams, we bring you….
Dream Lake (Rocky Mountain NP)
Pop-Up Markets 101, The Complete Checklist
Thinking about doing a 10×10 Pop Up Event as a first time maker? Everything you need to know and more! What to bring, what to expect, what to wear, find it here!
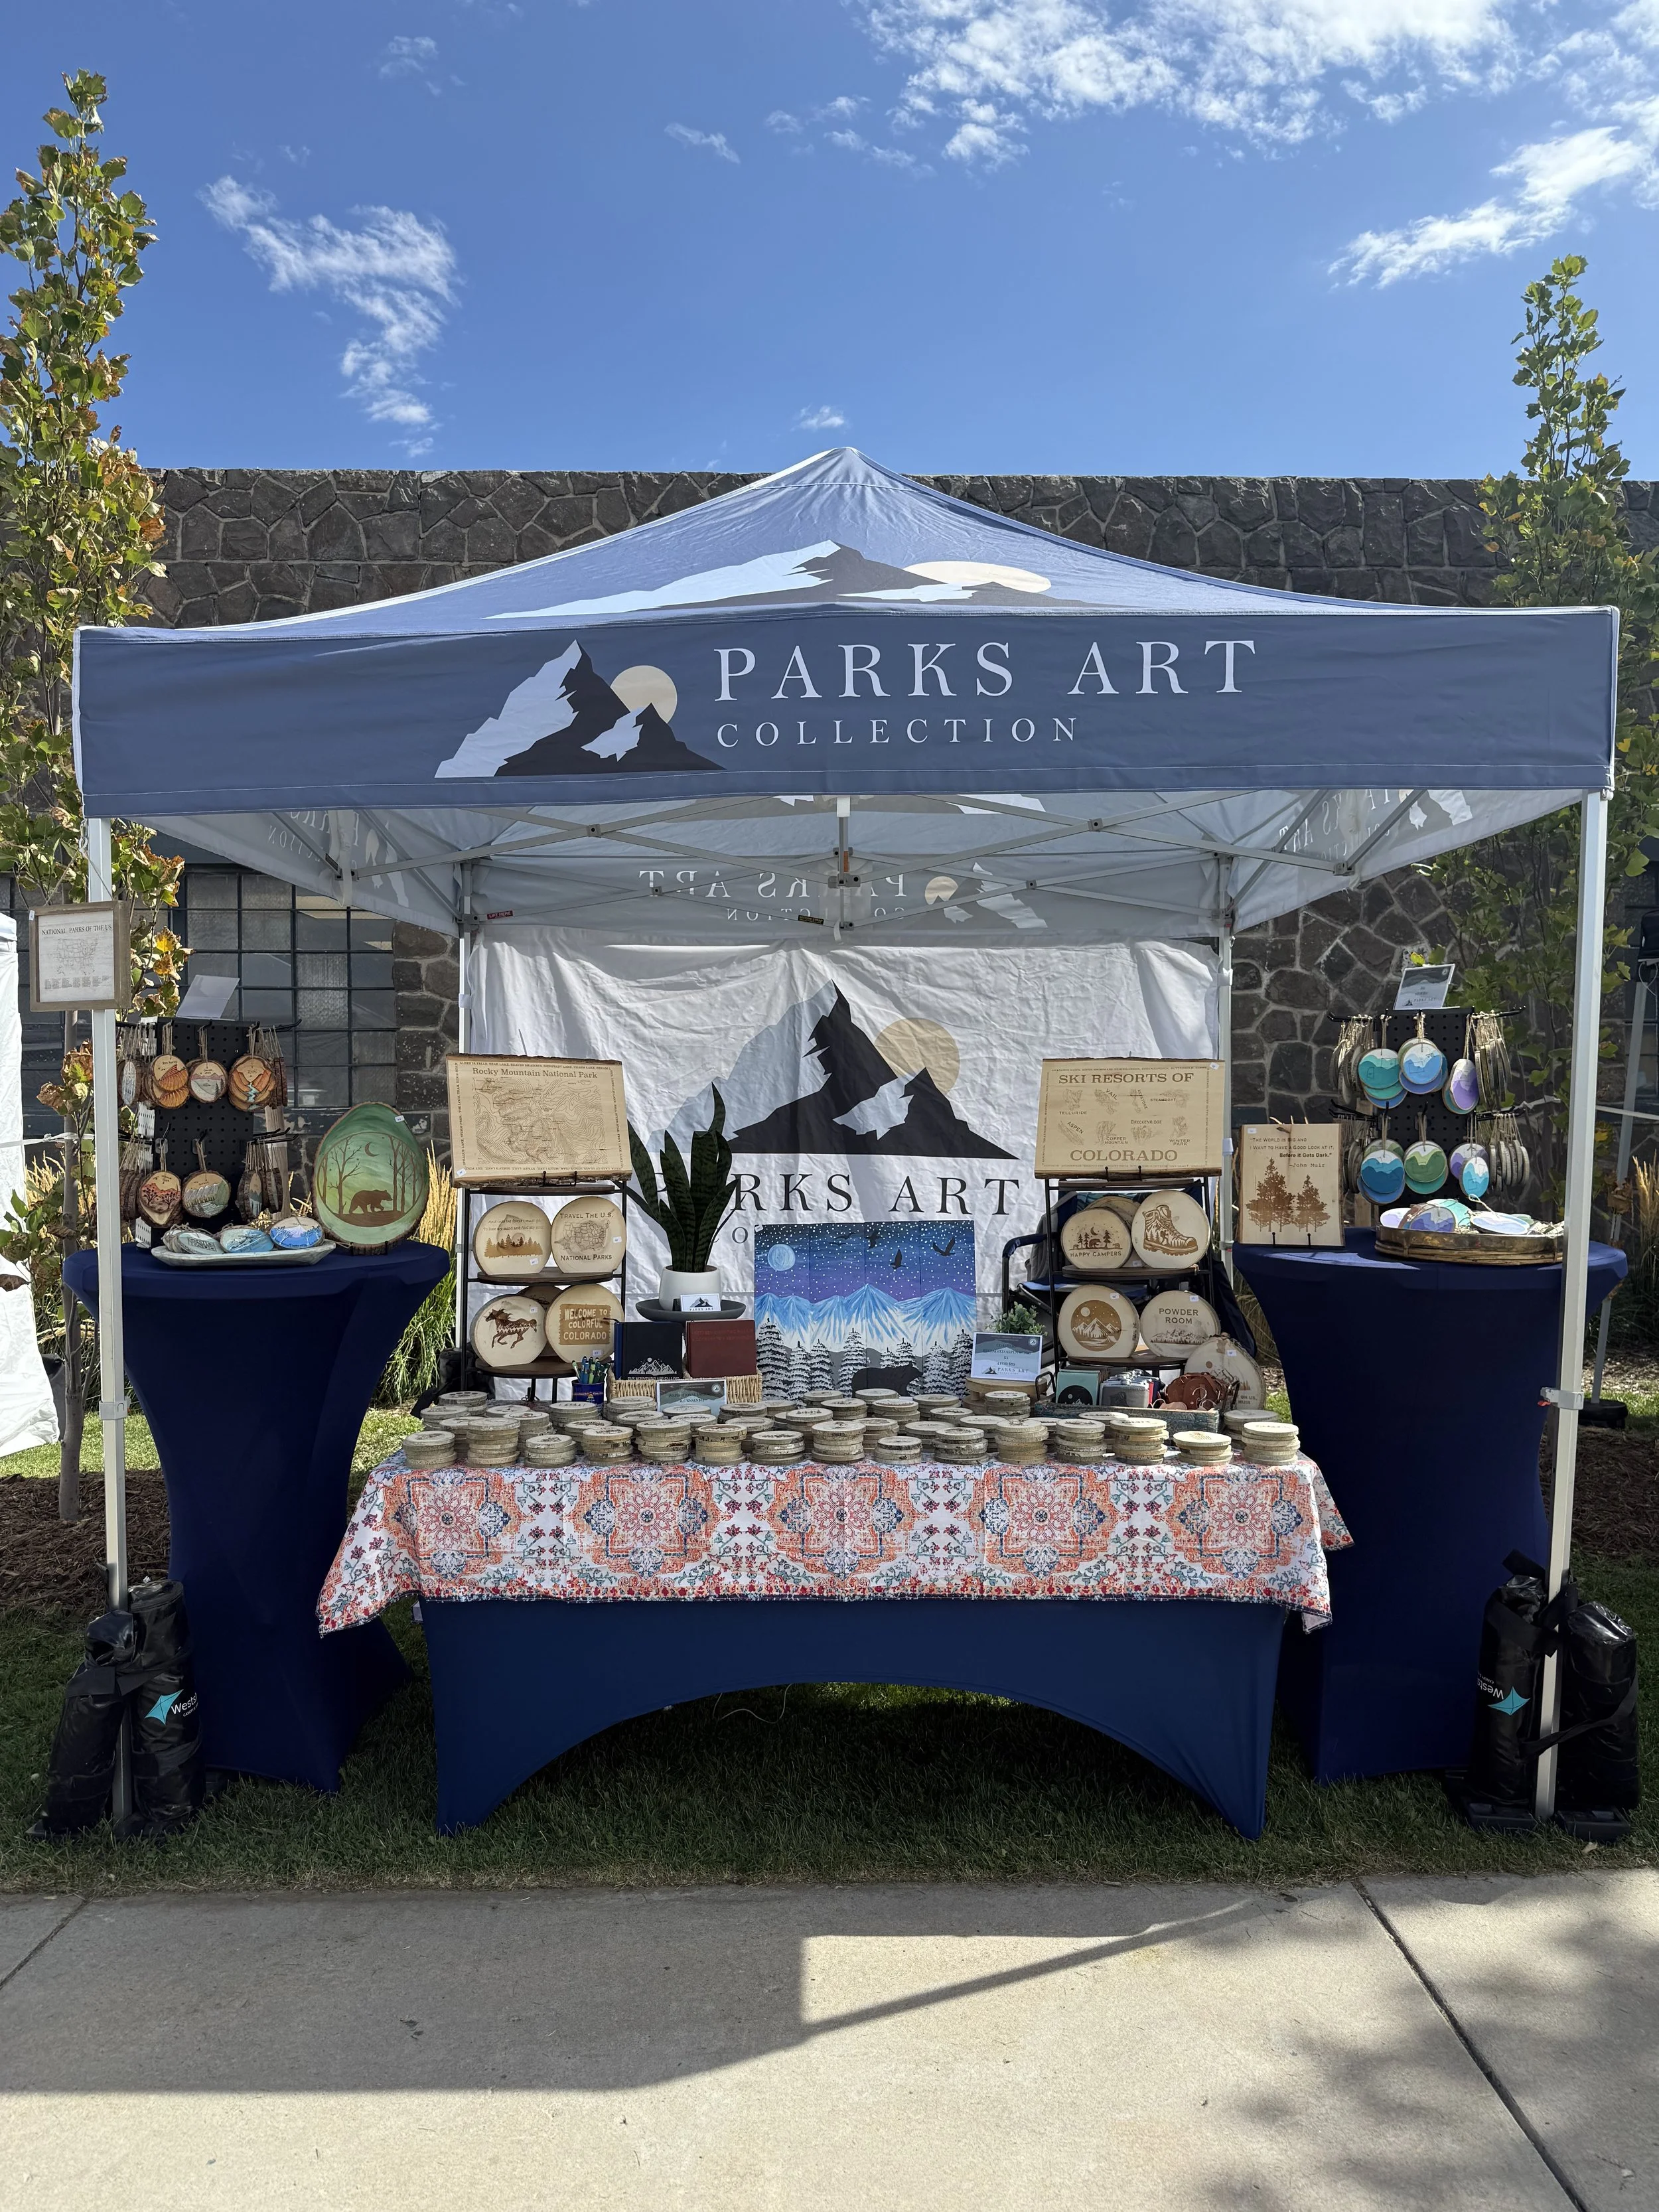
The Ultimate Guide to Your First 10x10 Pop-Up Tent Event as a Handmade Maker
Your first 10x10 pop-up event as a handmade maker feels magical… until the wind hits.
There is something incredibly exciting about taking your handmade products out from behind a screen and putting them into the real world. Customers can touch them. Hold them. Ask you questions. Connect with your story. But outdoor markets are unpredictable, and the biggest lesson I can give you is this: plan for a horror story of your own someday. I’m only somewhat kidding. Here’s mine:
I have spent an entire hour carefully hanging hand-painted ornaments on grid hooks, only to have one massive gust of wind come through and take the entire display down. Everything. On the ground. In a pile. I just stood there staring at it. A homeless man nearby ran over and helped me pick every single ornament up. Before I could even thank him, he ran off. I wanted to cry — partly from stress, partly from gratitude. And Denver once had a windstorm so bad it collapsed wooden holiday huts. You truly have to be ready for anything.
That’s why there are a few things I never go anywhere without: duct tape, zip ties, scissors, bungee cords (for emergency wind situations), heavy-duty magnets, and a notebook with paper. These little items will save your booth over and over again. Something snaps? Zip tie. Tablecloth flying? Duct tape. Wind picking up? Bungee cords. You will quickly become the most popular vendor on your row when you’re the one who came prepared.
Let’s talk about tent weights because this is not optional. You need a minimum of 40 pounds per leg. When I started, I didn’t do this. I almost lost a tent. I have also seen tents flip and completely bend even with 40 pounds per leg attached. Wind is no joke. If you’re on a budget, sandbags or cinder blocks can work at first, but proper tent weights are worth every penny. Your tent is protecting your product, your investment, and your income.
Beyond safety, you need a simple but functional setup: a 10x10 canopy, a 6-foot folding table, a fitted tablecloth, and a way to display your products attractively. Baskets, bins, tiered stands, or even beautiful dishes can elevate your presentation without costing a fortune. You do not need a Pinterest-perfect booth your first time — you need clean, organized, and secure. Check Facebook Marketplace and thrift stores before buying everything new. You’d be surprised what you can find.
Branding matters too. You need a clear banner or sign with your company name. If people cannot remember who you are, they cannot follow you later. Bring business cards and a holder so they do not blow away. Have an email sign-up sheet on a clipboard and start building your list immediately. If it is a nighttime show, bring lights. You are responsible for making sure people can see your products.
TAKE PICTURES OF YOUR BOOTH ONCE IT’S SET UP- YOU WILL NEED MANY OF THESE TO APPLY FOR SHOWS IN THE FUTURE. That’s why I always get there early as possible!
There are also practical details that new vendors often forget. Bring $1 and $5 bills for cash buyers. Have your Square or credit card reader ready to go. Bring a wireless charging dock or battery pack because your phone will die faster than you think. Have tissue paper or small recyclable bags for customers who request them. Bring hand sanitizer. These small touches make checkout smooth and professional.
Comfort equals performance. Wear comfortable shoes. Bring layers. Pack a raincoat even if the forecast looks perfect. Bring snacks and water. Hot hands in cold months. Portable fans in warm months. Markets are long, and your energy affects your sales. If you are miserable, your booth energy will show it.
One of the most underrated essentials is a large plastic tote for your emergency supplies. Not canvas. Not fabric. Plastic. If it rains, canvas soaks through and everything inside gets wet — cash, paper, electronics. A plastic tote keeps your survival kit waterproof and contained.
Now let’s talk about something people do not always consider: insurance. Should you get it? If you are doing one very small market just to test the waters, you might decide to skip it. But honestly, it is in your best interest to have coverage. What if one of your displays falls over and injures a customer? What if you lose all your products overnight in a storm during a multi-day event? What if someone steals everything while you are gone? Some markets actually require insurance, so do your research or ask around. Mine costs $85 per month, and for the peace of mind alone, it is worth it.
Another important question: how are you transporting everything? Will it all fit in your car? A 10x10 canopy, tables, weights, displays, product bins, signage — it adds up quickly. Do a full mock pack before event day. The last thing you want is to realize your tent does not fit in your vehicle the morning of the show.
Okay so let’s discuss money, because this is the question every new vendor eventually asks: how much money should you make at a show?
The honest answer is — it depends. Weather plays a huge role. So does the event organizer’s ability to promote and bring in real foot traffic. A “good” show can vary person to person depending on your price points, overhead, and experience level. But for those who have been doing this long enough, a general rule of thumb is that making 5–10 times your booth fee is considered decent.
If you paid $100 to get into a one-day show, you would hope to generate somewhere between $500–$1,000 in sales. That is revenue, not profit. It does not account for product costs, booth investments, materials, or your time. But it gives you a realistic benchmark. If you are consistently making only 1–2 times your booth fee, it may not be the right event for you. If you are hitting 5–10 times, you are likely in a strong market for your products.
So how do you find the right shows? Research is everything. Vendor scams are real. There are fake events, poorly promoted events, and shows that look amazing online but end up with barely any foot traffic. Before applying, search local Facebook vendor groups and read reviews. Vendors are usually honest about their experiences. Once you start attending events, ask other makers which ones they love and which ones they avoid. That community knowledge is incredibly valuable.
Keep a running list in your phone of potential shows. Track application deadlines, booth fees, and event dates. Research when applications open — especially for strong holiday markets. Some of the best November and December events open applications in the summer. If you wait until fall, you are often too late. Being organized and proactive can completely change your event calendar.
Your first 10x10 event will not be perfect. Something will go wrong at some point. That is part of the story. But if you plan for wind, rain, exhaustion, logistics, and even the unexpected kindness of strangers, you will be far more prepared than most first-time vendors.
Outdoor markets are equal parts hustle and heart.
I always tell people— owning a small handmade business is 10% talent and 90% hustle, and I am not lying……. Go for it and never look back!
Is Wholesale Right for My Handmade Business? All the Deets for Artists and Crafters!
Are you trying to decide if Wholesale is right for your handmade business? Are you selling at pop-ups and getting tired. I will give you all my basics, my FAQs, pros and cons! I have been selling wholesale with my handmade art for about 2.5 years. Let’s talk about it!
Is Wholesale Right for My Handmade Business?
The down-and-dirty realities of wholesale (from someone actually doing it)
Wholesale gets hyped a lot in the handmade world.
It’s often framed as the magic next step:
Bigger orders
More legitimacy
Less time selling, more time creating
Passive income vibes ✨ (is anything really passive with handmade?)
And listen — wholesale can be amazing.
But it is not a shortcut, and it’s definitely not right for everyone at every stage. I’ve been doing wholesale since 2023 alongside pop-ups, markets, and online sales, and I want to be honest about what it really looks like — especially if you’re a handmade business like mine. I started my Faire catalog when I got COVID for the 2nd time and was quarantined in my Nephew’s bunk bed room for 7 days.
Want to apply to Faire? Check it out:
What wholesale actually means (not the Instagram version)
Wholesale means selling your products to shops at about 50% of retail, so they can sell it in their store at full price. Important note: Faire and Wholesale reps take an ADDITIONAL 15% off the top. So you would be making about 35% of what you would selling retail. Why would anyone do this? Keep reading….
In real terms, that means:
You make less per item
You rely on volume to make it worthwhile
Your pricing, processes, and time management matter a lot
Wholesale is a business model shift — not just “selling more.”
Pros vs Cons, let’s start with the Pros:
1. Larger orders, fewer transactions
Instead of selling 1–2 items at a time, you might ship 24, 48, or 100+ items in one order.
That can mean:
Less customer service back-and-forth
Fewer individual shipments (for anyone who has sold a ton on line or Etsy during the holidays, they know the pain of 50 packages being shipped in 1 night)
More predictable revenue when it’s working
2. Your work lives in cool places
Seeing your handmade work:
in national park gift shops (I wish, these are super hard to get into- more to come on that someday)
supporting other small businesses
in boutiques across the country
3. Repeat buyers (eventually)
Good wholesale accounts reorder.
It might take:
months
a tourist season
or a full year
…but once a shop finds a product that sells well, those reorders can become the backbone of your business.
Now the part people don’t love to talk about— The Cons!!
1. Your margins will feel tight — sometimes painfully tight
If you don’t know your true costs, wholesale will expose that fast.
You have to account for:
materials
packaging
labor
fees (Faire, credit cards, platforms)
mistakes, losses, and learning curves
If you’re already underpricing at retail, wholesale will not magically fix that.
2. You work a lot upfront
Wholesale is front-loaded labor.
You often:
produce a large order
buy materials in bulk
ship it all at once
…and then wait.
Payment terms can mean:
Net 30 (you don’t get paid for 30 days)
platform delays
slow reorders
It’s not instant cash.
3. You don’t control the final customer experience
Once your product is in a shop:
you don’t control how it’s displayed
you don’t control pricing consistency
you don’t control whether staff understands the story
You have to be okay letting go a little. I have found that many artists have a hard time letting go of the control of their work. They become attached to it and can’t handle someone else’s vision or ideas about it. That’s okay. Just important to work on setting boundaries and not taking this personal. Letting go of control can be very freeing in all aspects of life!
4. Not every shop is a dream account
Some stores:
order once and never reorder (in my experience on Faire, this is about 65-75% of accounts never order again)
disappear without explanation (maybe their shop closed, they ghost your emails, who knows)
don’t pay attention to sell-through
Wholesale includes rejection and ghosting — even when your work is good.
What makes wholesale work for me
Wholesale works for my handmade business because of a few very specific things:
My products are small, giftable, and easy to display
I can batch-produce without losing the handmade feel
My designs are location-specific (parks, places, travel)
Tourist shops rely on repeat foot traffic
I still do pop-ups and direct sales to balance cash flow
Wholesale is part of my business, not the whole thing. If you recently saw my revenue pie chart on Instagram, you’ll know that Wholesale was about 21% of my total revenue, so a big part, but not the biggest part.
Signs wholesale might be right for you
Wholesale could be a good fit if:
you can produce consistently and at scale (You might need to hire help!)
your pricing already supports healthy margins
your product solves a retail problem (easy gift, impulse buy, souvenir)
you’re okay trading margin for volume
you want your work in physical stores
Signs it might not be (yet)
Wholesale may not be the move if:
you’re still figuring out pricing
every item is deeply one-of-a-kind
production already feels overwhelming
cash flow is very tight
you hate repetition and batching
The tools, numbers, and resources that actually matter (for me)
I want to get specific here, because vague advice isn’t helpful.
The resources I actually use
Proof to Product podcast – hands down one of the most grounded, realistic resources for product-based businesses and wholesale. It helped me understand pricing, growth stages, and what normal really looks like. Check it Out!
Faire’s educational content – when Faire puts out webinars, seller education, or platform updates, I pay attention. It’s not perfect, but understanding how the platform works helps you make smarter decisions.
The reality of listing products on Faire
I currently have 500+ SKUs on Faire.
That did not happen overnight.
It took me about two years to get everything listed and optimized. And here’s the part people don’t talk about enough:
In reality, about 20 of those same listings sell over and over.
But your bestsellers will carry the business. Don’t be mad if the things that you wish were bestsellers don’t do well. Or if the Bigfoot keeps selling, argh! But you know, people want what they want!
Faire fees (the honest math)
Faire takes:
15% of every order
Plus $10 if it’s a first-time order from a new retailer
Unless: you send a retailer directly using your specific Faire link or QR code
Reorders: what’s actually normal
On Faire, about 25% of my buyers reorder more than once.
That means:
lots of one-off orders
lots of testing from retailers
lots of stores that try something and move on or forget, due to no follow up, maybe?
According to Google and industry data, that’s completely normal.
Where things change dramatically is in-person relationships.
When I meet buyers:
at markets
through direct outreach
via real conversations
The reorder rate is much higher.
I have accounts that have:
ordered consistently for 5–10 seasons
over a 2+ year span
Those relationships are how wholesale becomes predictable, stable, and year-round. That’s the goal.
The emotional reality of wholesale Wholesale is about 95% “no thanks.”
Most people will:
not respond
politely decline
already have something similar
pass without explanation
Some will even:
criticize your work
question your pricing
make comments that sting
You need thick skin to do wholesale. Rejection isn’t a sign you’re doing it wrong — it’s the baseline.
You will need marketing materials (and an easy button)
This is the part that surprises a lot of handmade sellers.
Wholesale isn’t just about having a good product — it’s about making it ridiculously easy for a busy shop owner to say yes.
How are they going to order?
This is the question you must answer clearly.
For me, Faire is the easiest option.
But: not every shop wants to use Faire, some shops can’t get approved, some prefer direct ordering
You need a backup. That’s where line sheets or catalogs come in.
Paper vs digital (what I’m actually seeing)
In reality, most buyers today want things digitally.
They want to: flip through on their phone, skim while standing behind the counter, forward it to a manager or buyer.
Long paper order forms and printed catalogs are becoming less practical.
A clean, digital line sheet or catalog:
keeps their attention
reduces friction
makes follow-up easier
Paper still has a place at shows — but digital is doing the heavy lifting.
Follow-up is a huge part of wholesale
Wholesale doesn’t usually close in one interaction.
It looks like emailing back and forth, touching base after shows, answering quick questions, sending marketing emails.
Businesses are insanely busy.
If you think you’re busy, talk to a shop owner.
They want things to be fast, clear, and low-effort
Find the easy button: Something that lets them order right now, while they’re interested.
Your job is to:
grab their attention
not lose it
remove every possible obstacle
Wholesale works best when ordering feels effortless for them — even if it took you a lot of work to set up behind the scenes.
Inventory, cash flow, and the unglamorous money stuff
This is the part that can make or break wholesale for handmade artists.
You have to invest in inventory
Wholesale assumes you can fulfill volume orders within a reasonable timeframe.
If you’re a handmade business, you can’t make 100 hand‑blown glass ornaments overnight or fire 200 pieces of pottery on demand.
That means you need inventory on hand, cash reserves to produce ahead of time, and systems that let you replicate work efficiently.
Wholesale favors products that can be made consistently, quickly, and without reinventing the wheel every time.
Lead times matter: lead time means, how fast can you ship?
My standard lead time is 7–10 days. OR 2-3 weeks for custom. Neither is wrong — but you must be clear.
Payment terms are a real thing- What does that mean?
Net 30
Net 60
That means: they do not pay upfront OR you may be waiting 30–60 days for payment
Sometimes that also means: following up, tracking invoices, chasing payments
You need basic systems in place
Before you say yes to wholesale, ask yourself: How will I invoice? How can they pay? (credit card matters) Will I charge processing fees? Who pays shipping? What are my order minimums? What are my reorder minimums?Have CLEAR policies in place about all of these!
Yes, it’s overwhelming at first— But if this sounds right for you, I would encourage you to start somewhere!

Selling at Painted Tree Boutiques: My Honest Experience as a Small Business Owner UPDATE: 4/14/26 THEY CLOSED ALL LOCATIONS WITHOUT WARNING. MORE TO COME…
If you’re researching how to sell at Painted Tree Boutiques, I hope my experience gives you a clearer picture of what to expect. Every location is different, but the opportunity can be worth exploring if you treat it like a business, not a hobby.
Is Painted Tree Worth It for Makers and Small Businesses? A Vendor’s Real Experience
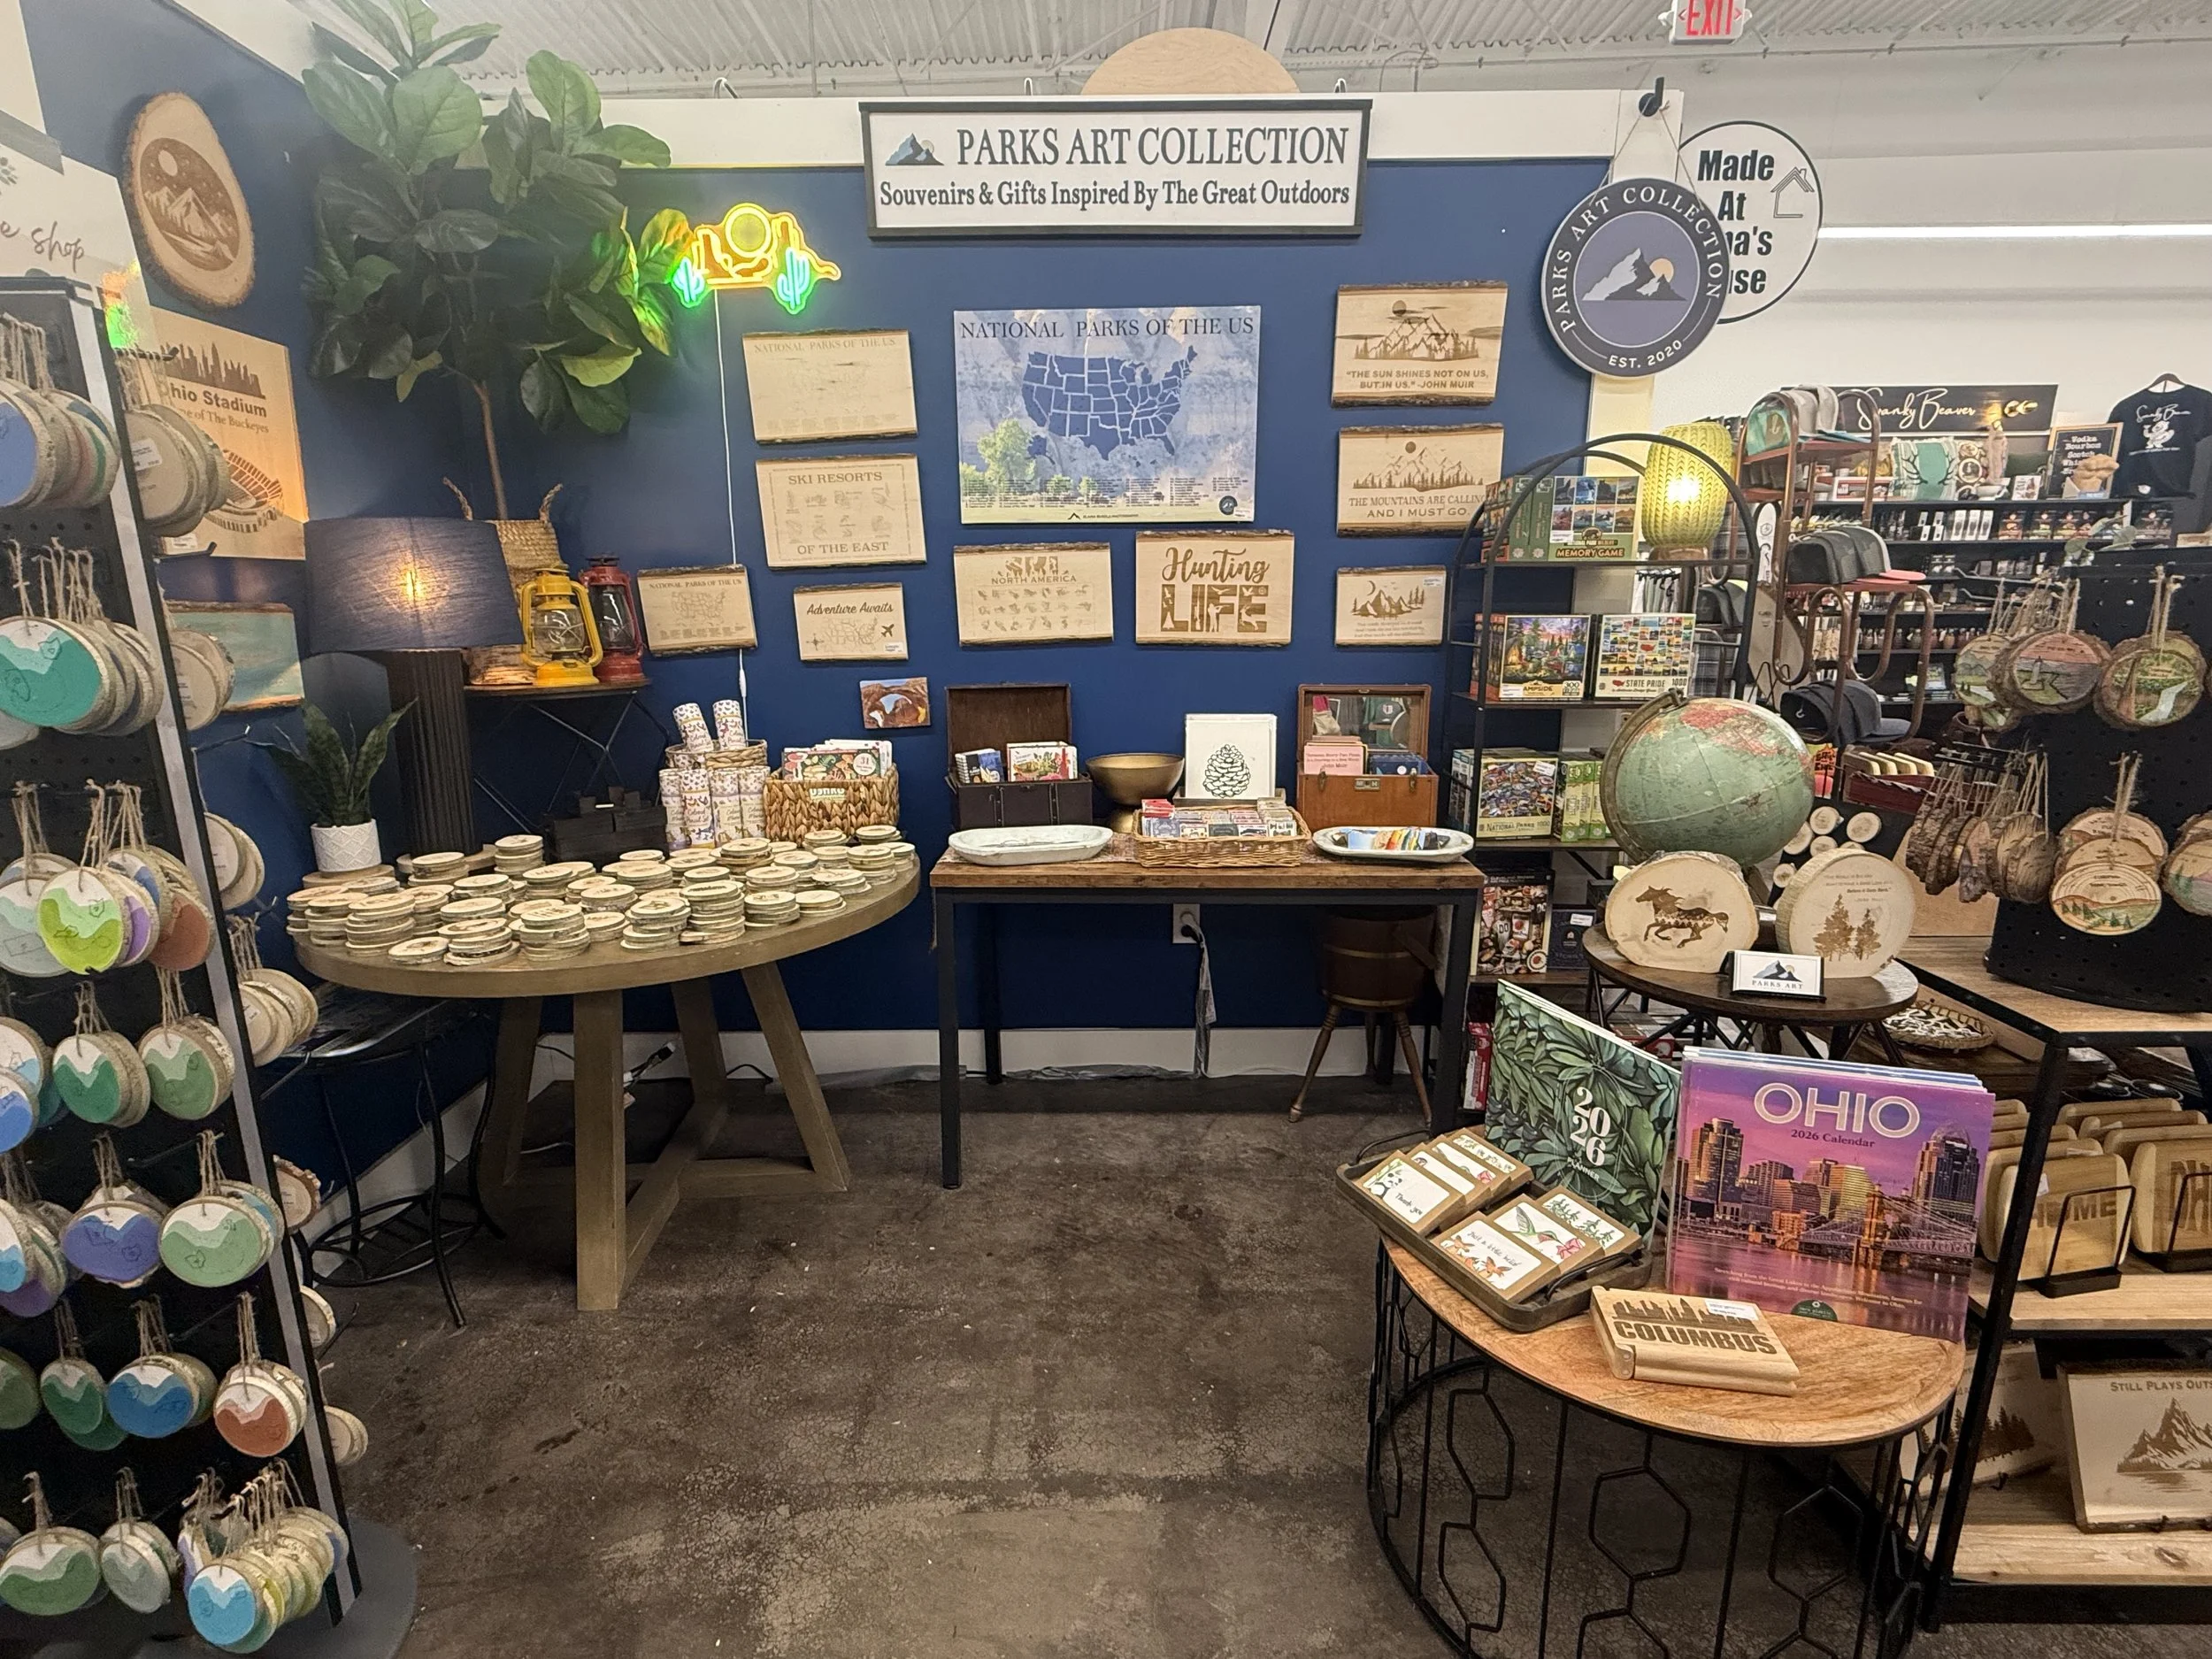
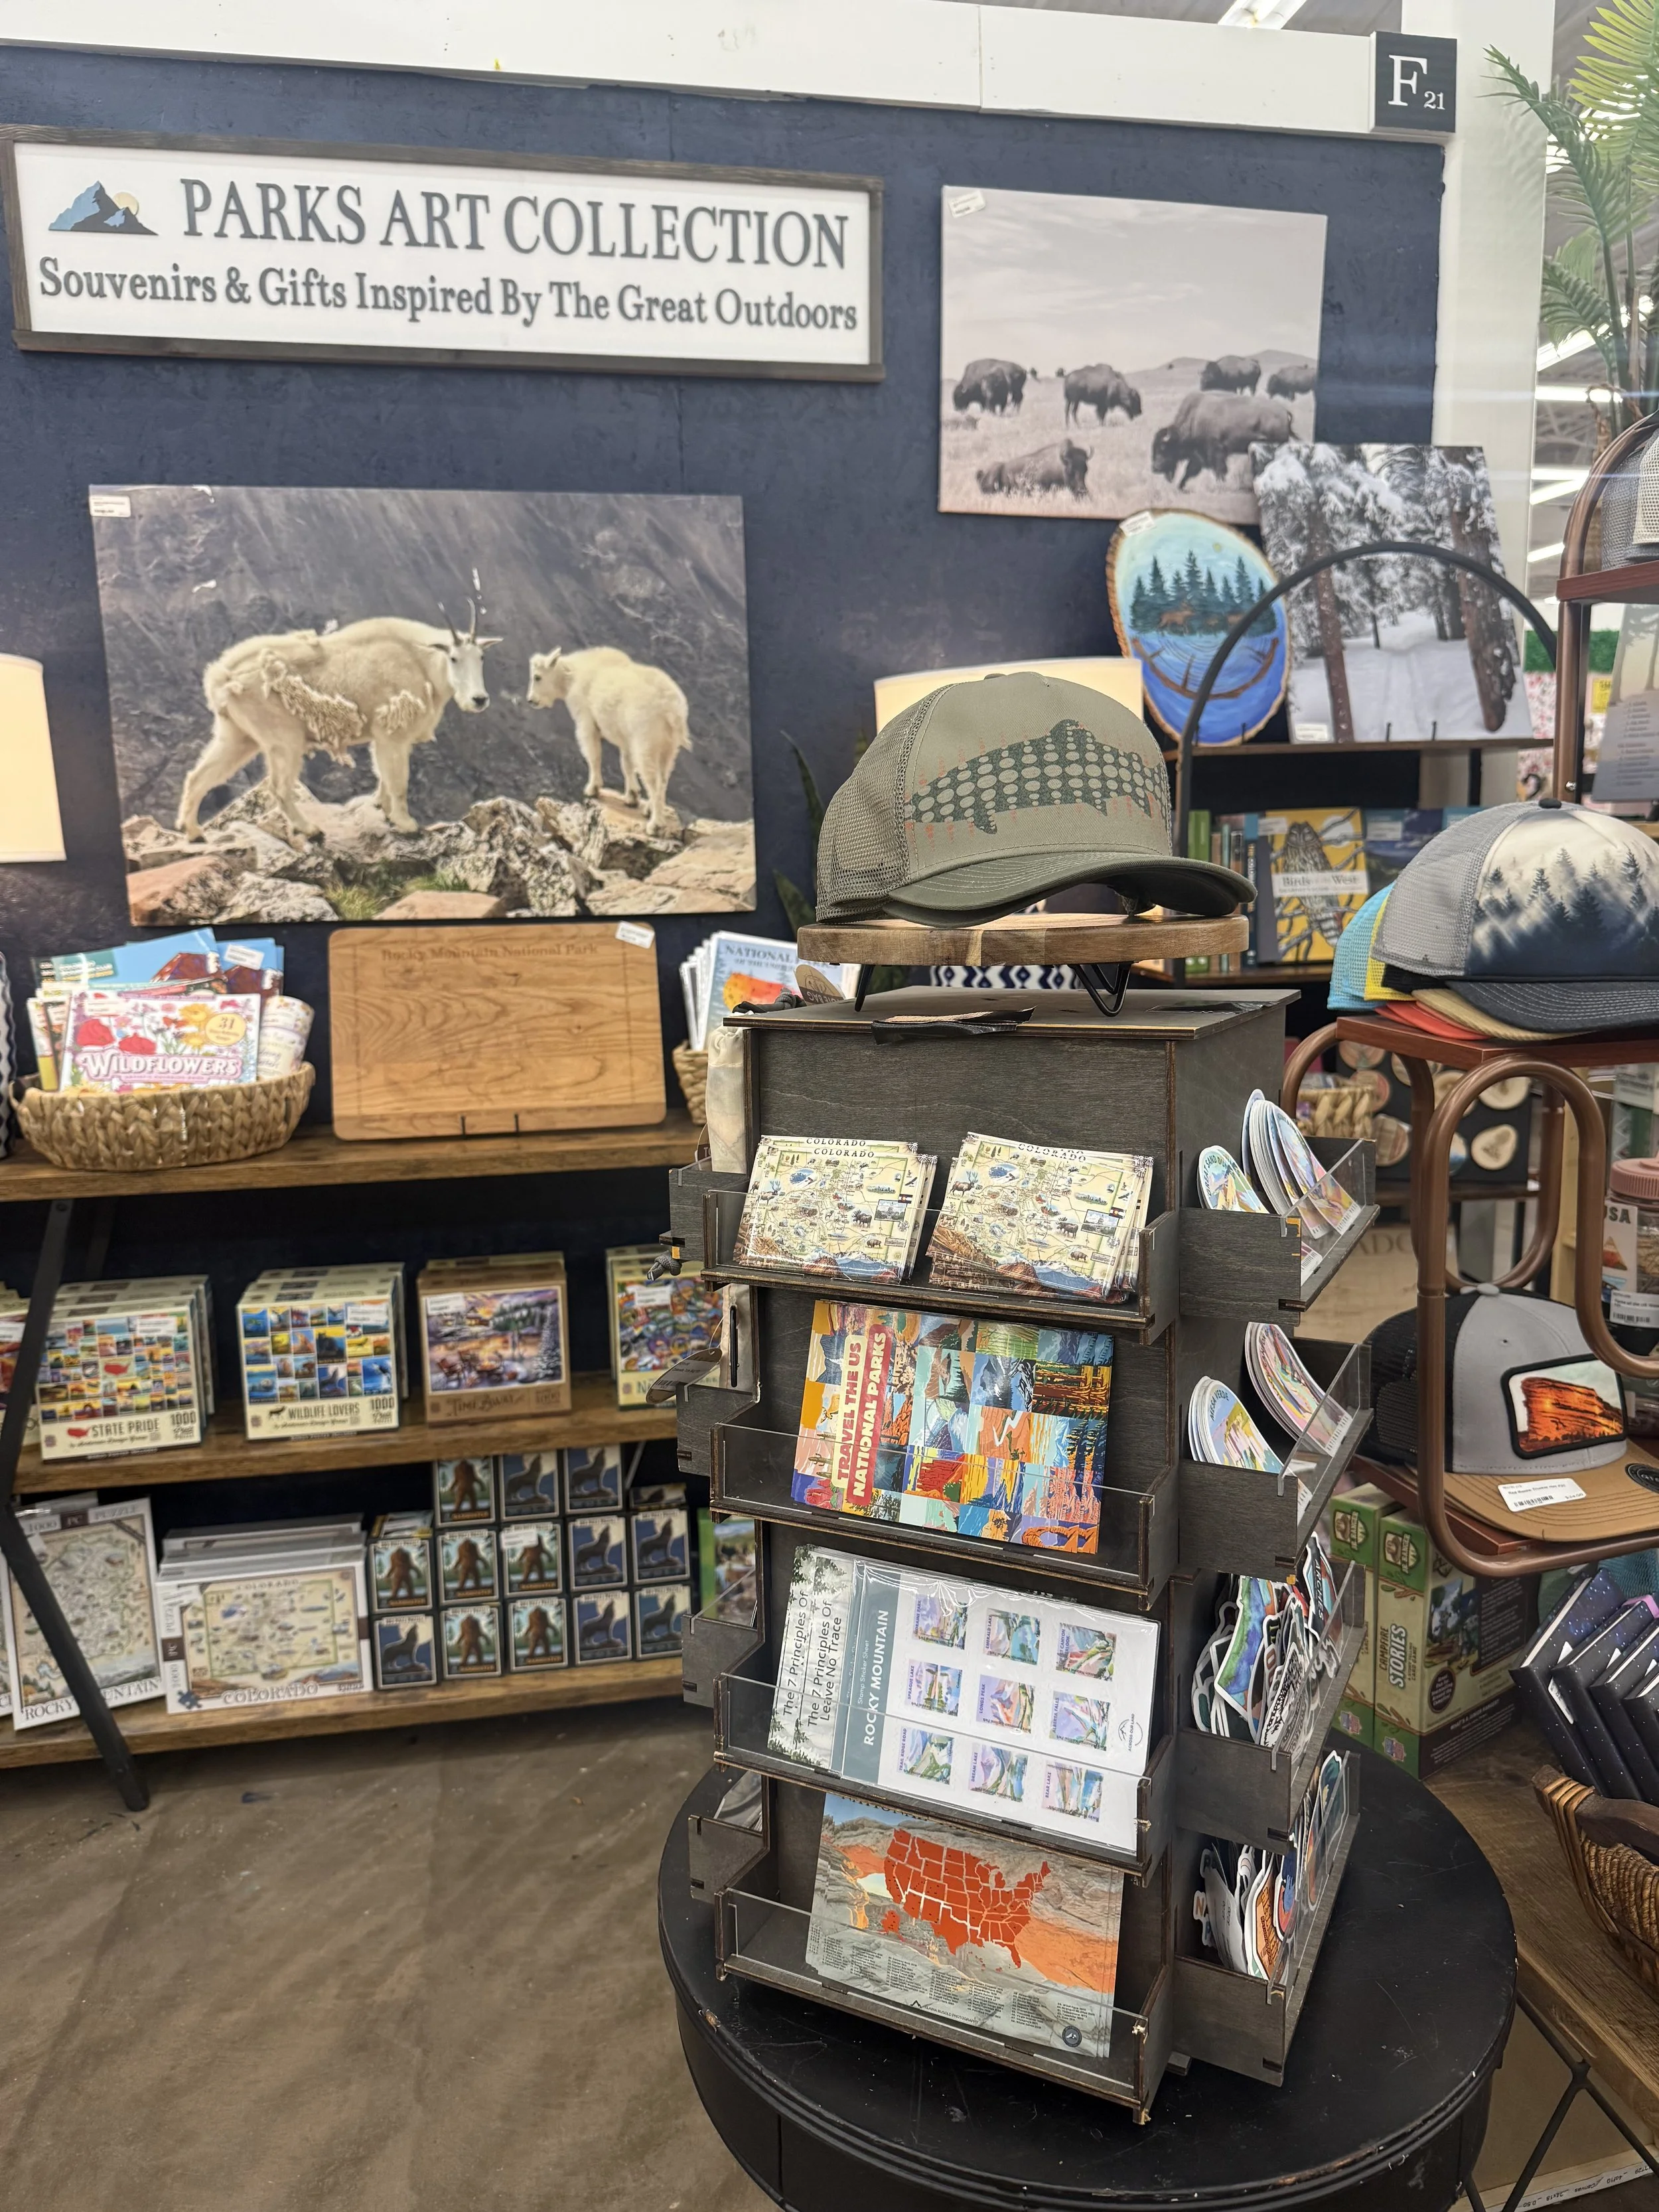
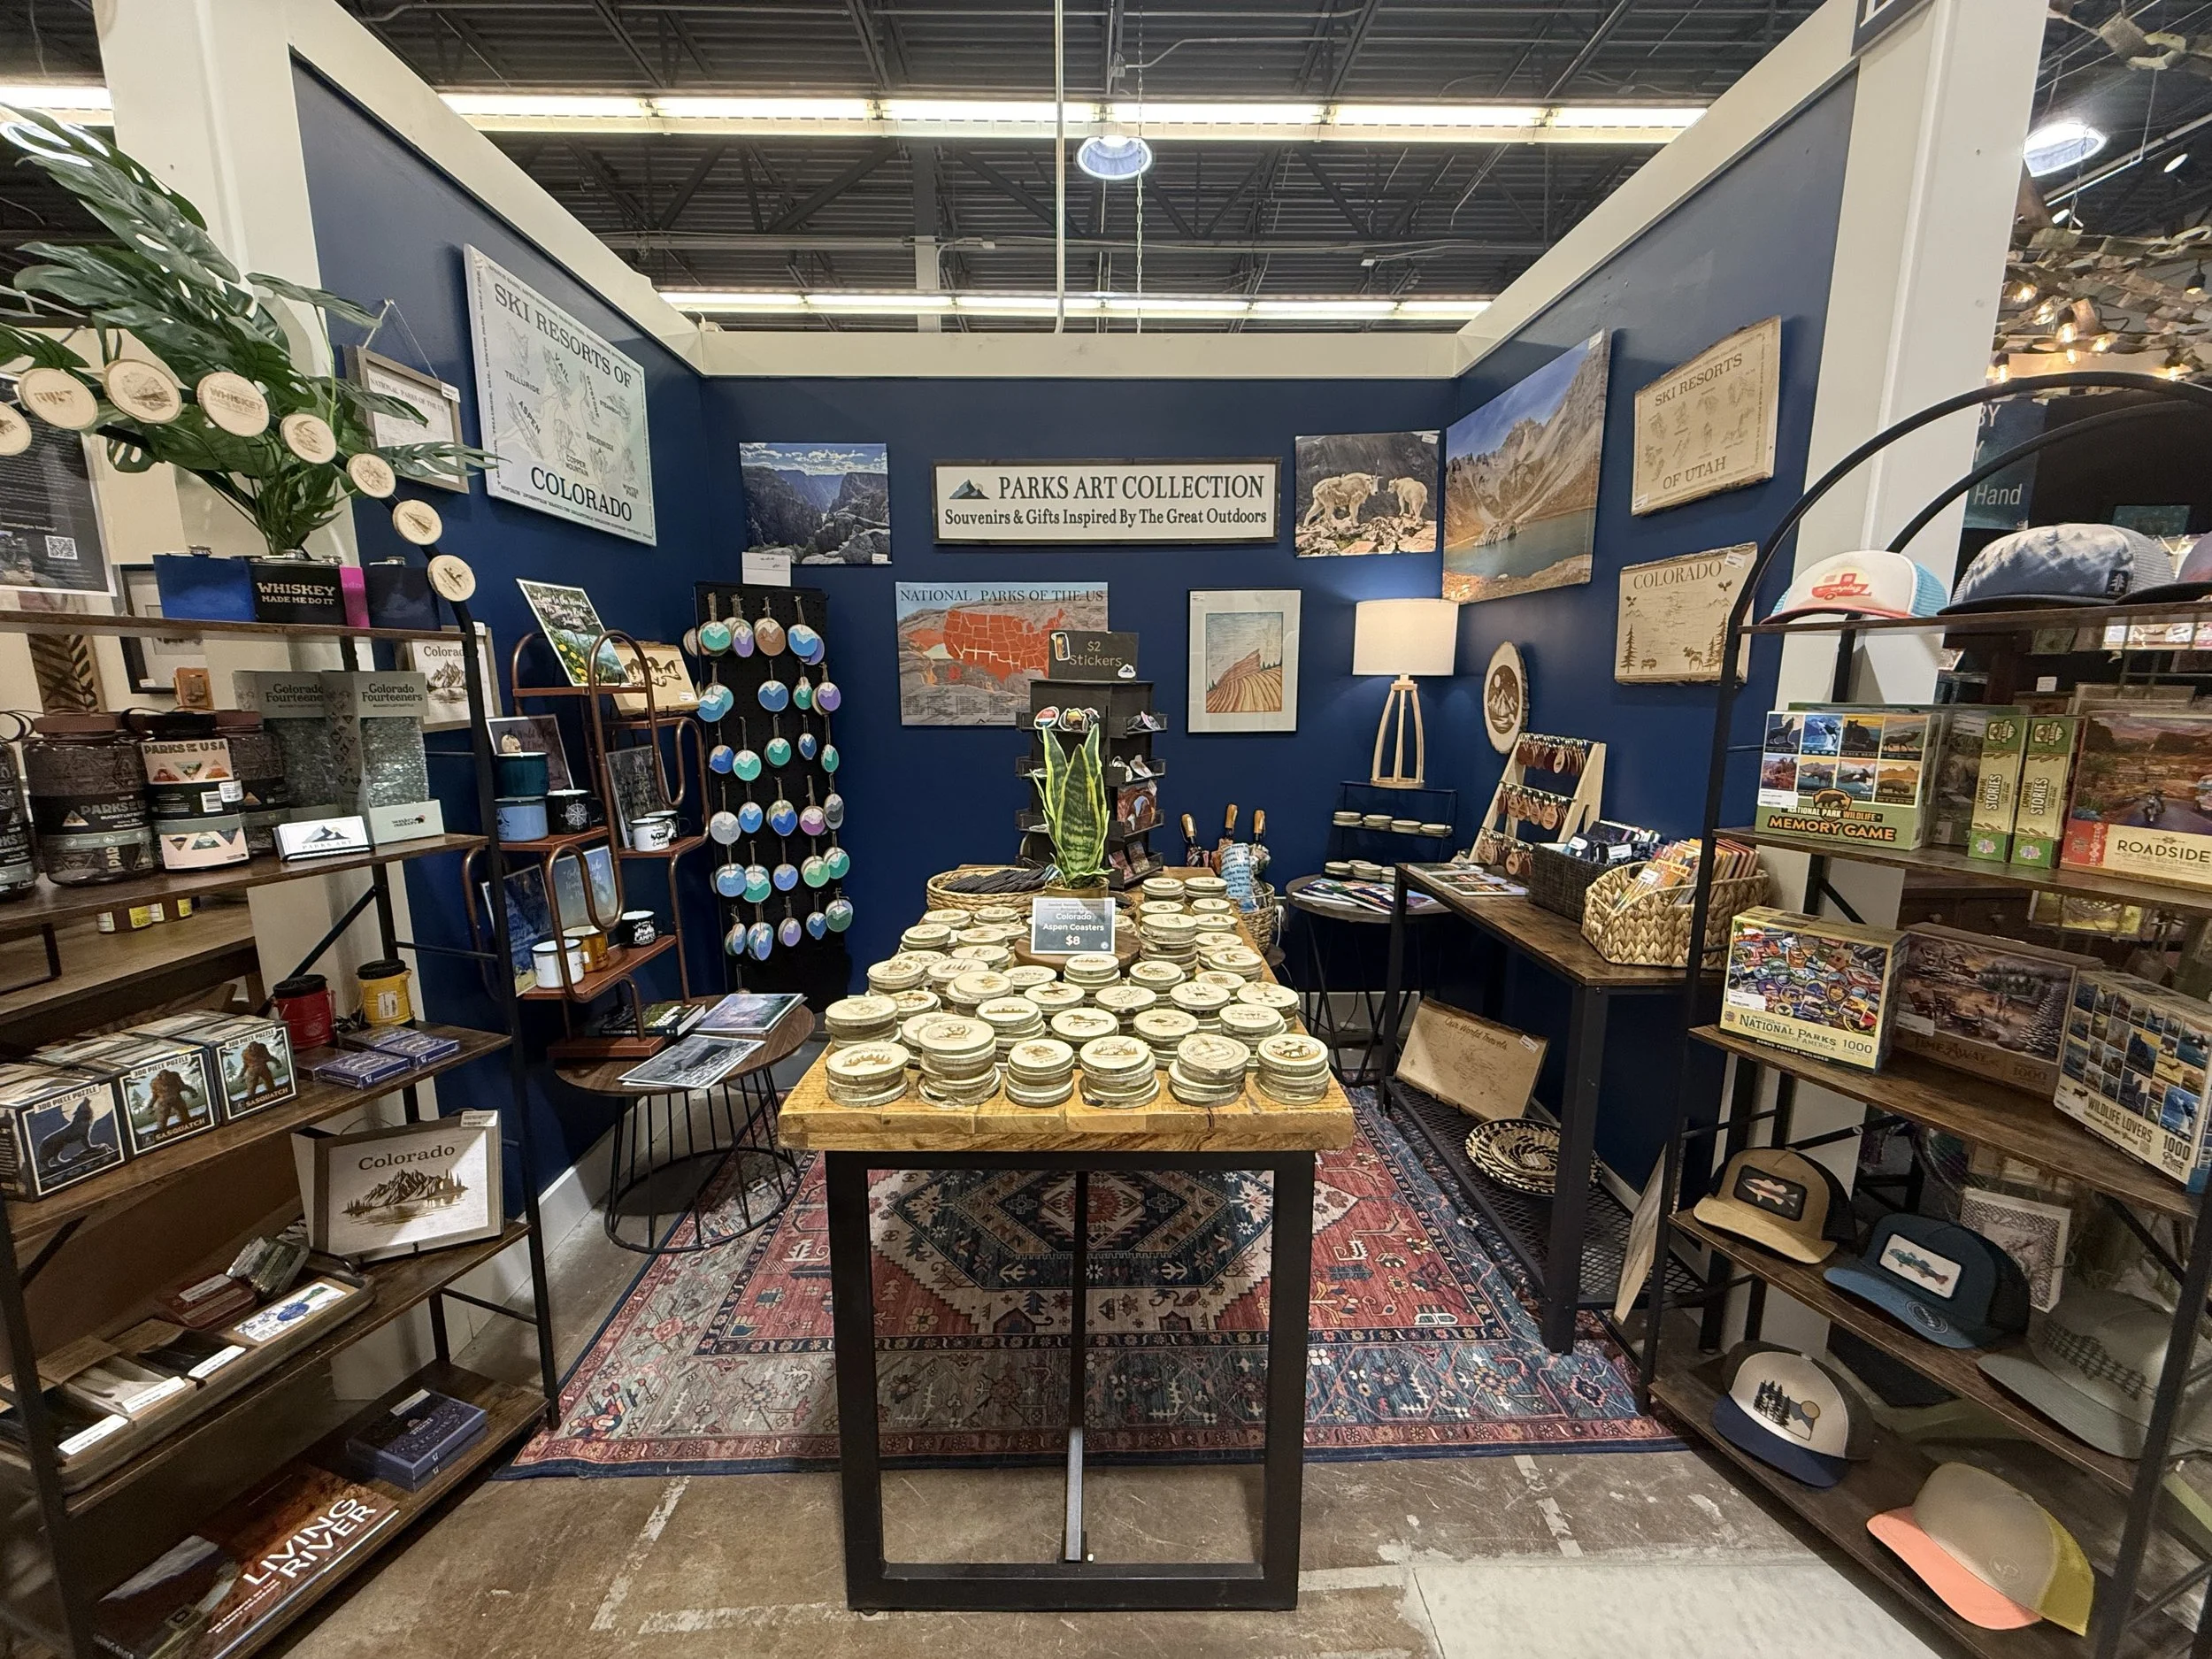
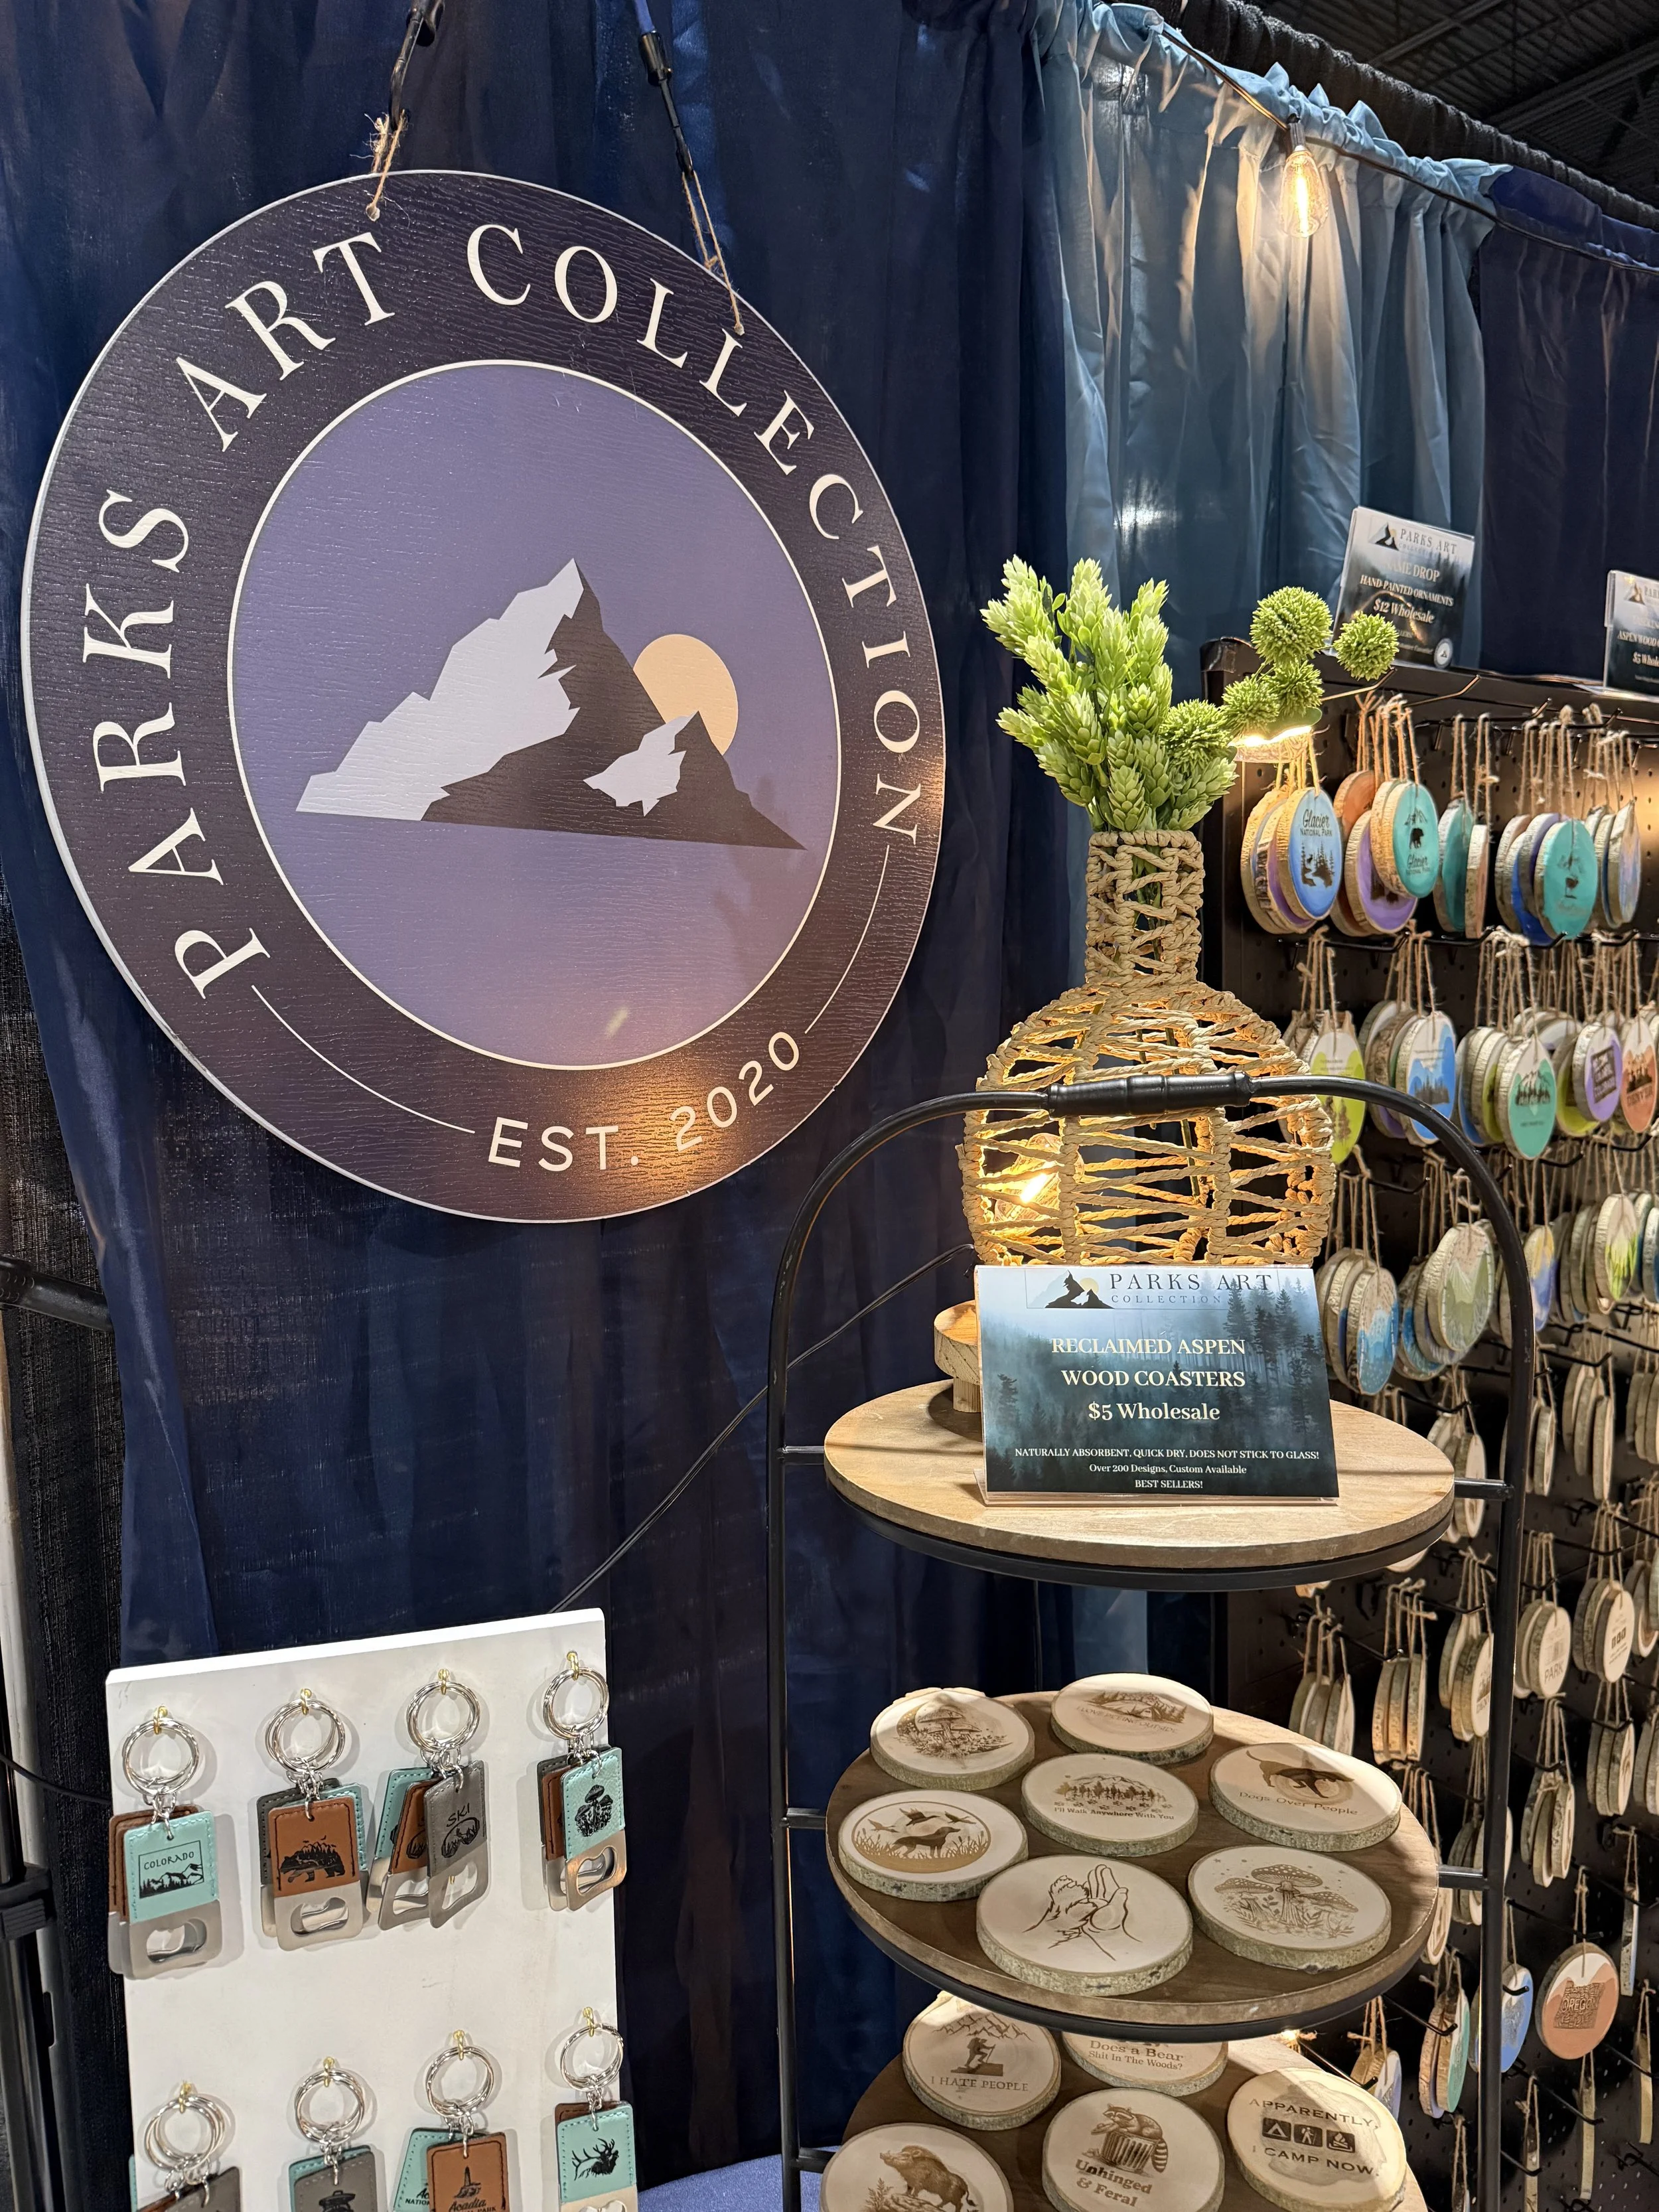
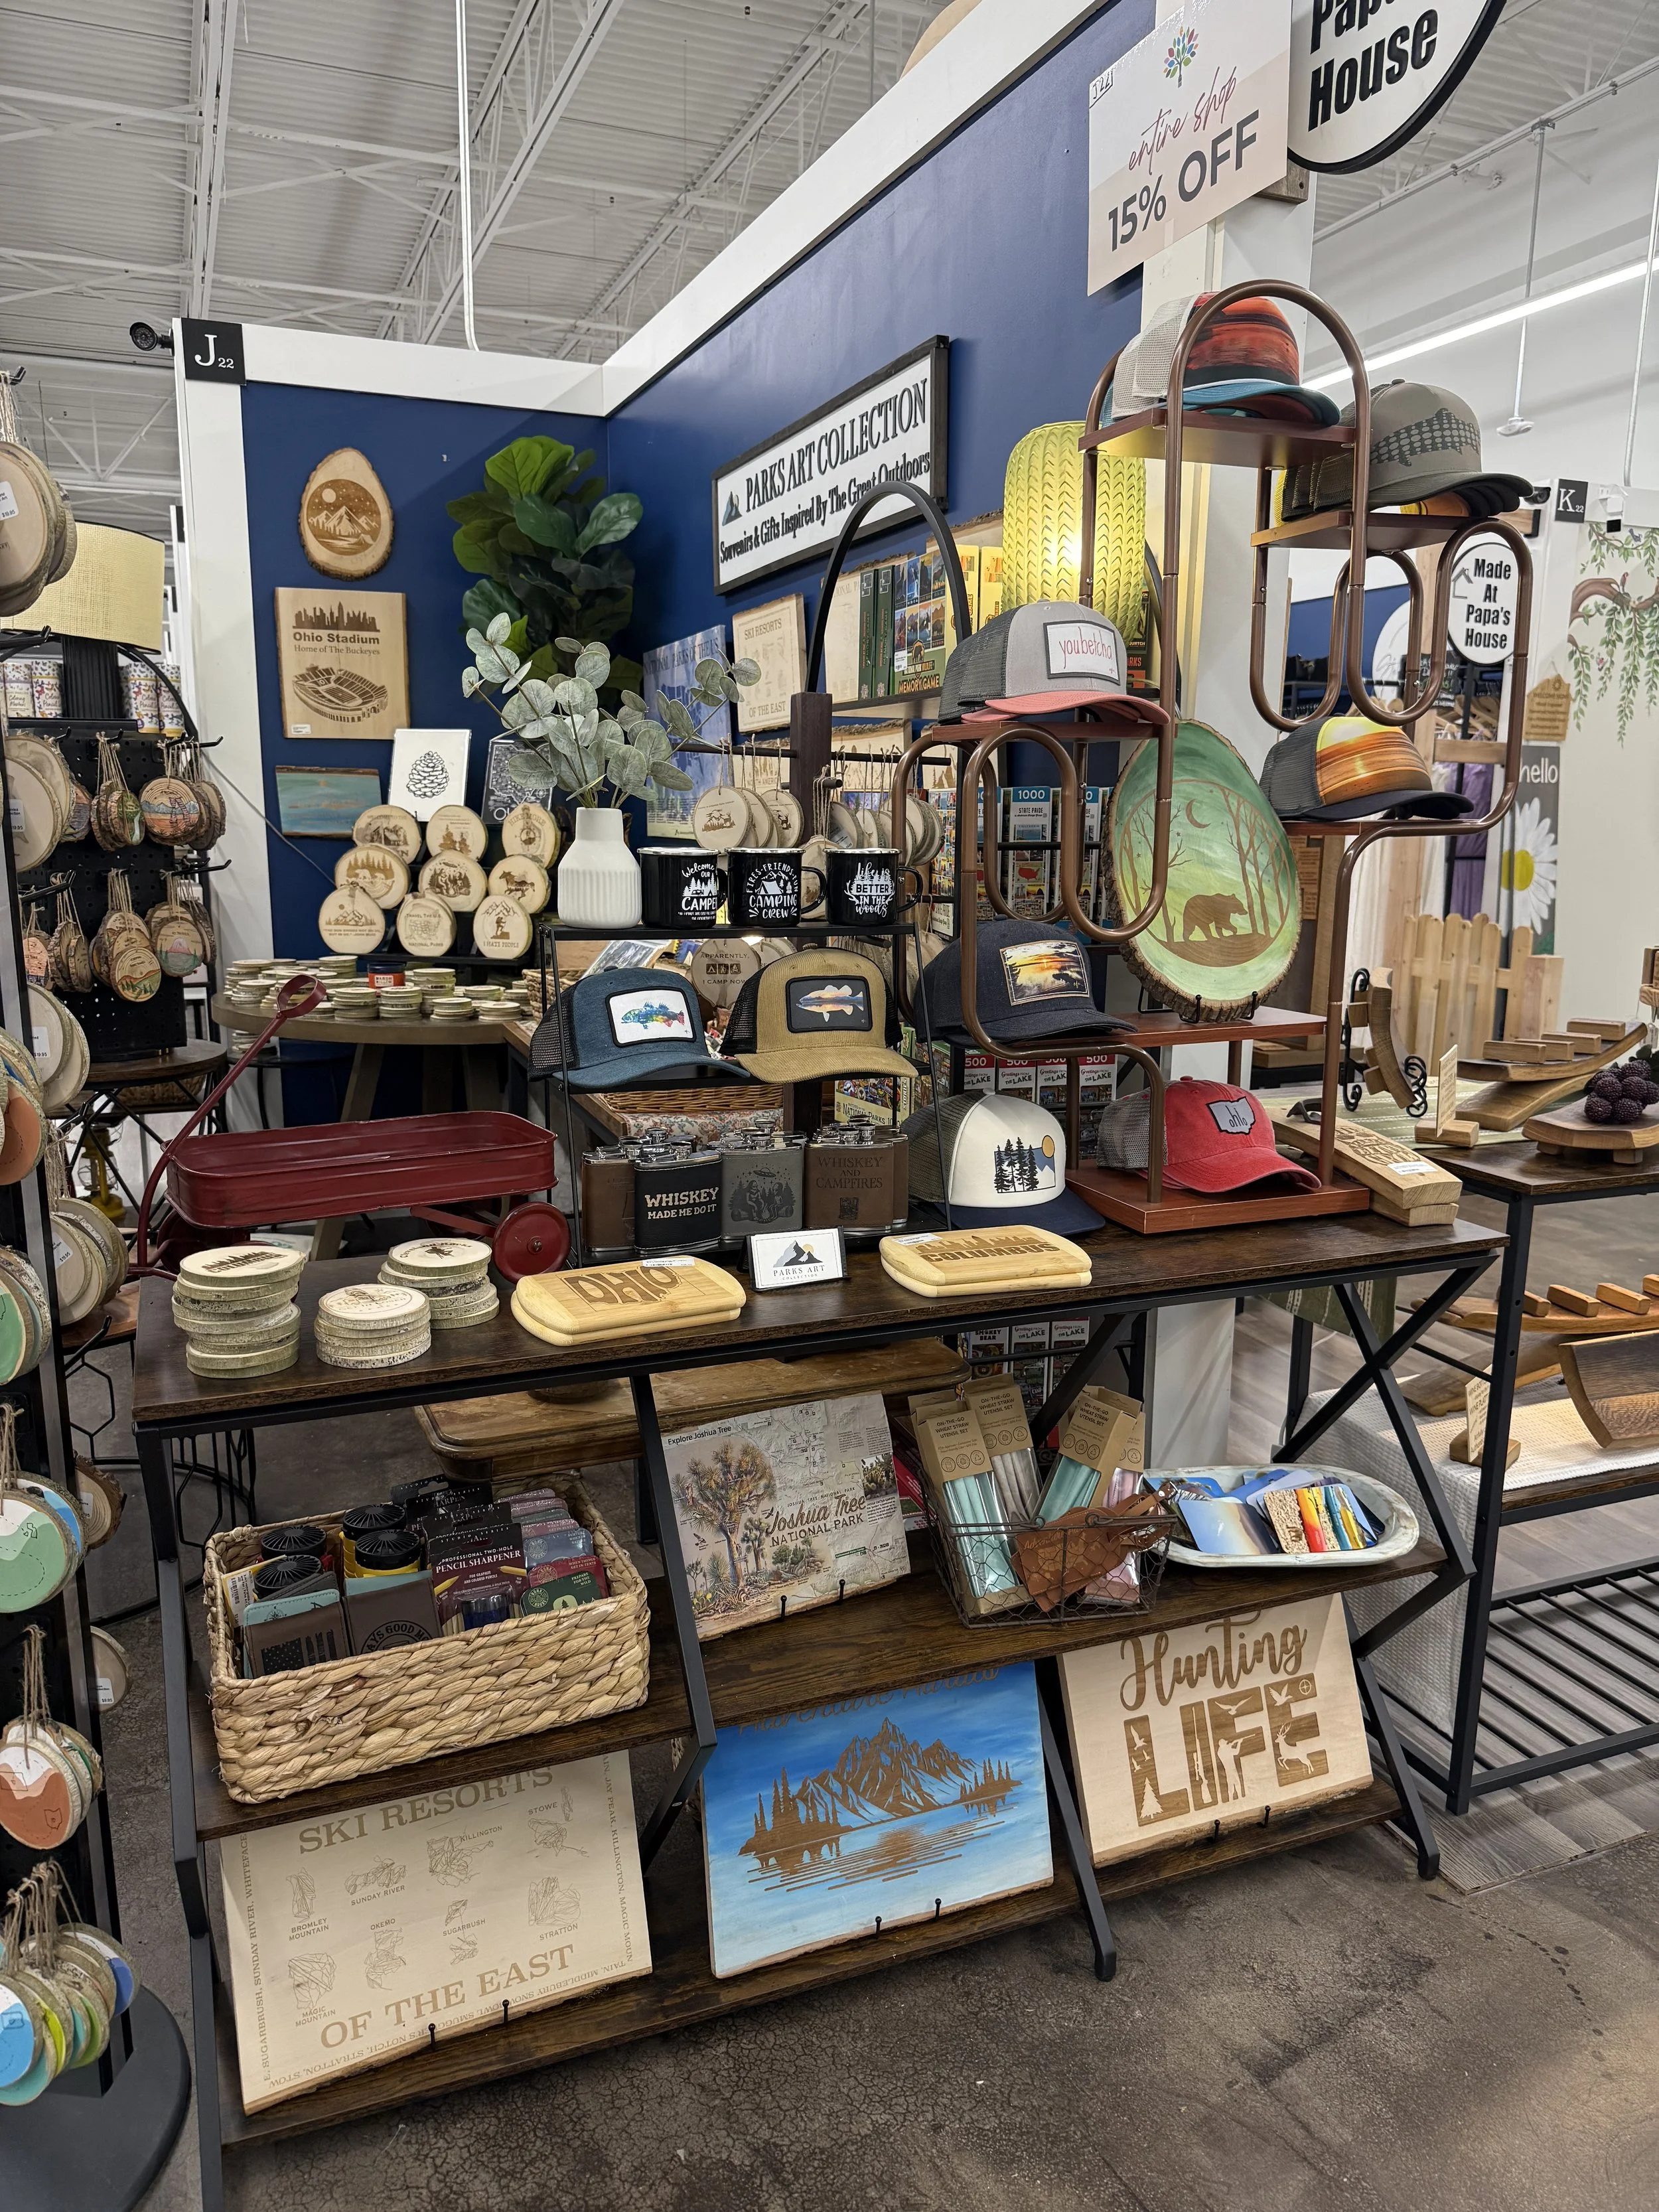
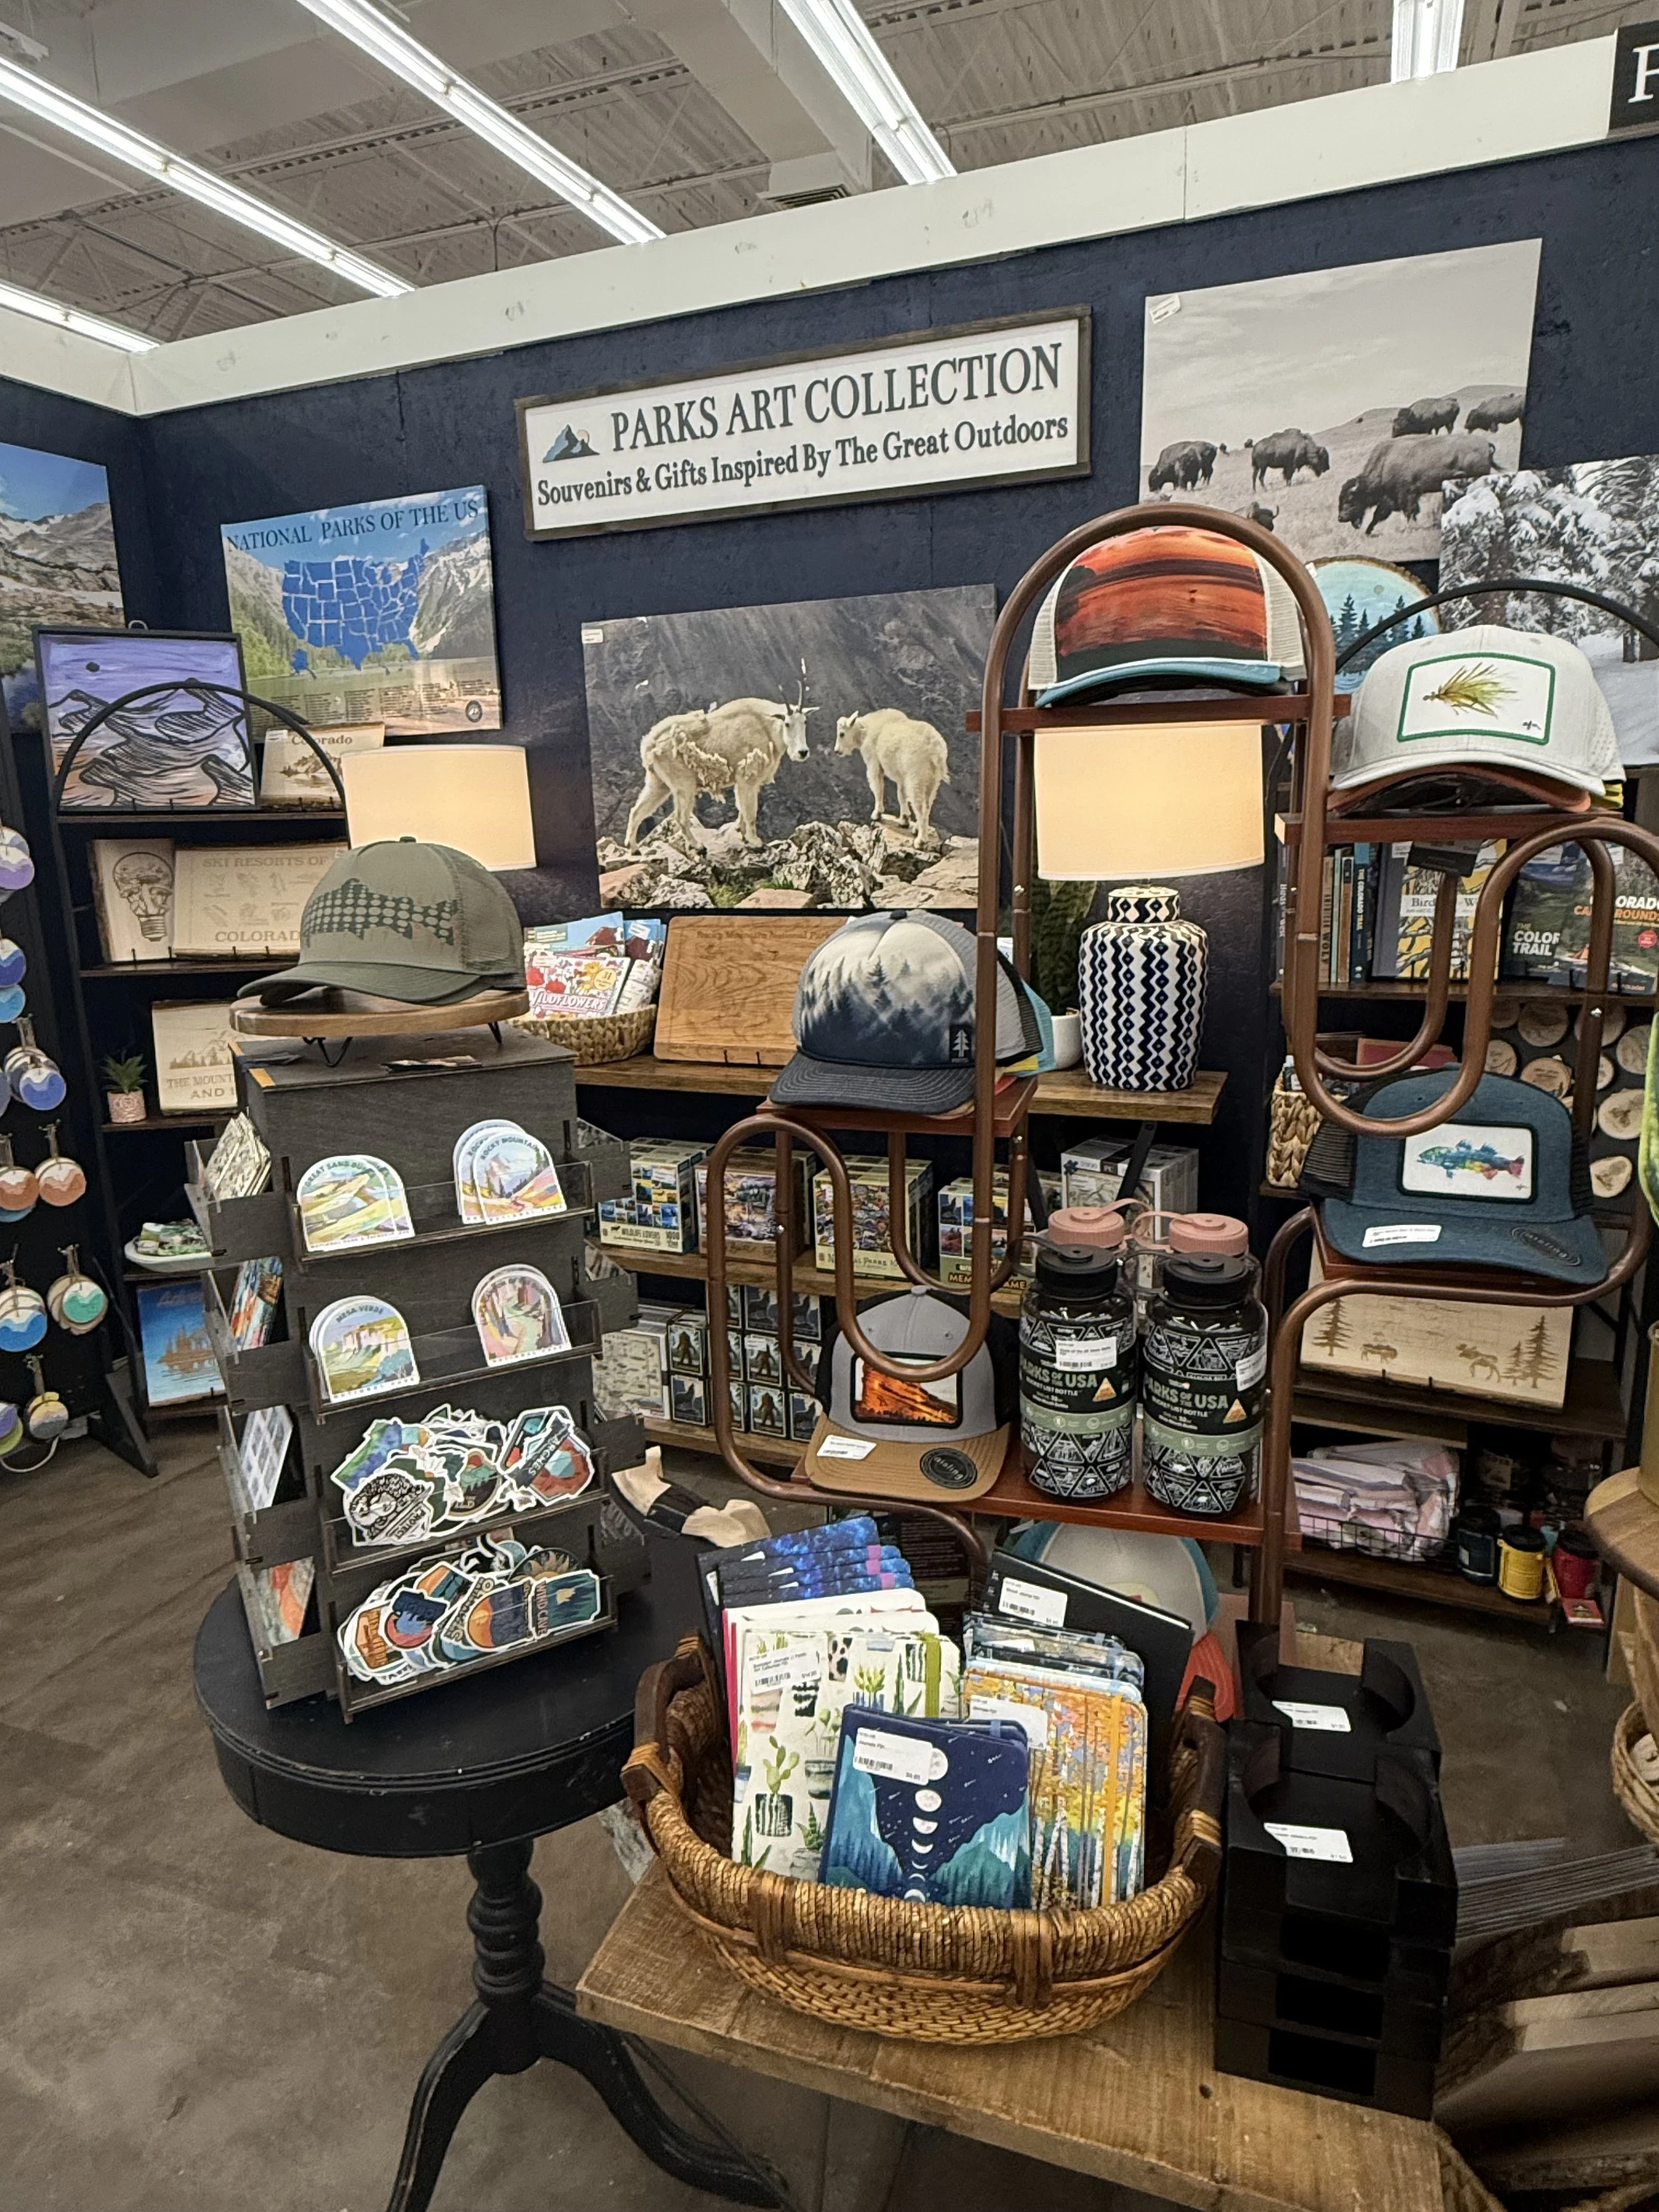
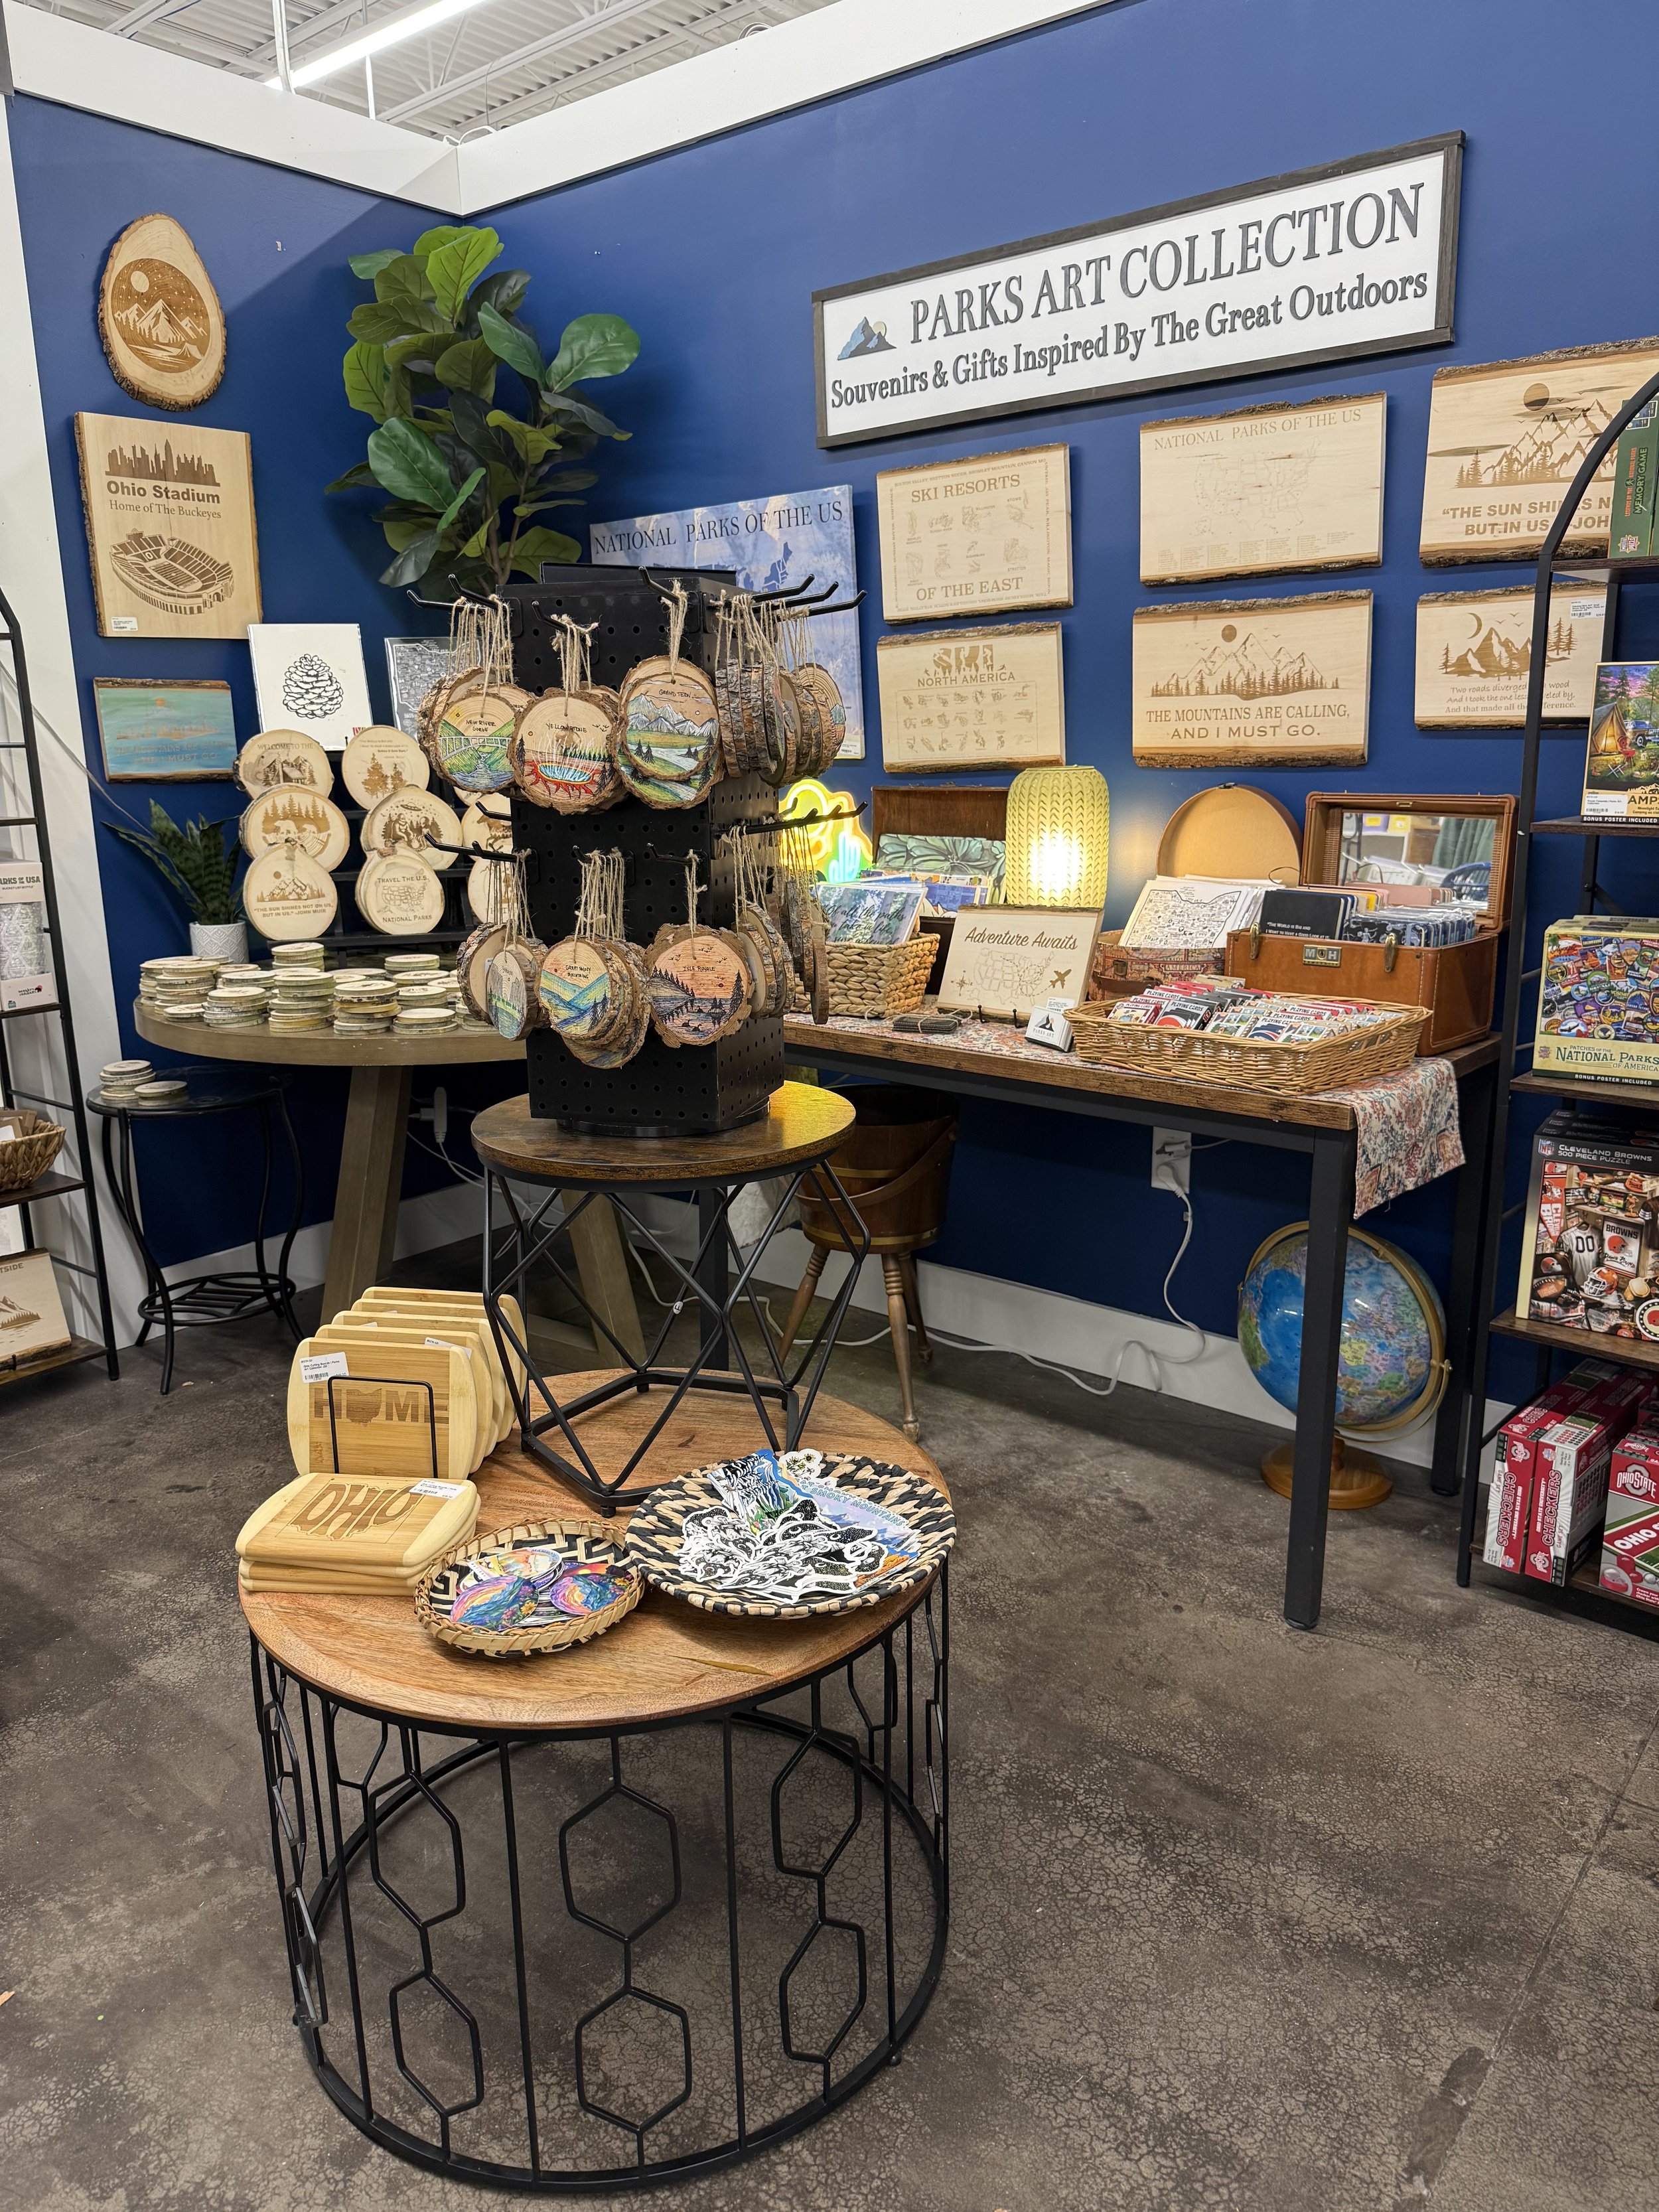
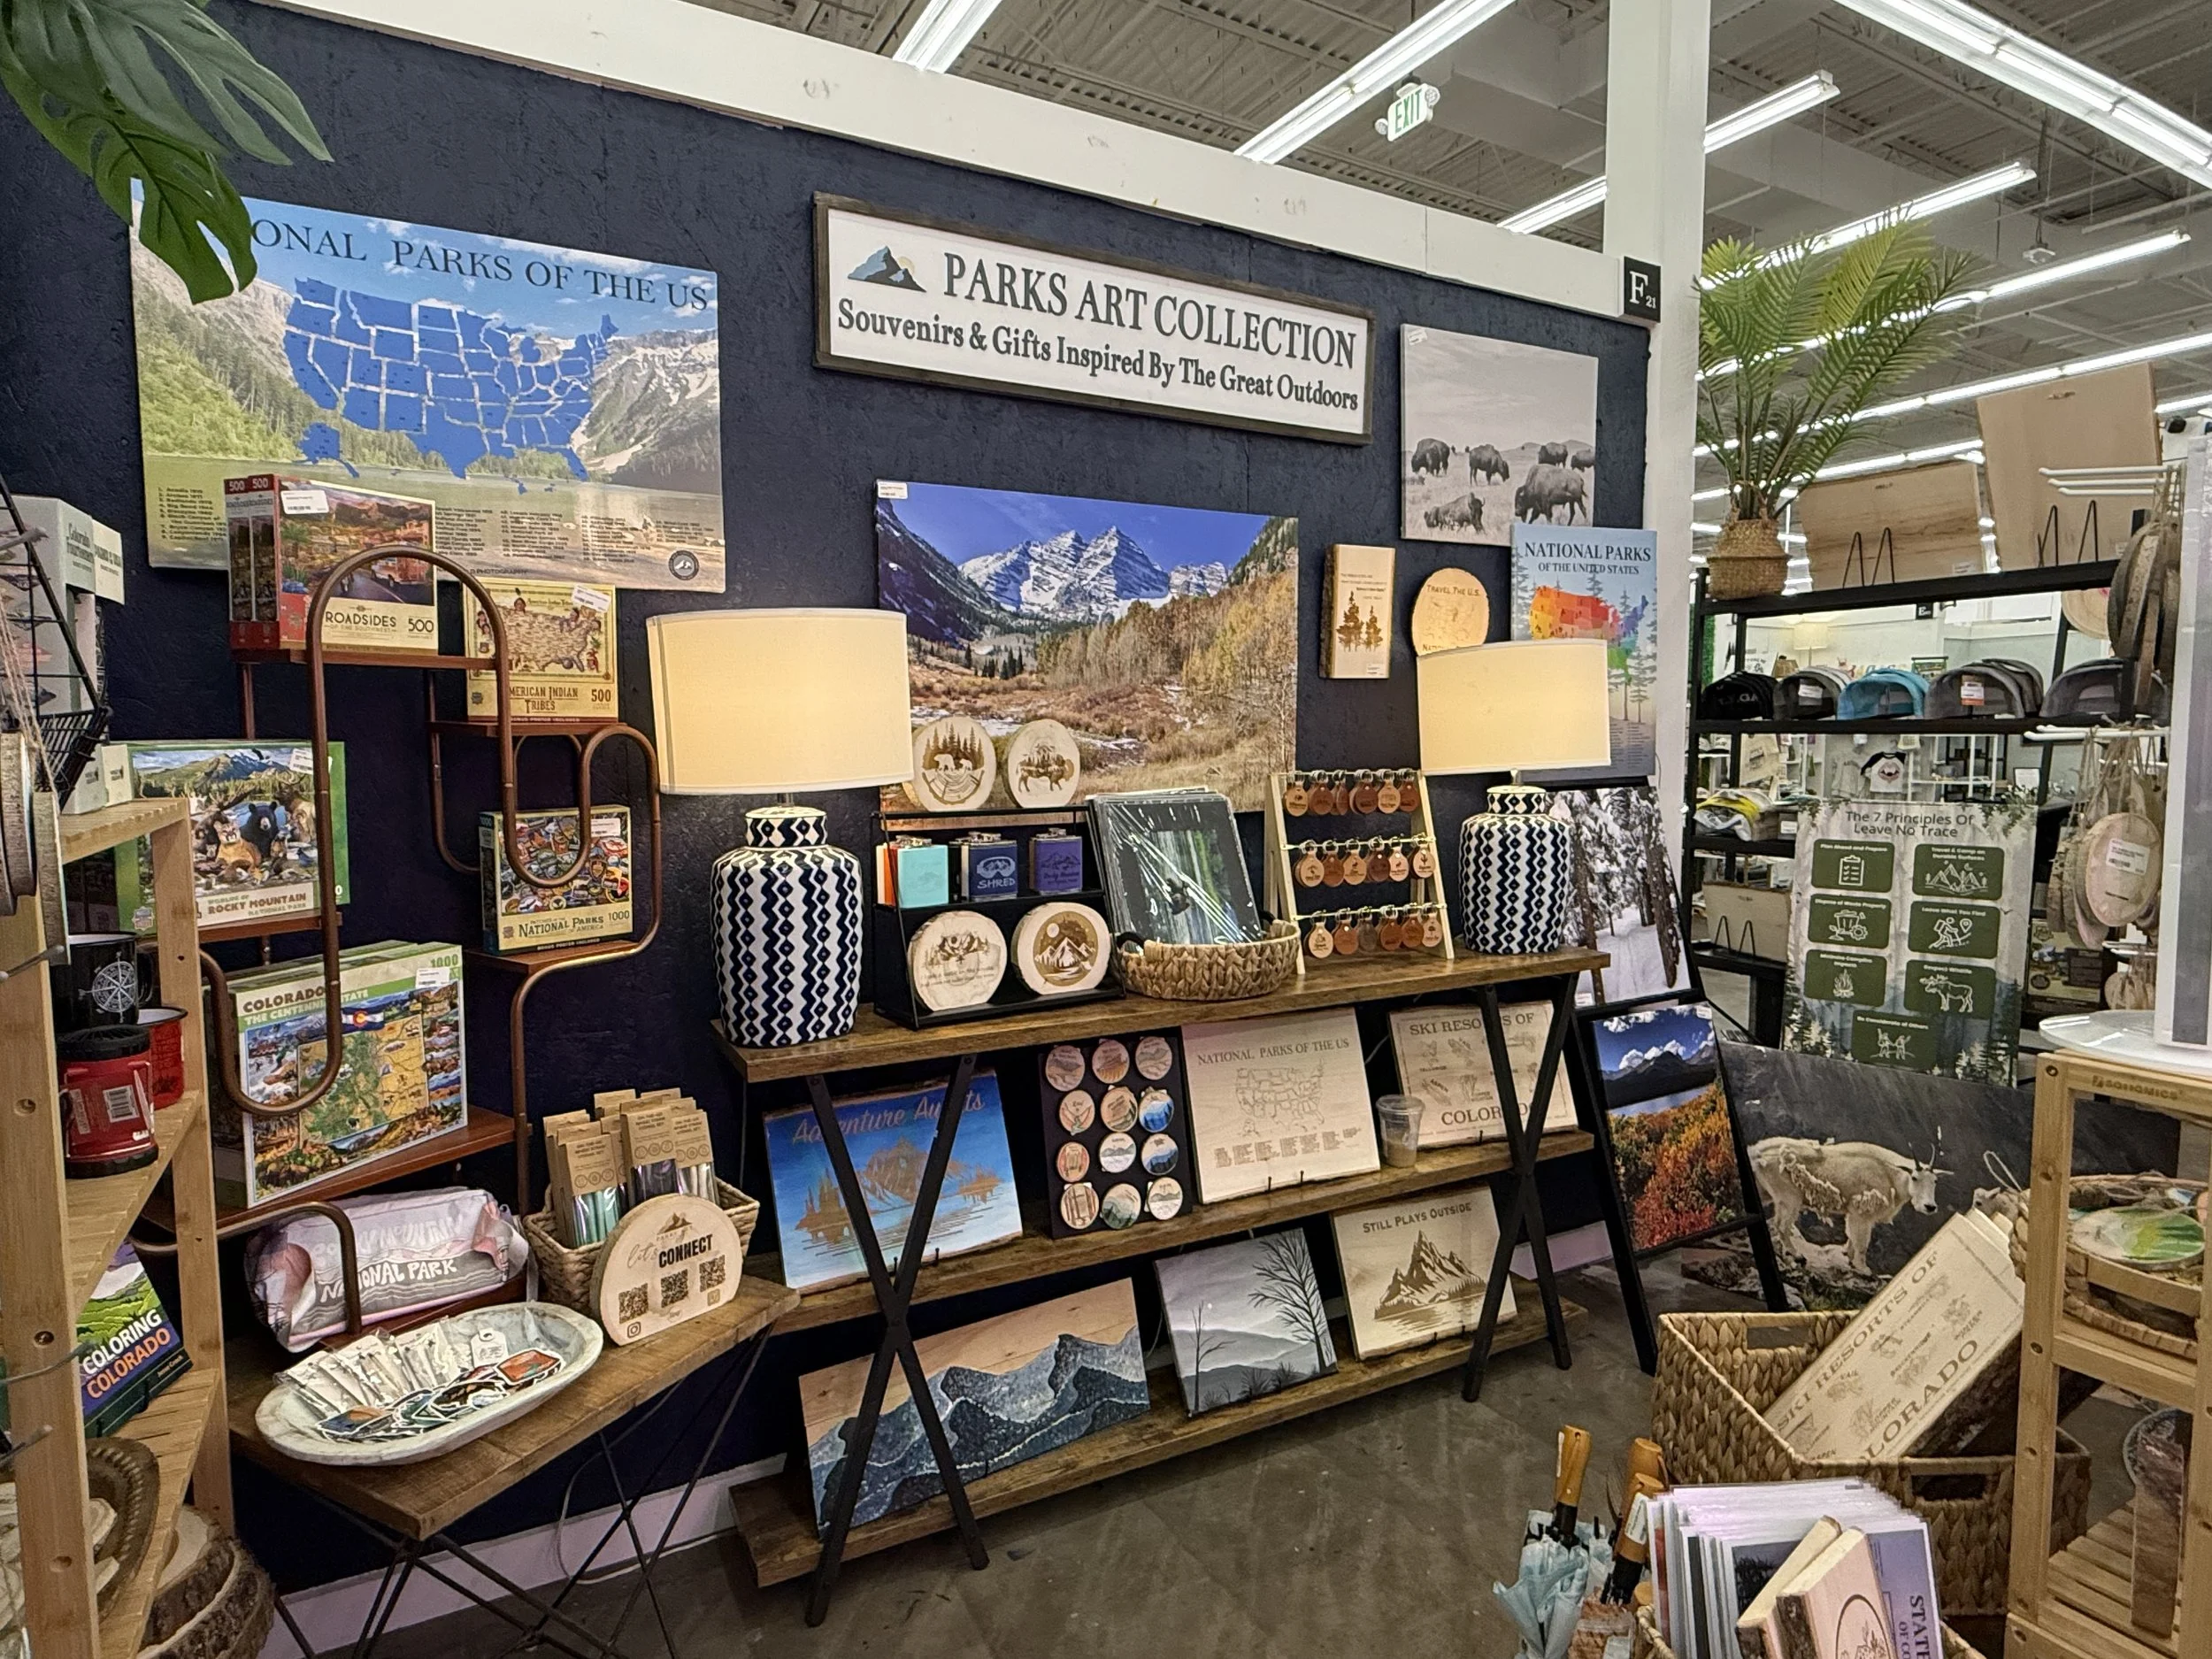
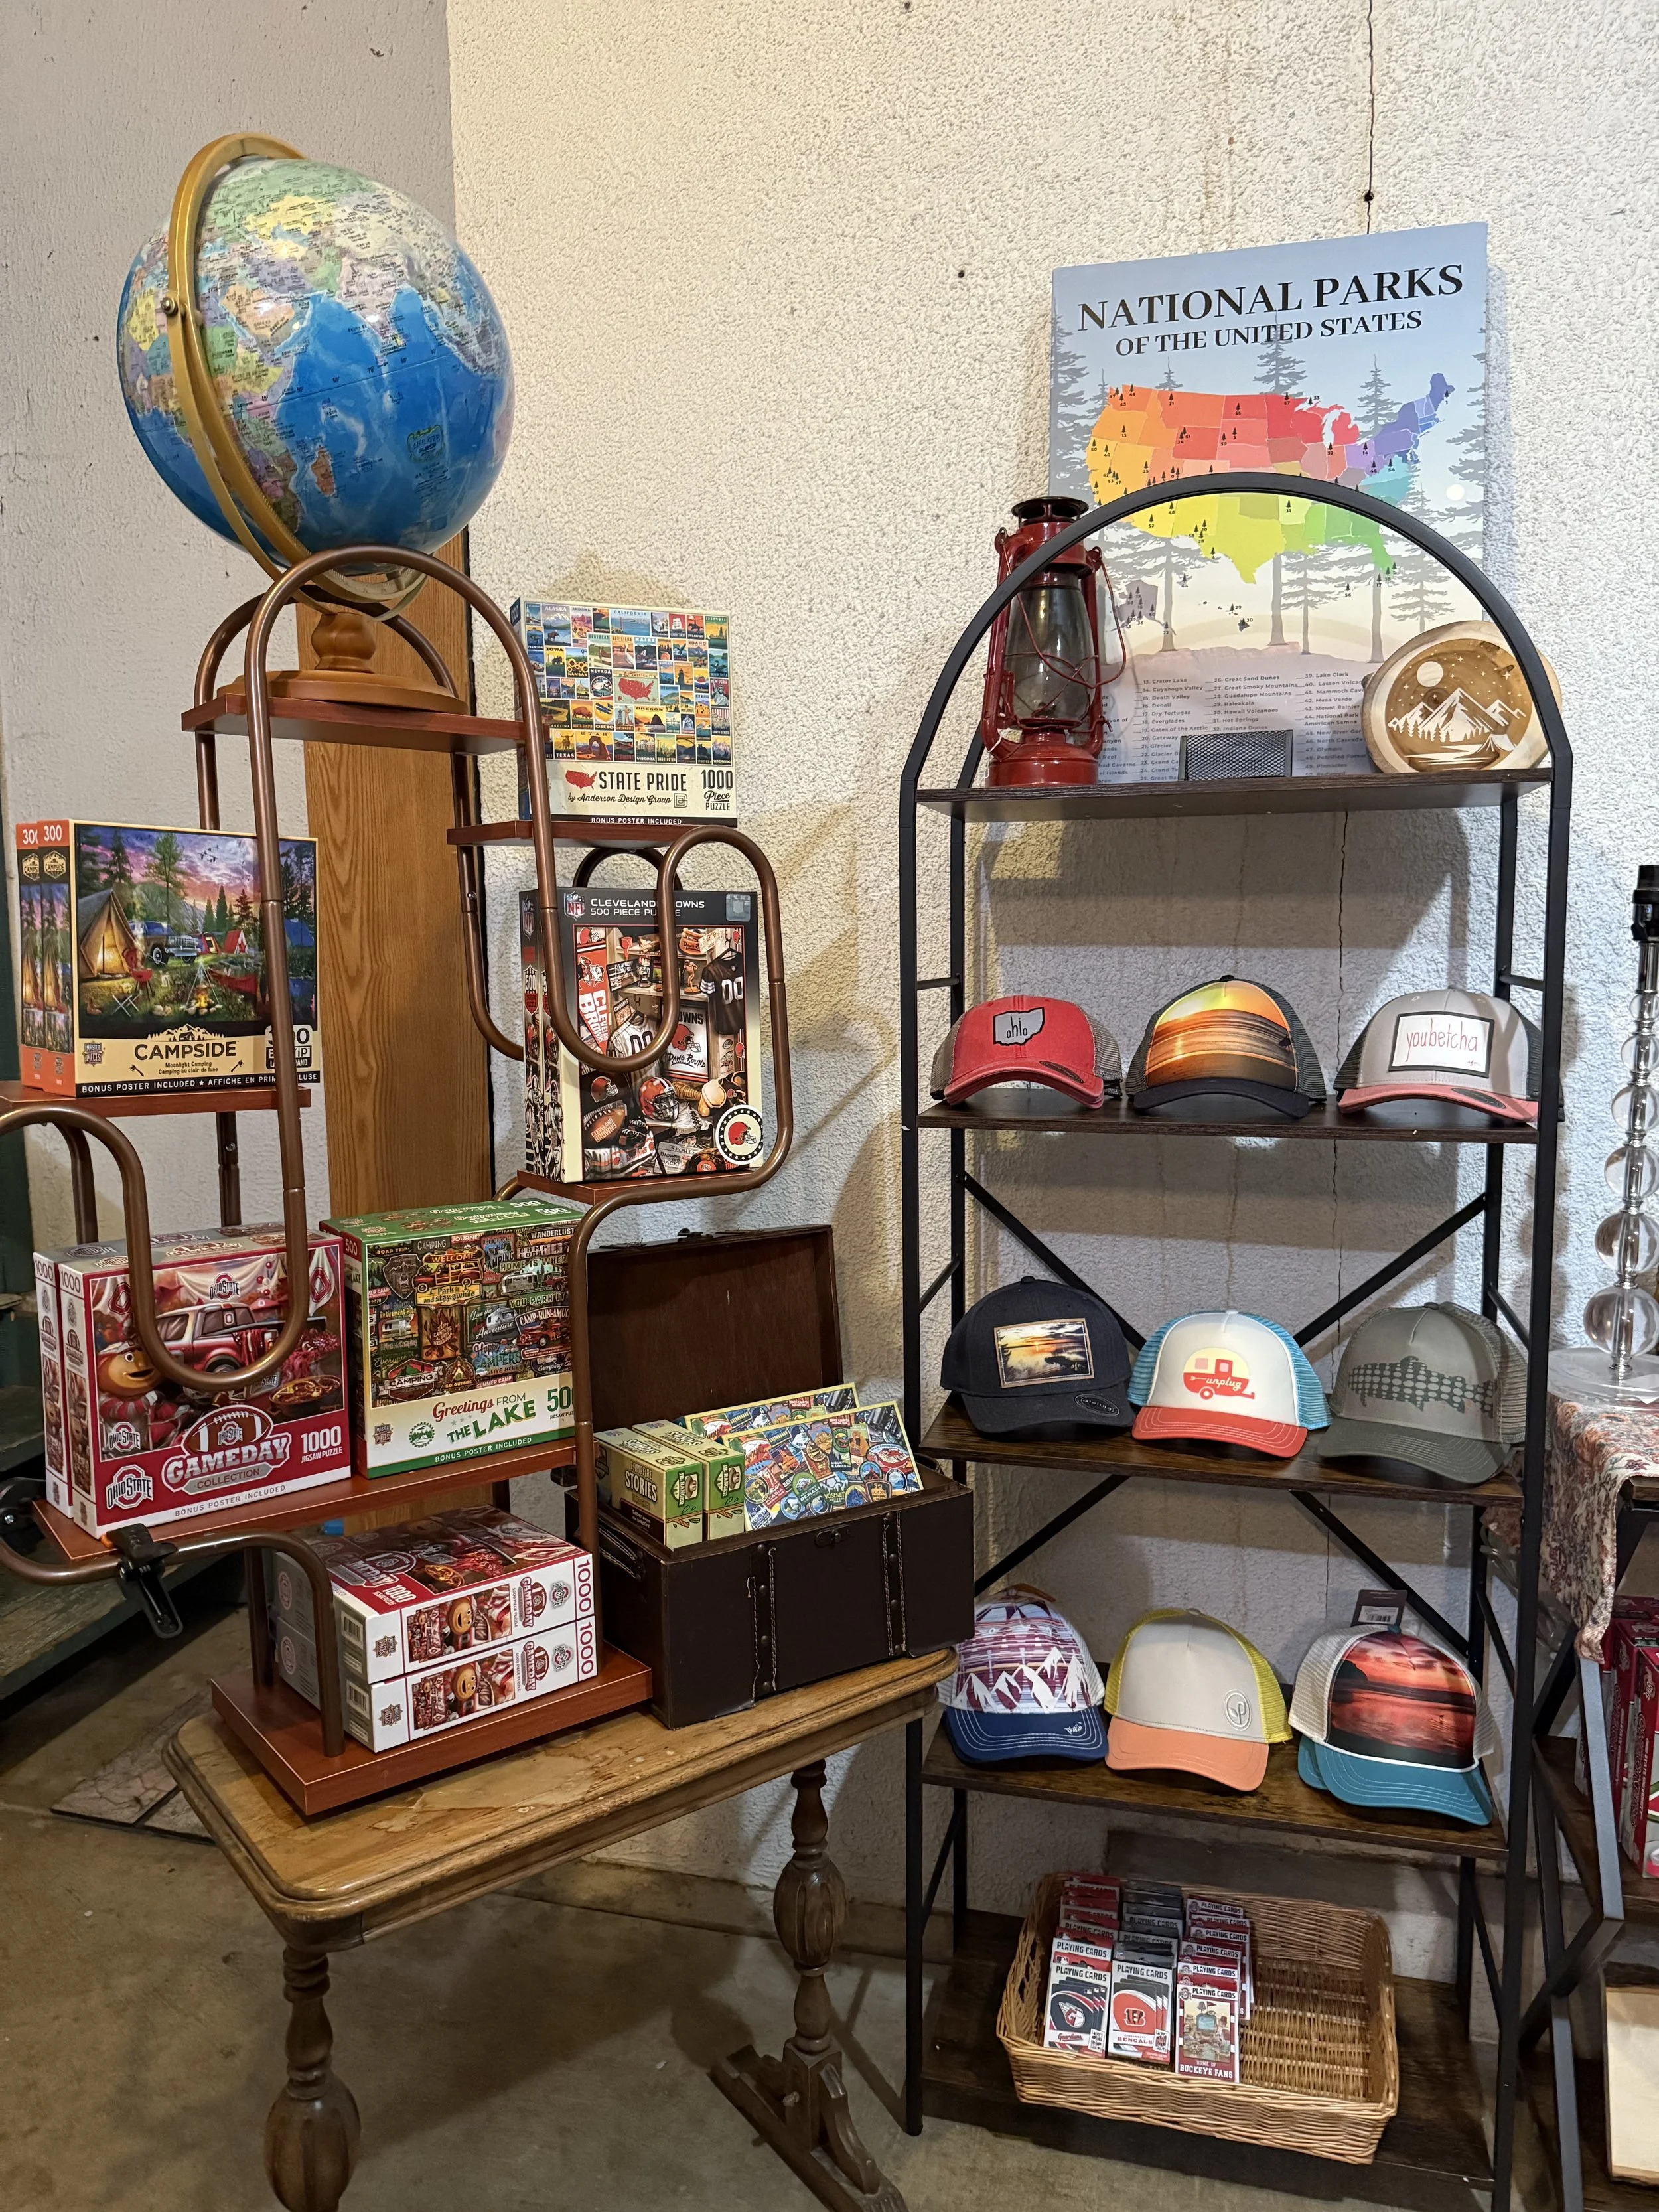
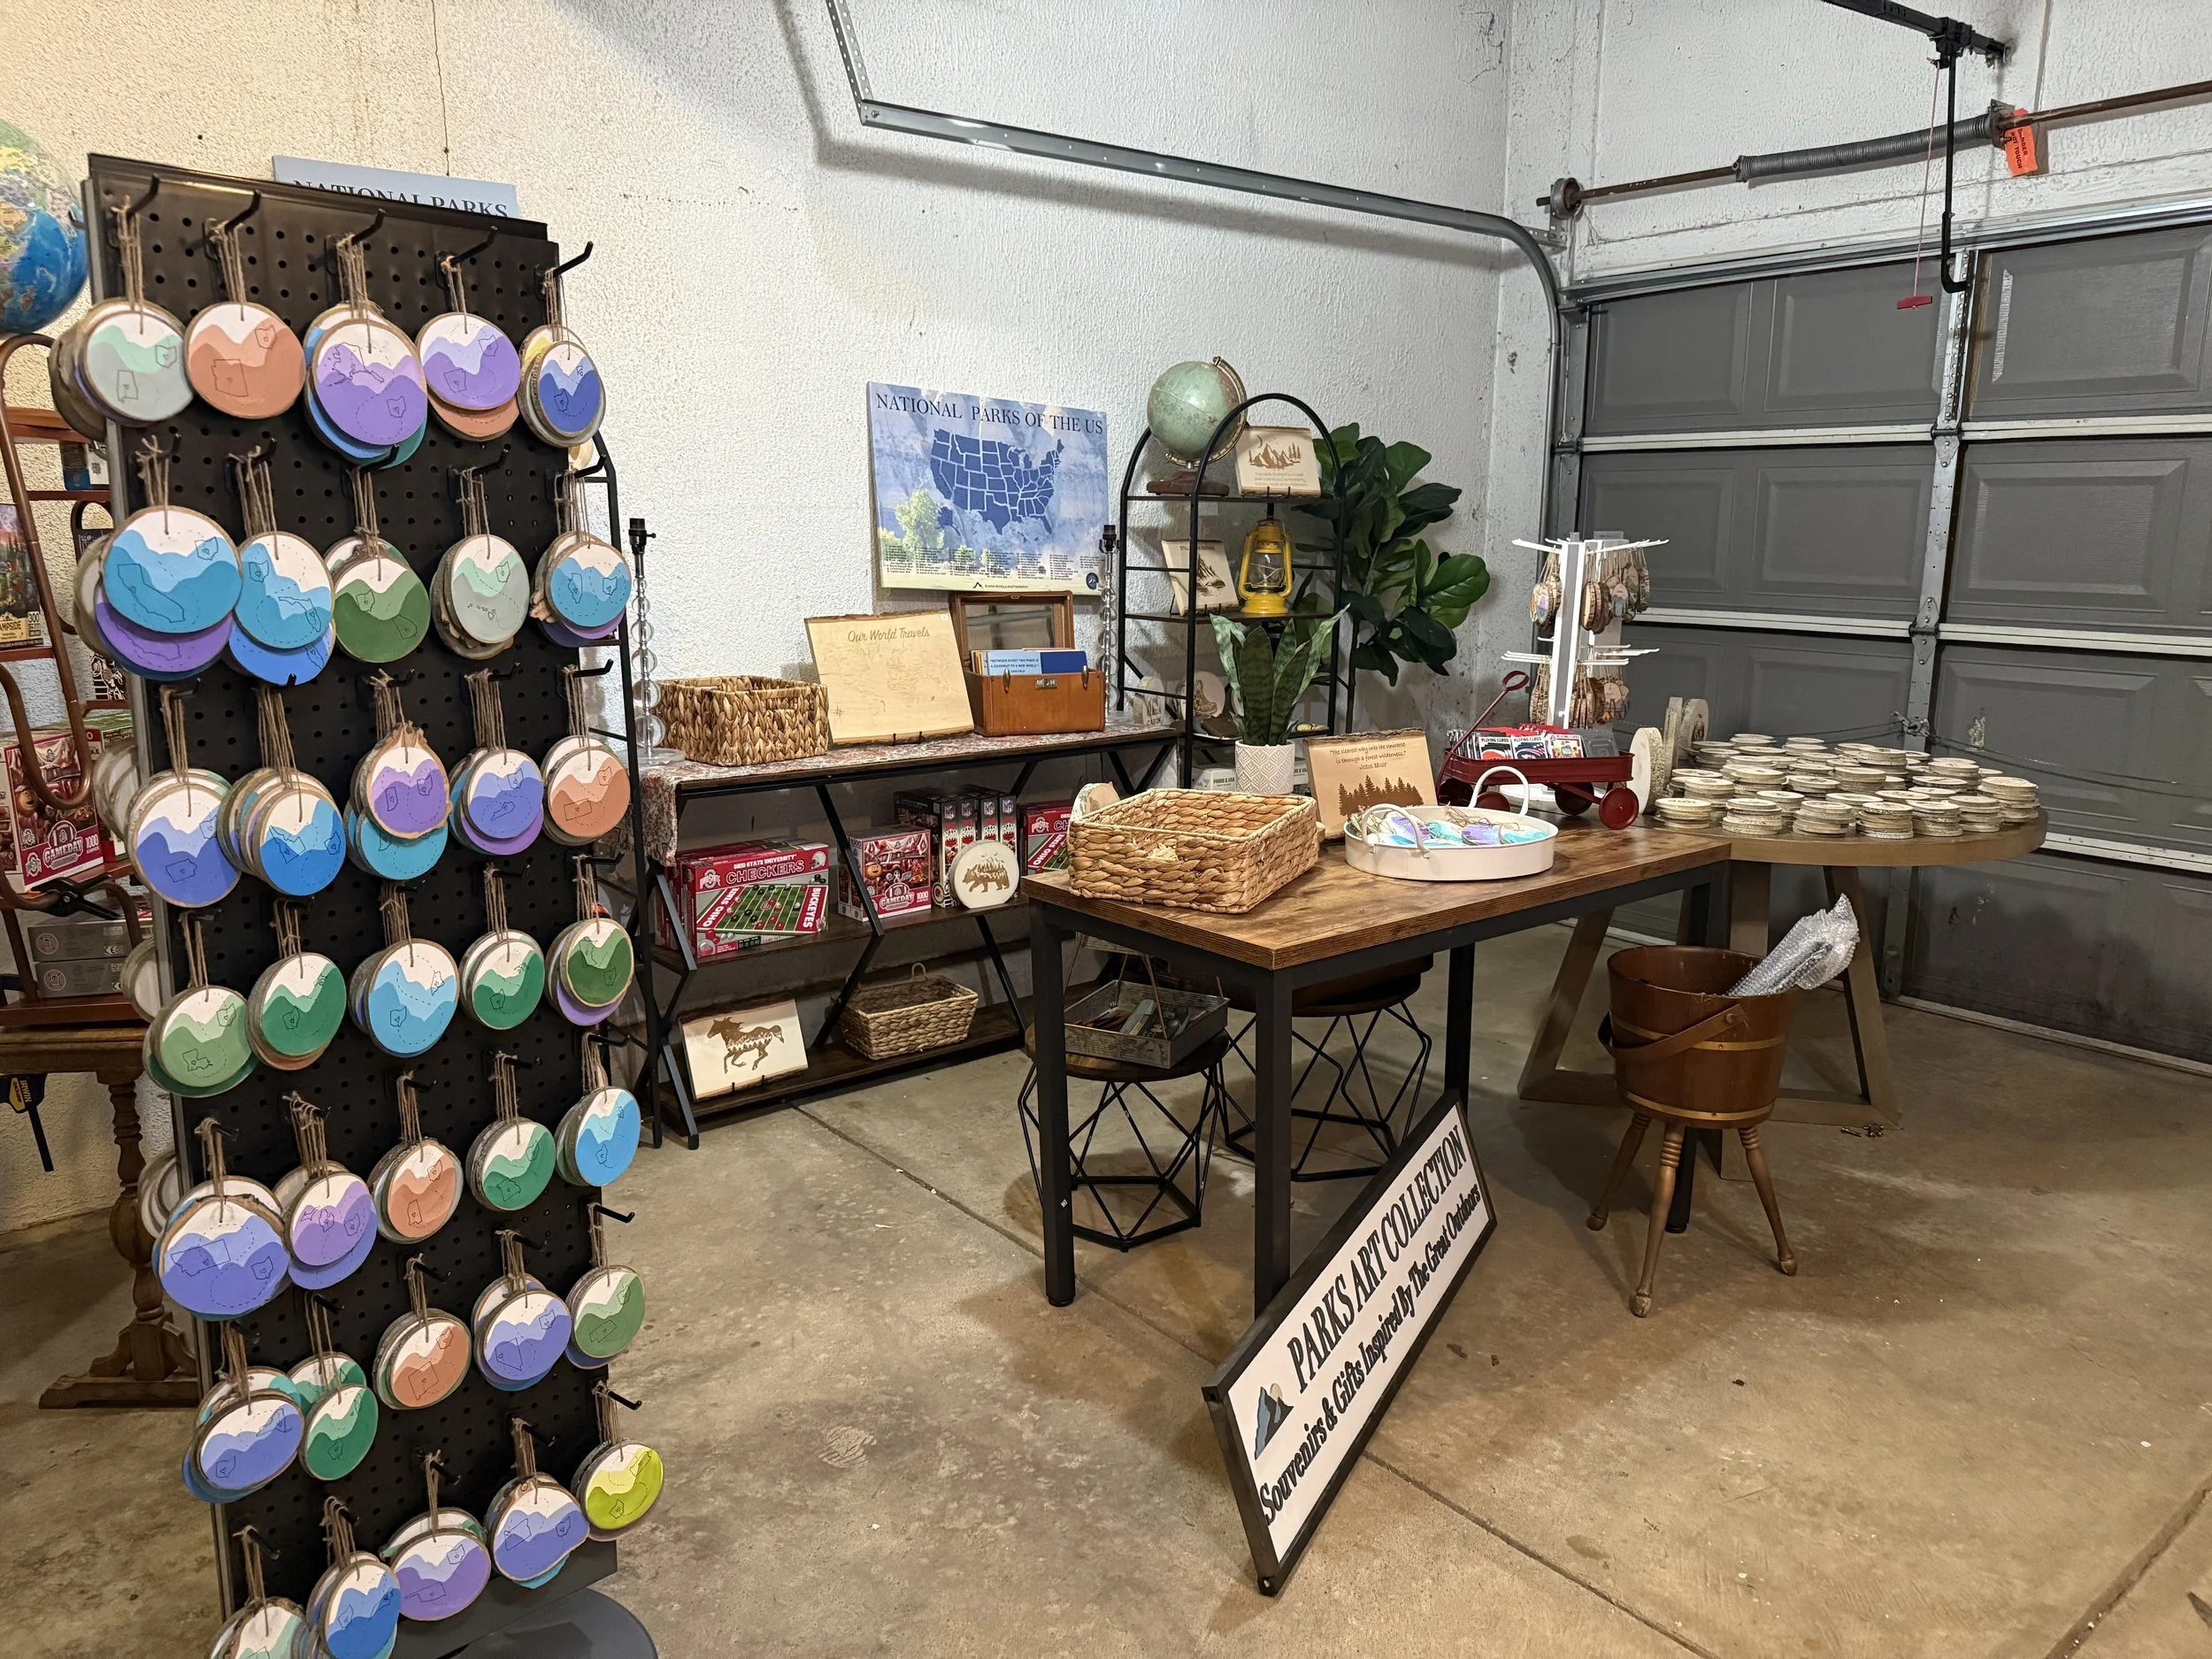
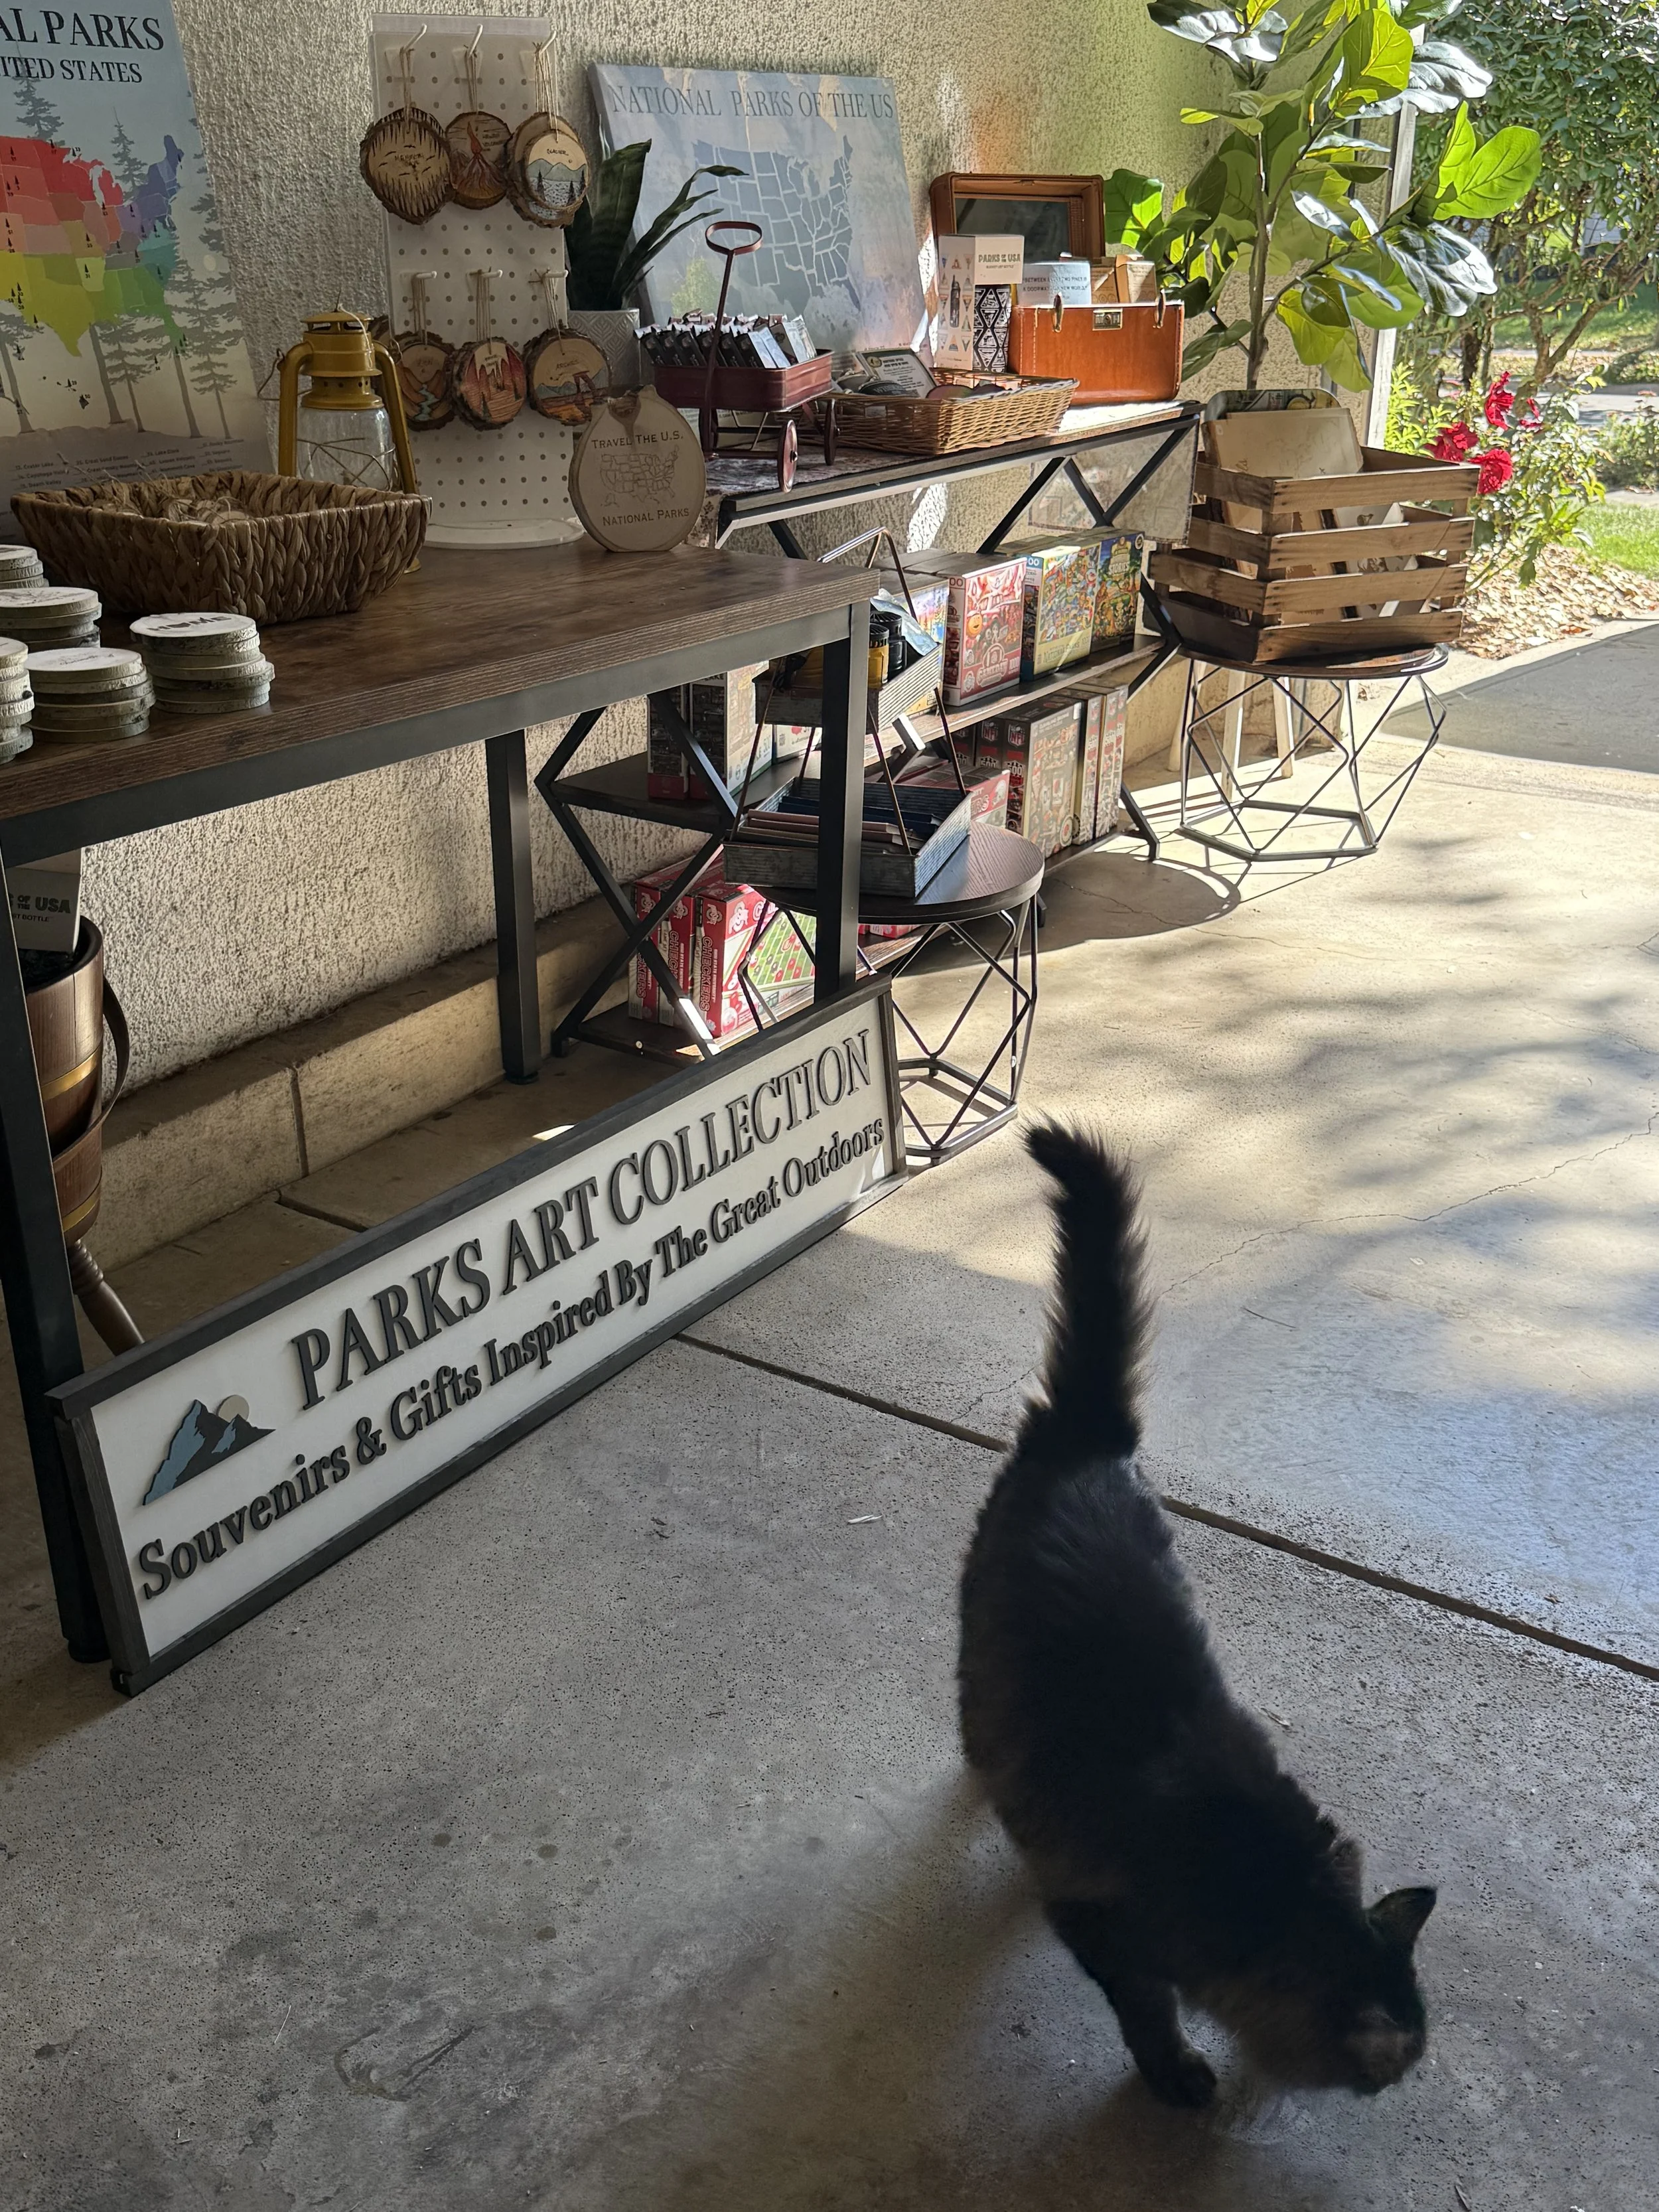
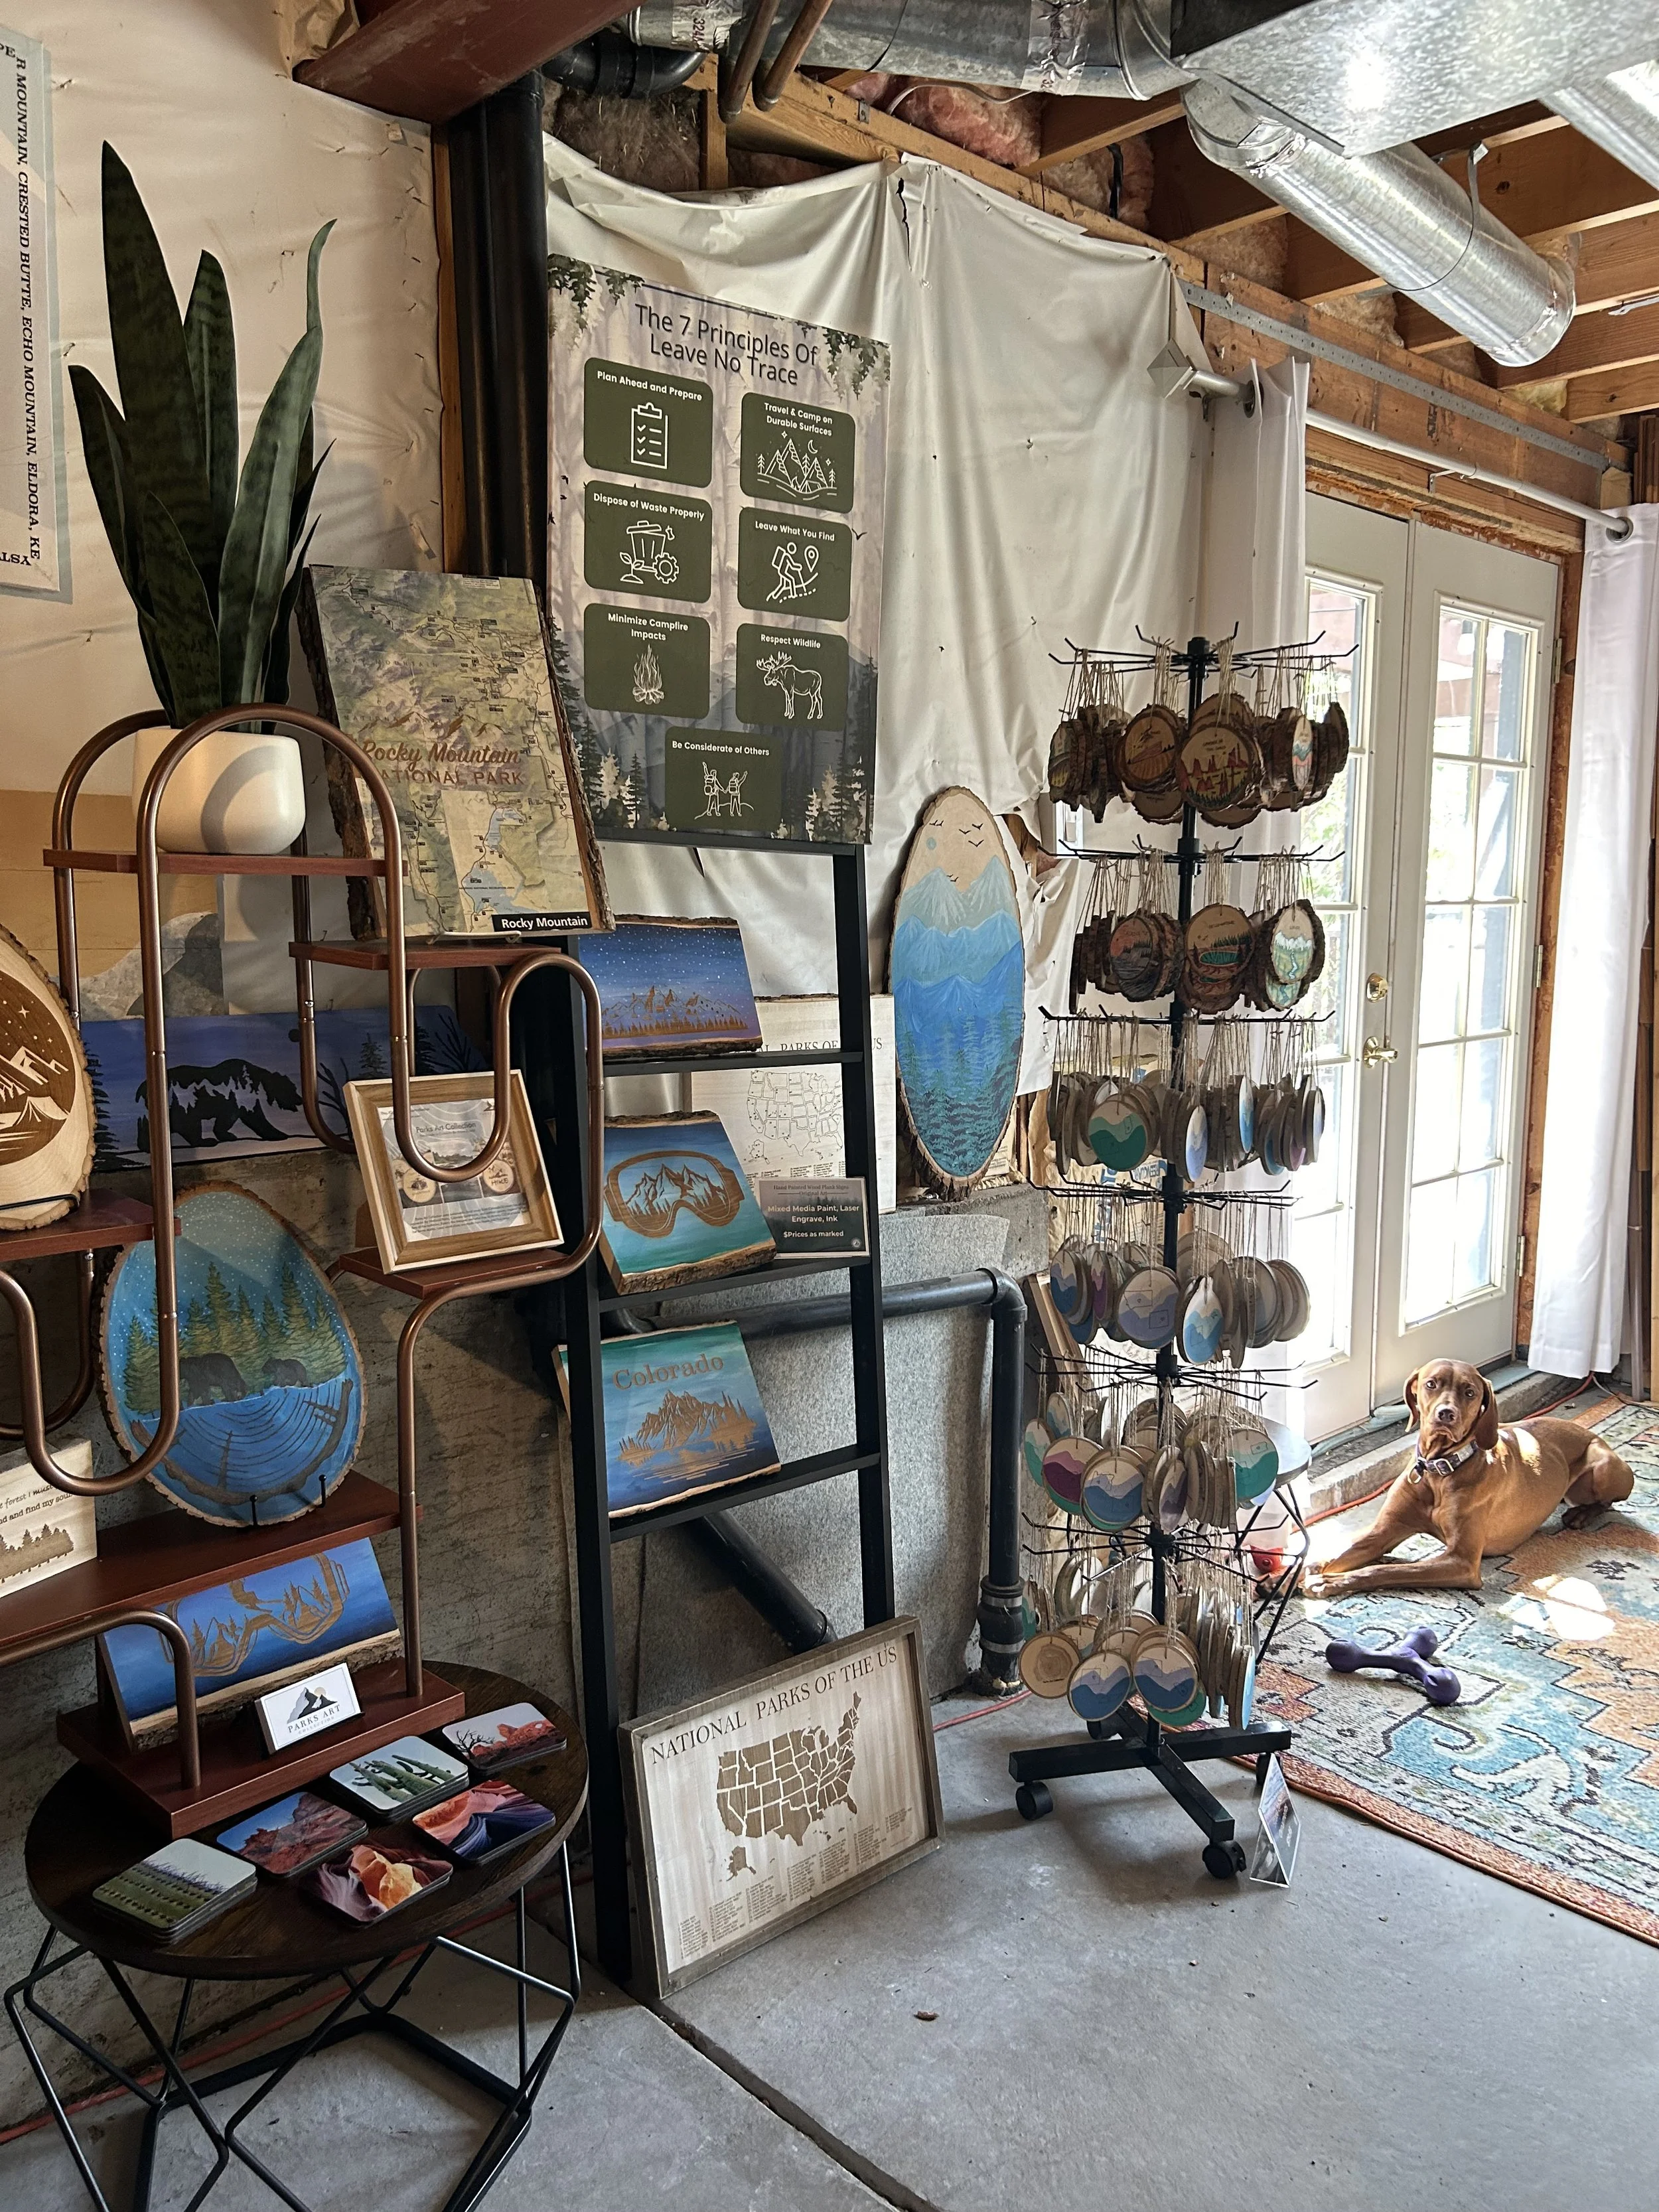
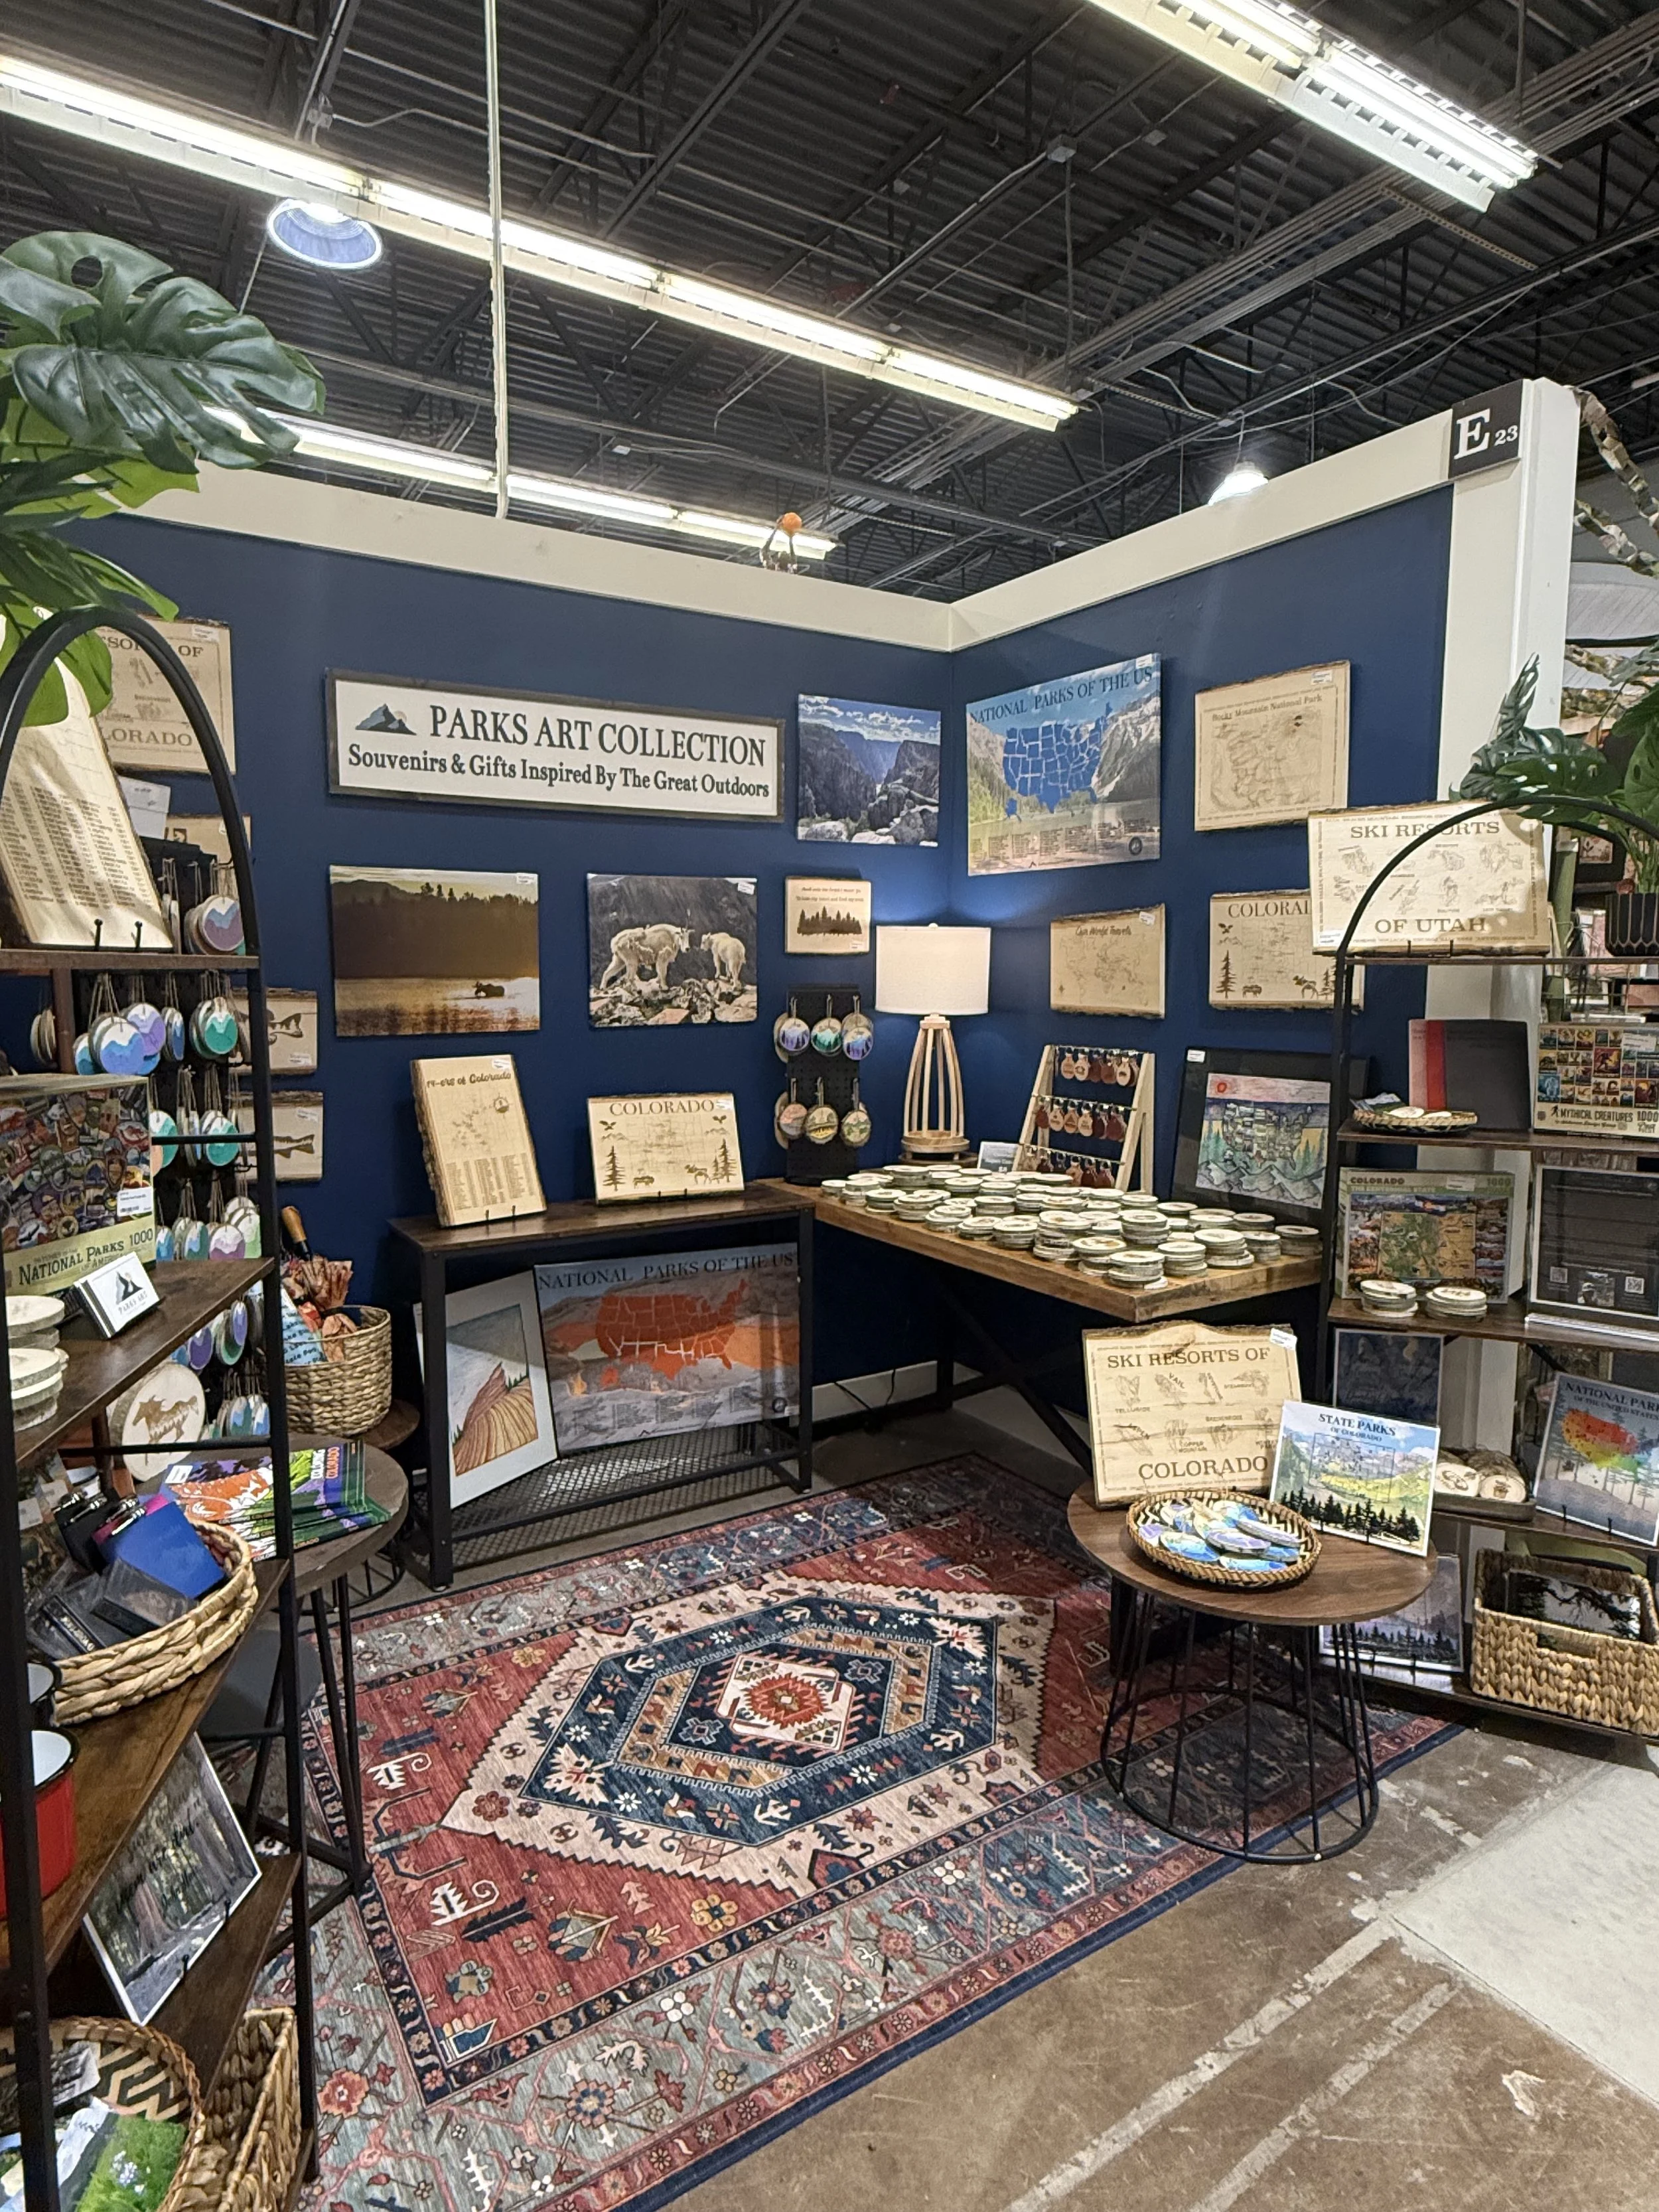
As the owner of Parks Art Collection, a small business that celebrates the beauty of national parks and public lands through hand-painted and laser-engraved wood art, I’m always looking for creative ways to reach more people without losing touch with my roots as a maker.
When I first heard about Painted Tree Boutiques, I was intrigued by the idea — a co-retail space where local makers, artists, and small businesses could have a “mini storefront” without the cost or commitment of a full retail lease. As the owner of Parks Art Collection, I decided to give it a try in November 2024, starting with the Colorado Springs location. Since then, I’ve expanded into Northglenn (March 2025) and will soon be setting up in Lewis Center, Ohio — which happens to be near my mom, brother, aunts, and friends. Since I travel there frequently, it felt like a great opportunity to use those trips “home” as a legitimate business write-off, too.
It’s been a journey full of learning, testing, and growth — both for me personally and for my business. Here’s what I’ve learned so far.
What It’s Like Selling at Painted Tree Boutiques
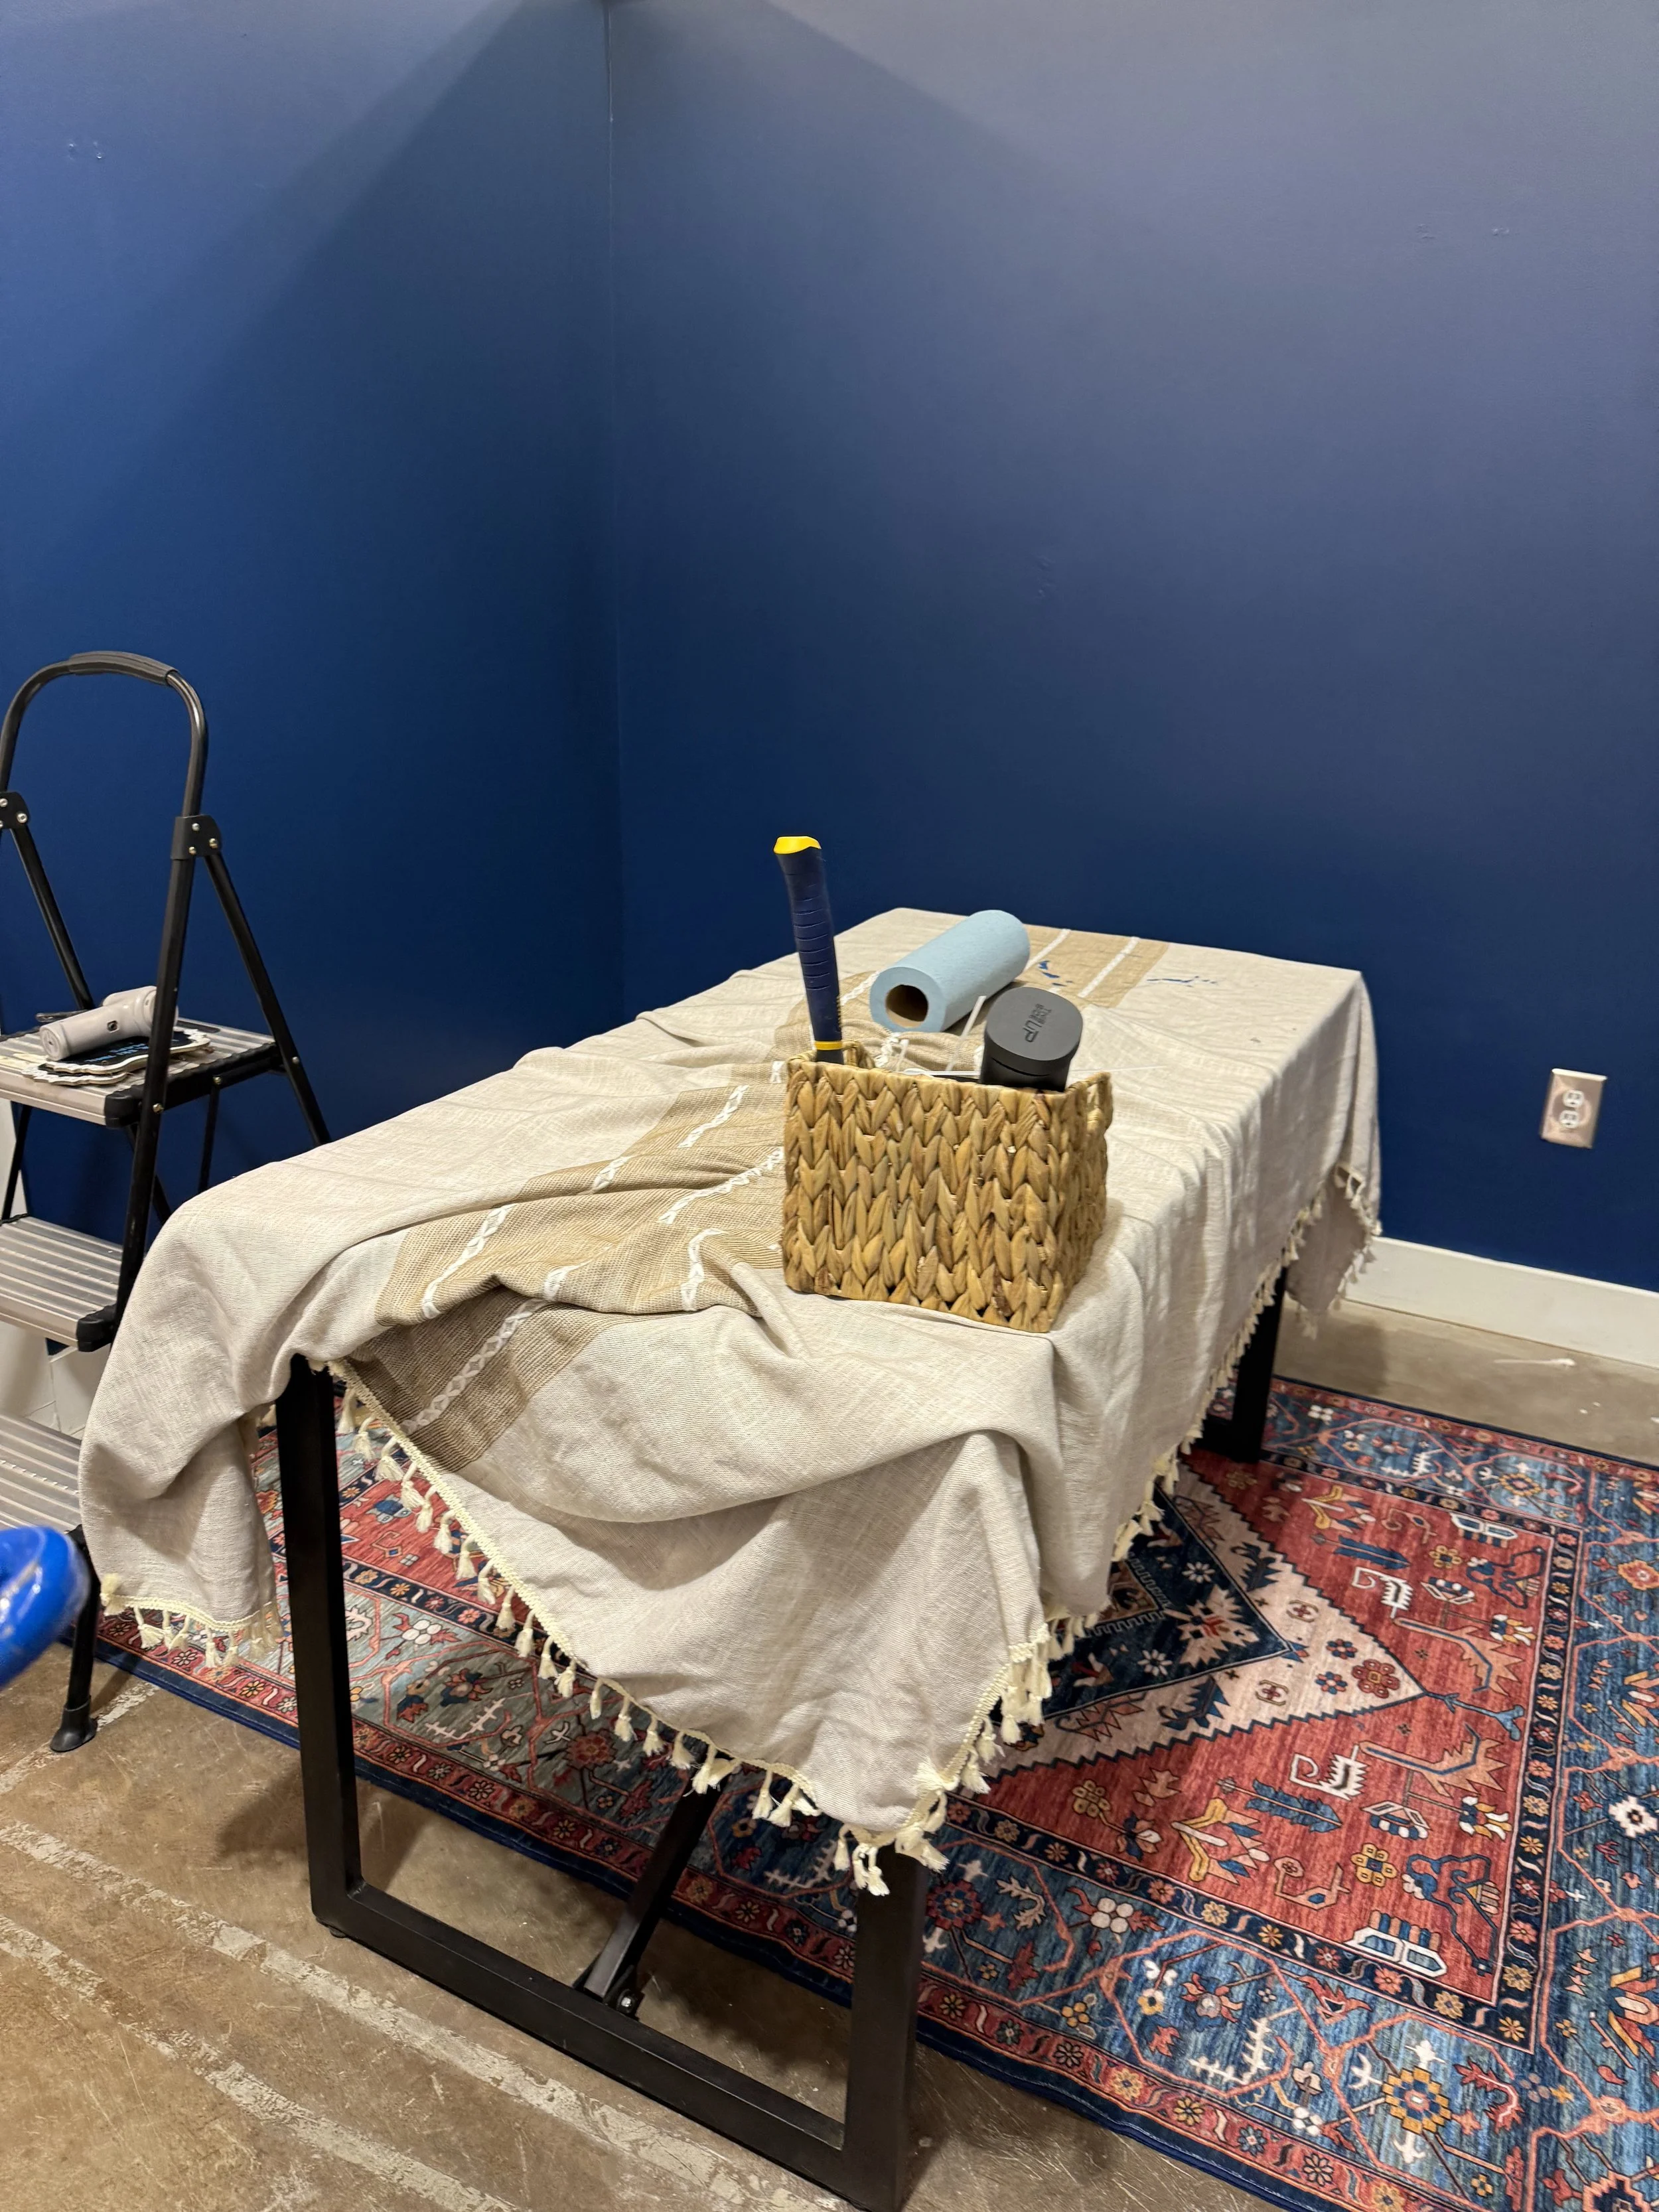
The Setup: A Bigger Investment Than Expected
When you rent a booth at Painted Tree, you’re essentially creating your own small retail environment within a larger shared space. You pay monthly rent (typically $300–$400) depending on the size of your booth, and Painted Tree also takes 10% of each sale. That fee might sound steep at first, but if you compare it to the costs of a full storefront — rent, utilities, insurance, staffing, marketing — it’s actually pretty reasonable.
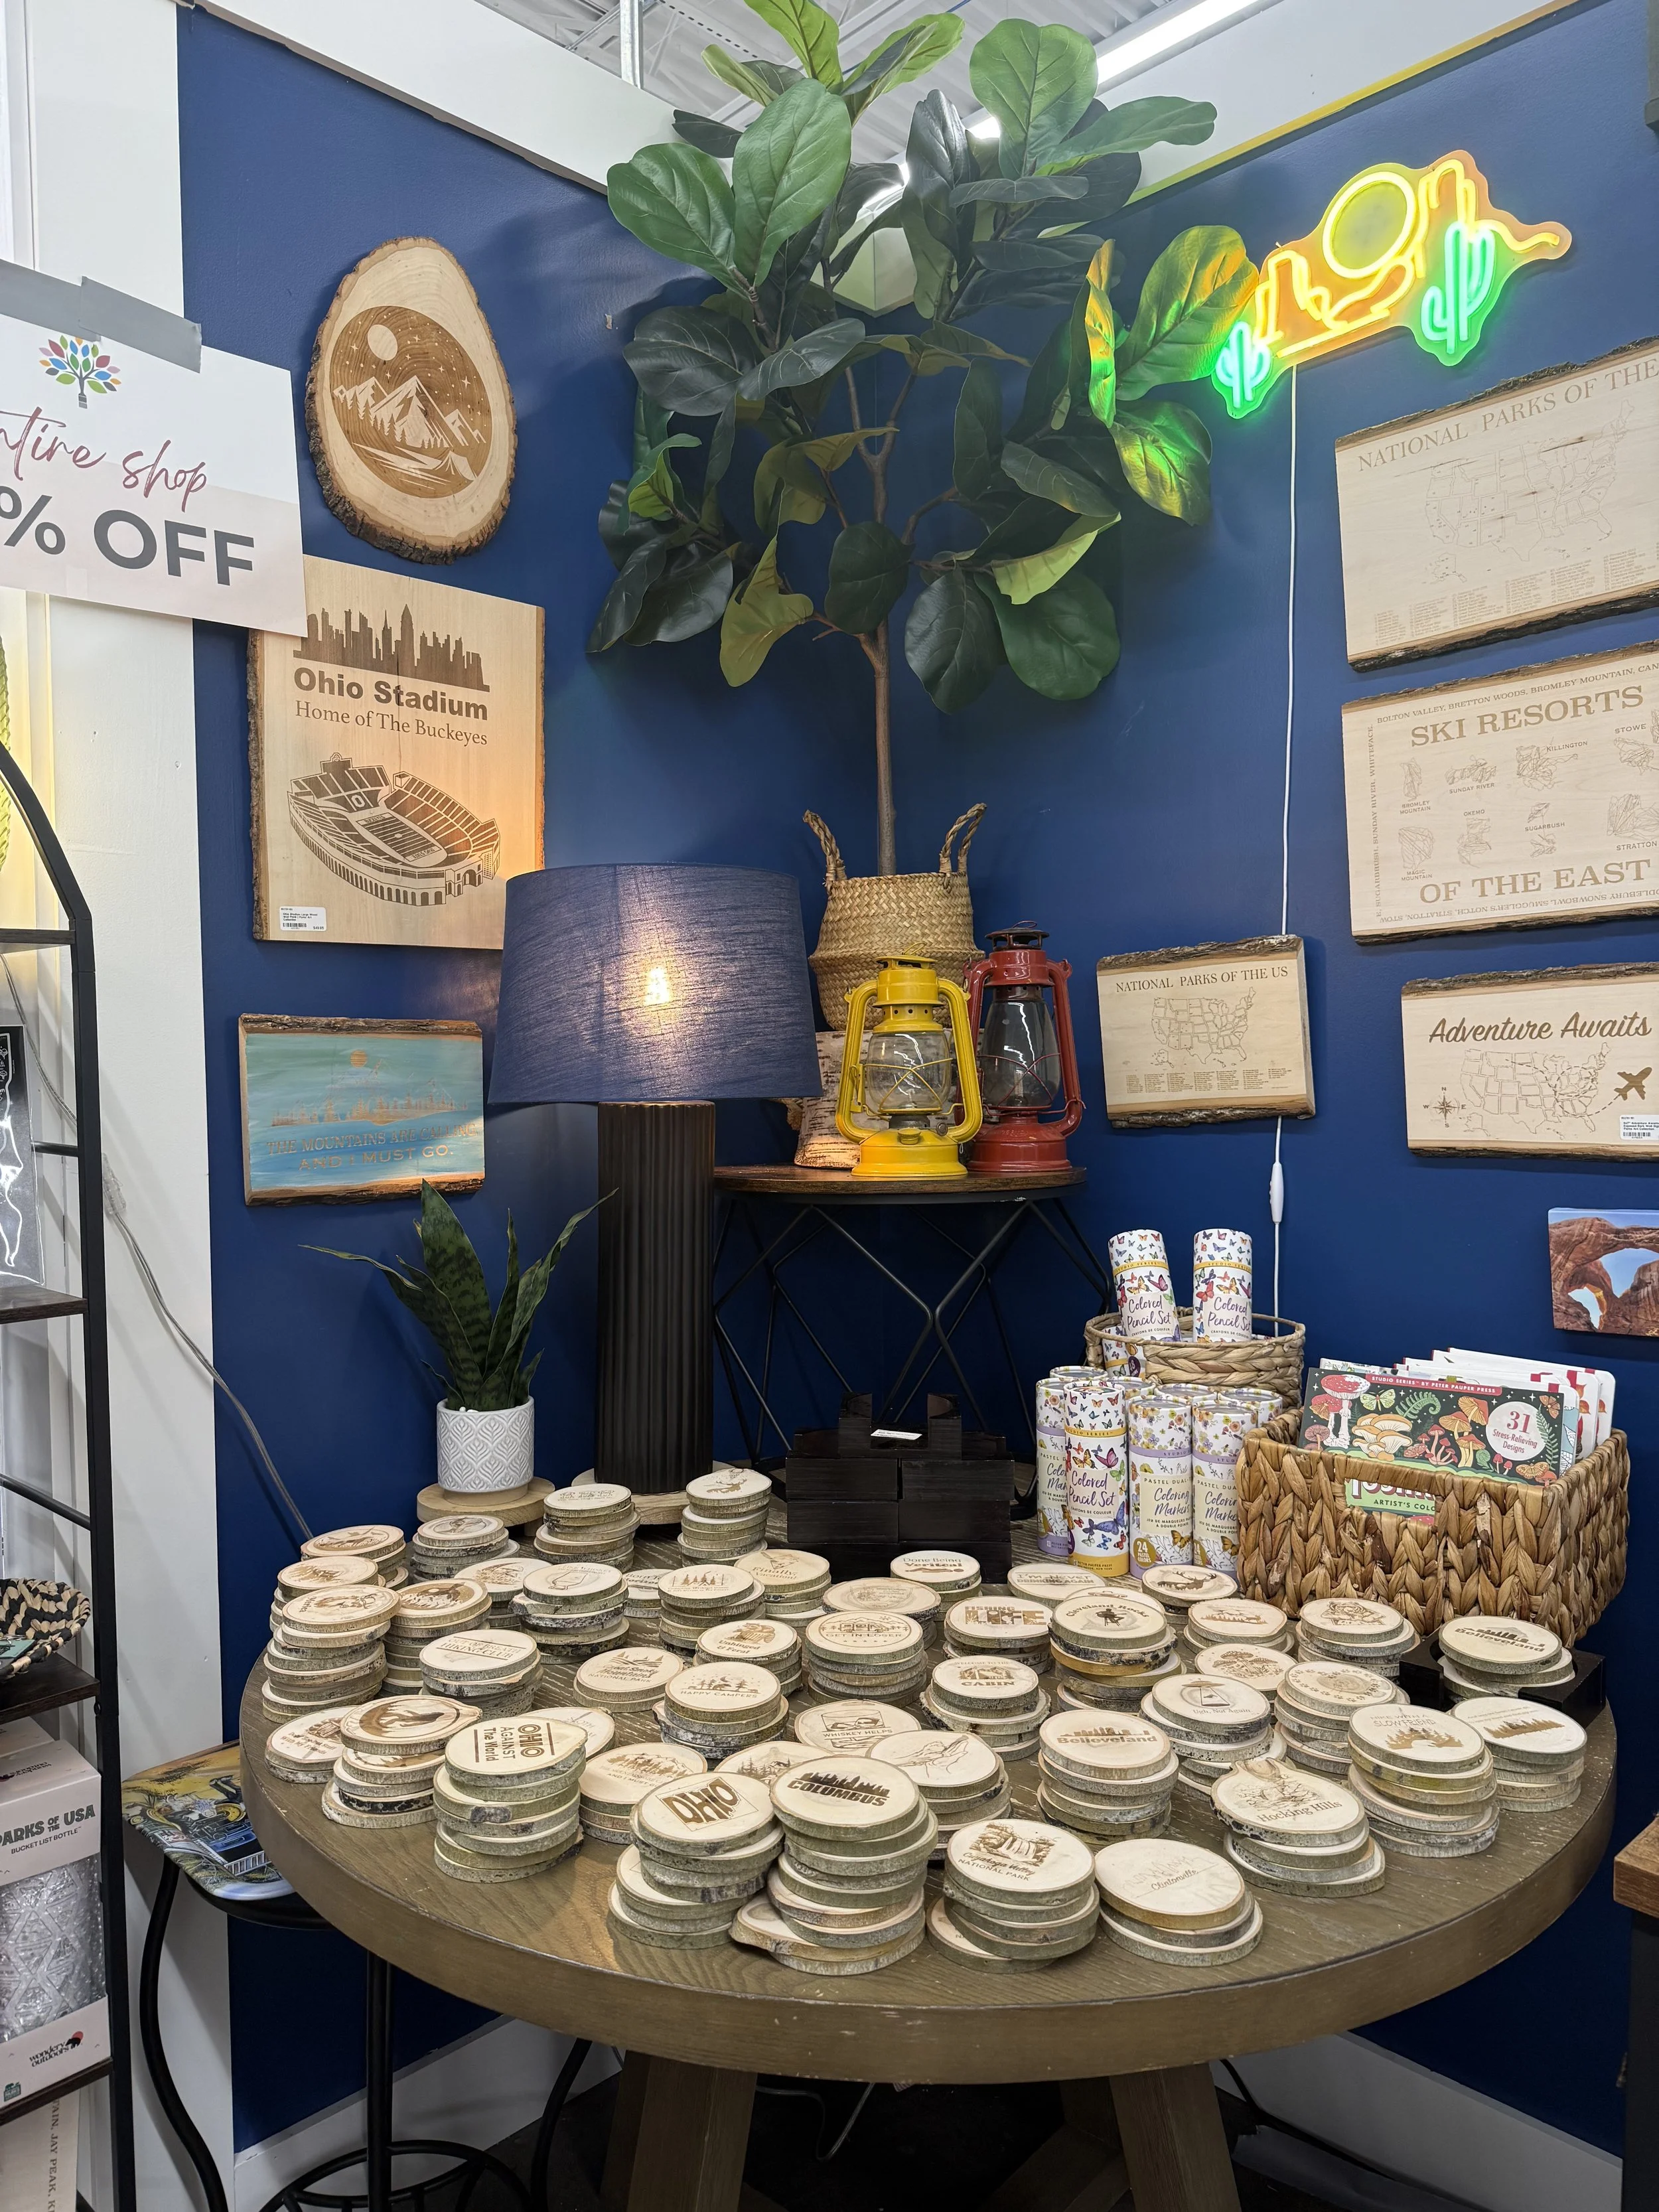
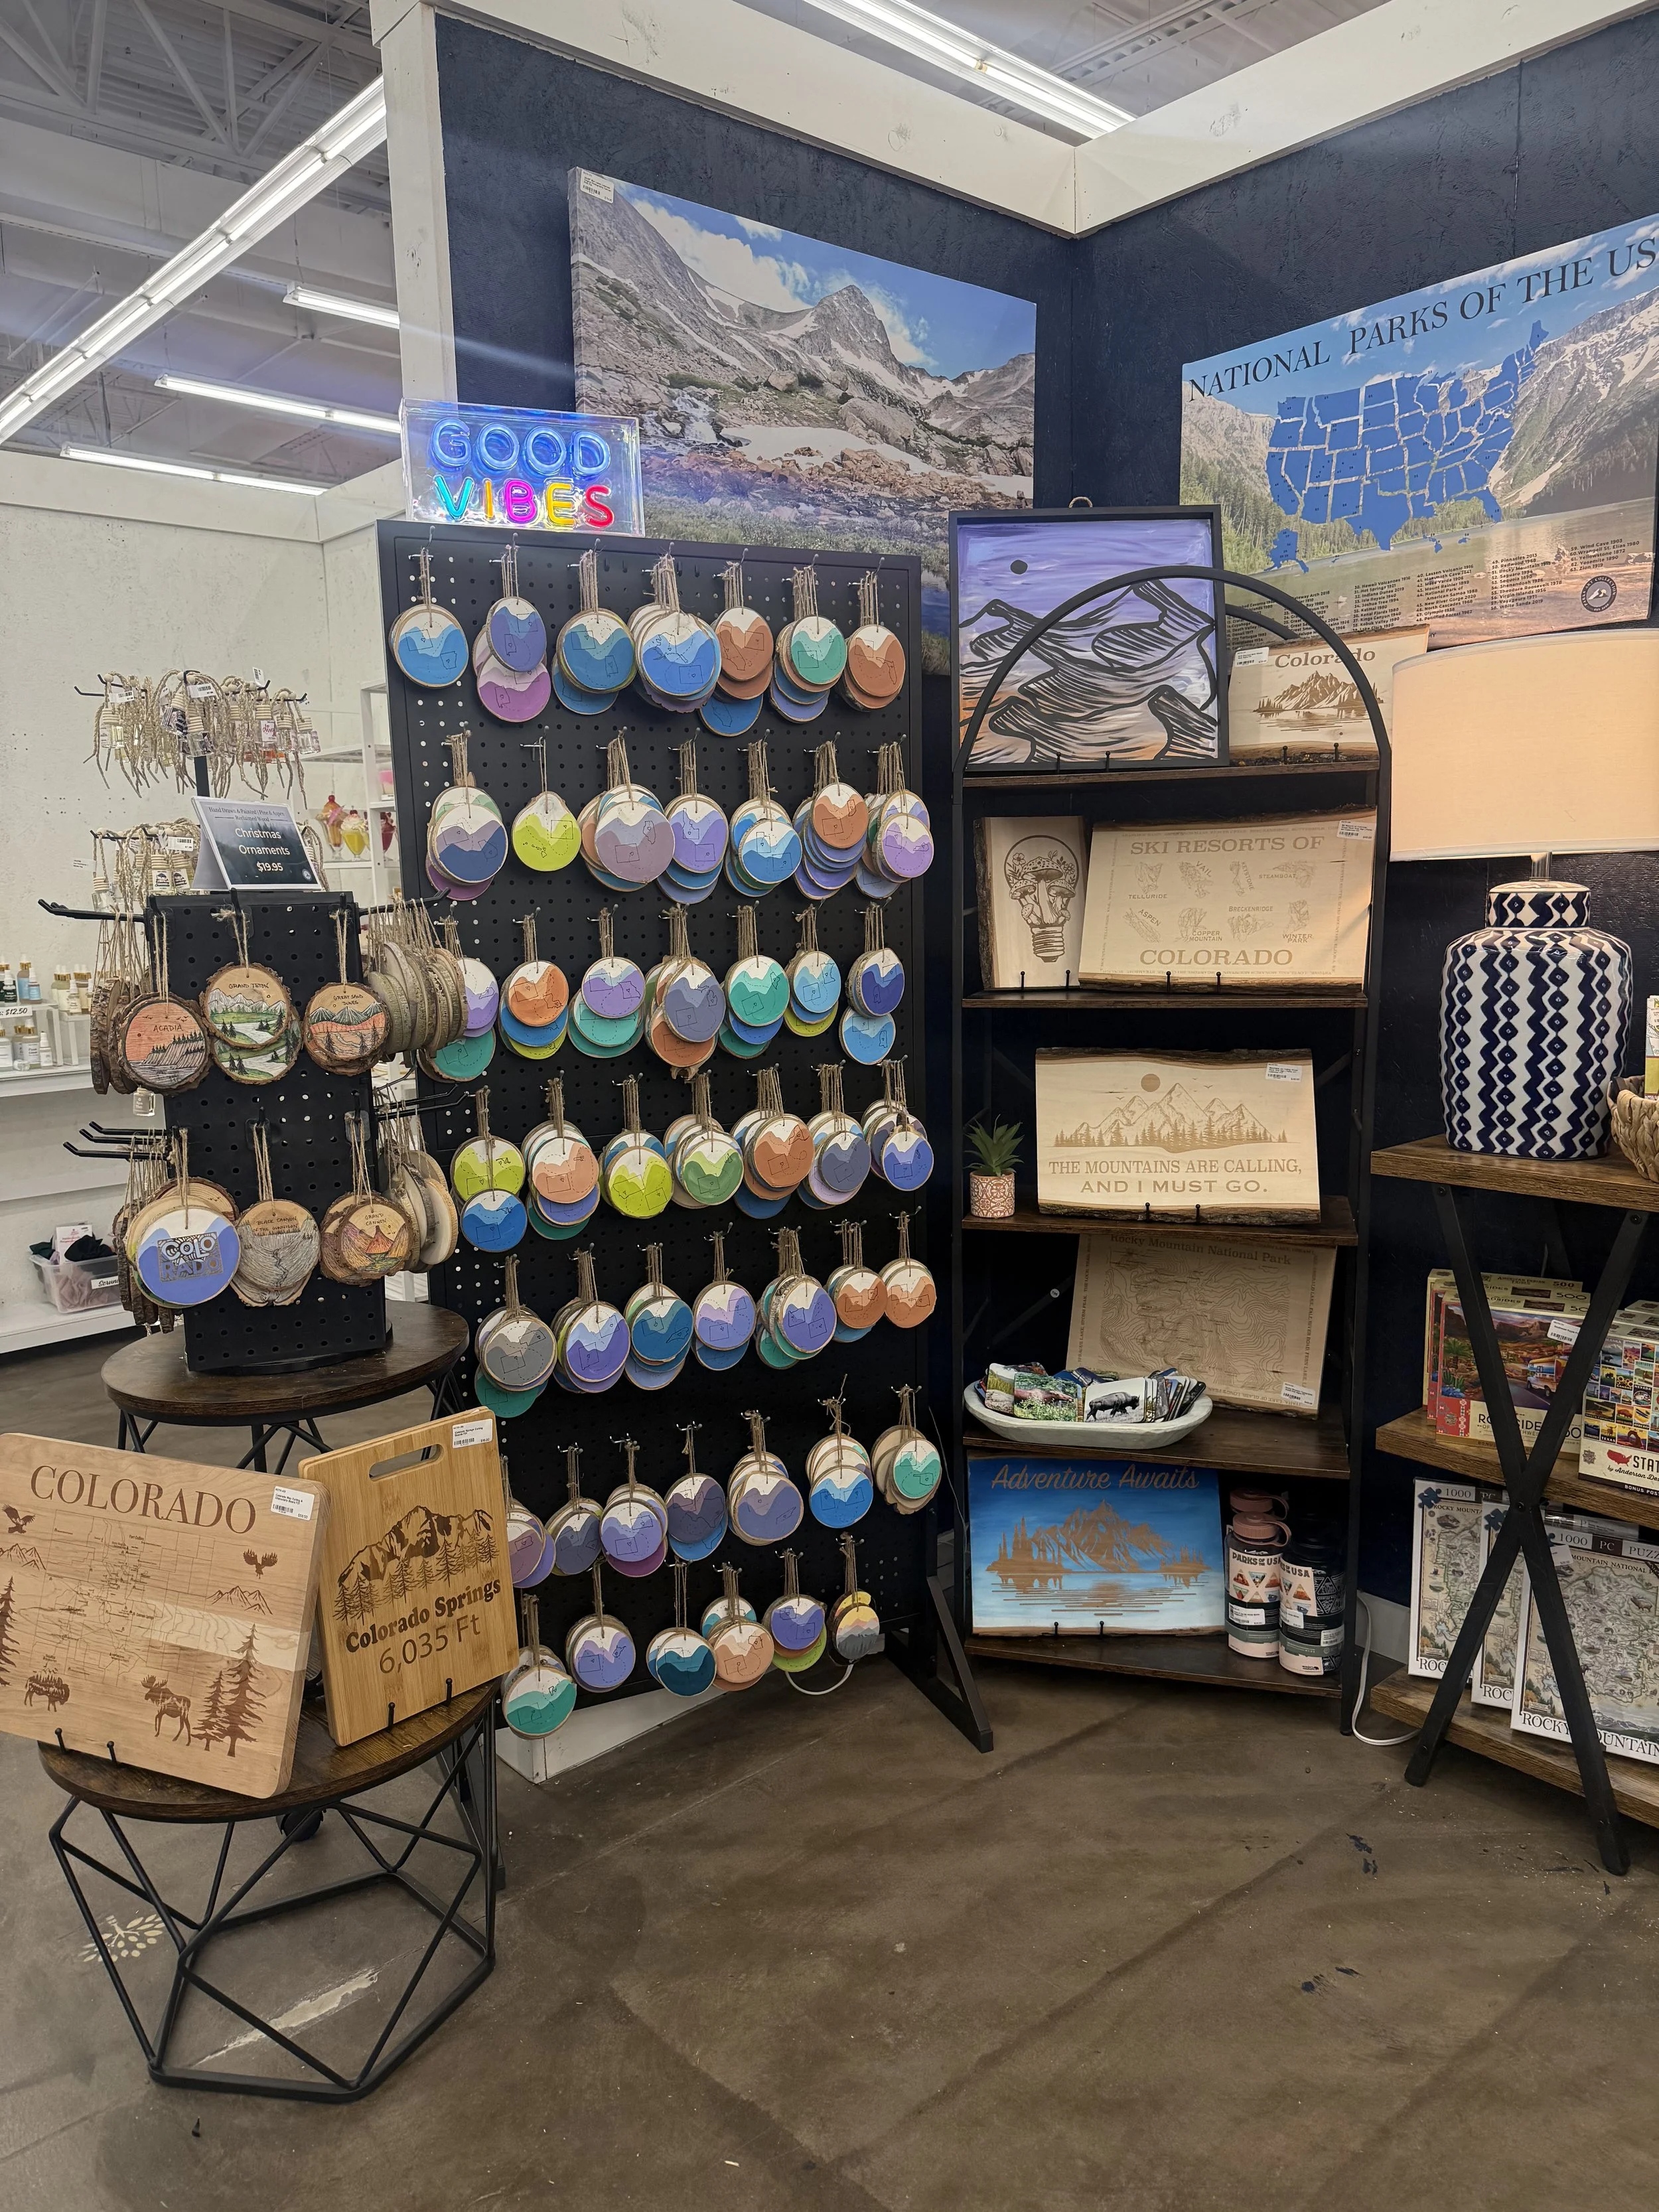
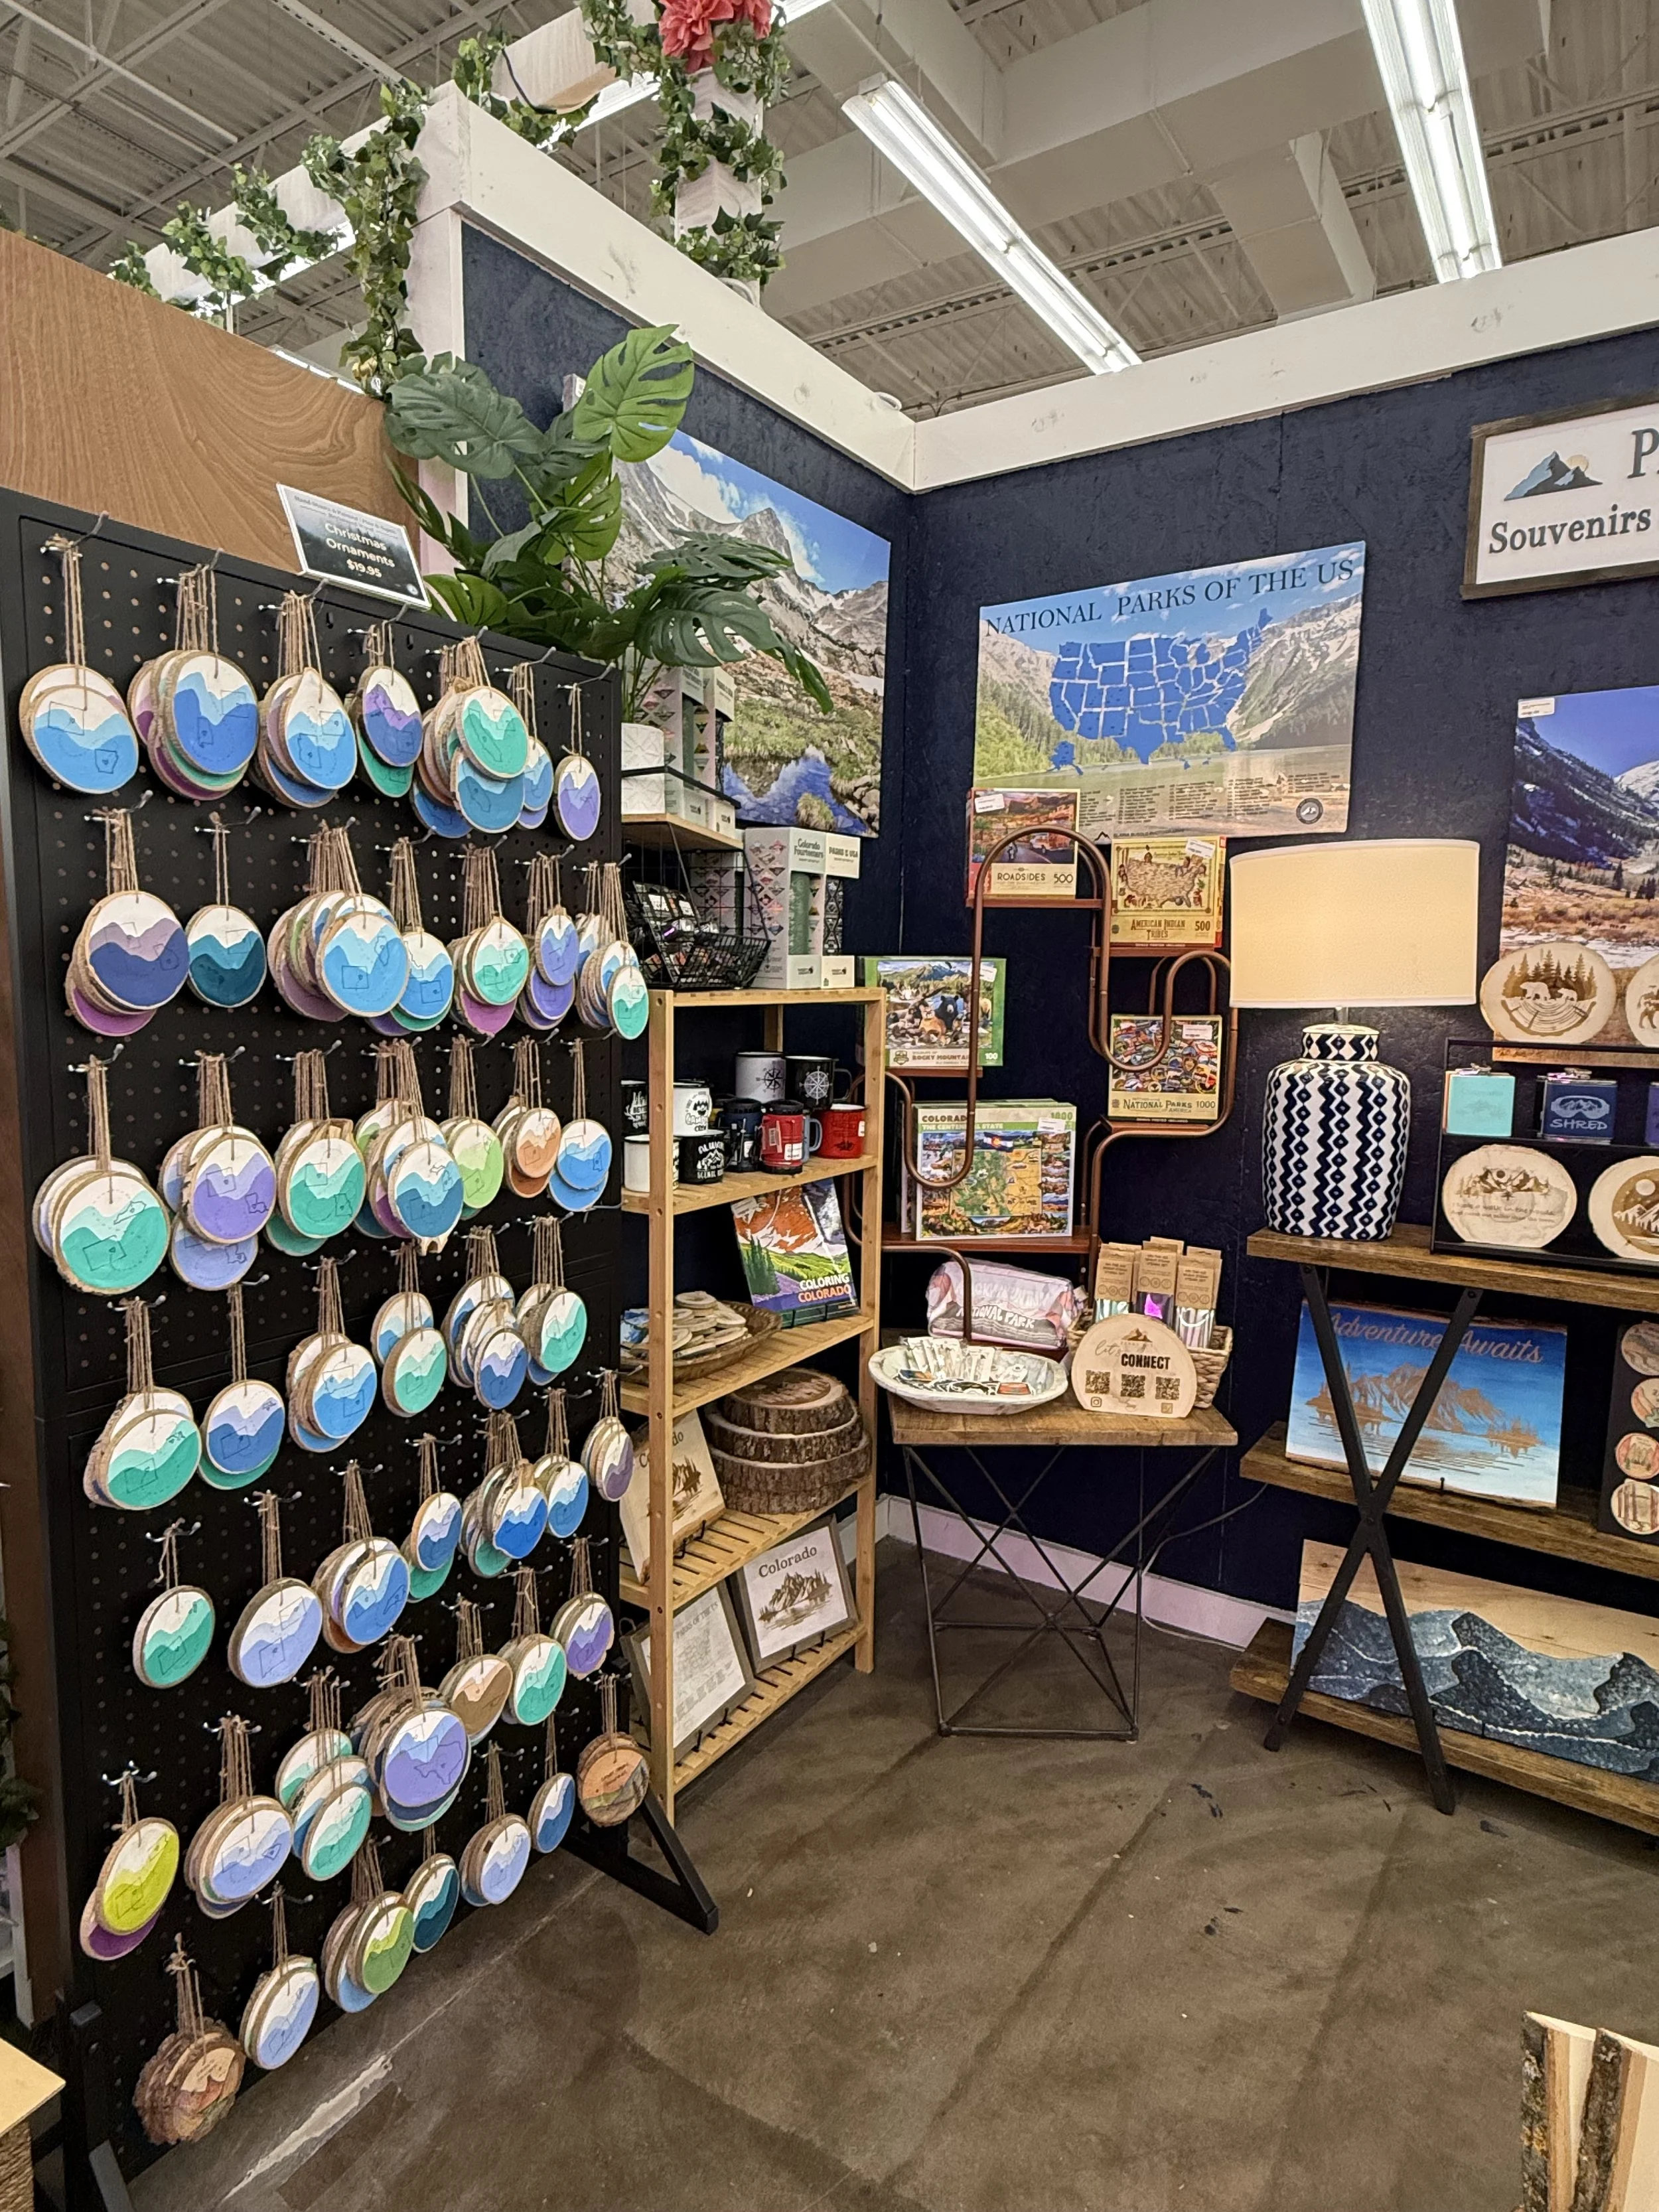
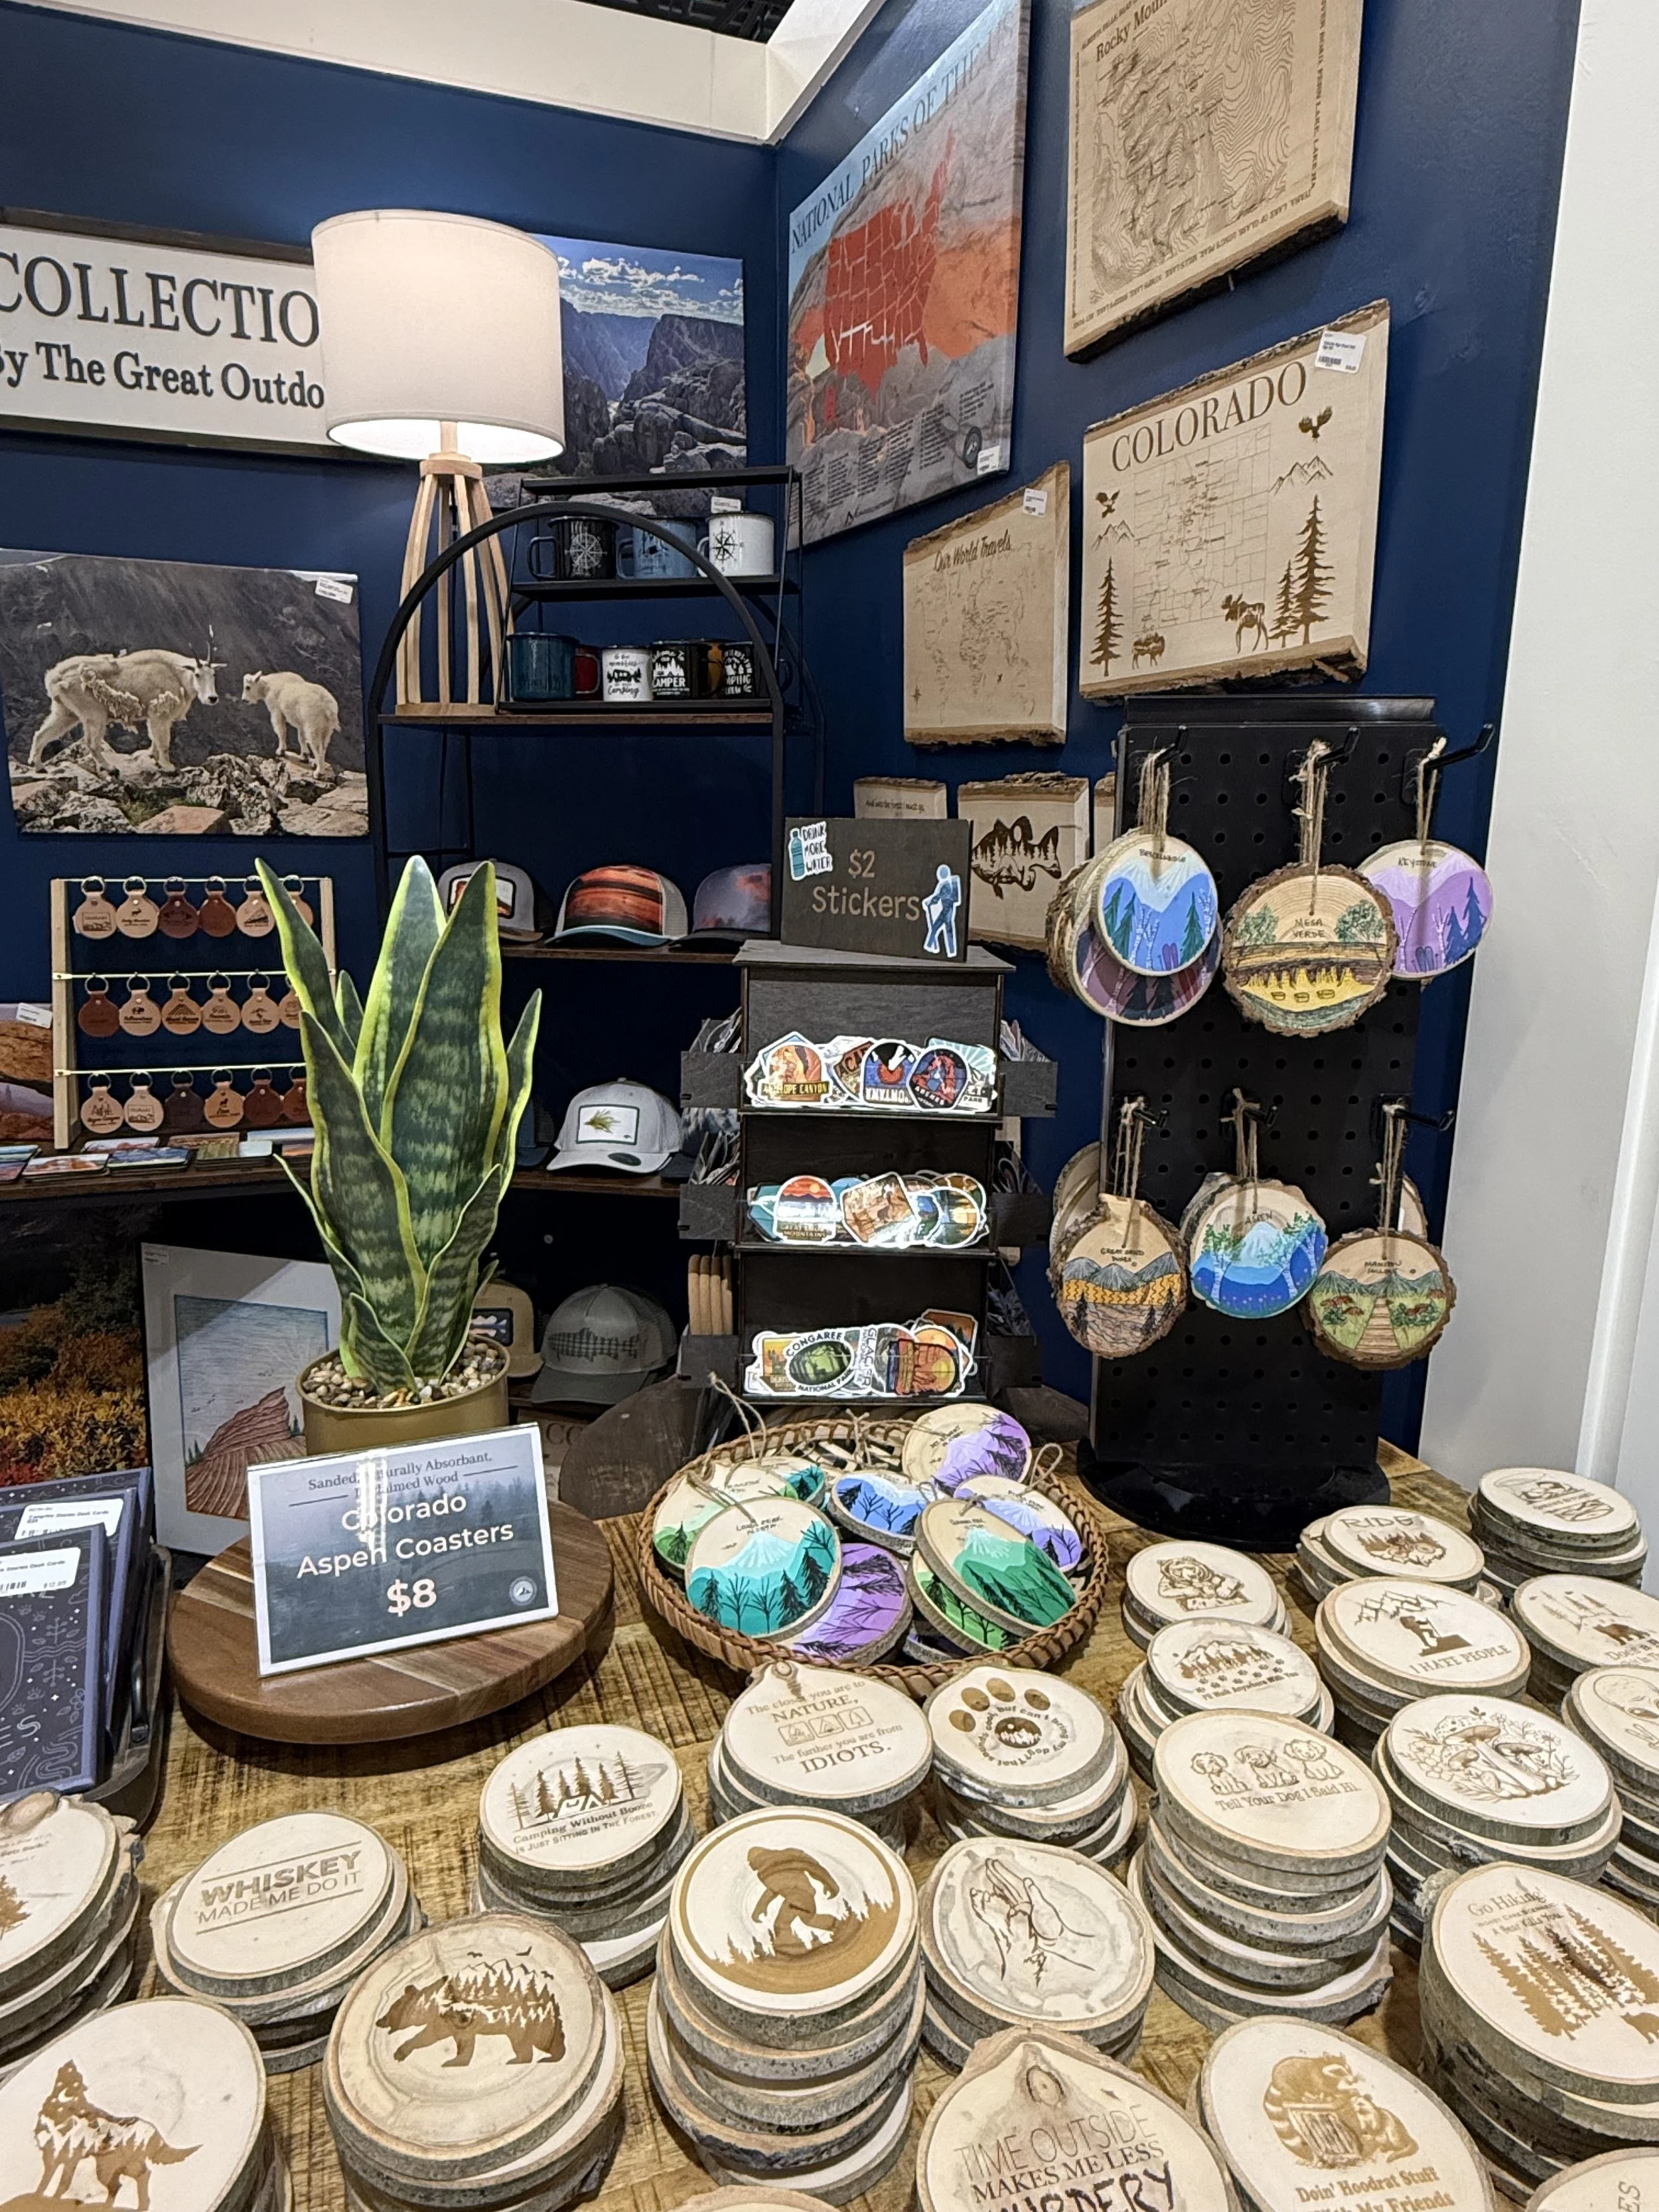
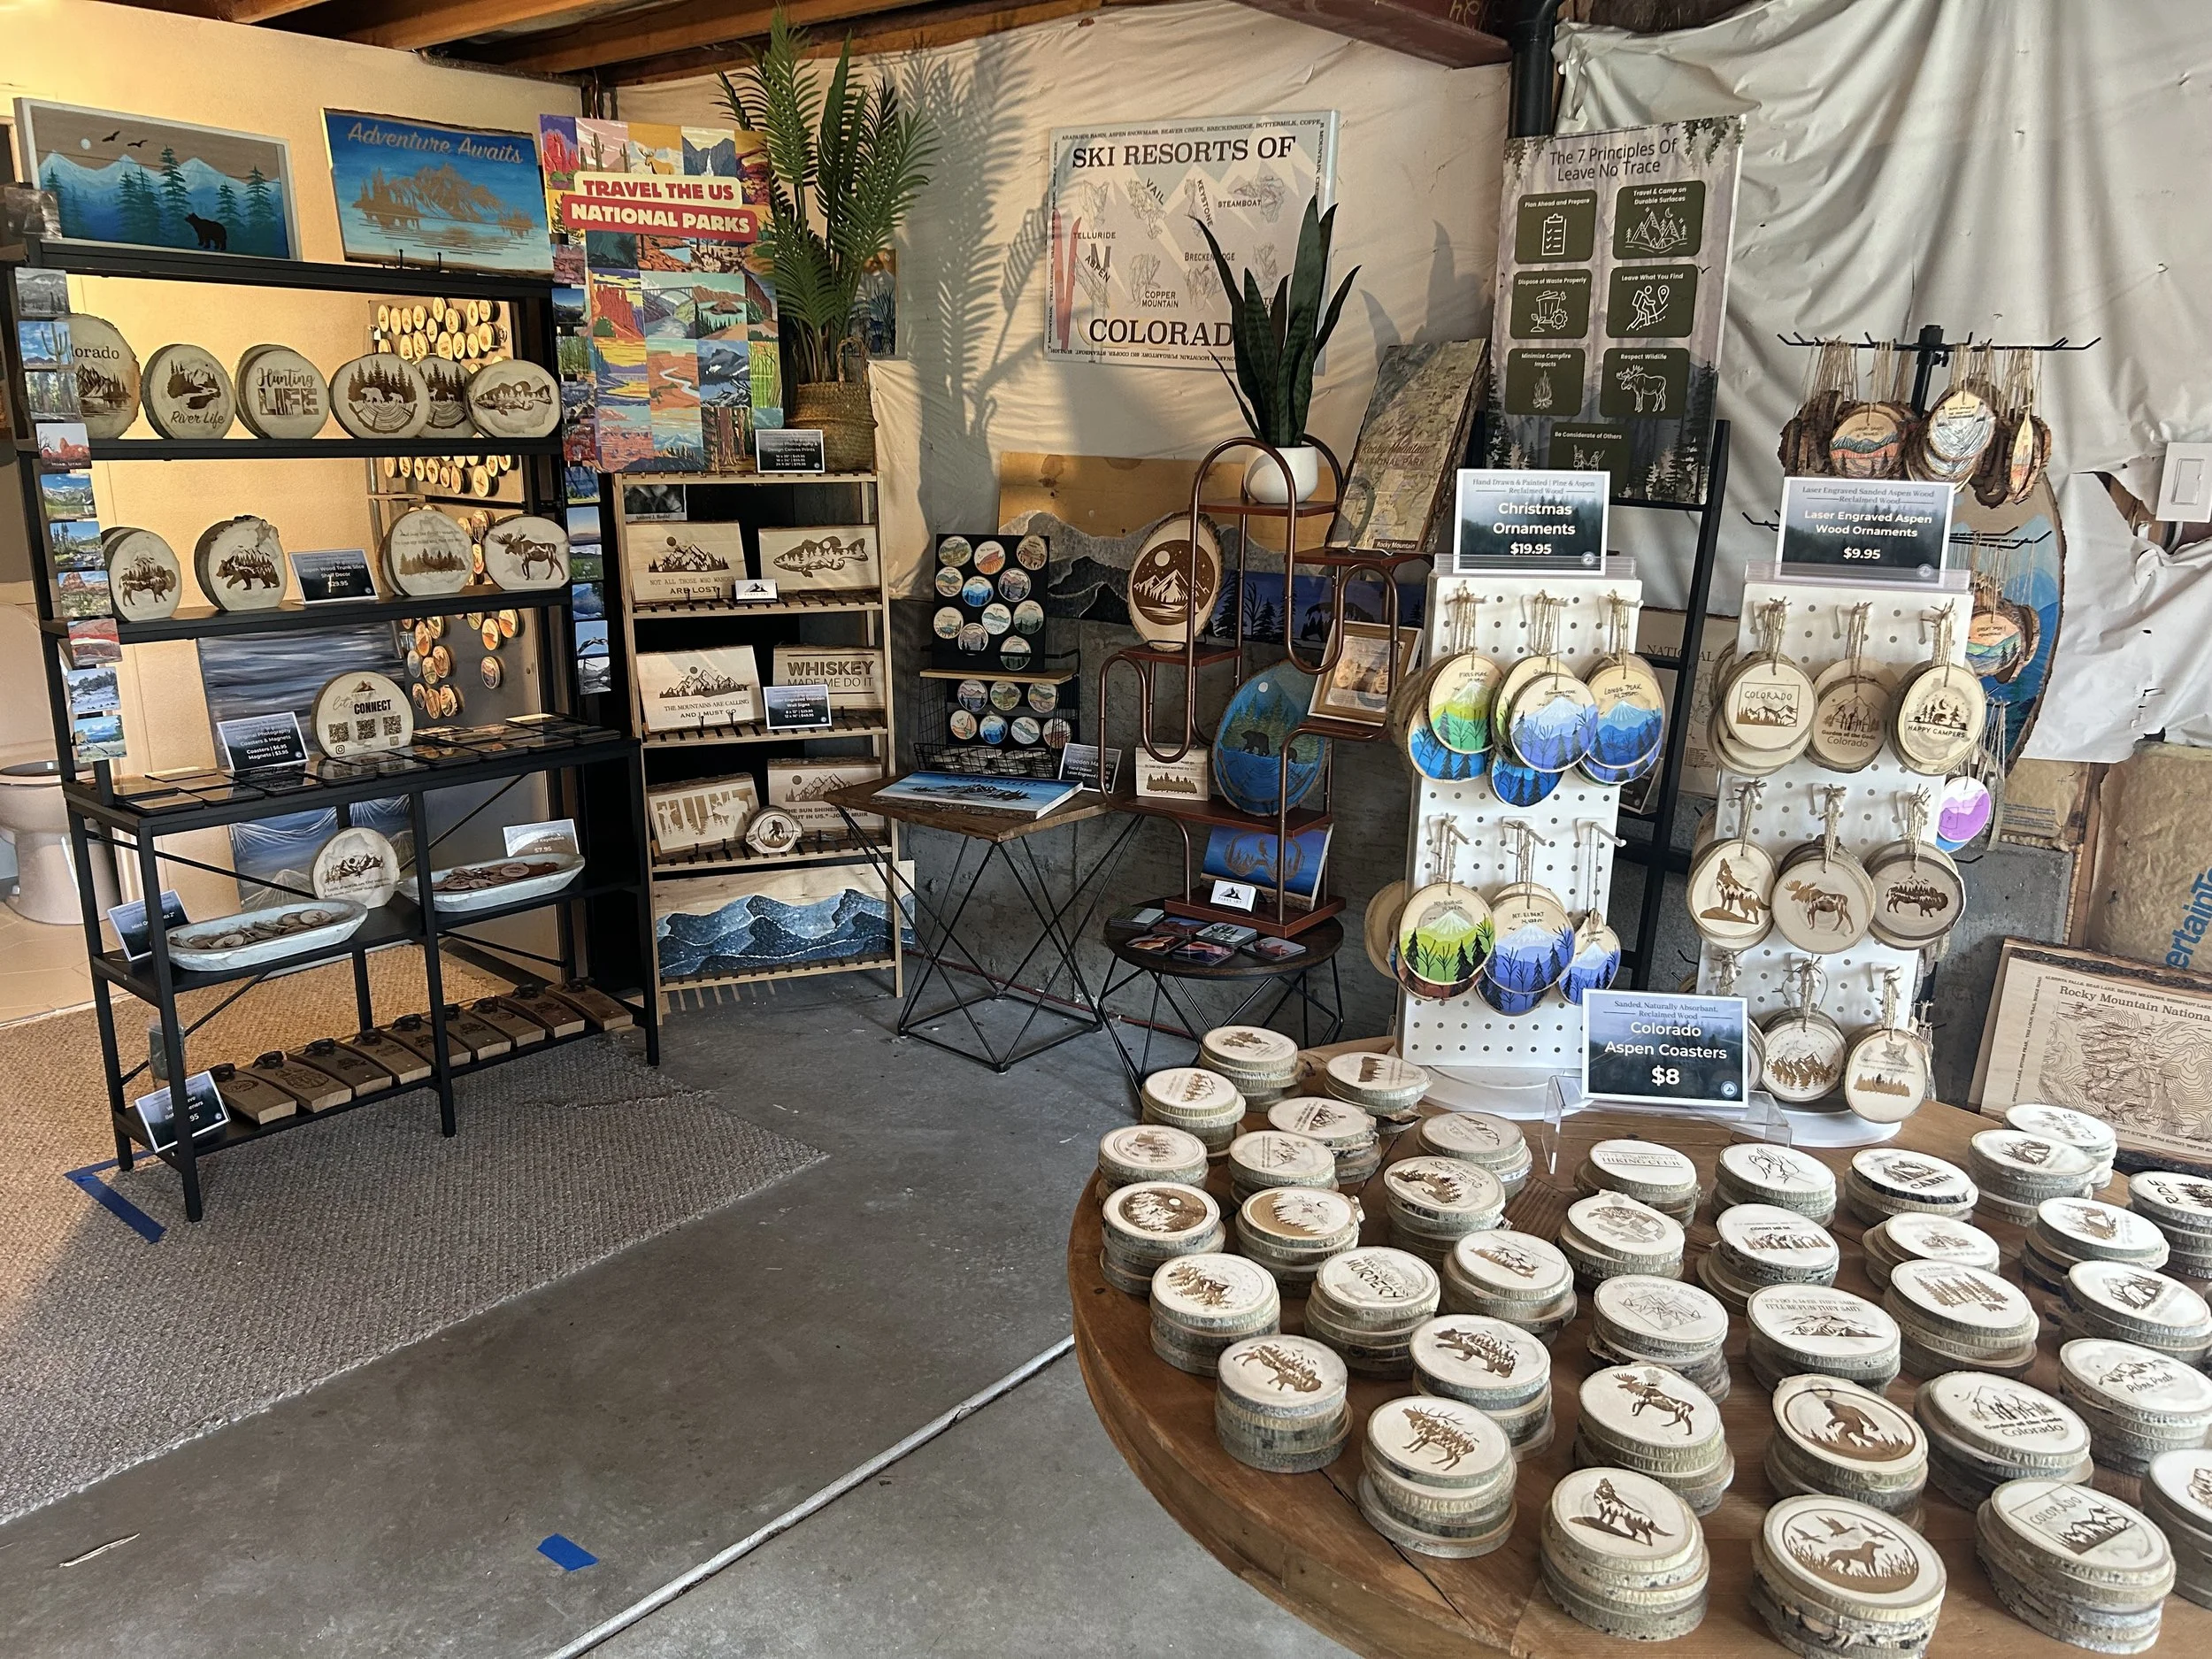
That said, the initial setup cost can be surprising. You can’t use simple booth setups like grid walls, folding tables, or pegboards that work great at pop-up markets. Painted Tree wants the space to feel more like a boutique and less like a craft fair. So, I invested around $1,000–$1,500 in fixtures and display elements — real furniture, shelving, bins, signage, lighting, and even a custom wood sign (no vinyl allowed!). I also painted the booth walls to match my brand’s aesthetic, which helped make the space feel cohesive and professional.
Some vendors opt for smaller options like kiosk spaces or shelf rentals, which are significantly more affordable but come with much less retail space. On the other hand, some larger companies rent huge spaces that can cost upwards of $1,000 per month.
Painted Tree also offers a 10% rent discount if you’re in three or more locations — which I’ll soon qualify for. (At least, that’s the current policy; they’ve been making a lot of changes lately.) Note: This does NOT include shelf or kiosk spaces.
How Painted Tree’s Consignment System Works
Once your booth is set up, you enter your products into Consignor Access, the app that tracks all your inventory and pricing. Painted Tree prints the barcoded tags for you, and when a customer buys your product, it gets scanned at checkout and logged under your account. Payments are issued regularly, so it’s a fairly simple system once you get the hang of it.
I personally check in on my spaces about once every other month. That’s honestly one of the biggest perks — my products can sell without me needing to staff the booth or be there every weekend. It’s a low-maintenance way to stay visible year-round, even when I’m busy with wholesale orders, markets, or travel.
The Financial Reality of Selling at Painted Tree Boutiques
There’s a common saying among Painted Tree vendors: “If you don’t owe them money at the end of the month, you’re doing great.” But that’s not the full story.
While it’s true that breaking even on rent is a good sign, you also have to factor in your product costs, time, materials, and display investment. From my experience, here’s a more realistic benchmark:
If you make your own products (like I do), aim to make at least 2–3x your rent each month.
If you resell or curate products, shoot for 4x your rent to cover wholesale costs and your time.
Overall, Painted Tree accounts for about 5-10% of my annual revenue — so not a major piece of my business, but still a consistent and worthwhile addition. Do I regret it? No, definitely not. But it hasn’t been some secret jackpot either, like some people seem to think. My biggest revenue of my business remains Pop Up markets in the Denver area. But Wholesale is a close second! Check out my Wholesale Here. Etsy accounts for another 10% or so. I have 12,000 + sales on Etsy, but most of those came early on. Etsy is since run by AI and has changed a lot…. more to come on this. Follow me on IG for tips on small business.

Learning What Sells (and What Doesn’t)
One of the biggest benefits of being in Painted Tree has been learning what sells without me being present. At markets, I can tell my story and engage with customers directly. But at Painted Tree, my products have to speak for themselves.
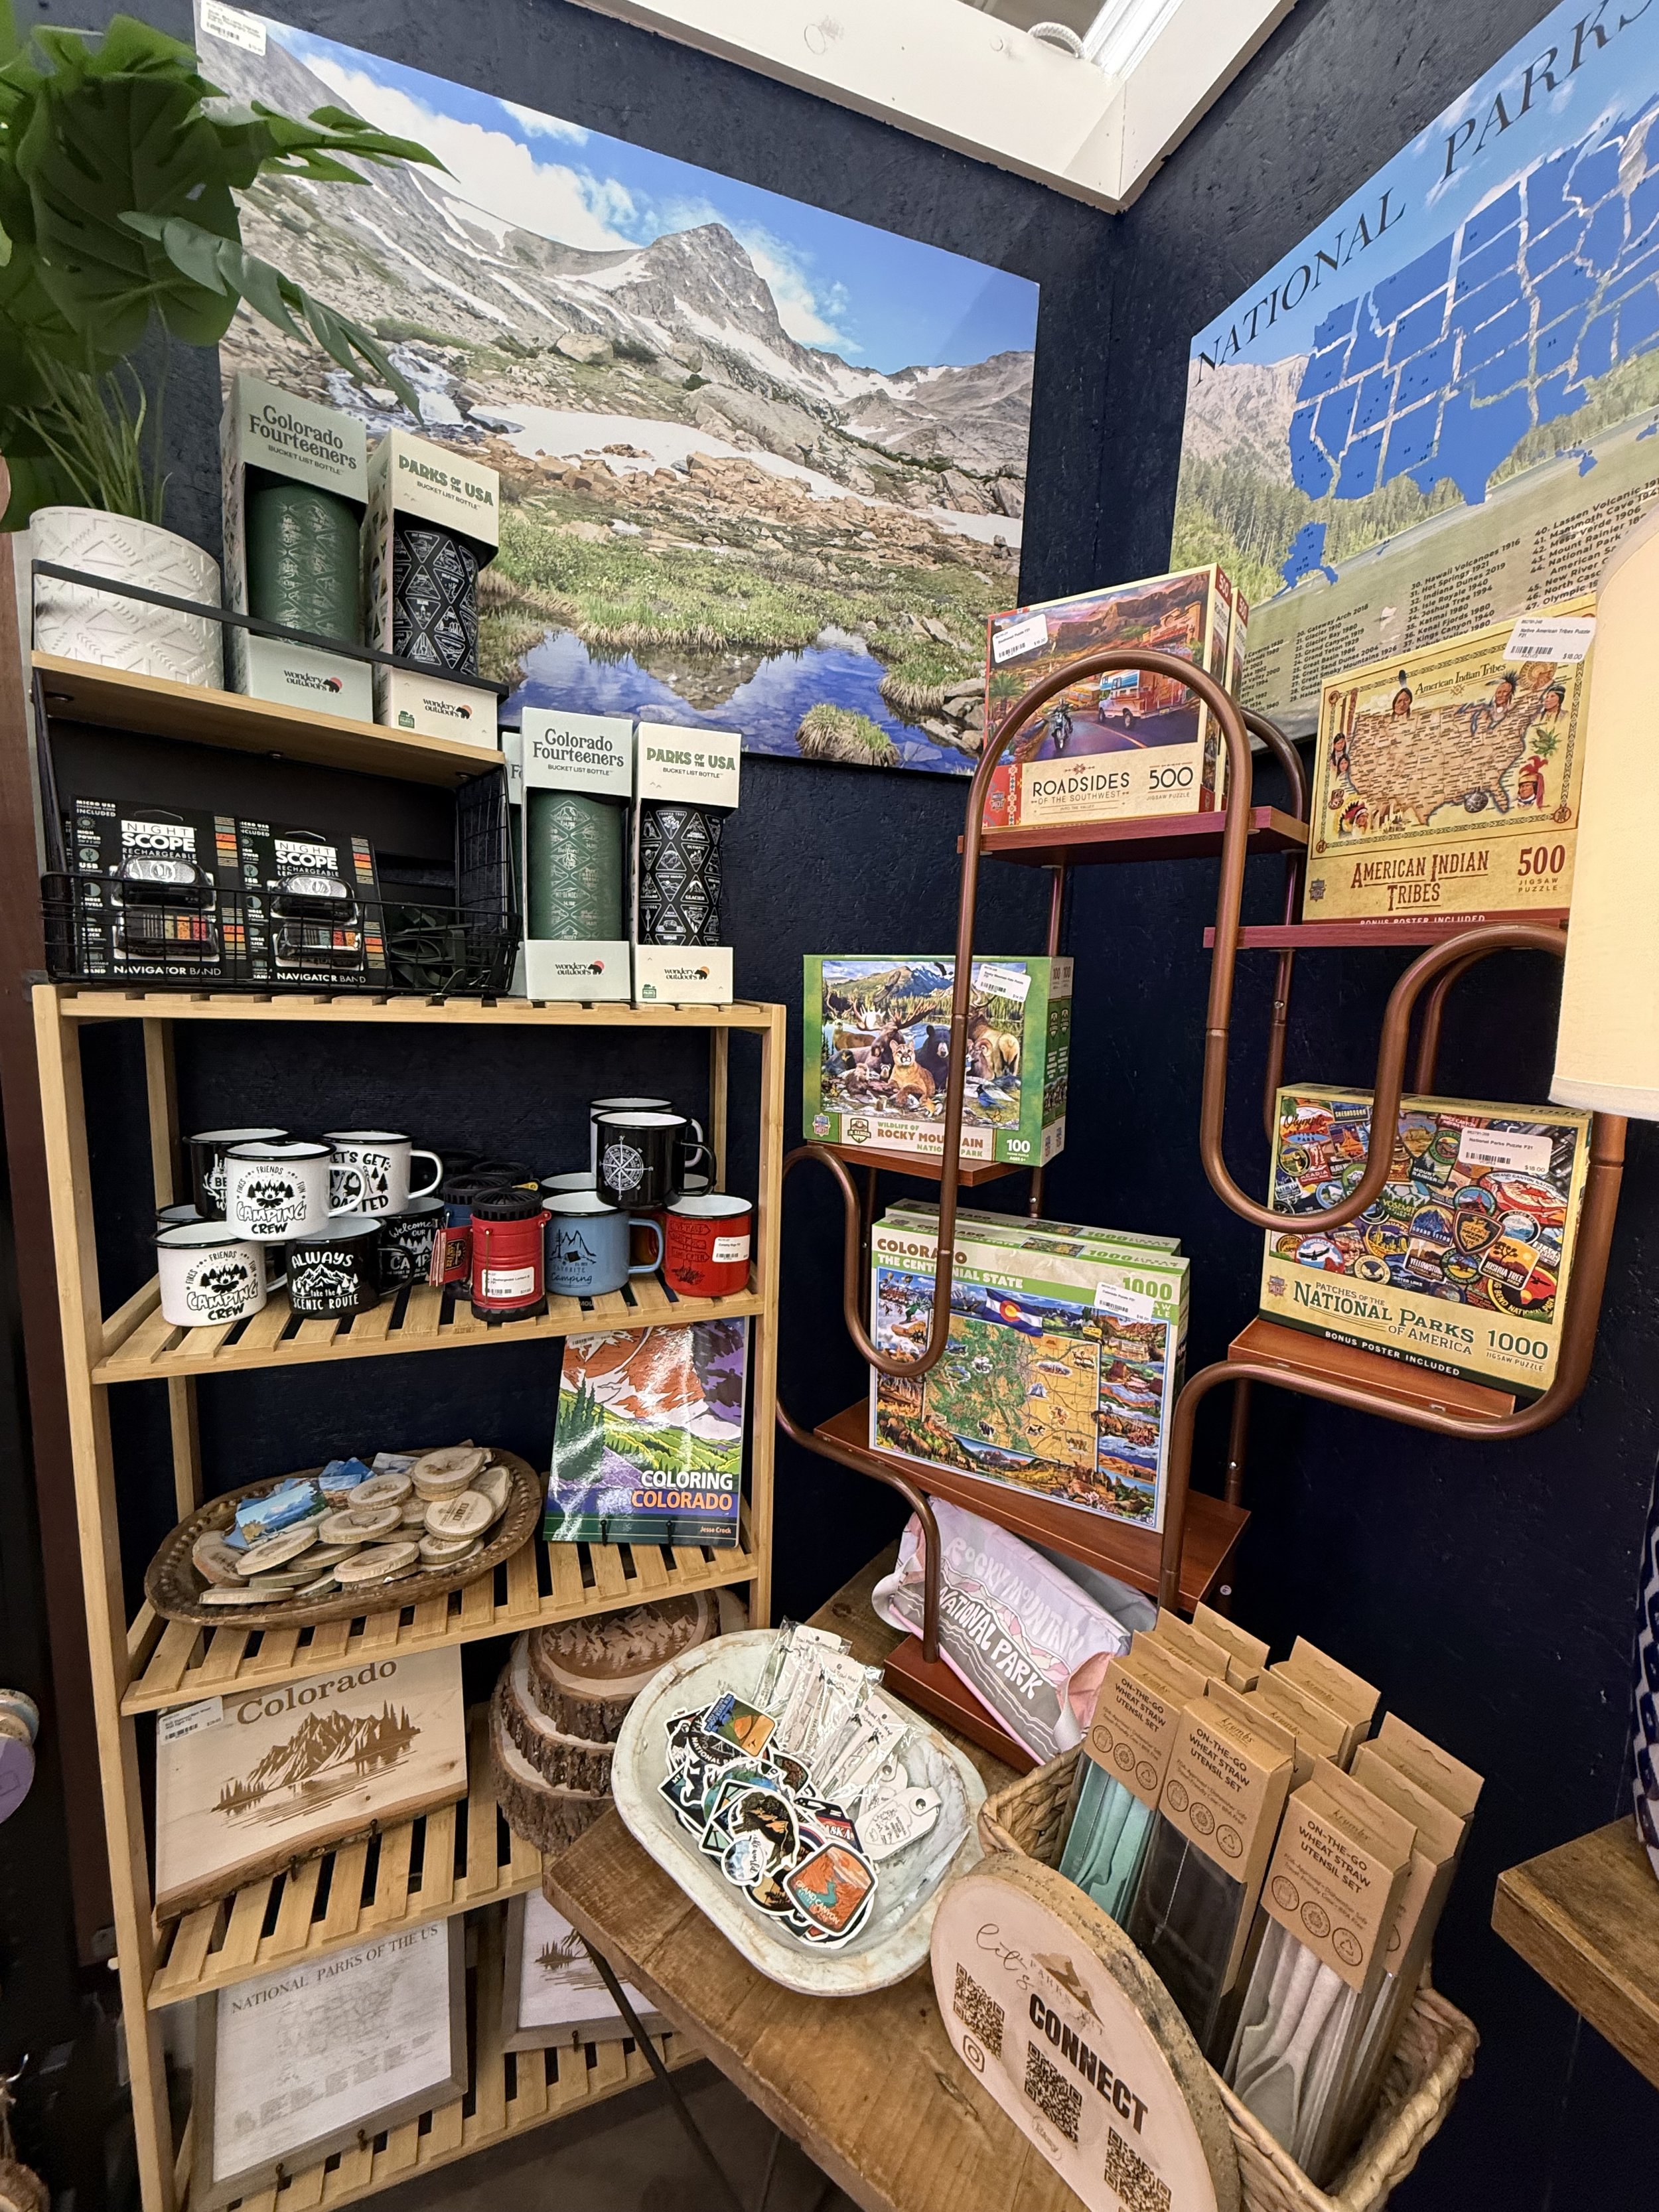
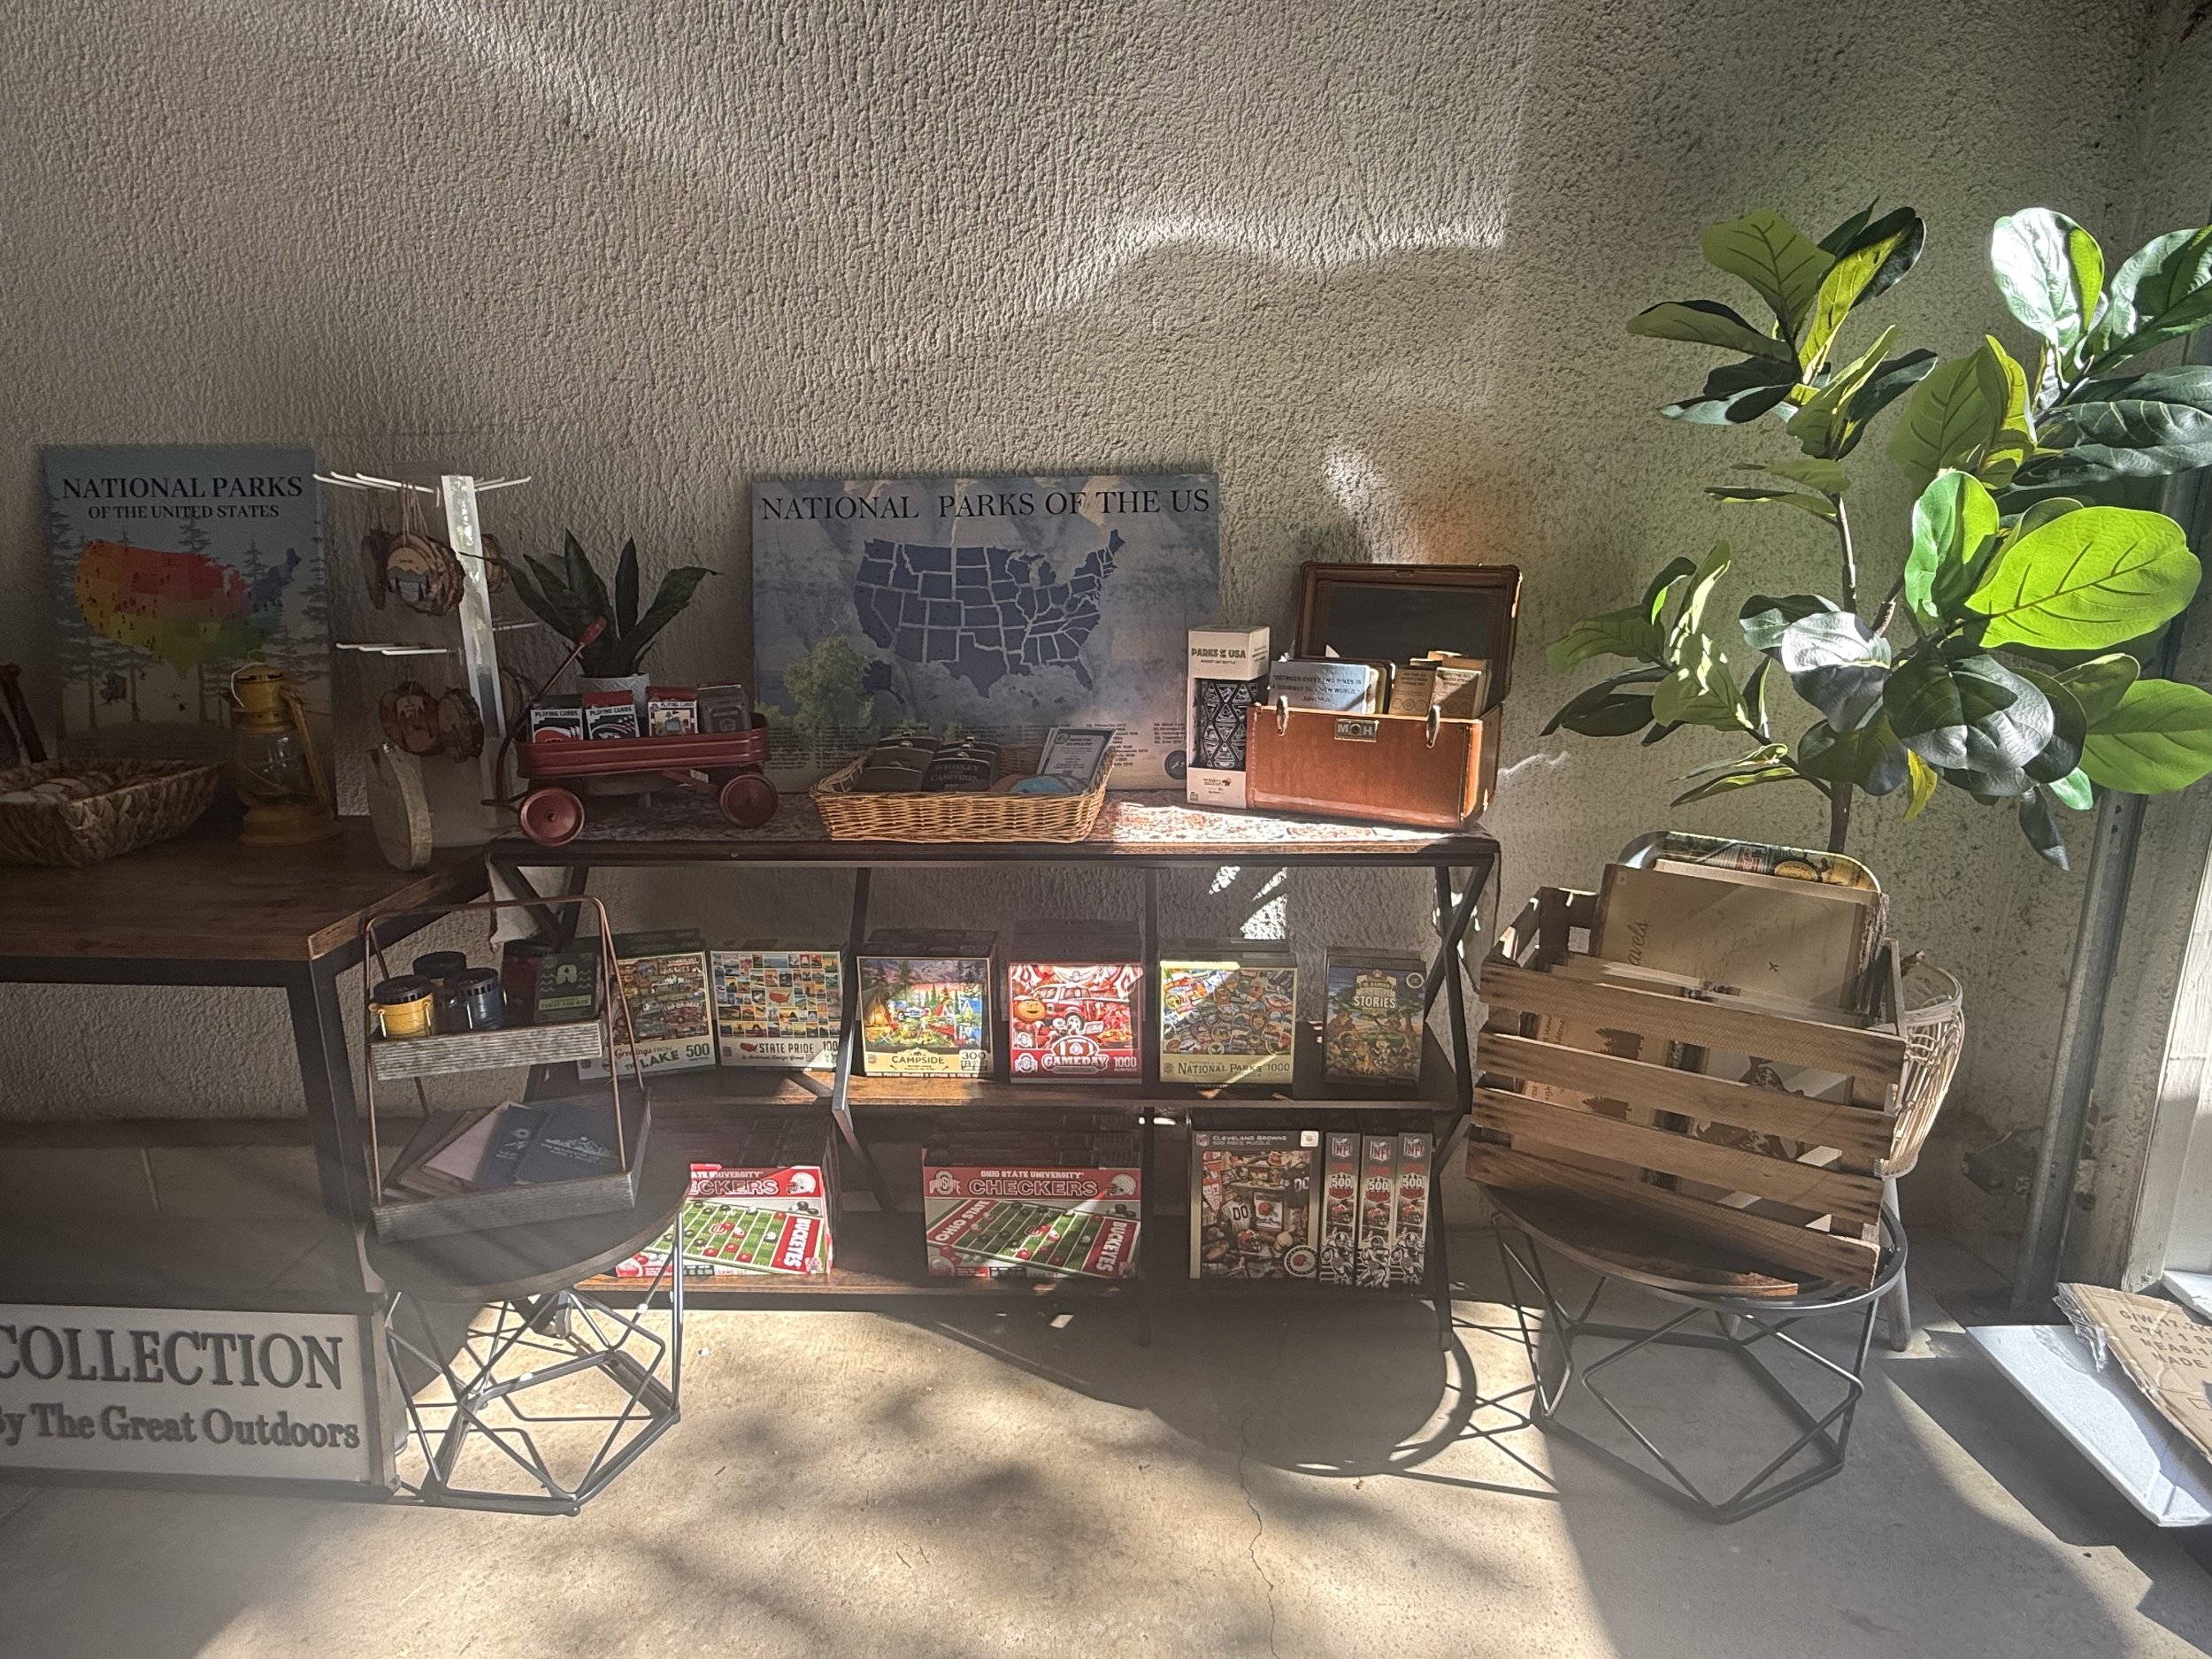
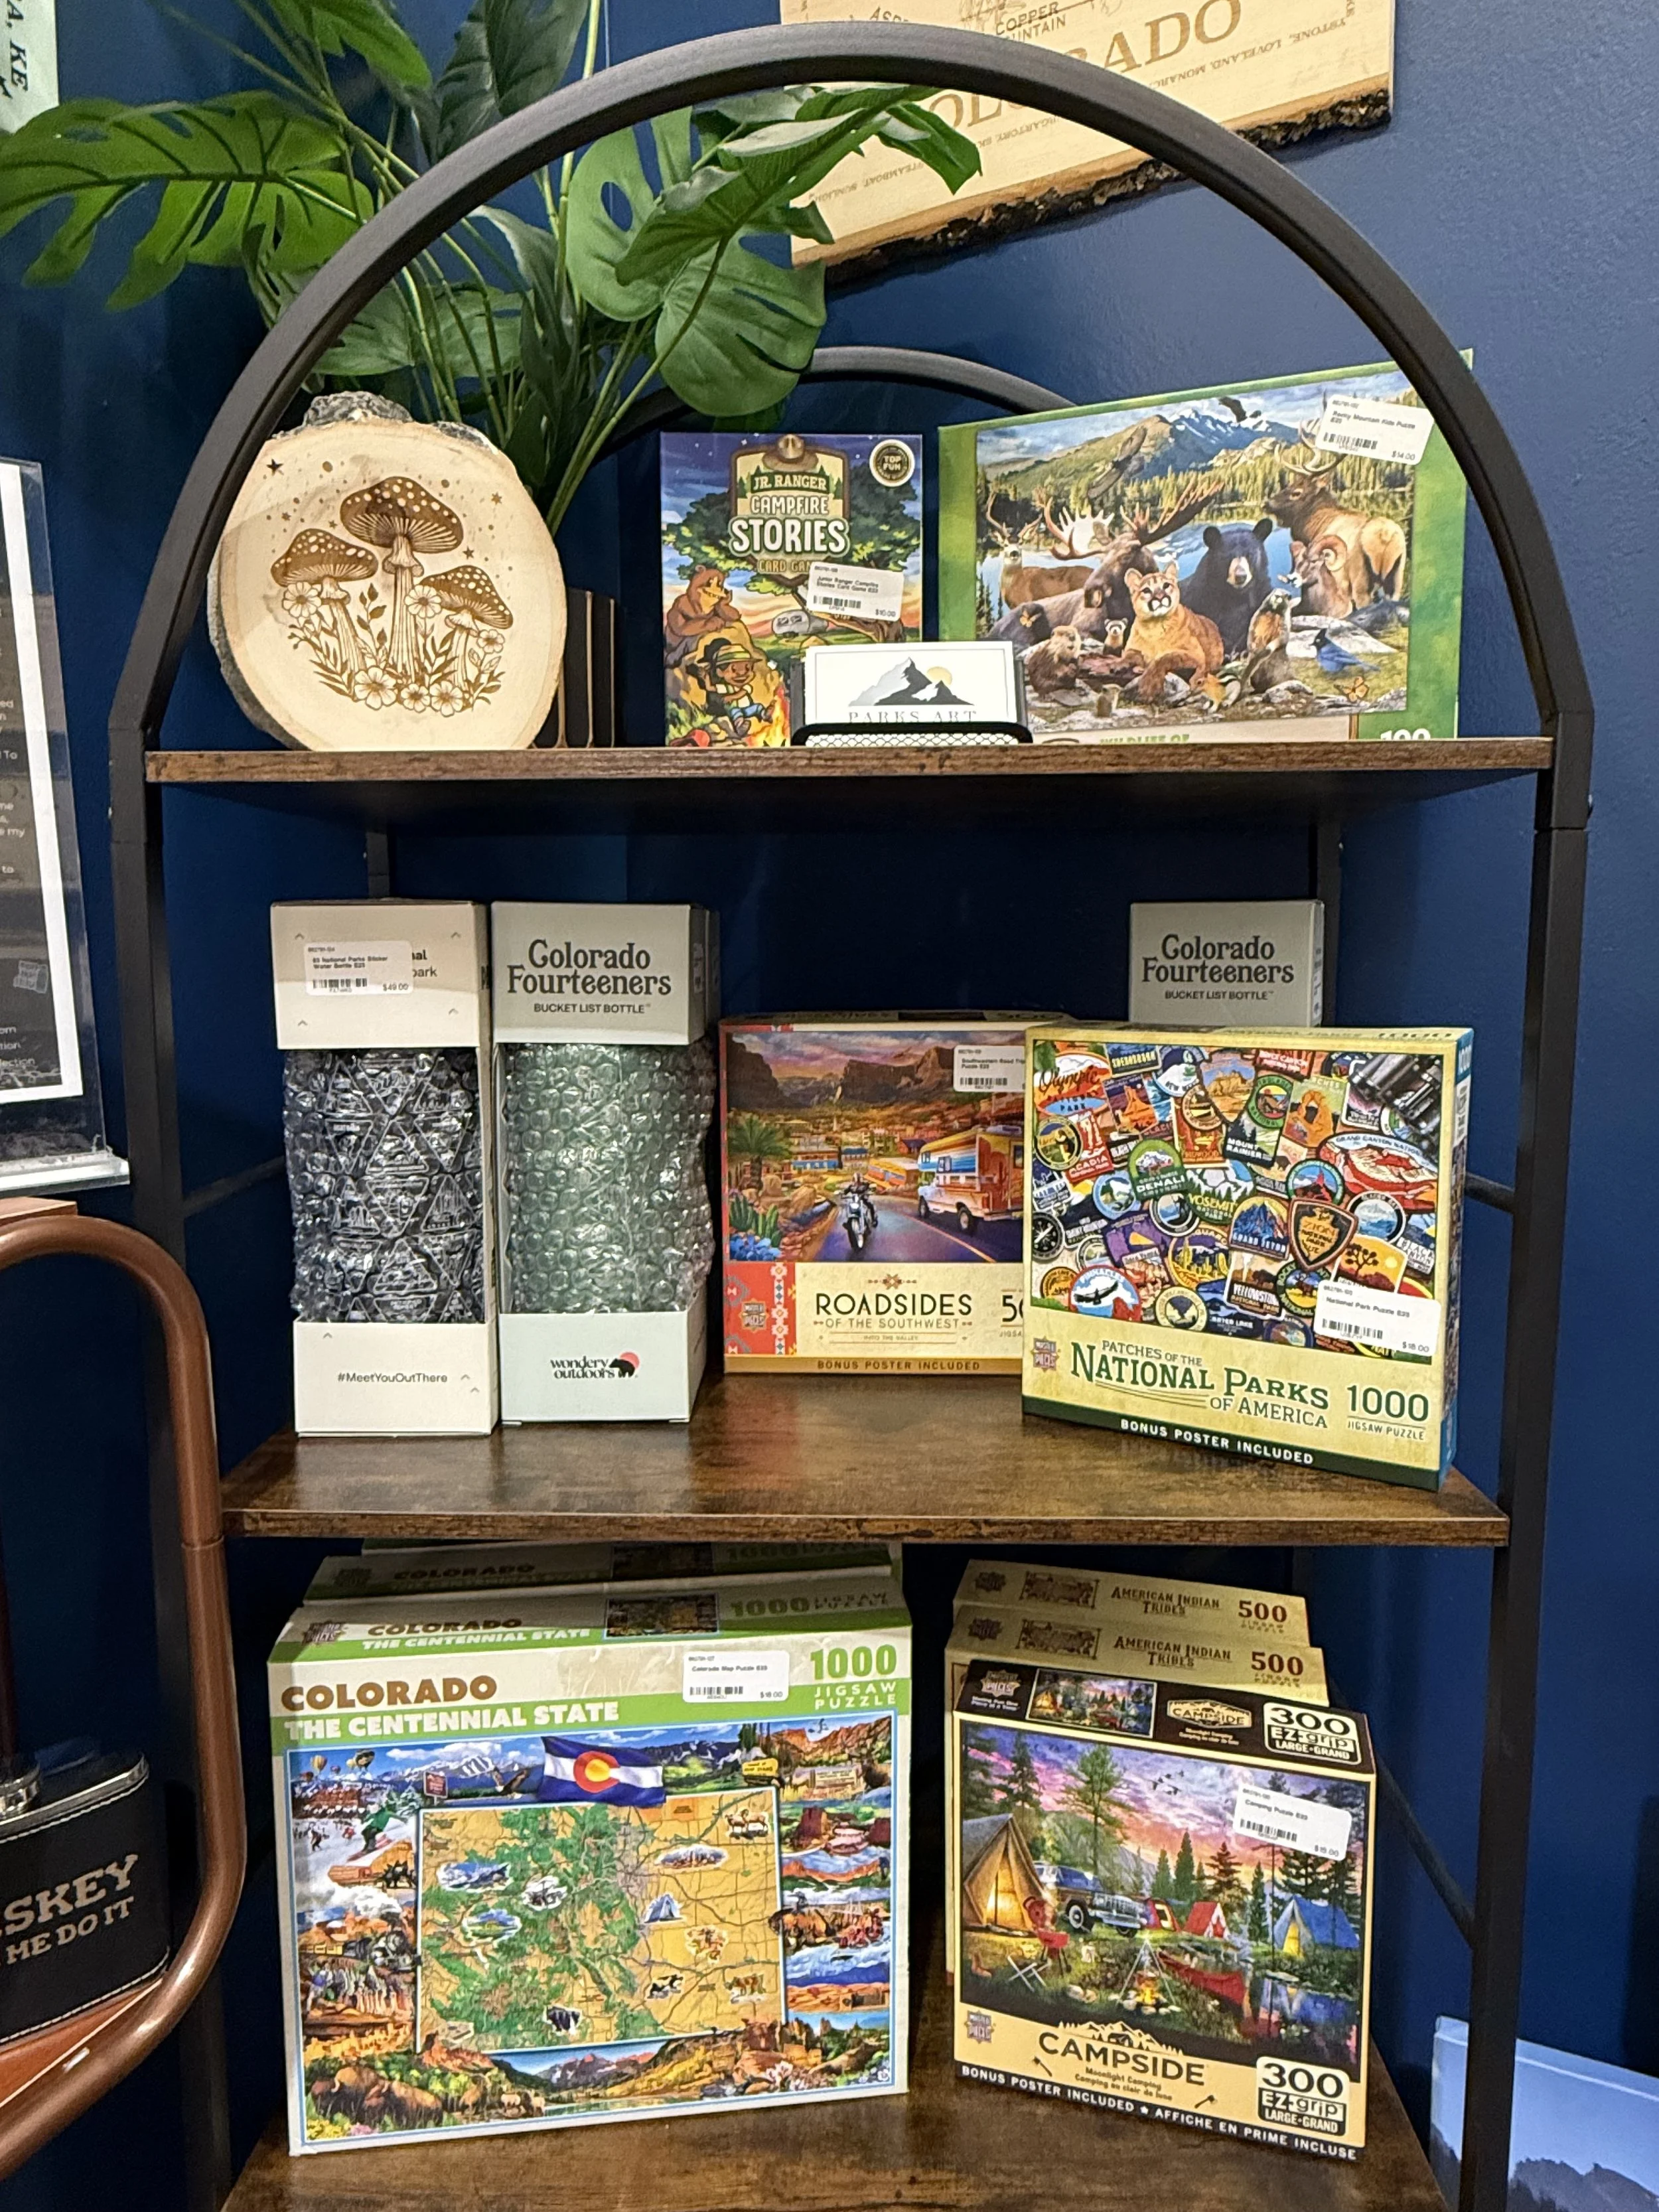
For example, my puzzles have consistently done well (I don’t make puzzles, but rather buy them from other small businesses) — they seem to resonate with the Painted Tree shopper demographic. On the other hand, I’ve struggled to move hats in that environment. It’s been an eye-opening way to understand customer behavior when I’m not there to explain or upsell. Check out what I sell here.
It’s also been an exercise in letting go of perfectionism. When you’re running multiple booths, you have to accept that not everything will always look perfect, and that’s okay. The goal is progress, not perfection. For example, when you are in multiple locations, you have to pay other people to “straighten up” your space, but it may not be how you would do it as the business owner. That’s okay for now and then.
My Results Across Different Painted Tree Locations
Each Painted Tree location has its own personality and traffic patterns.
Colorado Springs has been my strongest location — good foot traffic, friendly staff, and shoppers who appreciate handmade, nature-inspired products.
Northglenn, Colorado has been more of a challenge with minimal foot traffic and slower sales. (Ended up leaving after 1 year lease)
Lewis Center, Ohio (now open) feels like a full-circle move for me since it’s close to my family and friends, and it makes travel back “home” feel a little more purposeful from a business standpoint. So far, this location has been amazing (as of April, 2026)!
The Reality Behind the Aesthetic
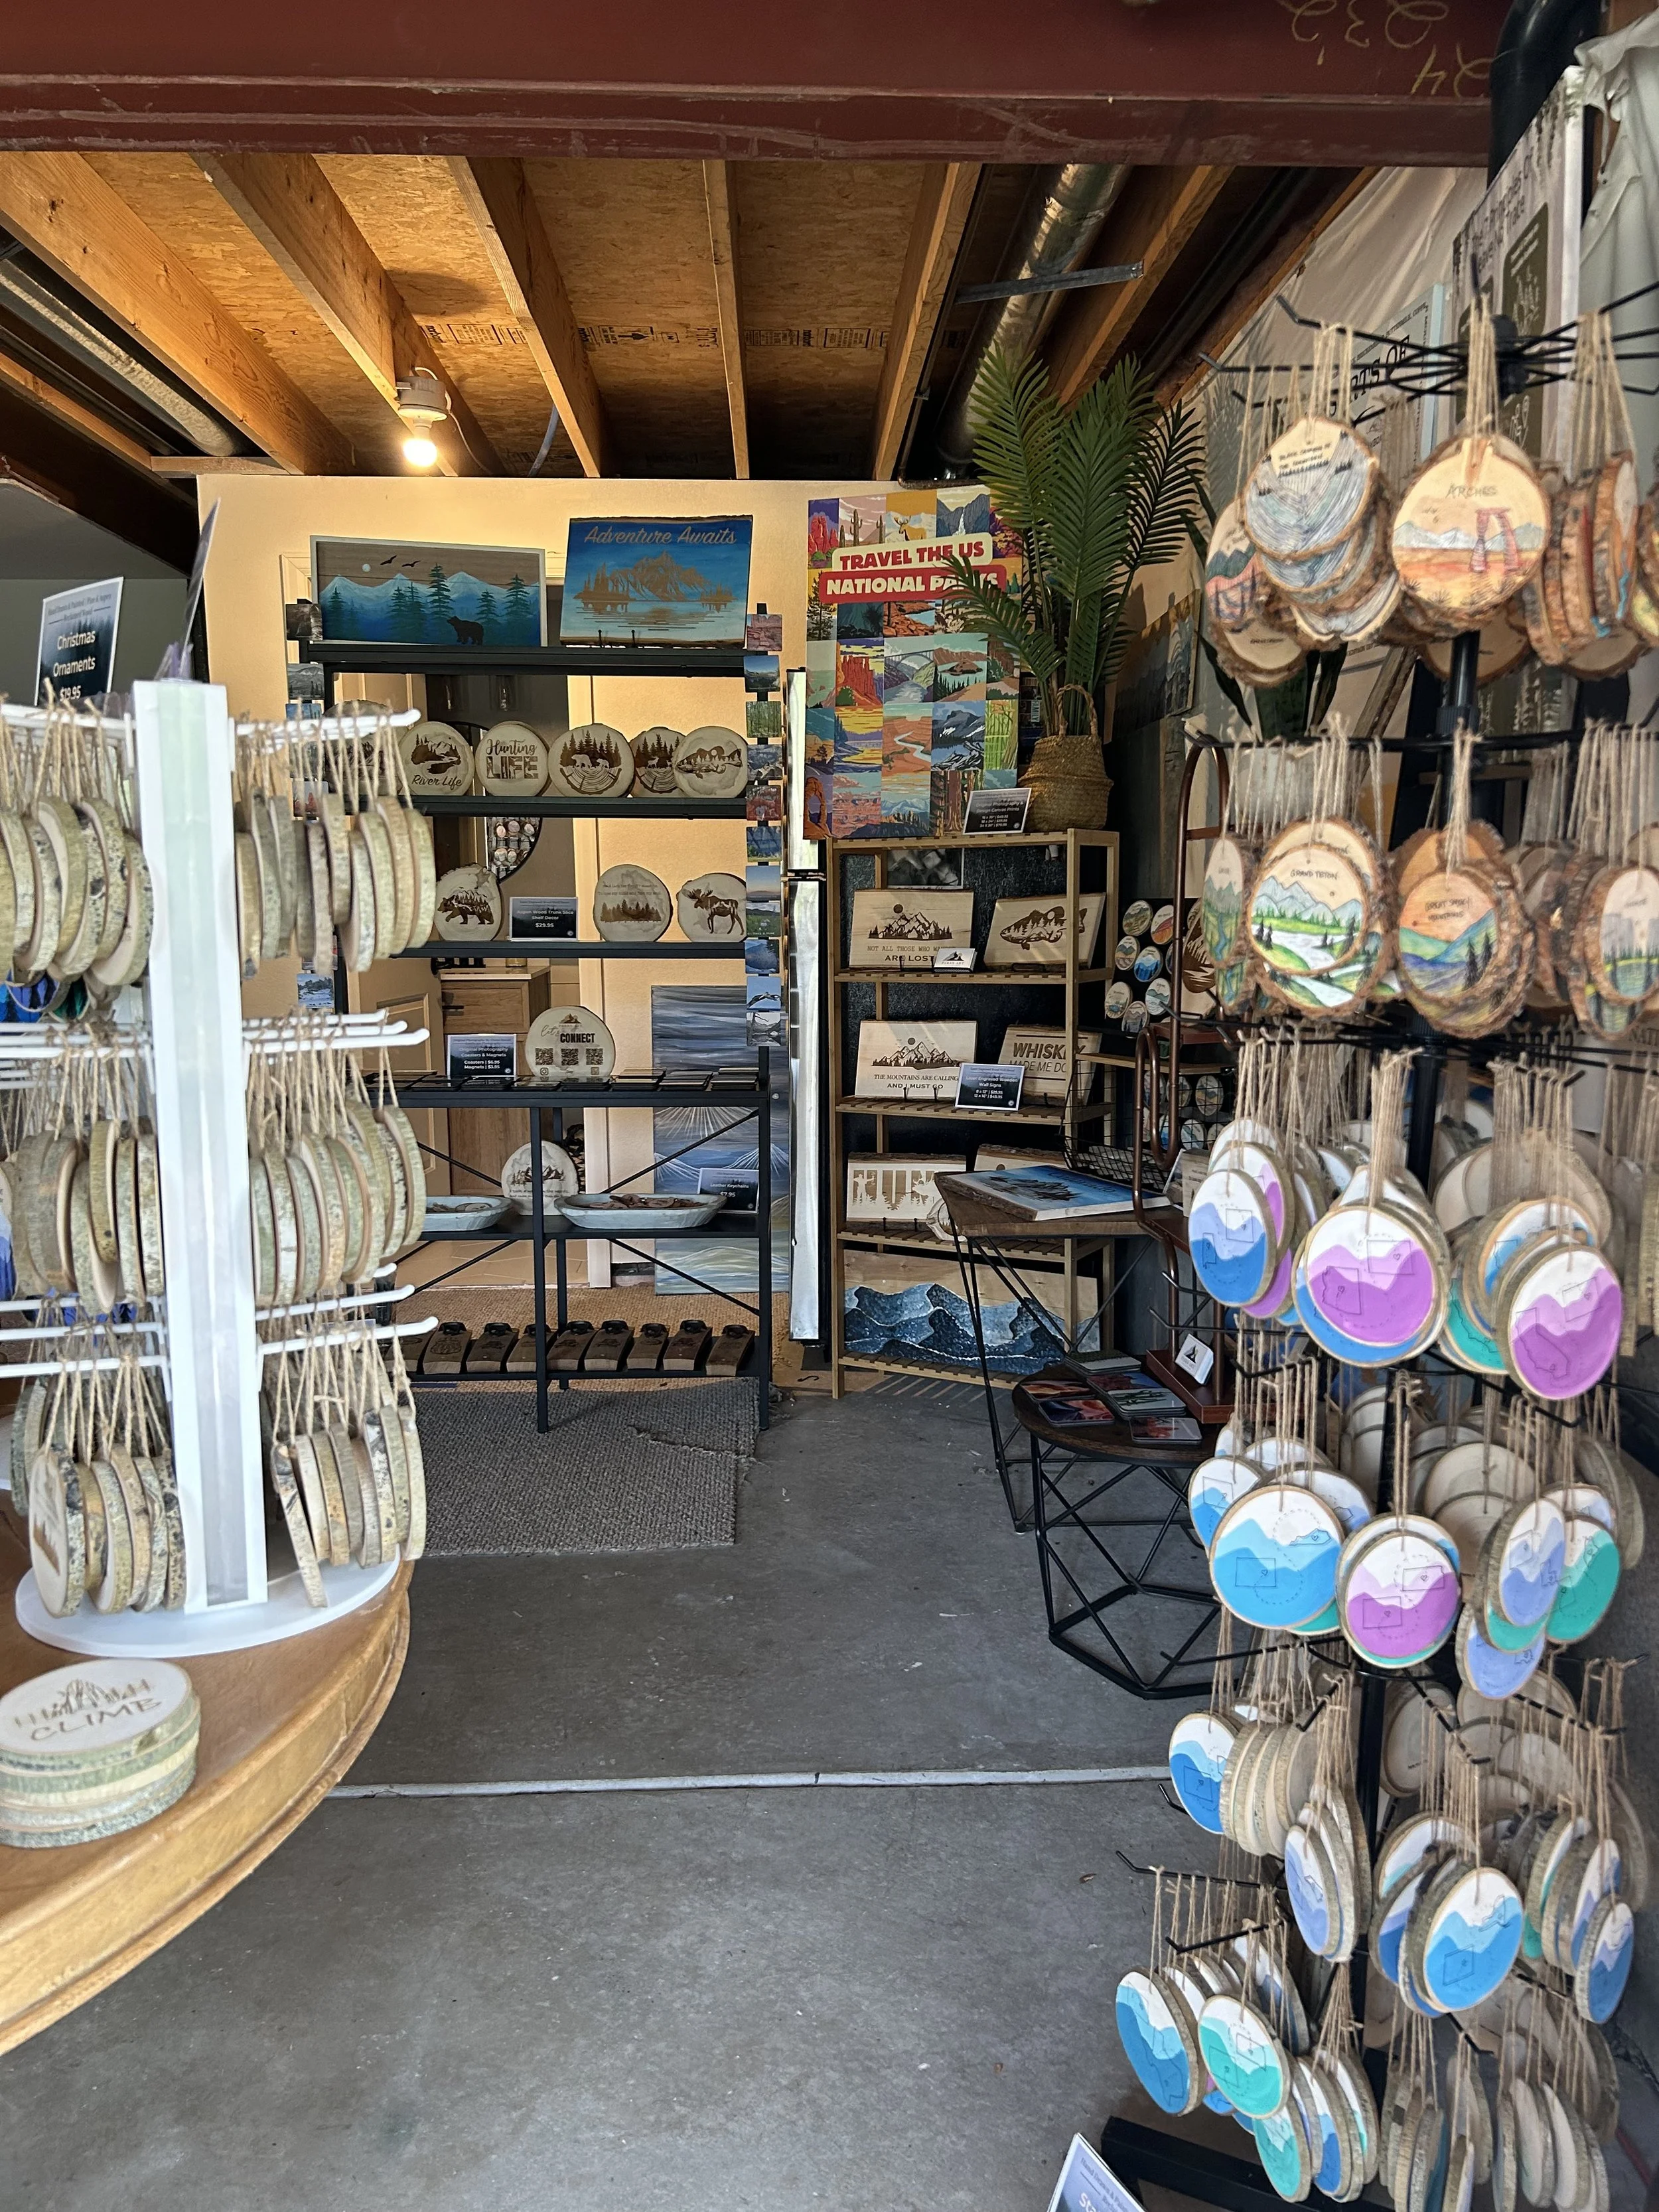
One thing I’ve noticed is that every Painted Tree booth looks different. Some are beautifully branded, professional, and thoughtfully designed — others look more like a high school craft fair. That’s part of what makes it interesting and fun to walk through, but it also means that presentation matters. You need a lot of inventory to make your space feel full and inviting. My advice? Don’t jump in too soon — make sure you have the stock to fill your space and the brand story to make it cohesive. You cannot believe the type of inventory it takes to fill a space. If you’re unsure, maybe start with a shelf space.
Make it stand out
People always tell me that they love the navy blue walls, be BOLD… and Don’t be afraid to listen to your own aesthetic, whatever that may be. People will be able to feel your vision. Paint your walls black, or hot pink, or do wallpaper. This is your SHOP!!!!
What I Wish I Knew Before Renting a Painted Tree Booth
Before I started at Painted Tree, I tried to research what to expect, but there wasn’t much helpful information out there. Most of what I found were negative Reddit threads telling people to stay far away. I don’t agree with that. I think a lot of small businesses join expecting massive results right away and are disappointed when that doesn’t happen.
If you have an established brand, good profit margins, plenty of inventory, and the ability to take a reasonable risk — it’s worth considering. Before signing up, join Facebook groups for Painted Tree vendors and ask honest questions about specific stores. Success has a lot to do with location, management, and foot traffic, and every Painted Tree is a little different.
Your products also need to sell themselves — meaning they shouldn’t need a big explanation or personal pitch. And yes, theft happens. You can install cameras and complain all you want, but some loss is just part of doing business in retail. I personally wouldn’t recommend selling small, high-theft items like jewelry there.
If your store is already open, take a walk around. Look at which categories are oversaturated before you decide what to bring in. It might save you a lot of frustration later.
Is Selling at Painted Tree Boutiques Worth It?
For me, Painted Tree has been both good and challenging. It provides a steady stream of extra income and keeps my products in front of new audiences, even when I’m not physically there. It’s also been a great testing ground for figuring out what designs and products connect with people outside of my pop-up markets and wholesale accounts. What is going to sell when you are not there? I’ve realized, that people LOVE STICKERS….. omg! More to come on stickers.
Would I recommend it? Yes — but with eyes wide open. It’s not a passive income source, and it’s not right for everyone. But if you make your own products, enjoy merchandising, and are willing to invest the time and money into creating a beautiful, self-sustaining booth, it can be a rewarding way to grow your business and brand presence.
My Advice for New Painted Tree Vendors
Budget for setup — expect to invest at least $1,000 before you even open.
Pick your location carefully — ask current vendors about traffic before committing.
Track your margins — don’t confuse gross sales with profit.
Keep your booth fresh — new products and displays drive repeat visits. I rearrange everything about once every 6 months.
Be patient — it takes a few months to find your rhythm and your ideal inventory balance.
Final Thoughts
Painted Tree has given me the opportunity to reach new customers who might never have found my work otherwise. Like any retail adventure, it’s a mix of art, business, and a little bit of trial and error — and for now, that balance works for me.
If you’re researching what it’s really like to sell at Painted Tree Boutiques, I hope this post gives you a realistic picture from someone who’s actually doing it. Every experience is different, but with the right expectations, it can be a great tool for growth.
To learn more about my work or see what I sell in my booths, you can visit www.parksartcollection.com or follow me on Instagram and Facebook @parksartcollection.
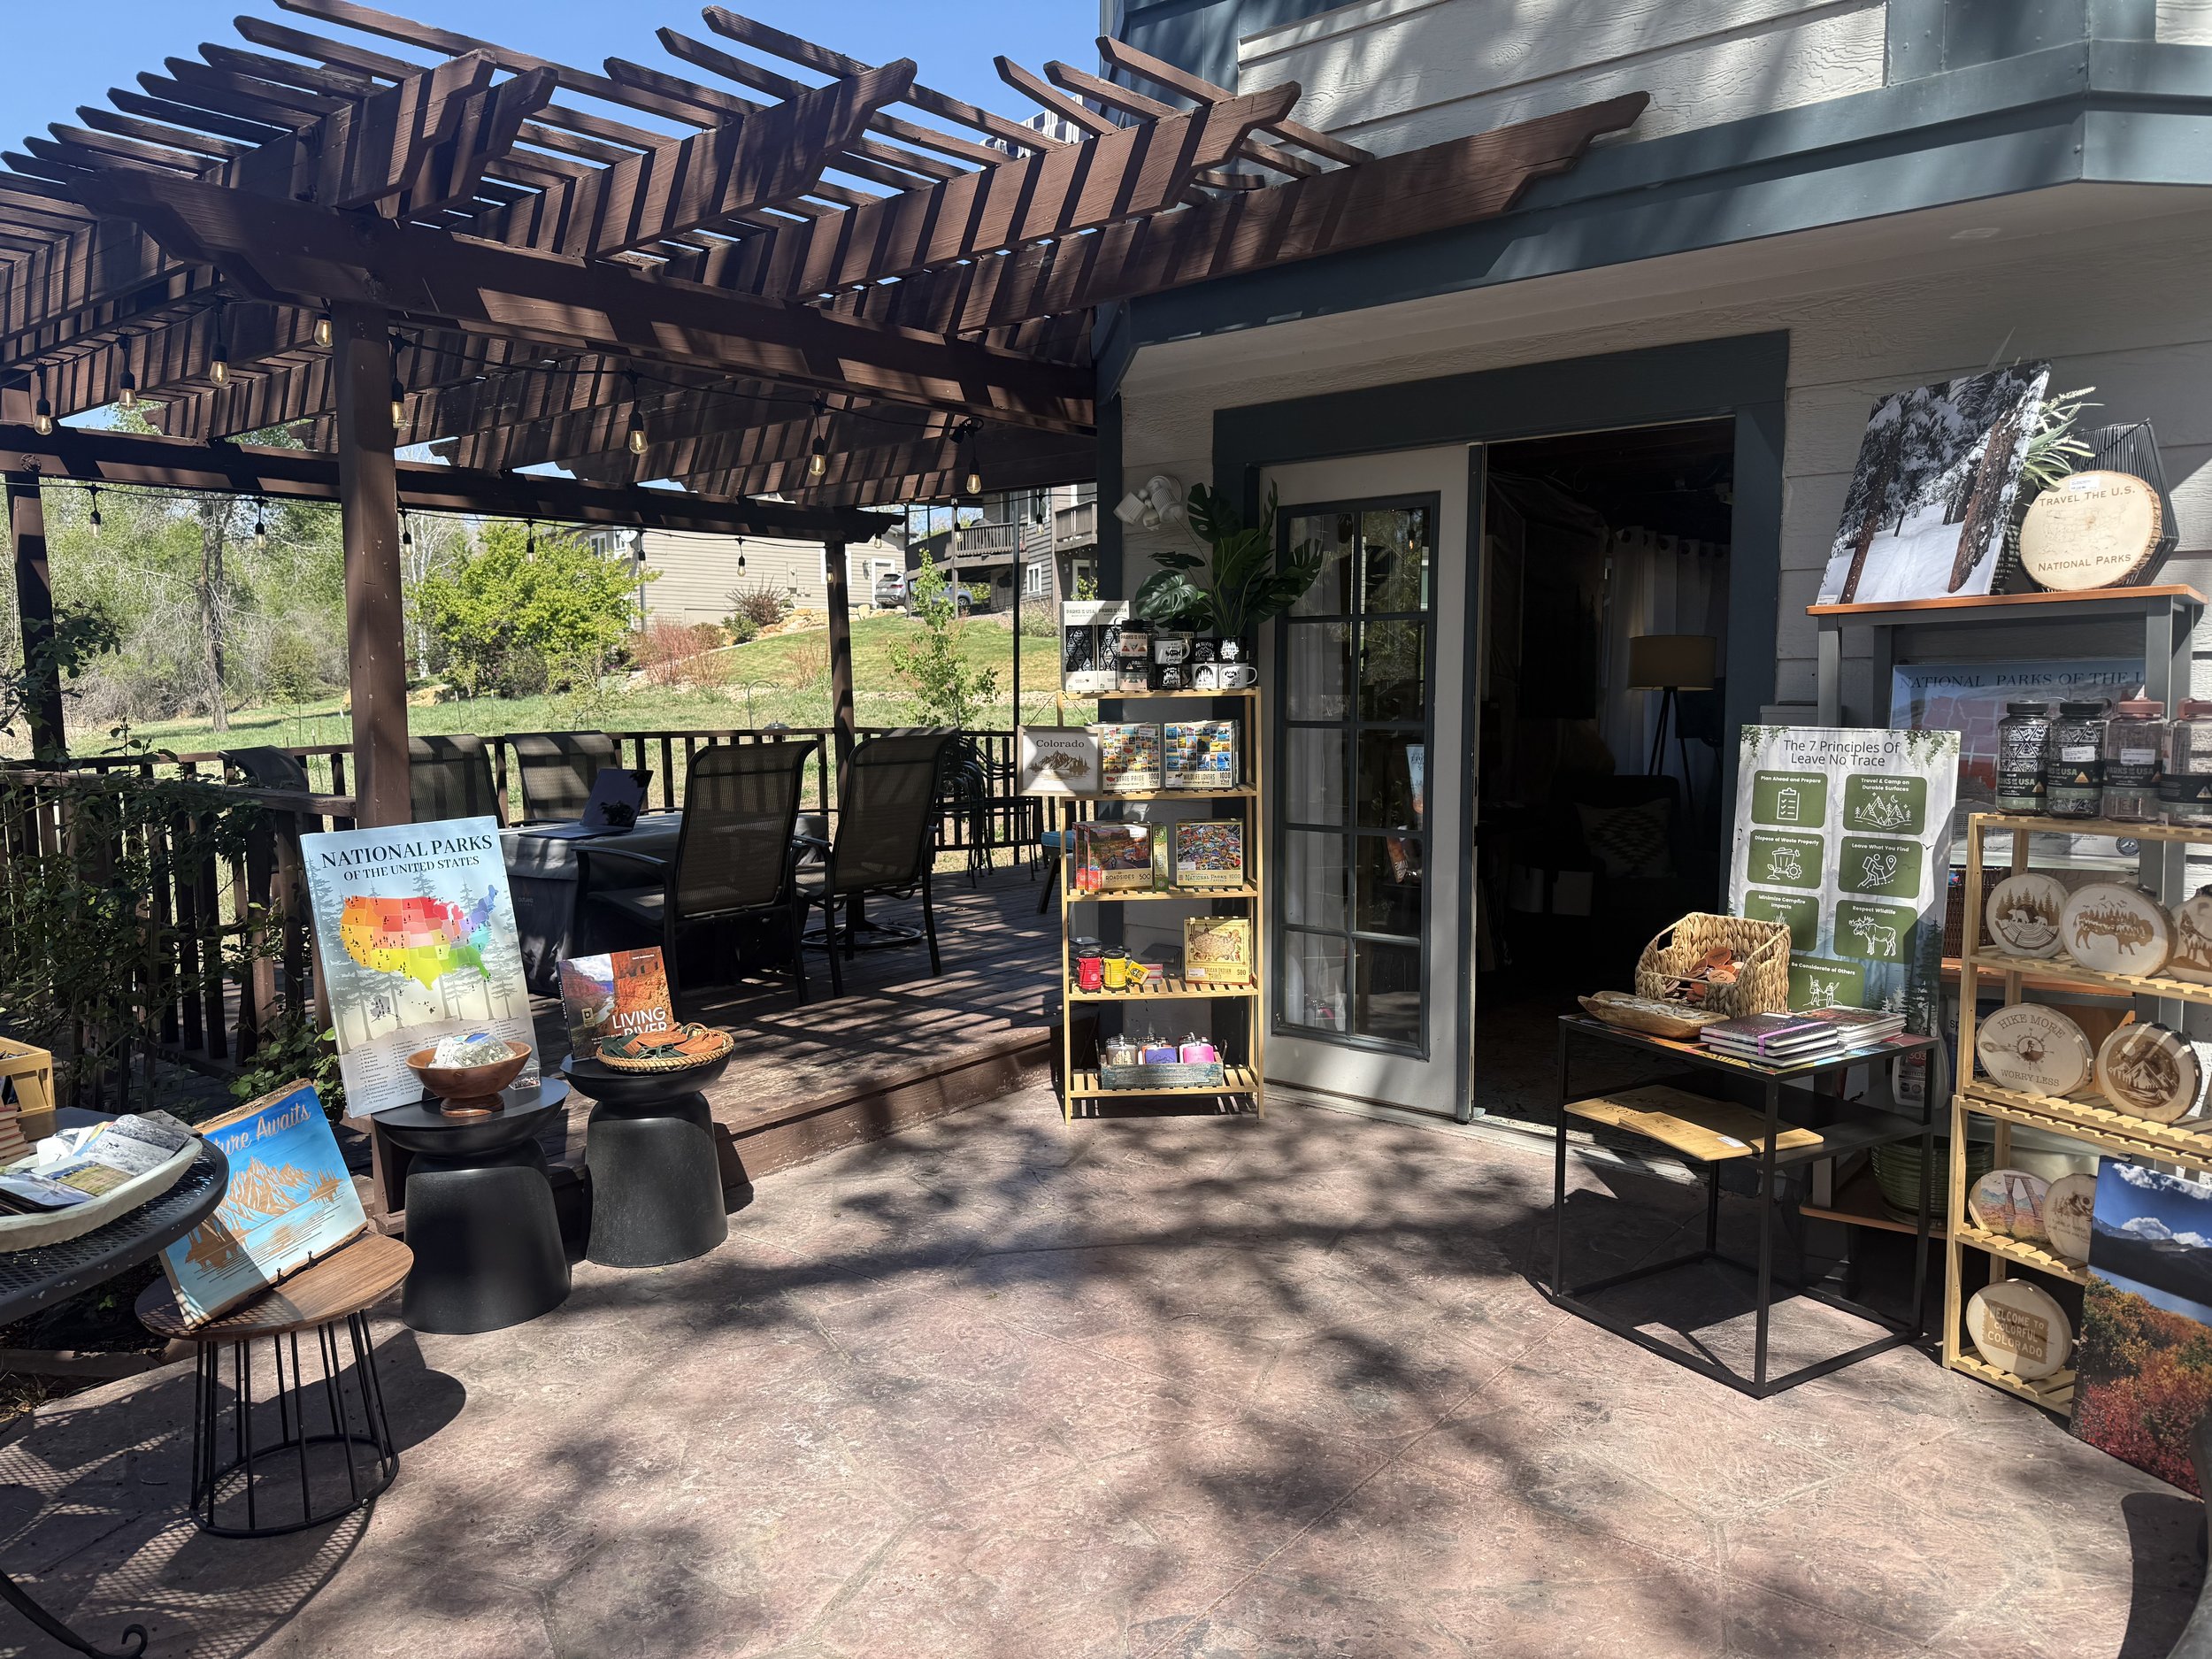
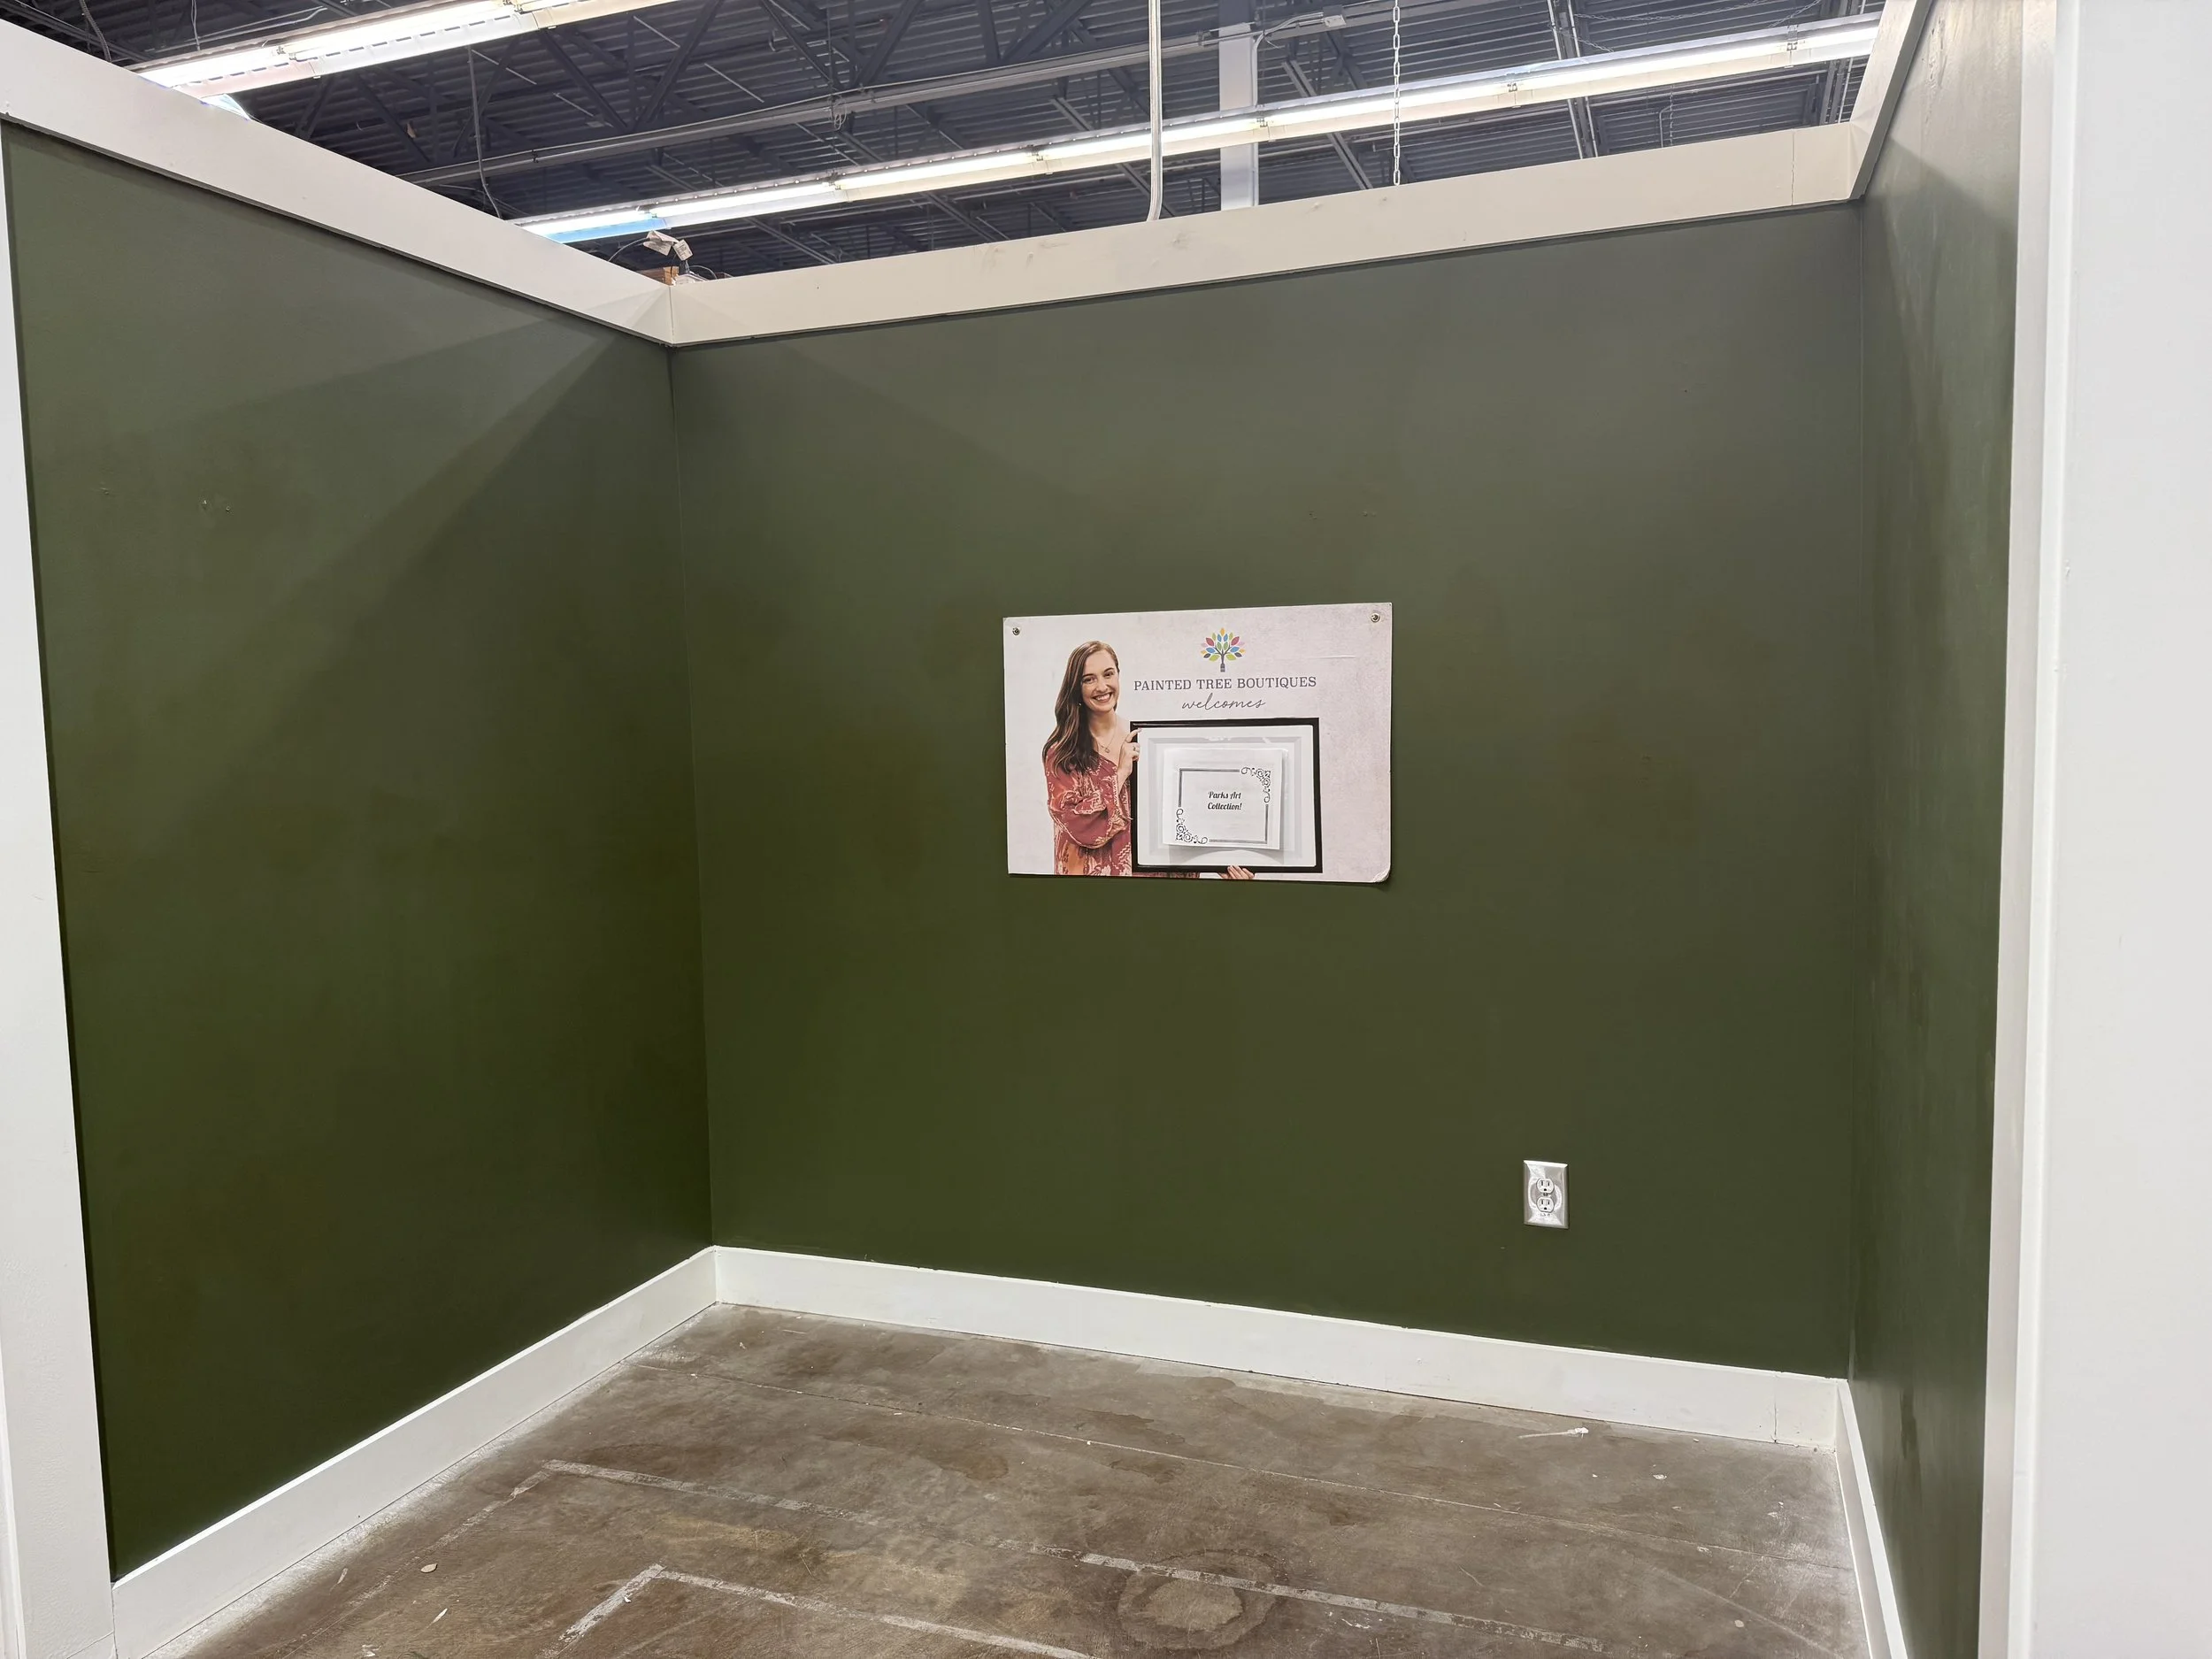
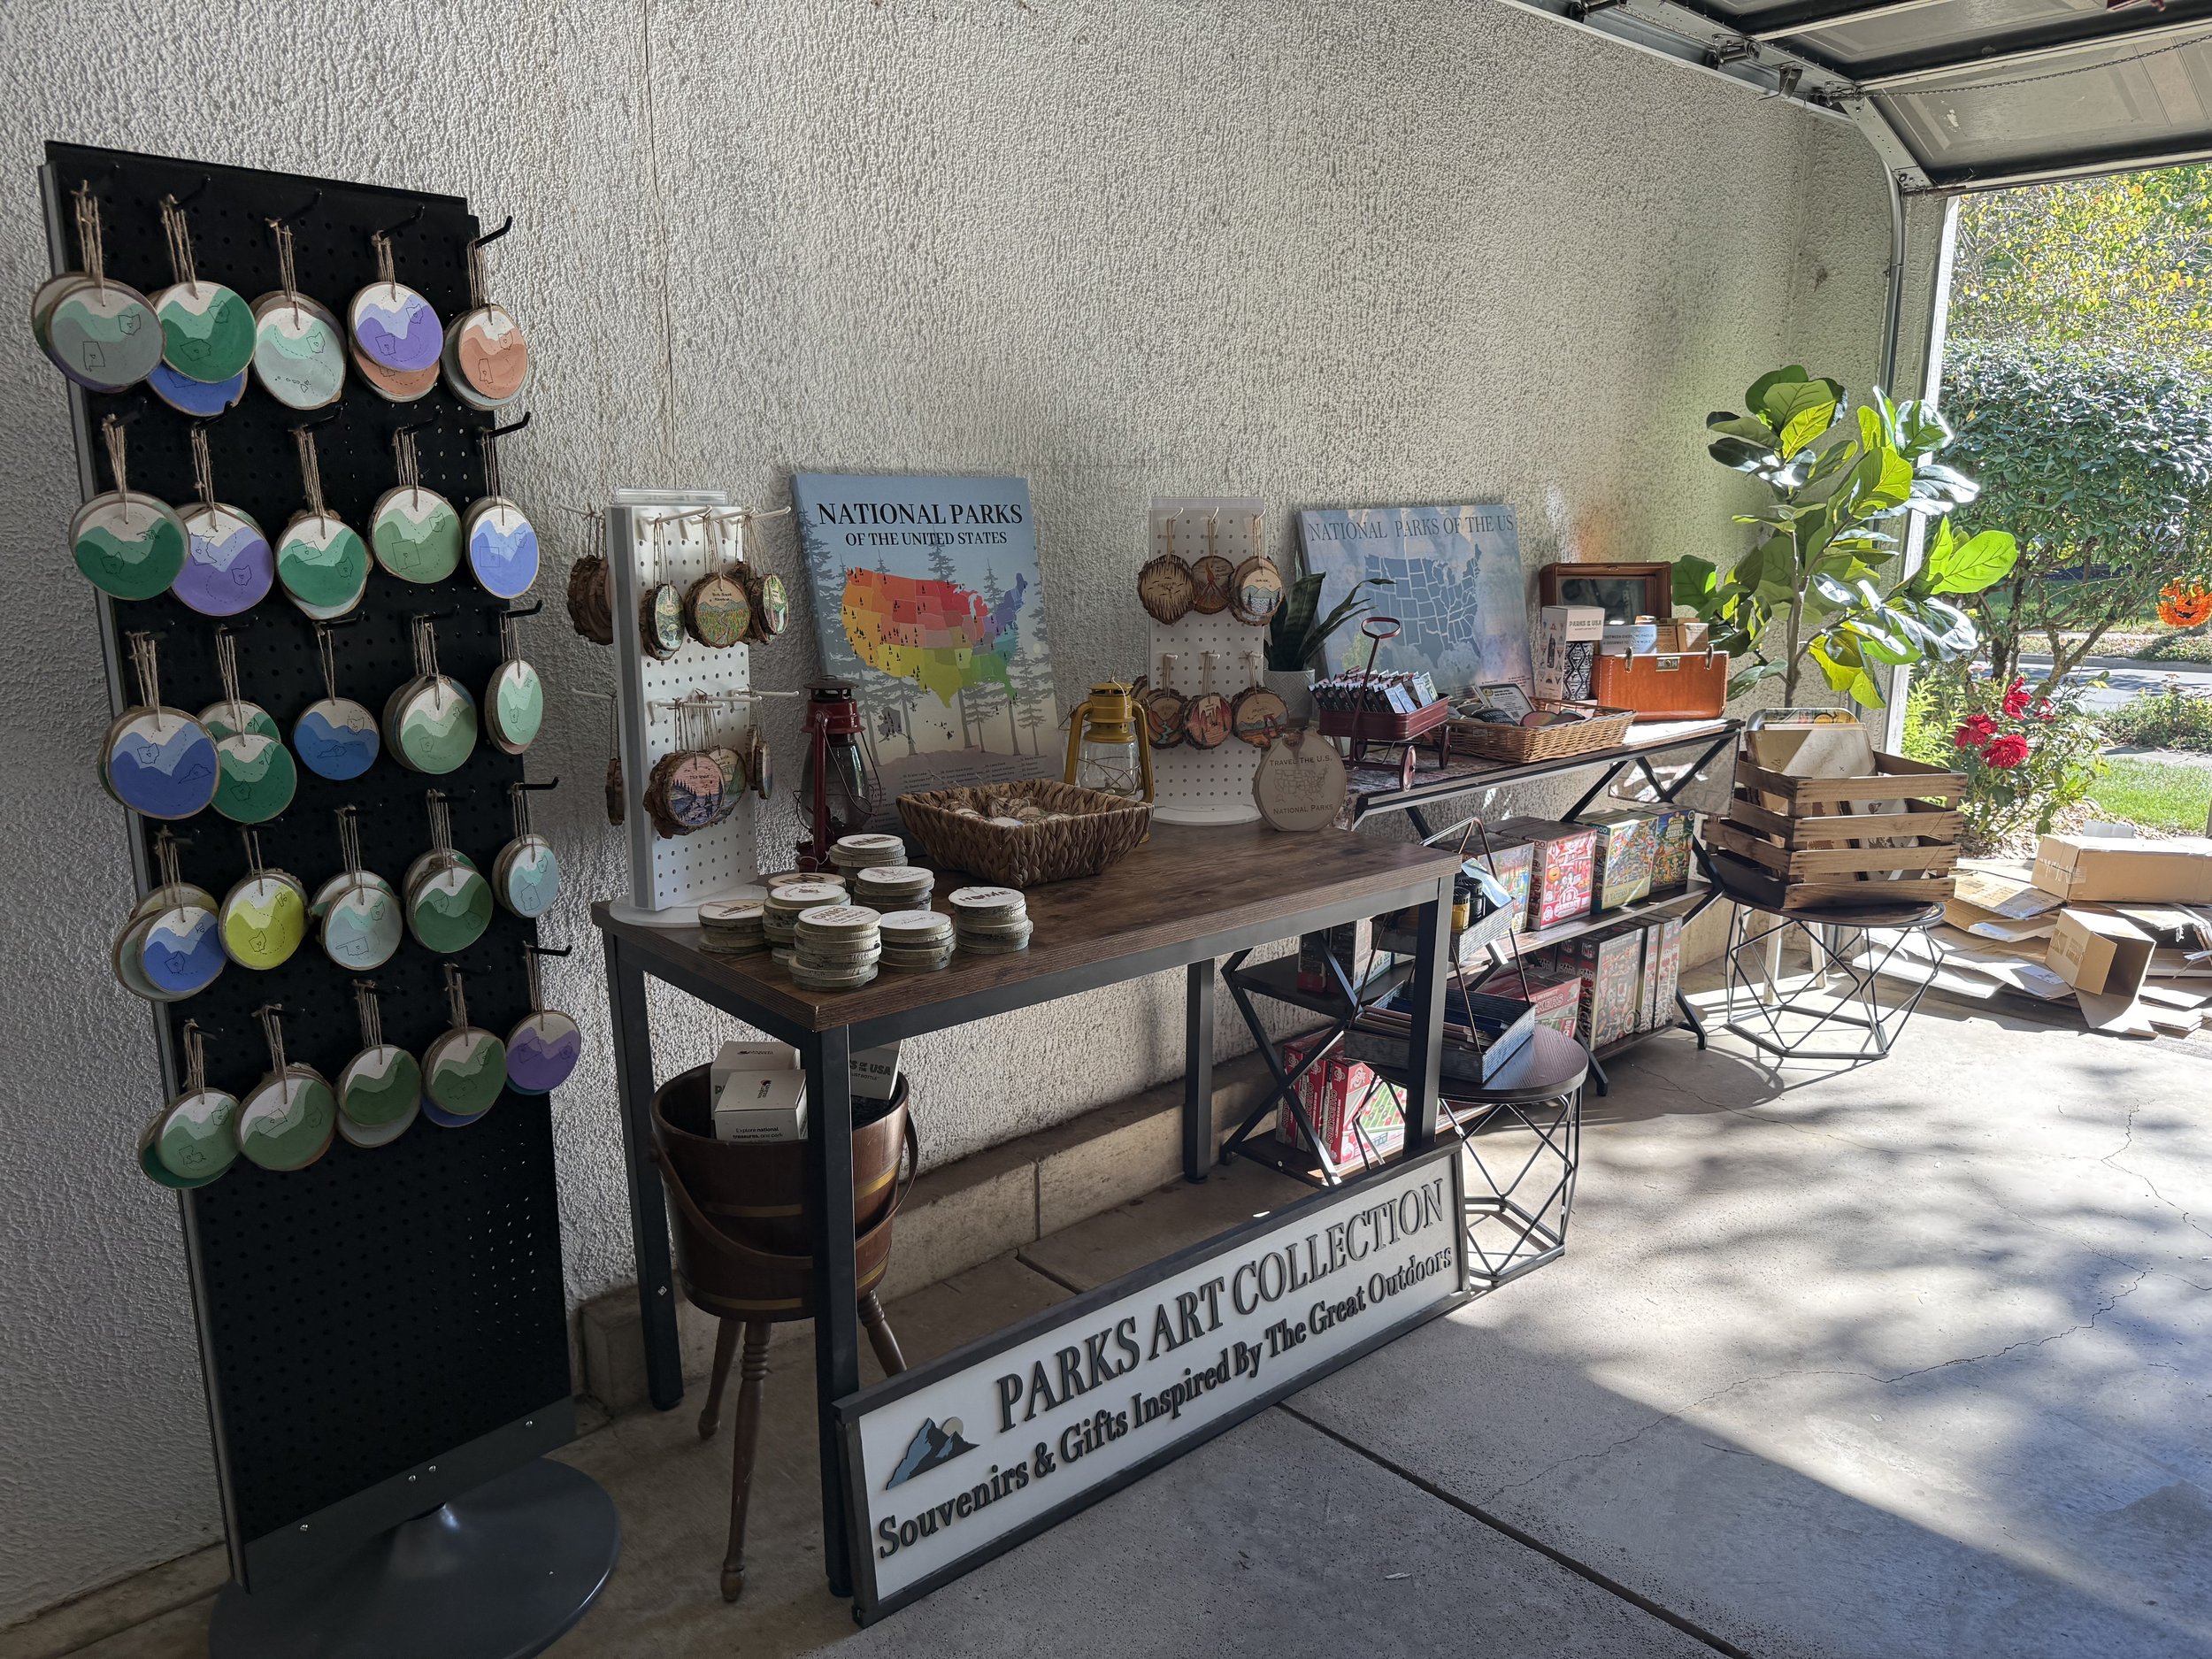
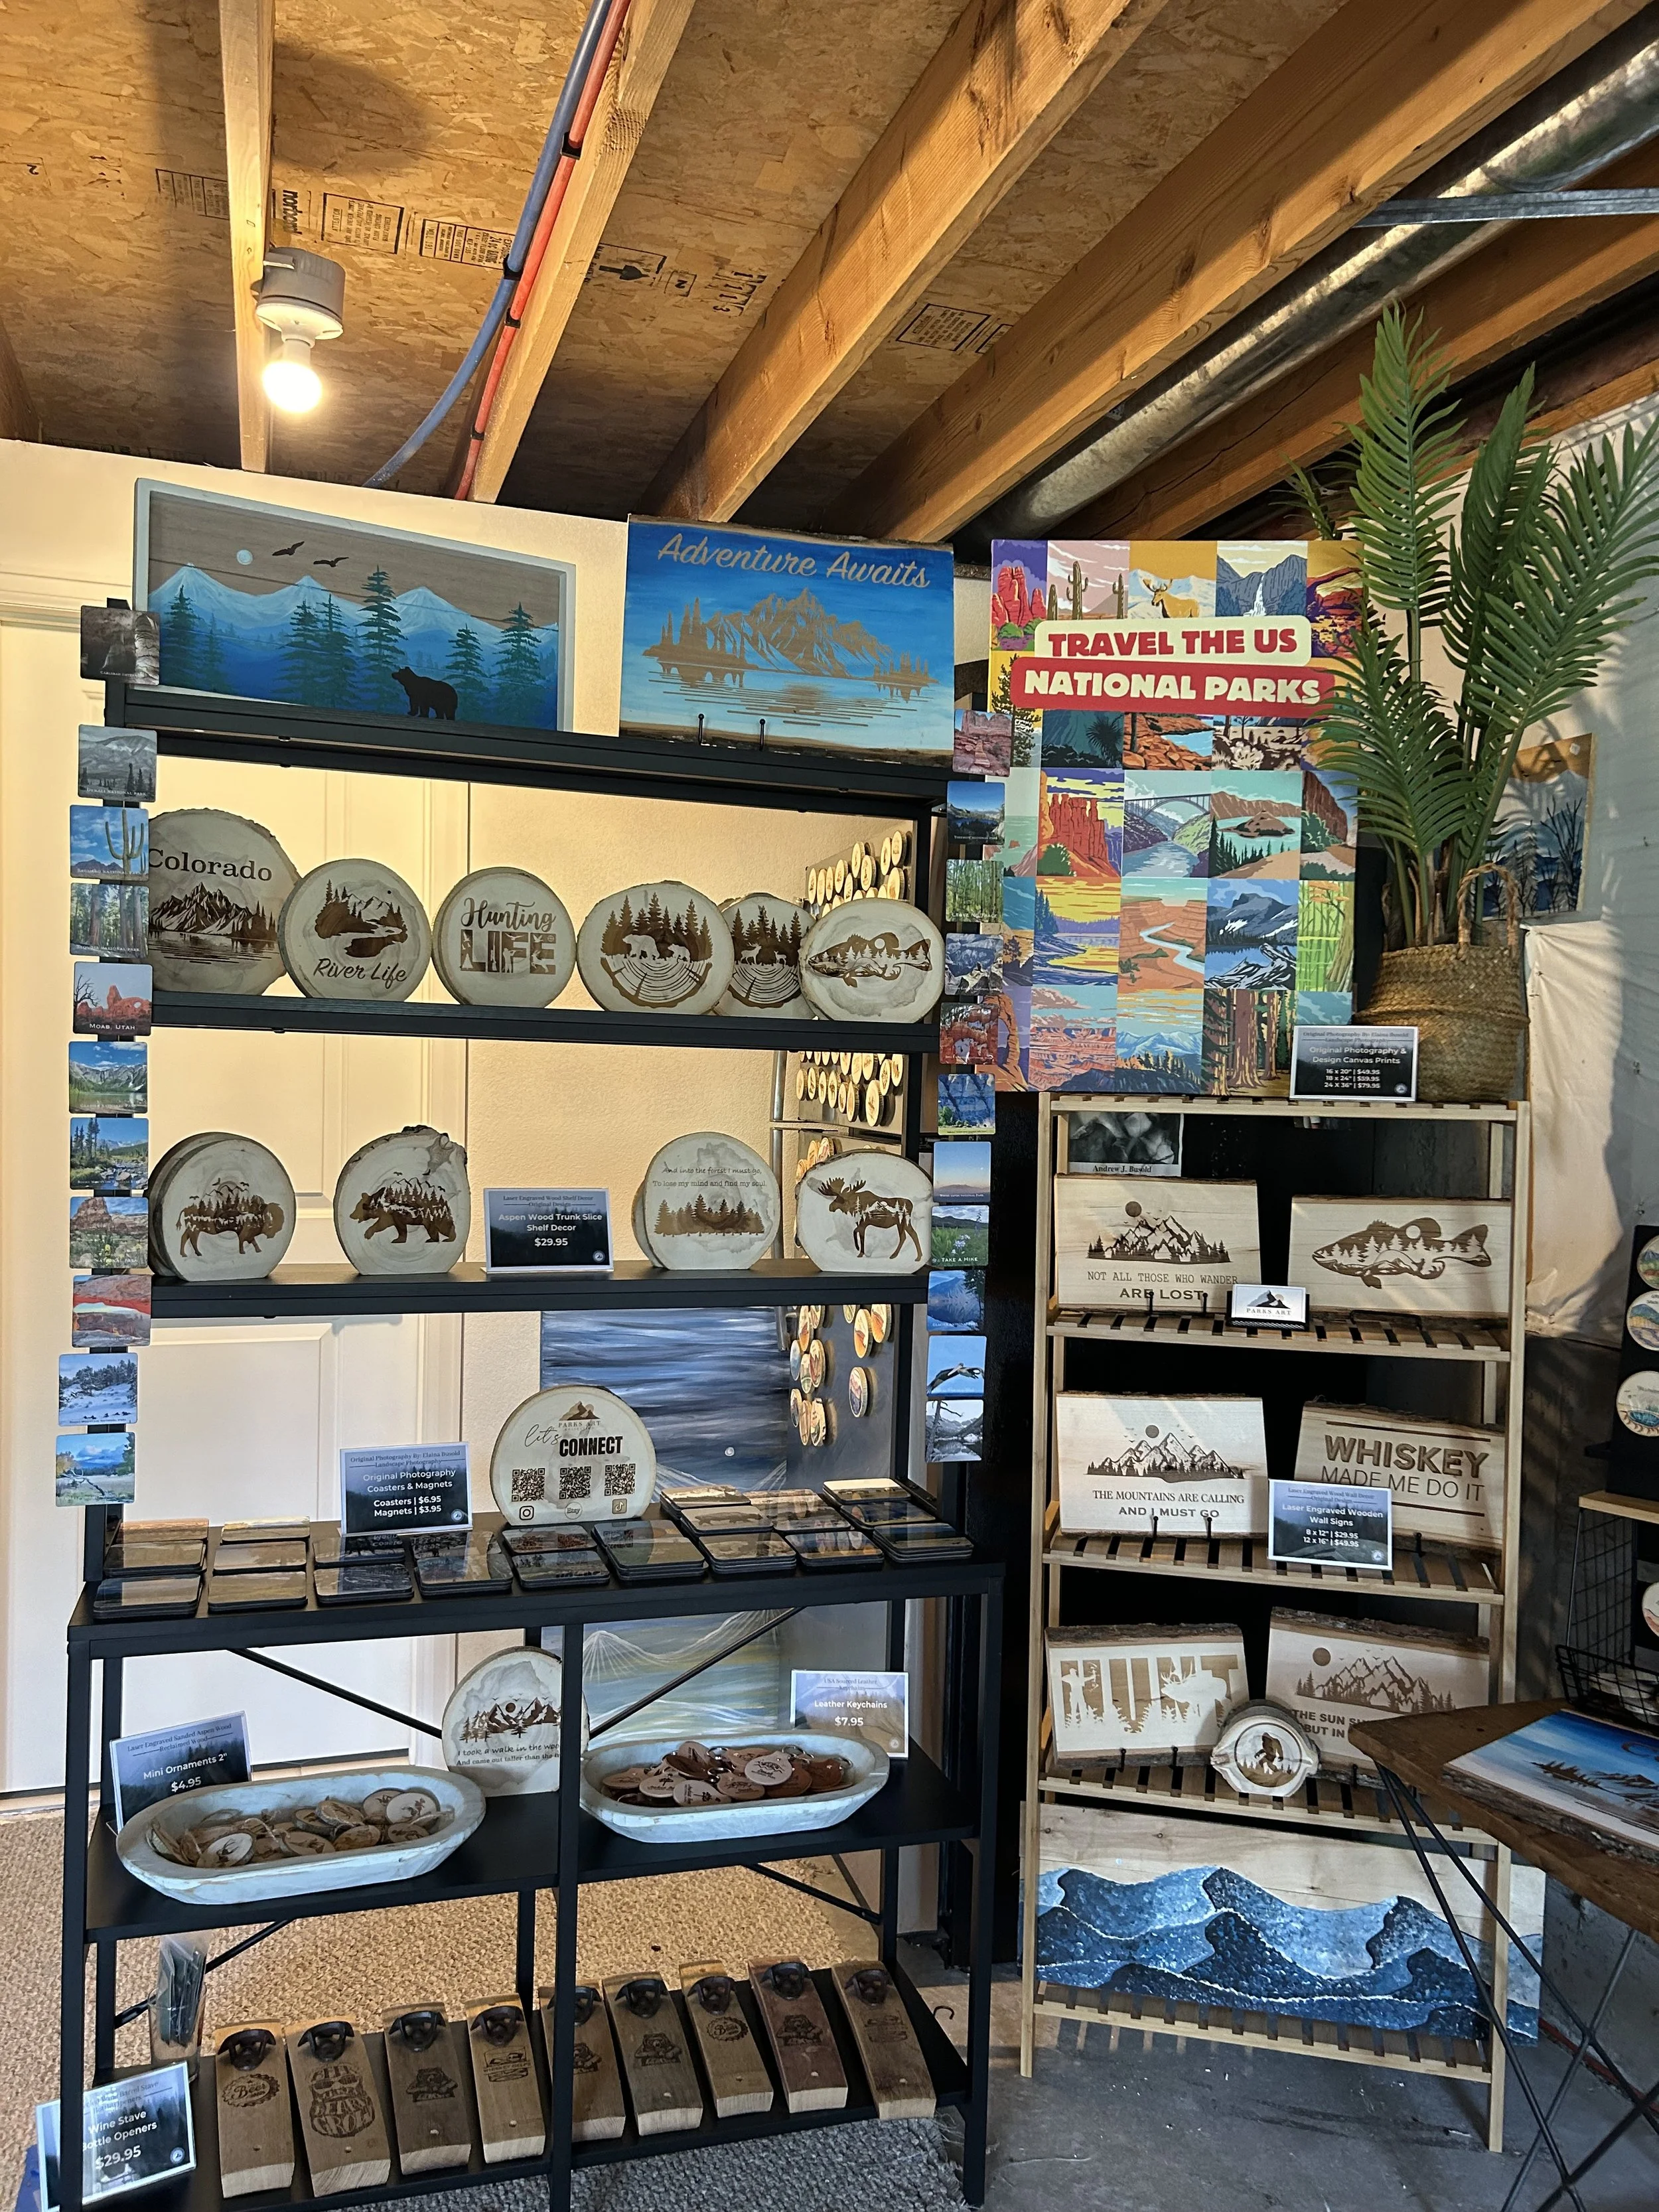
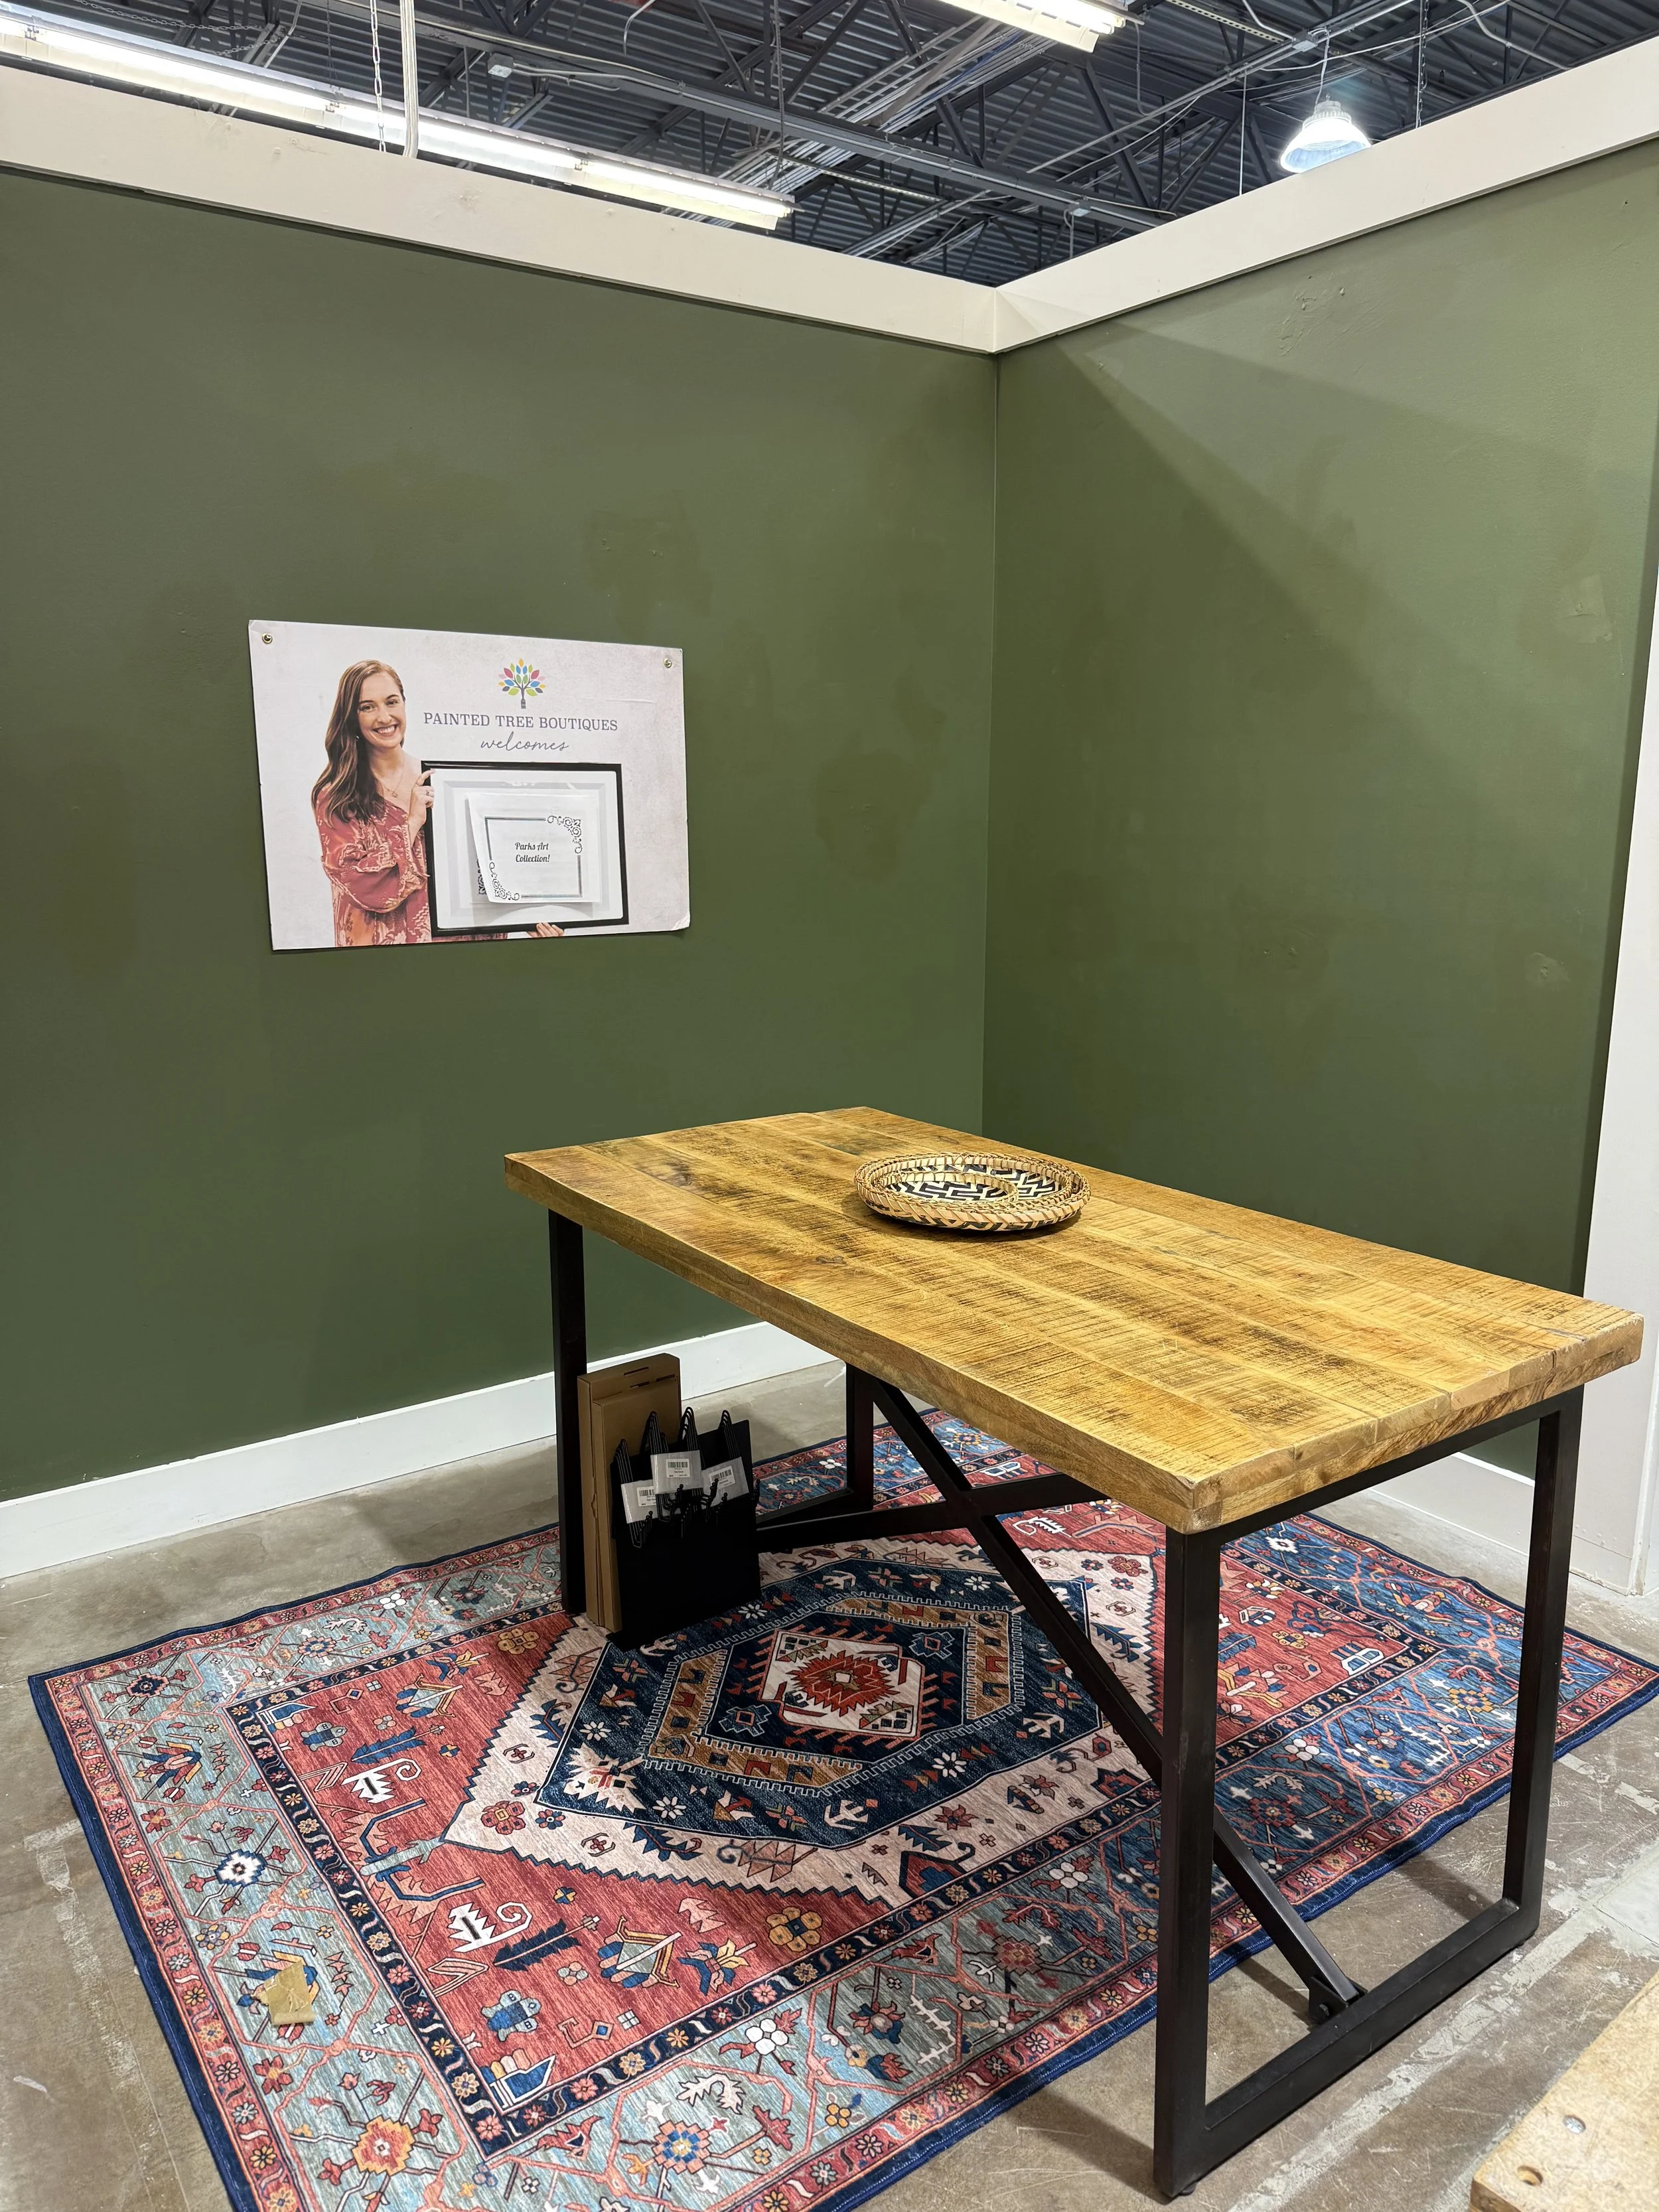
Here are some photos of the process from planning, the outside look, to the finished booth look. Feel free to message me with any questions!


Alaska Adventure: Seeing Lake Clark & Katmai National Parks
Finally made it to Katmai and Lake Clark. It wasn’t easy and it wasn’t cheap, but man, it was awesome.
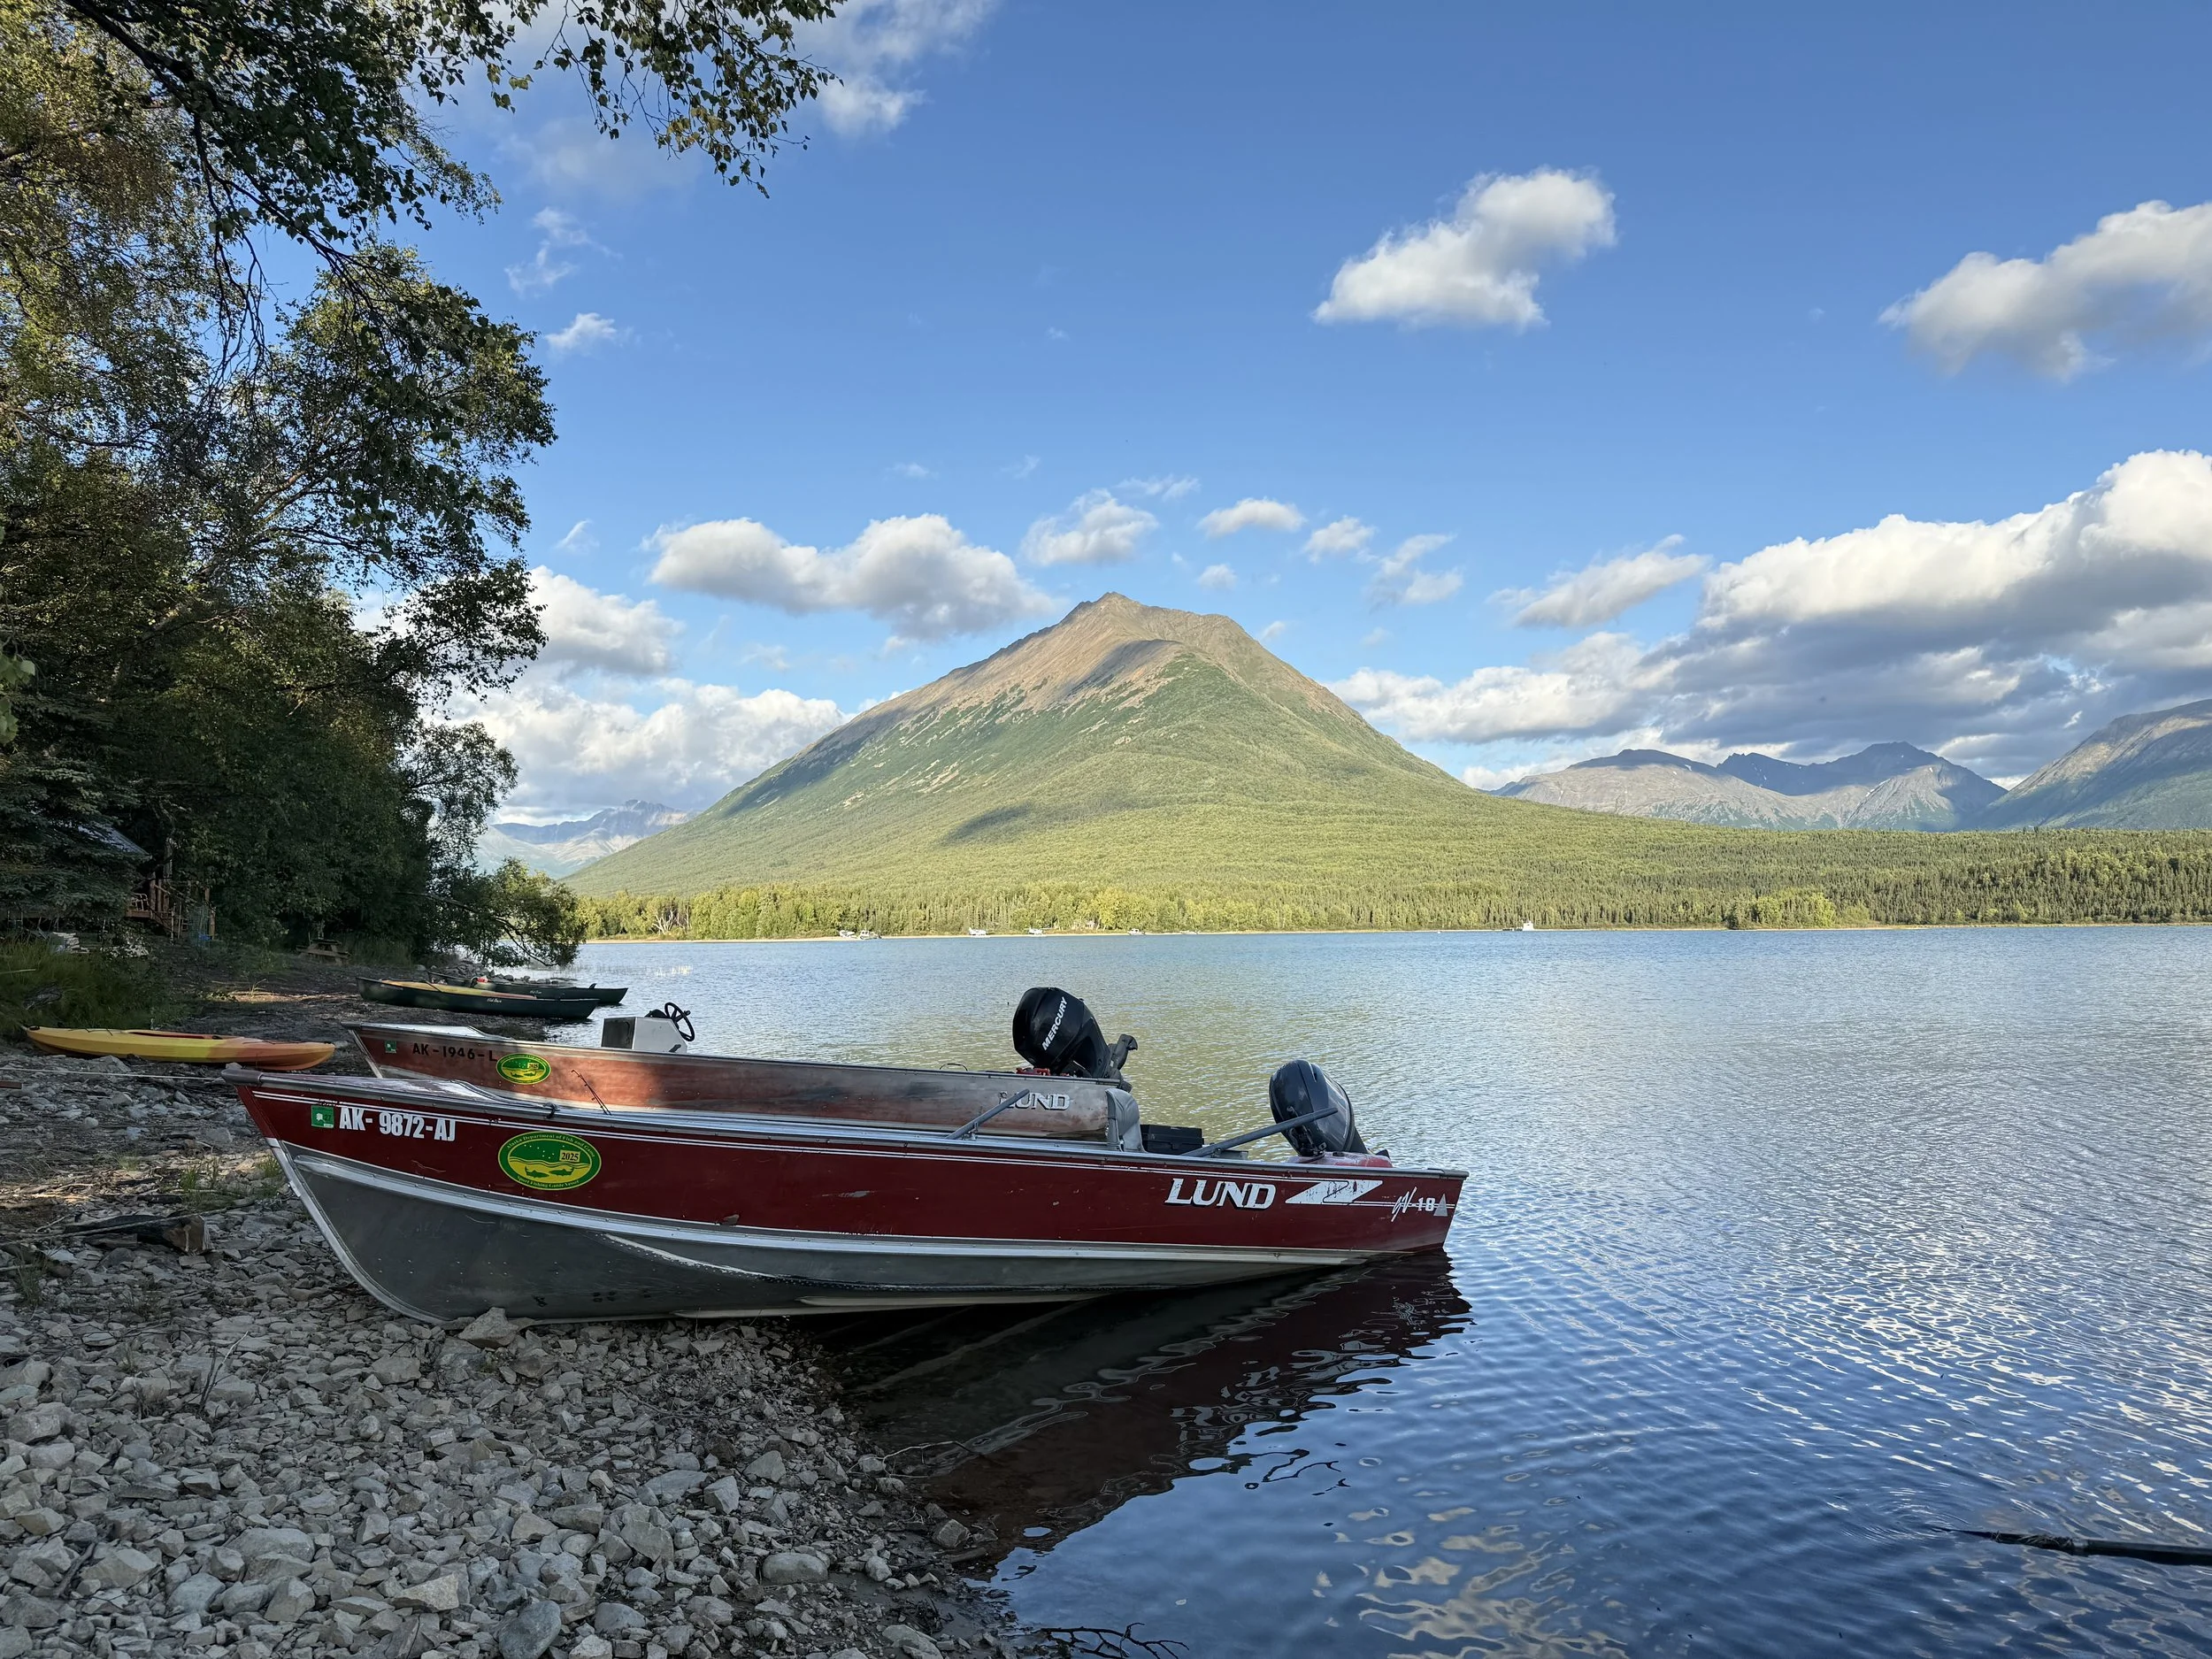
Days 1–3: Lake Clark National Park
After grabbing breakfast at Joy’s Corner and killing some time at Glenn Square and Bass Pro Shop, I checked in at Merrill Field for the start of my first big adventure—Lake Clark National Park.
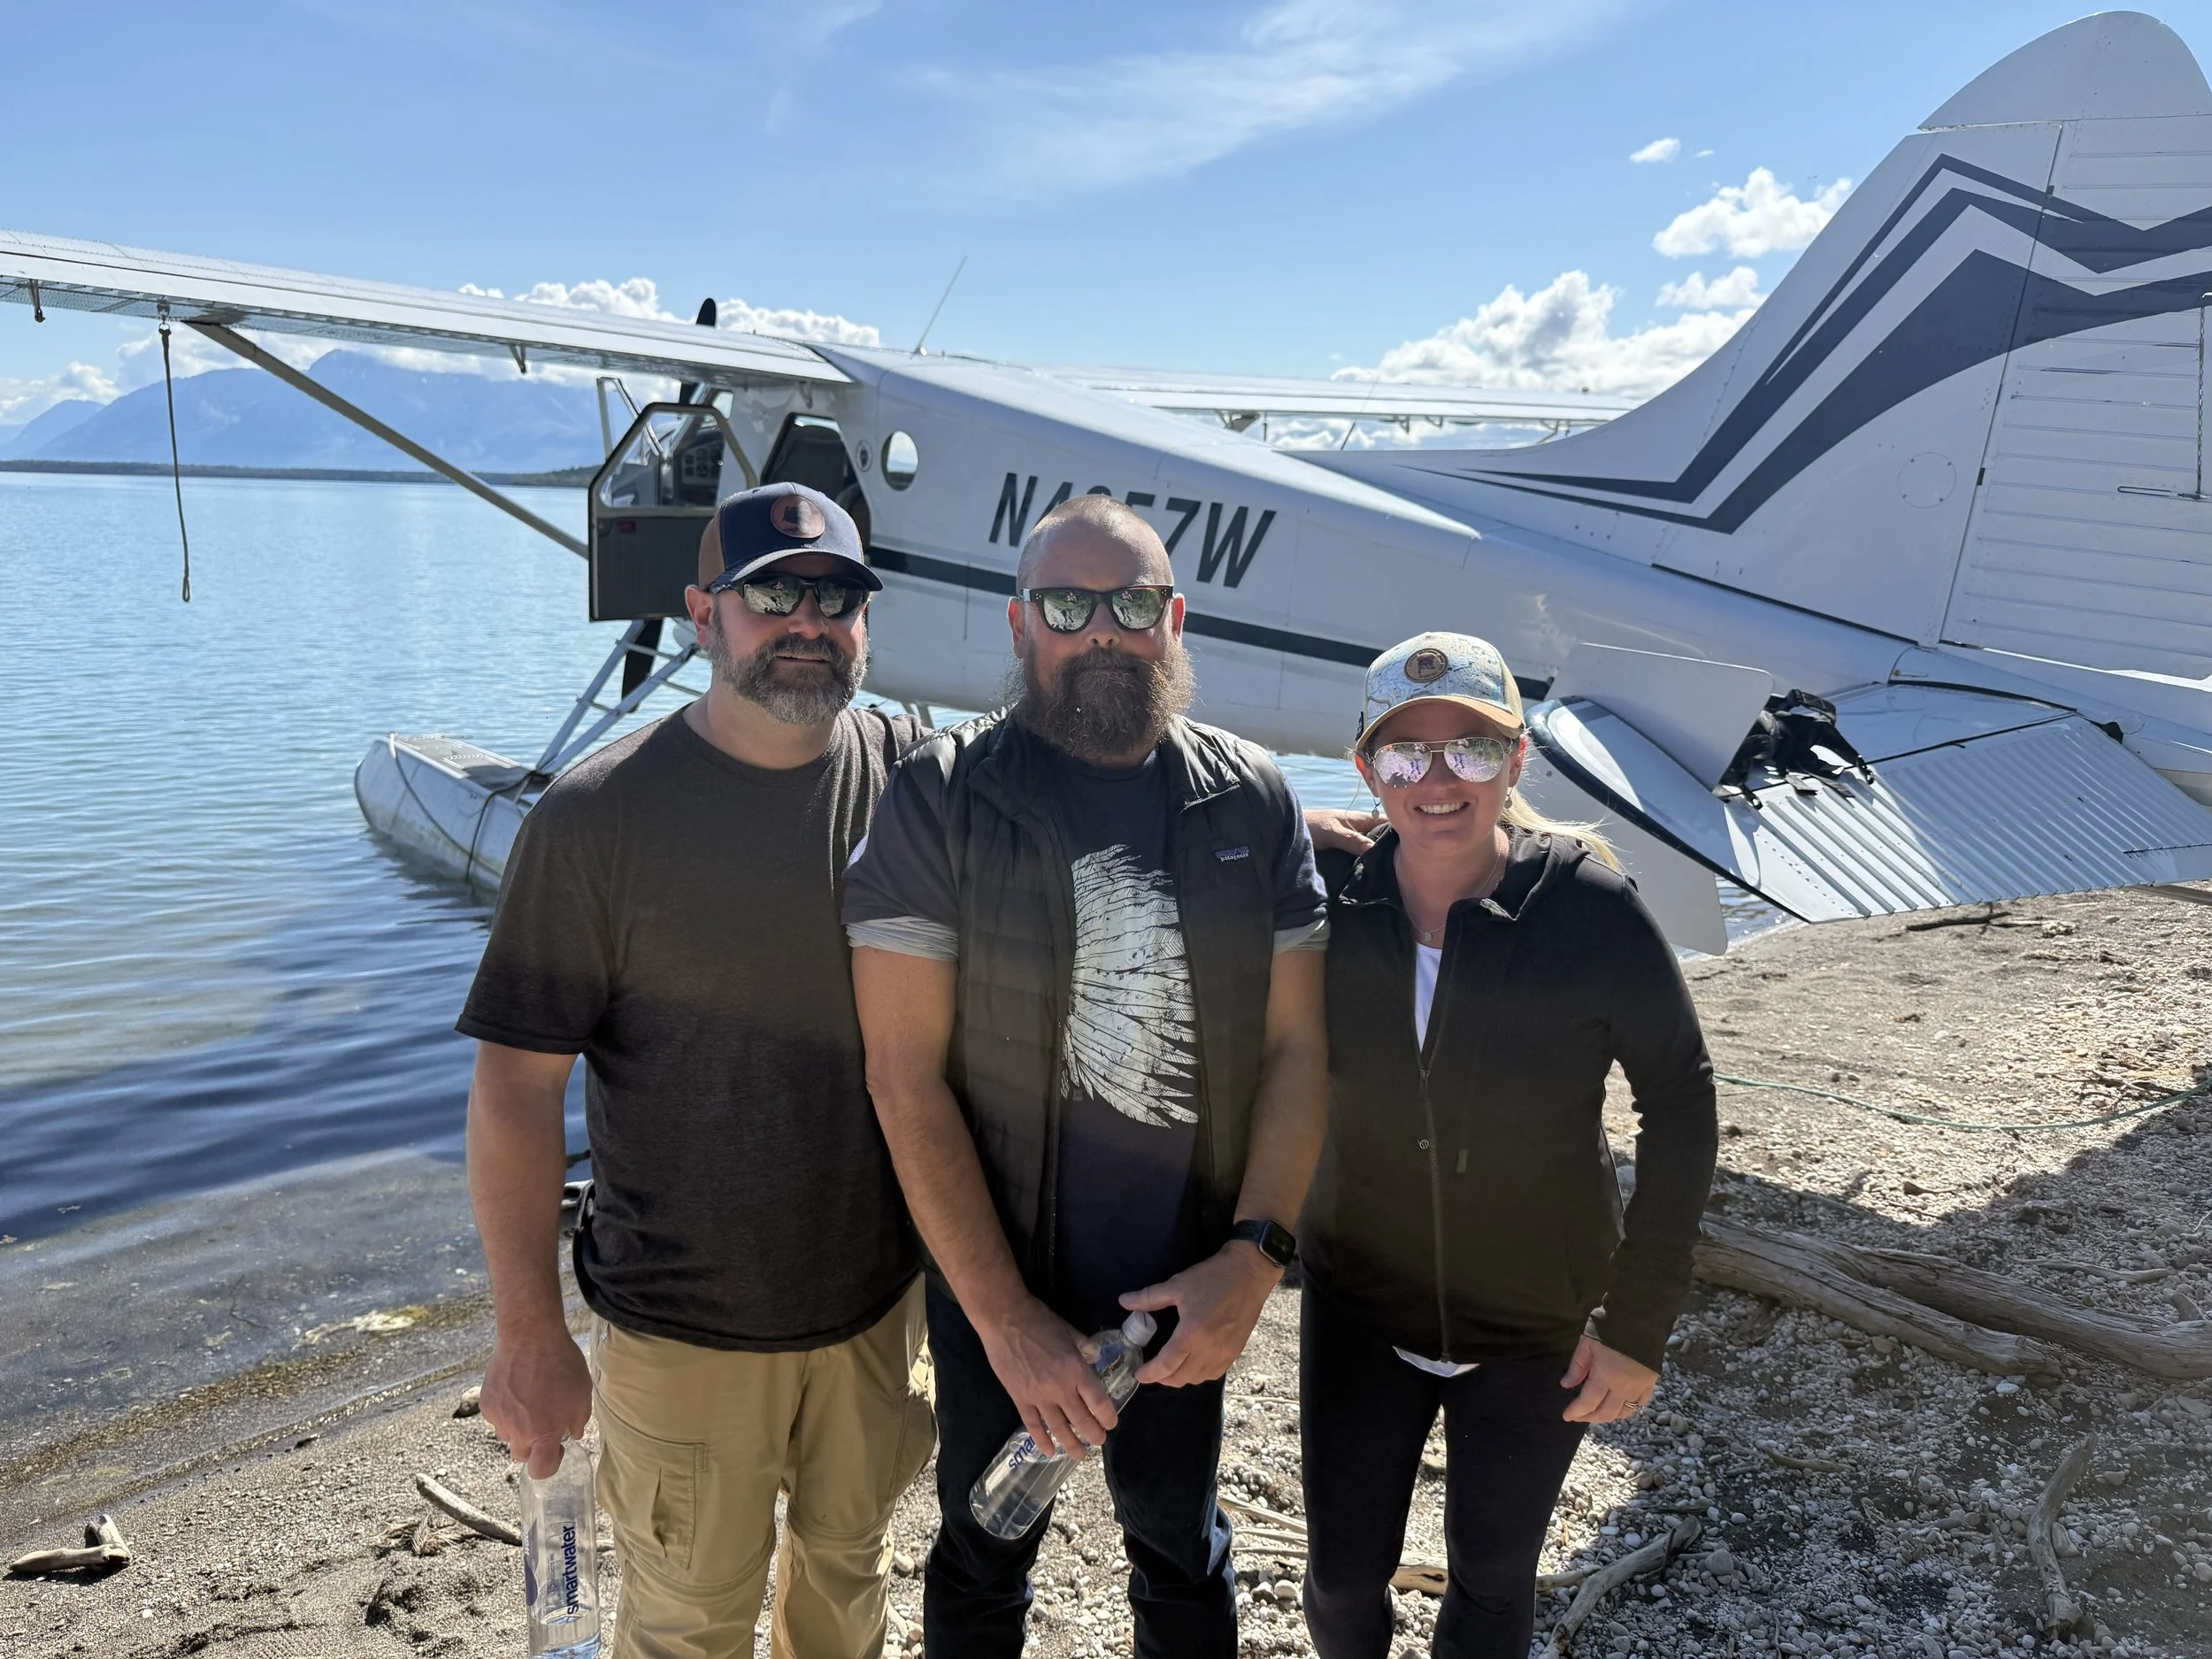
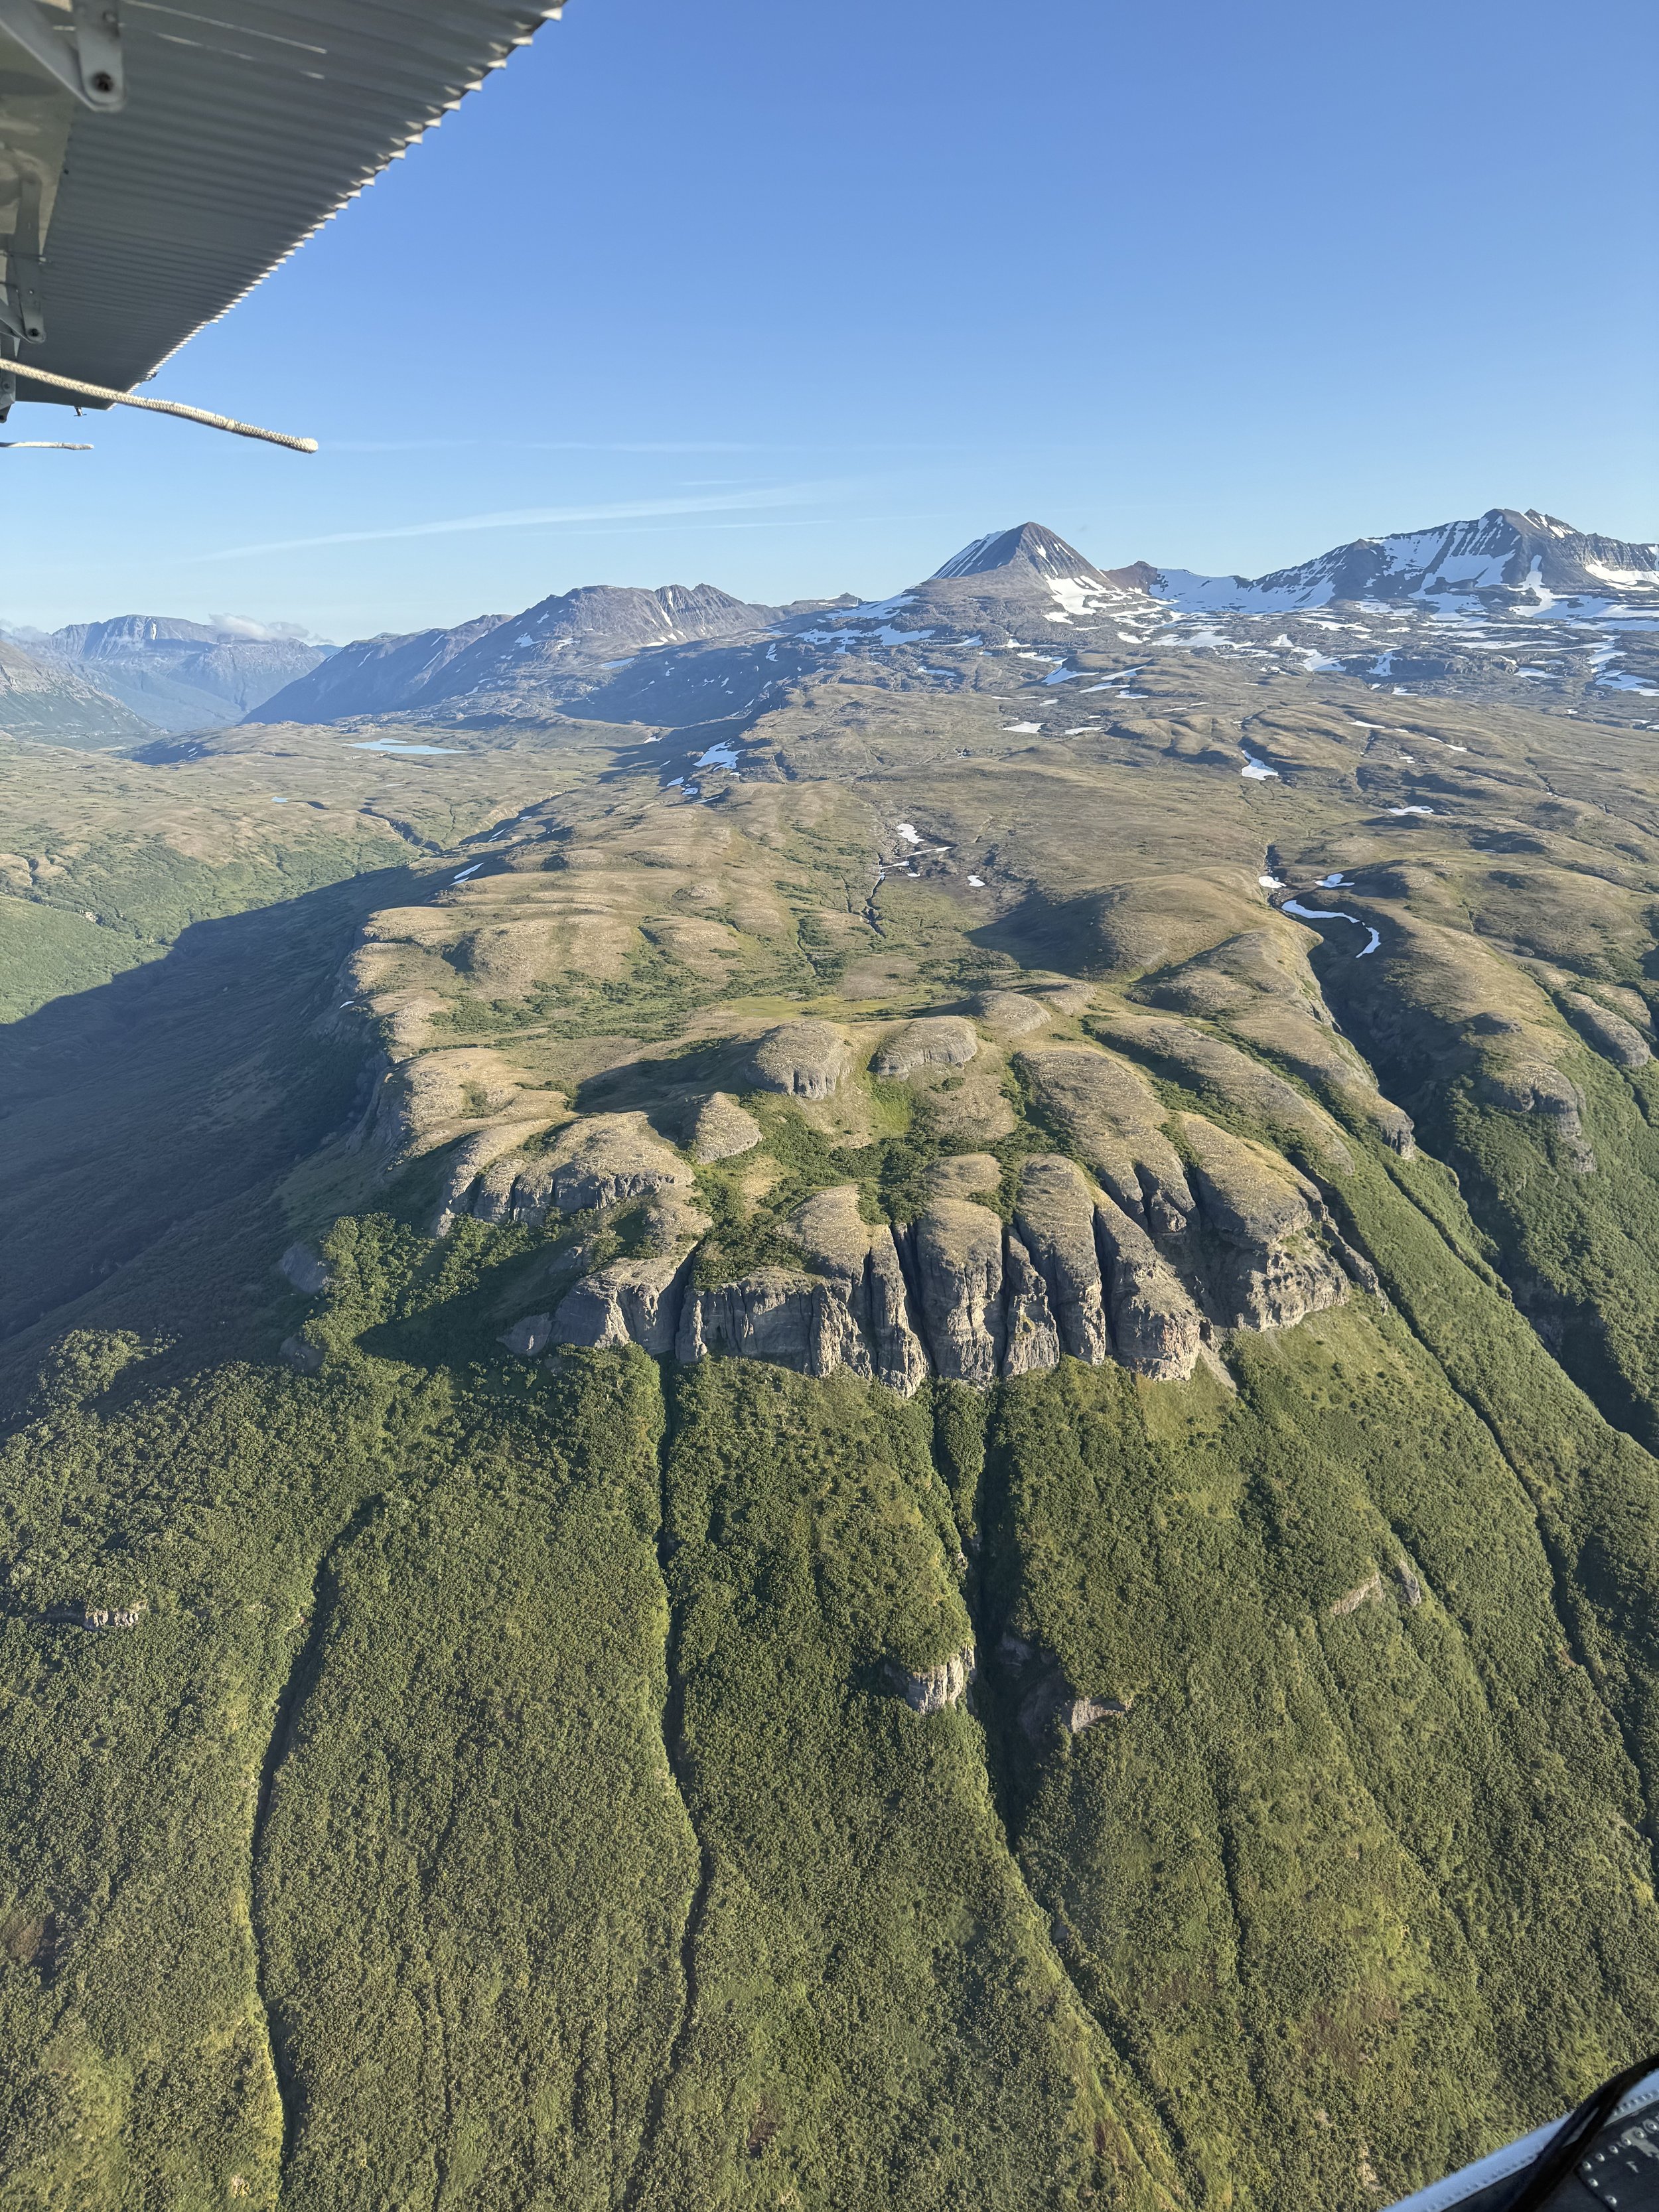
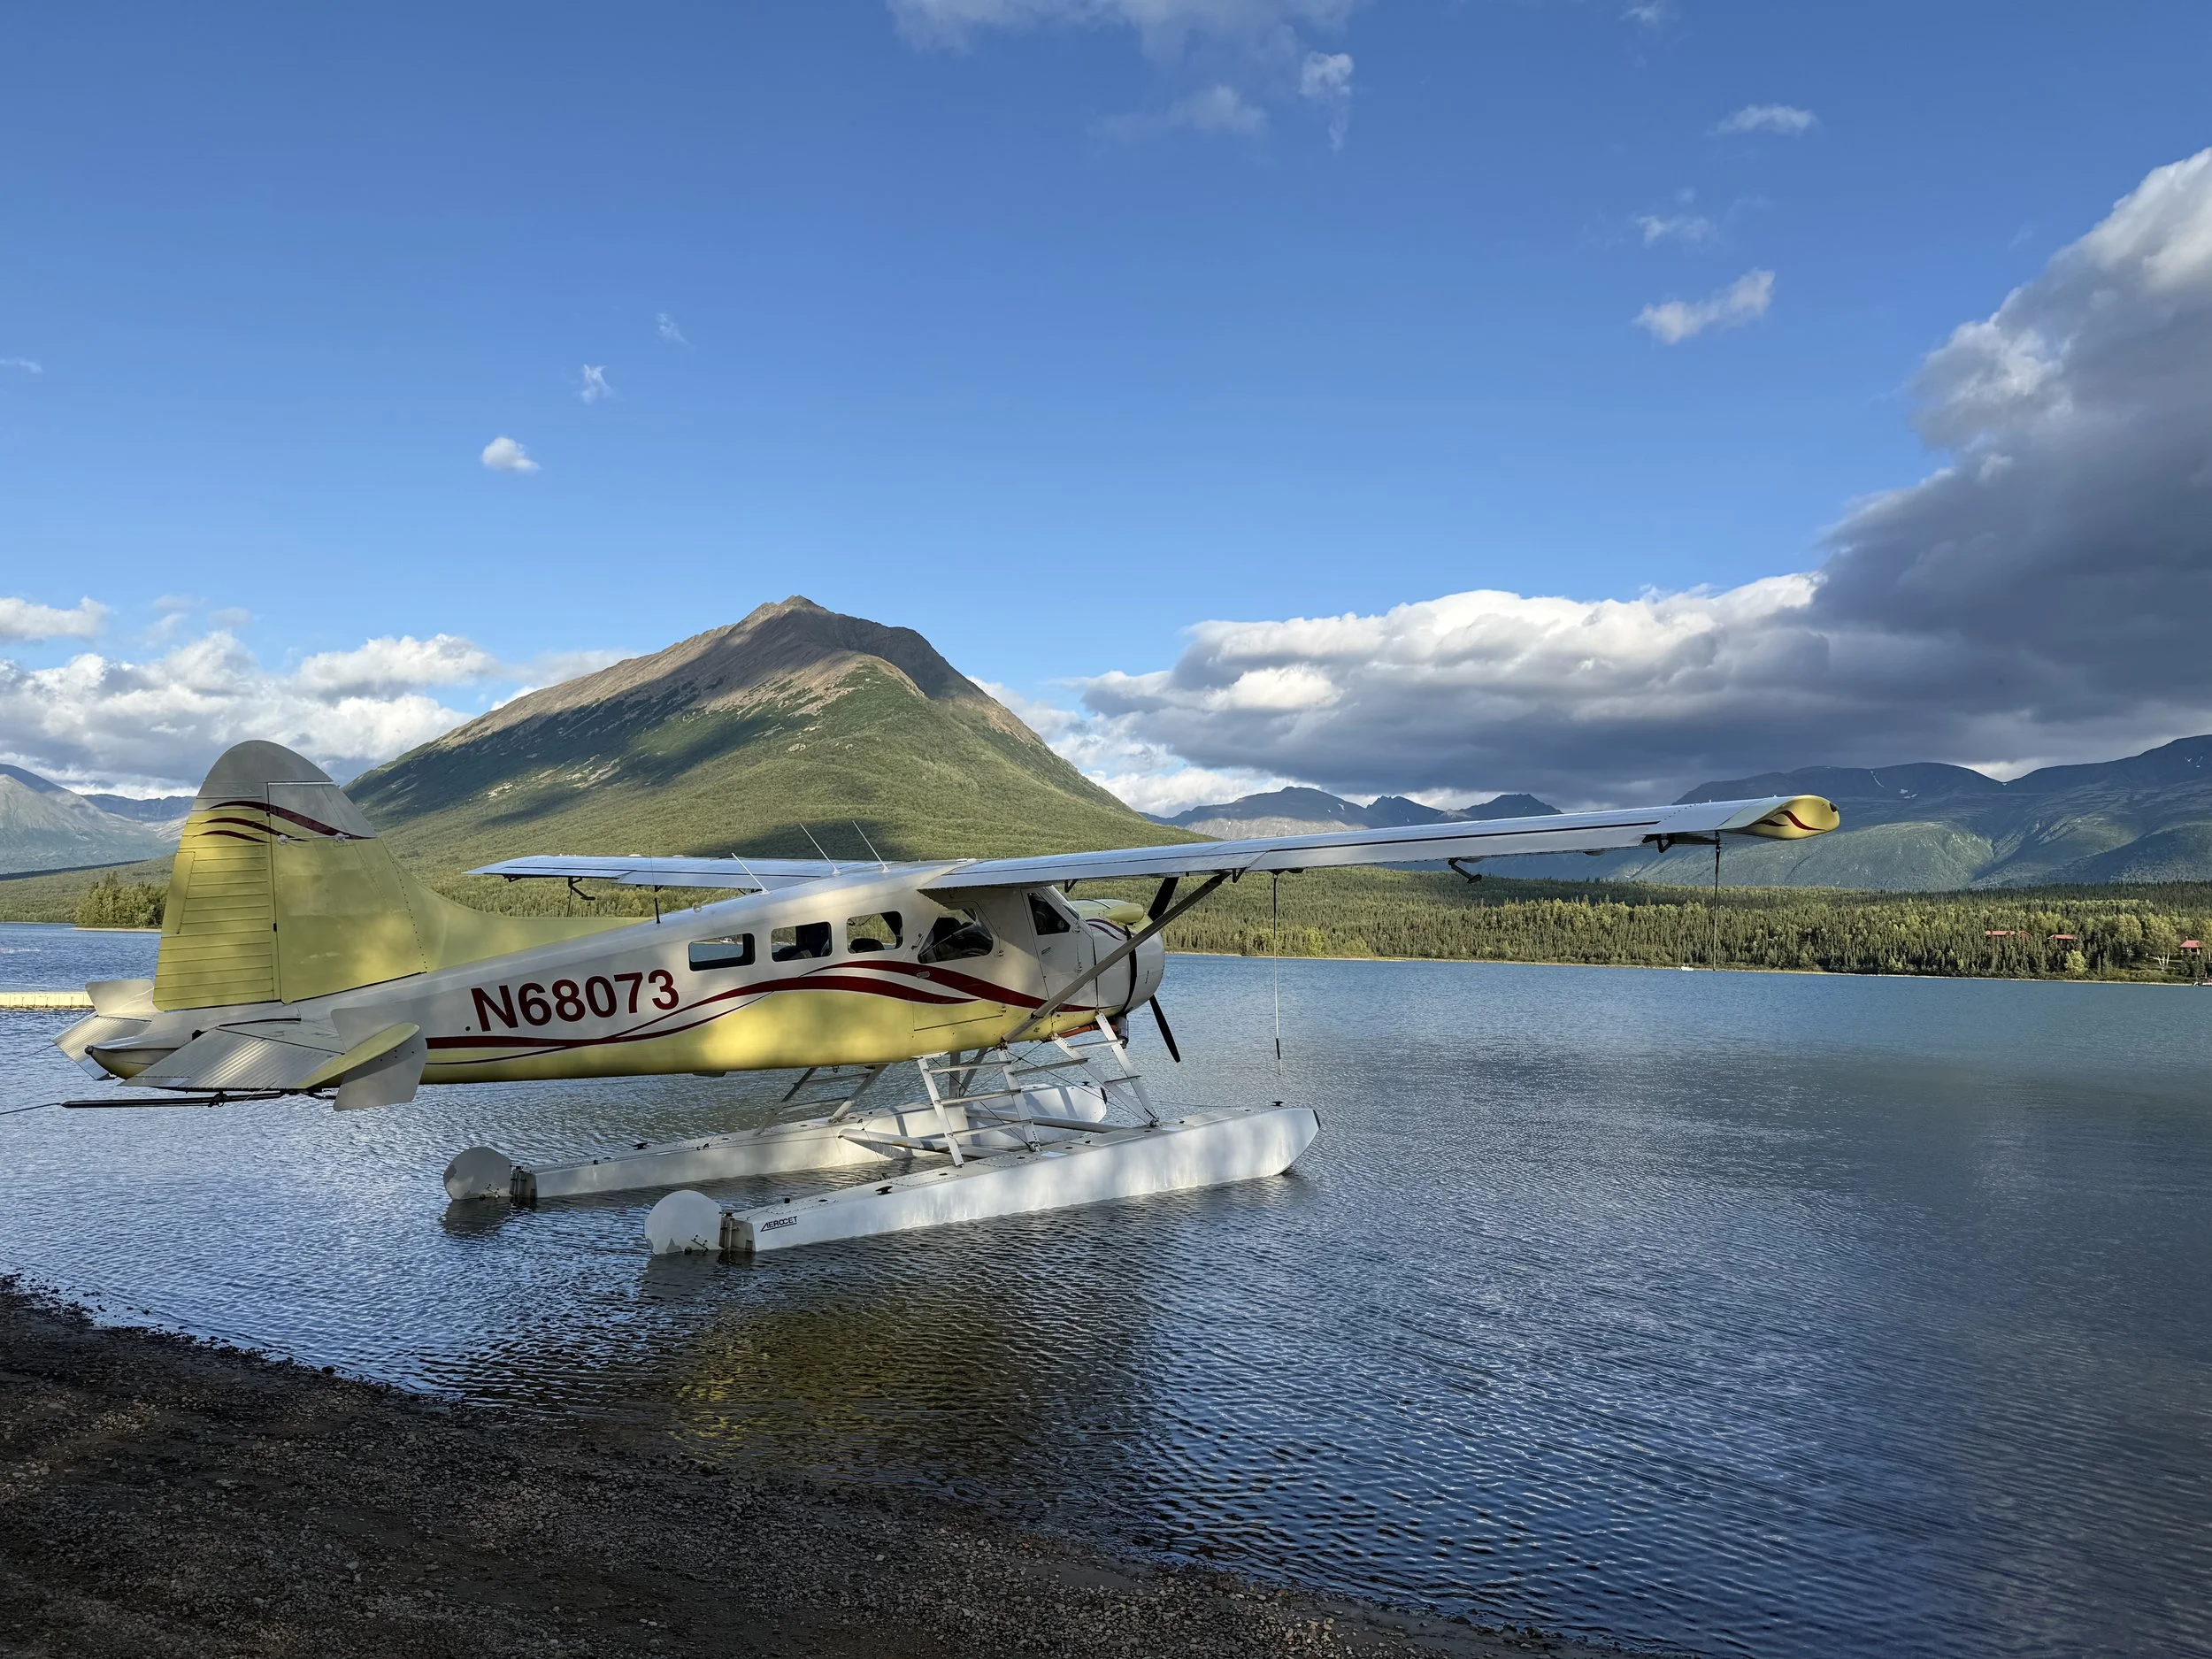
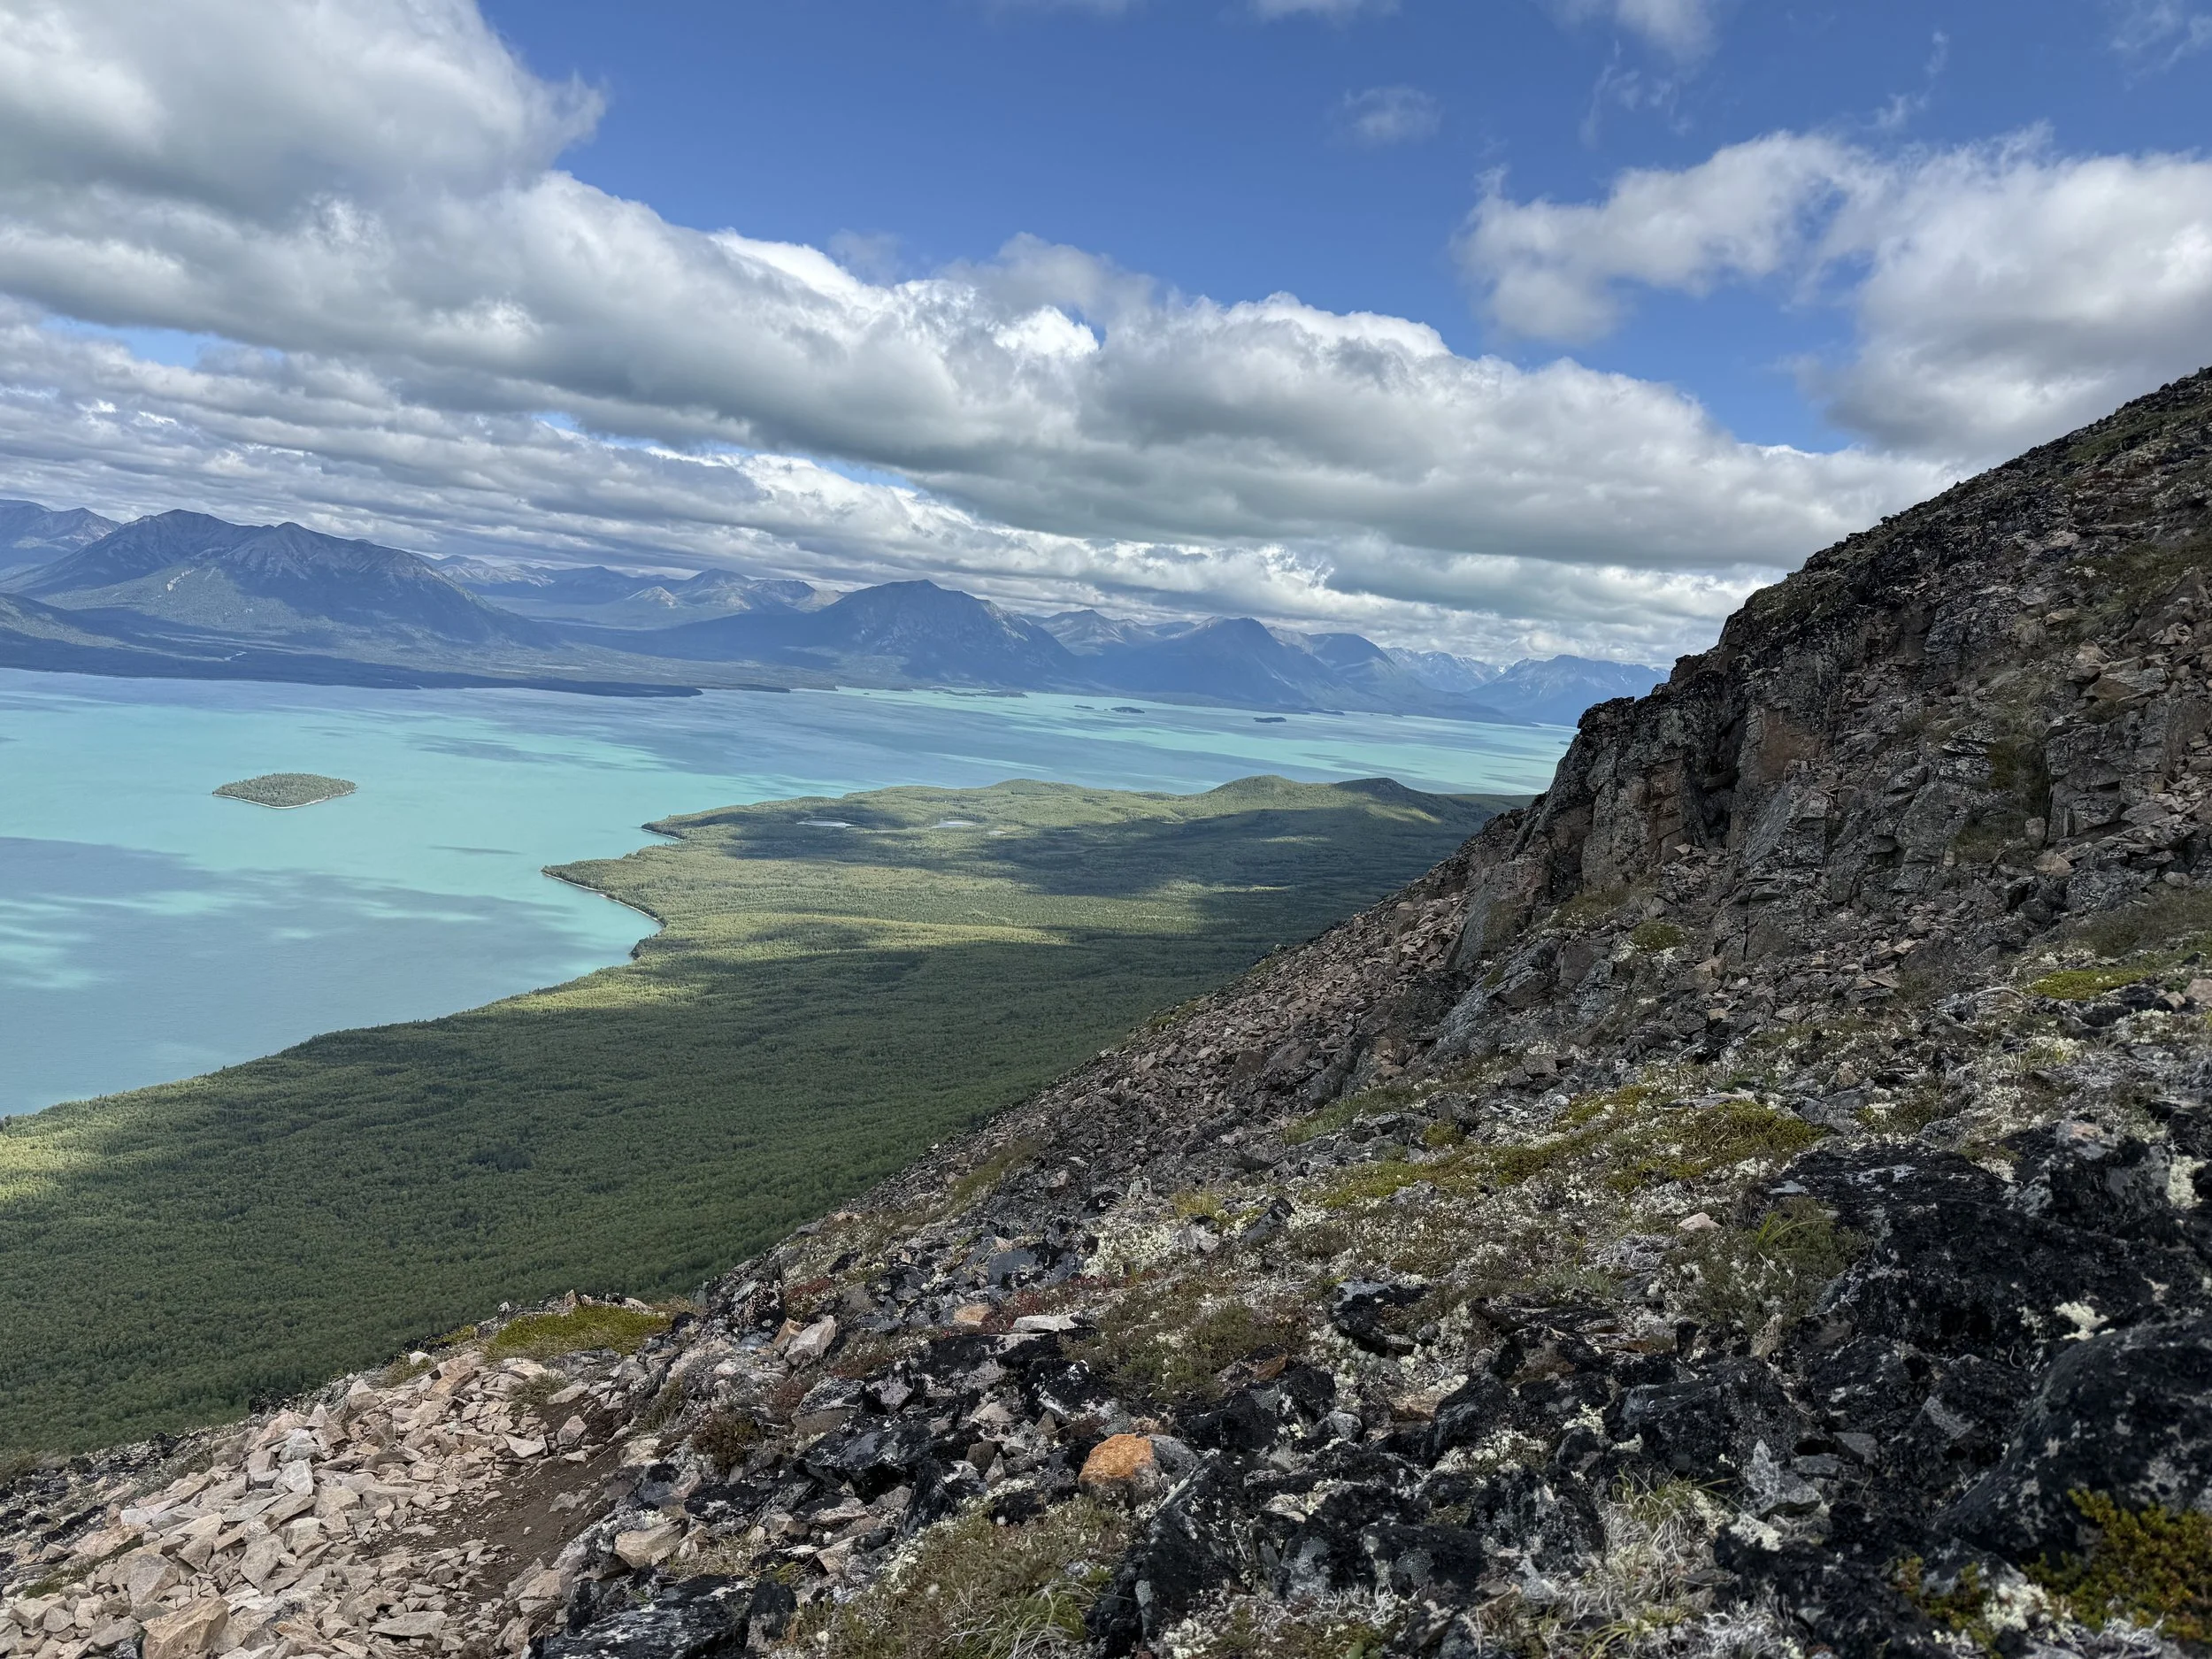
I flew with Lake Clark Air, and the entire experience was top-notch. Their pilots were skilled, professional, and friendly—5 stars all the way. The scenic flight over glaciers, rivers, and rugged peaks before landing on the turquoise waters of Lake Clark was unforgettable. This was the scariest flight of my life. See the video below to check out the turbulence!
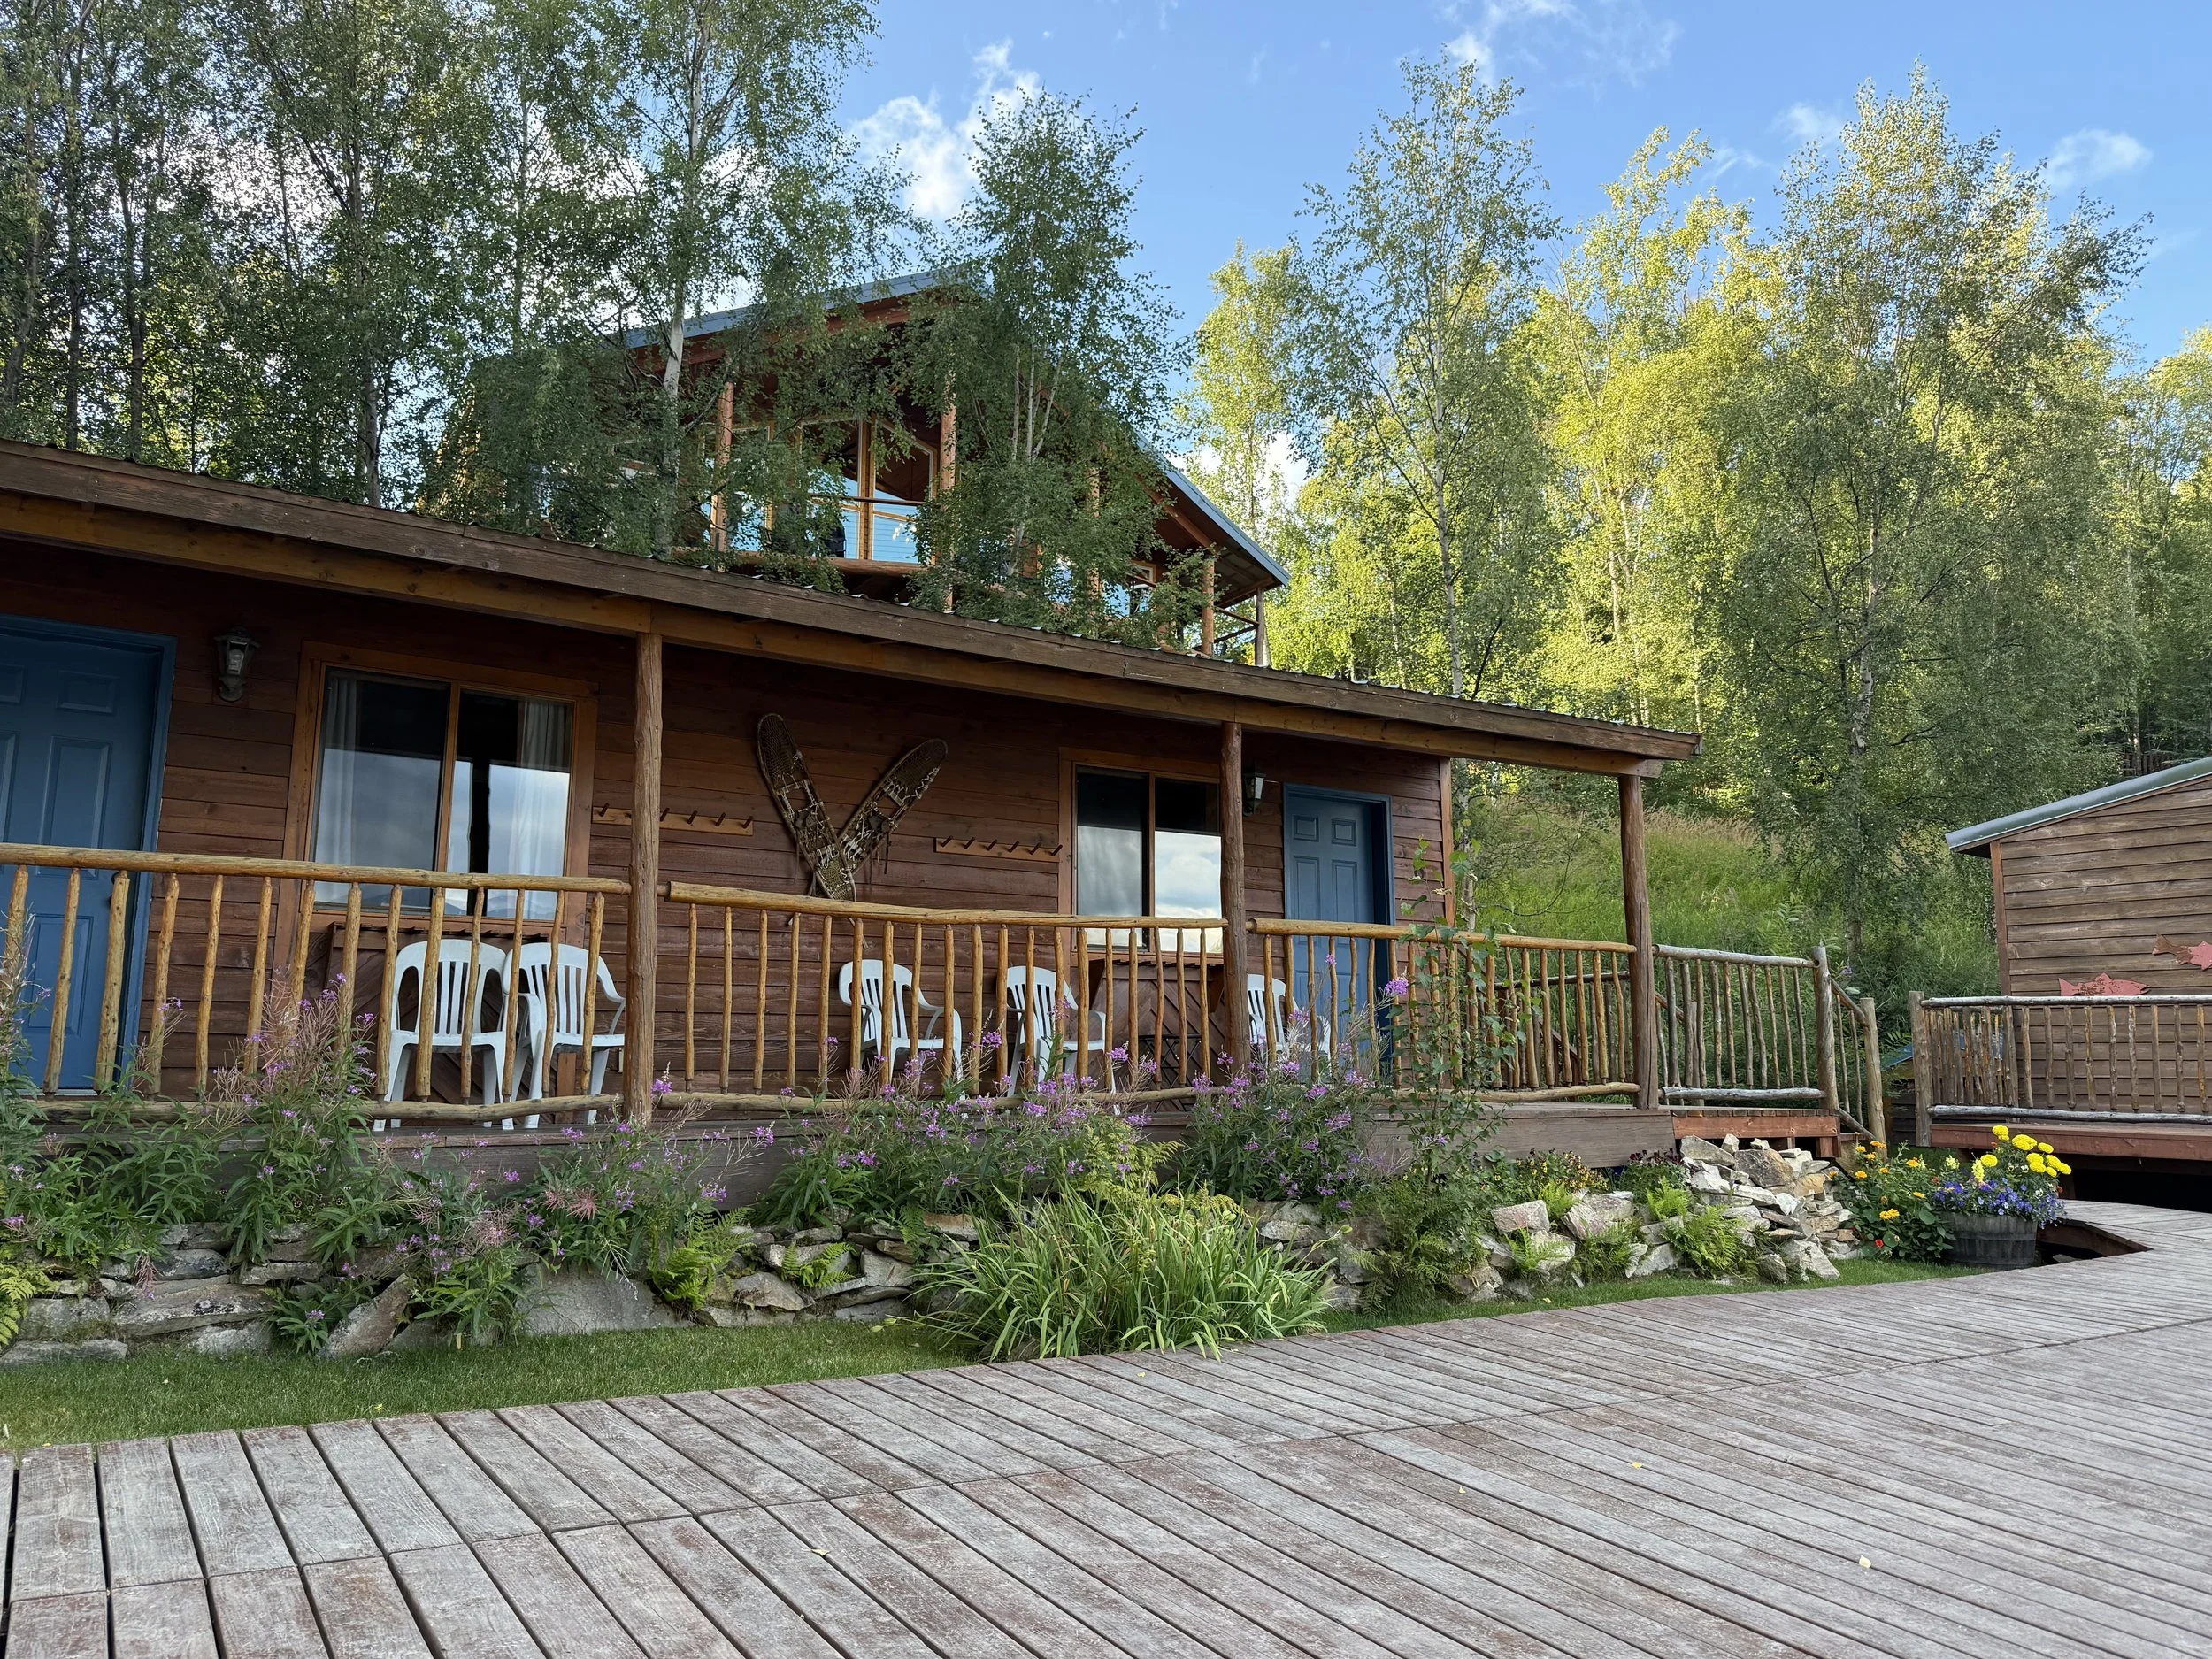
My stay at Lake Clark Resort (The Farm Lodge) felt like a true Alaskan retreat, complete with cozy rooms and home-cooked meals. Waking up to crisp mountain air and lake views was the perfect way to start each day. You could rent the kayaks for free and they had bear spray, hiking poles, and a coffee shop in this small town of about 250. The staff was super friendly, most of them being there for the summer, away from college. Bring plenty of tip money for them as well! They deserve it. The meals were honestly great and the cost was well worth what we paid.
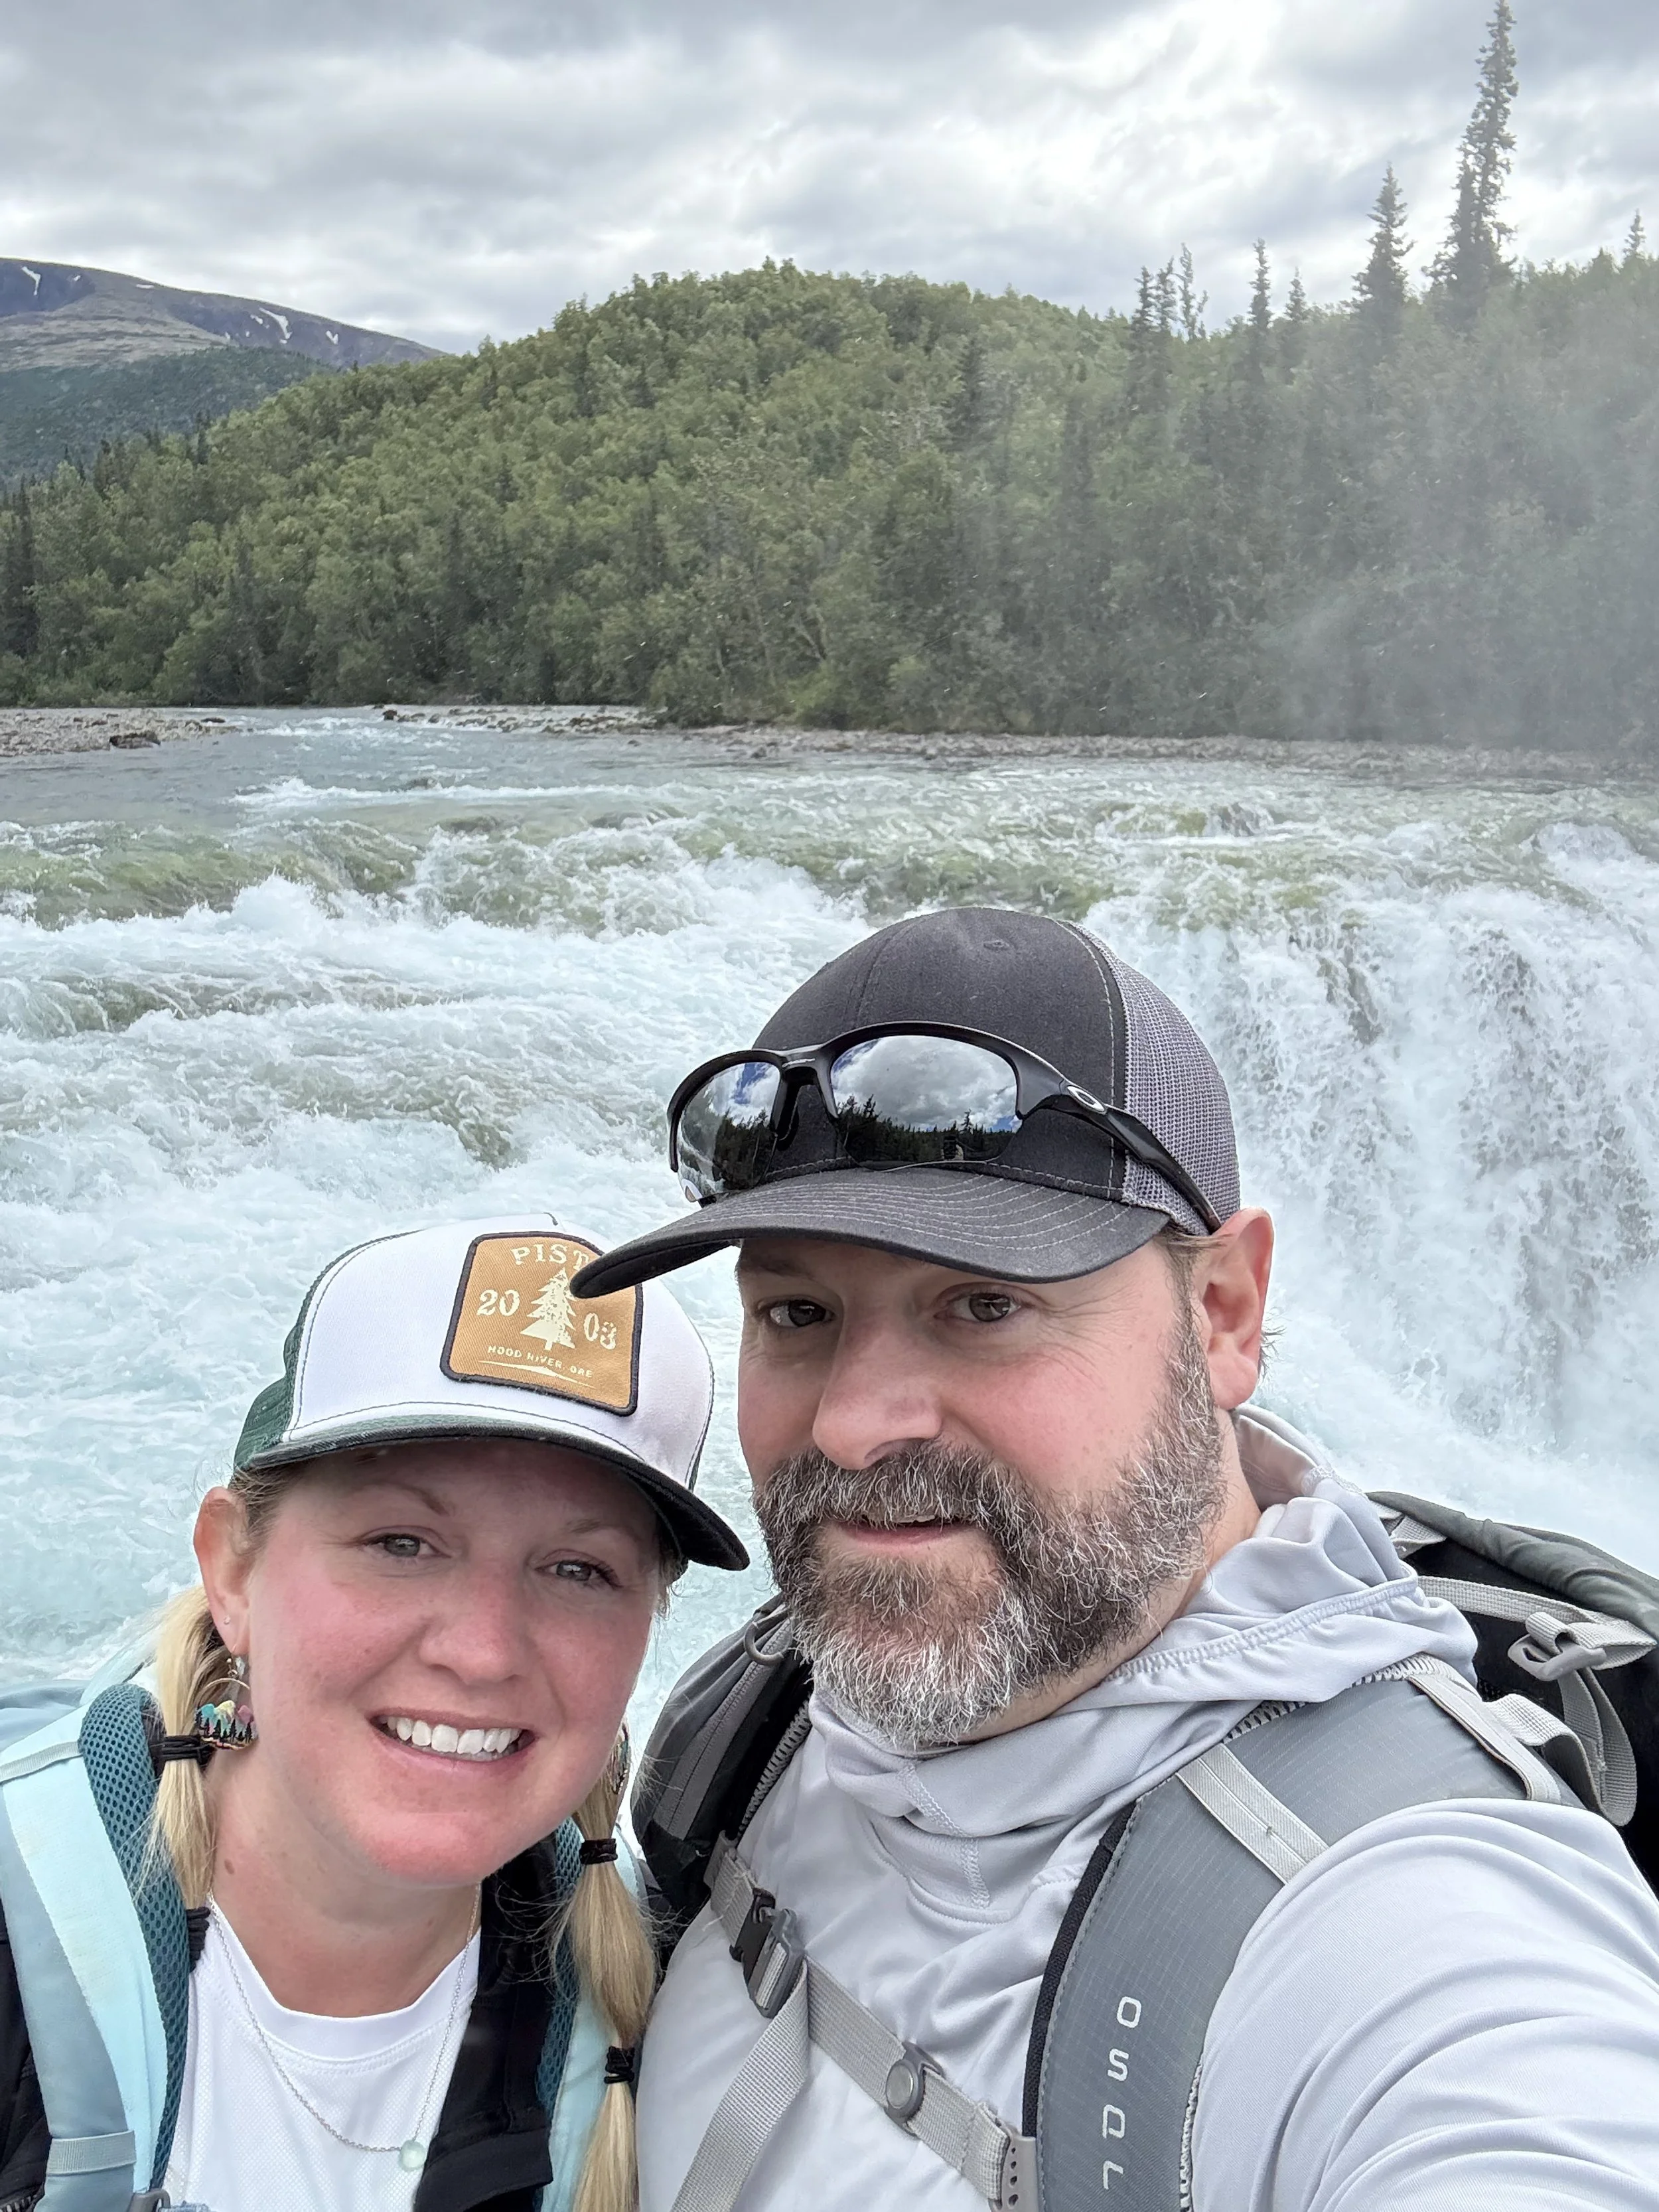
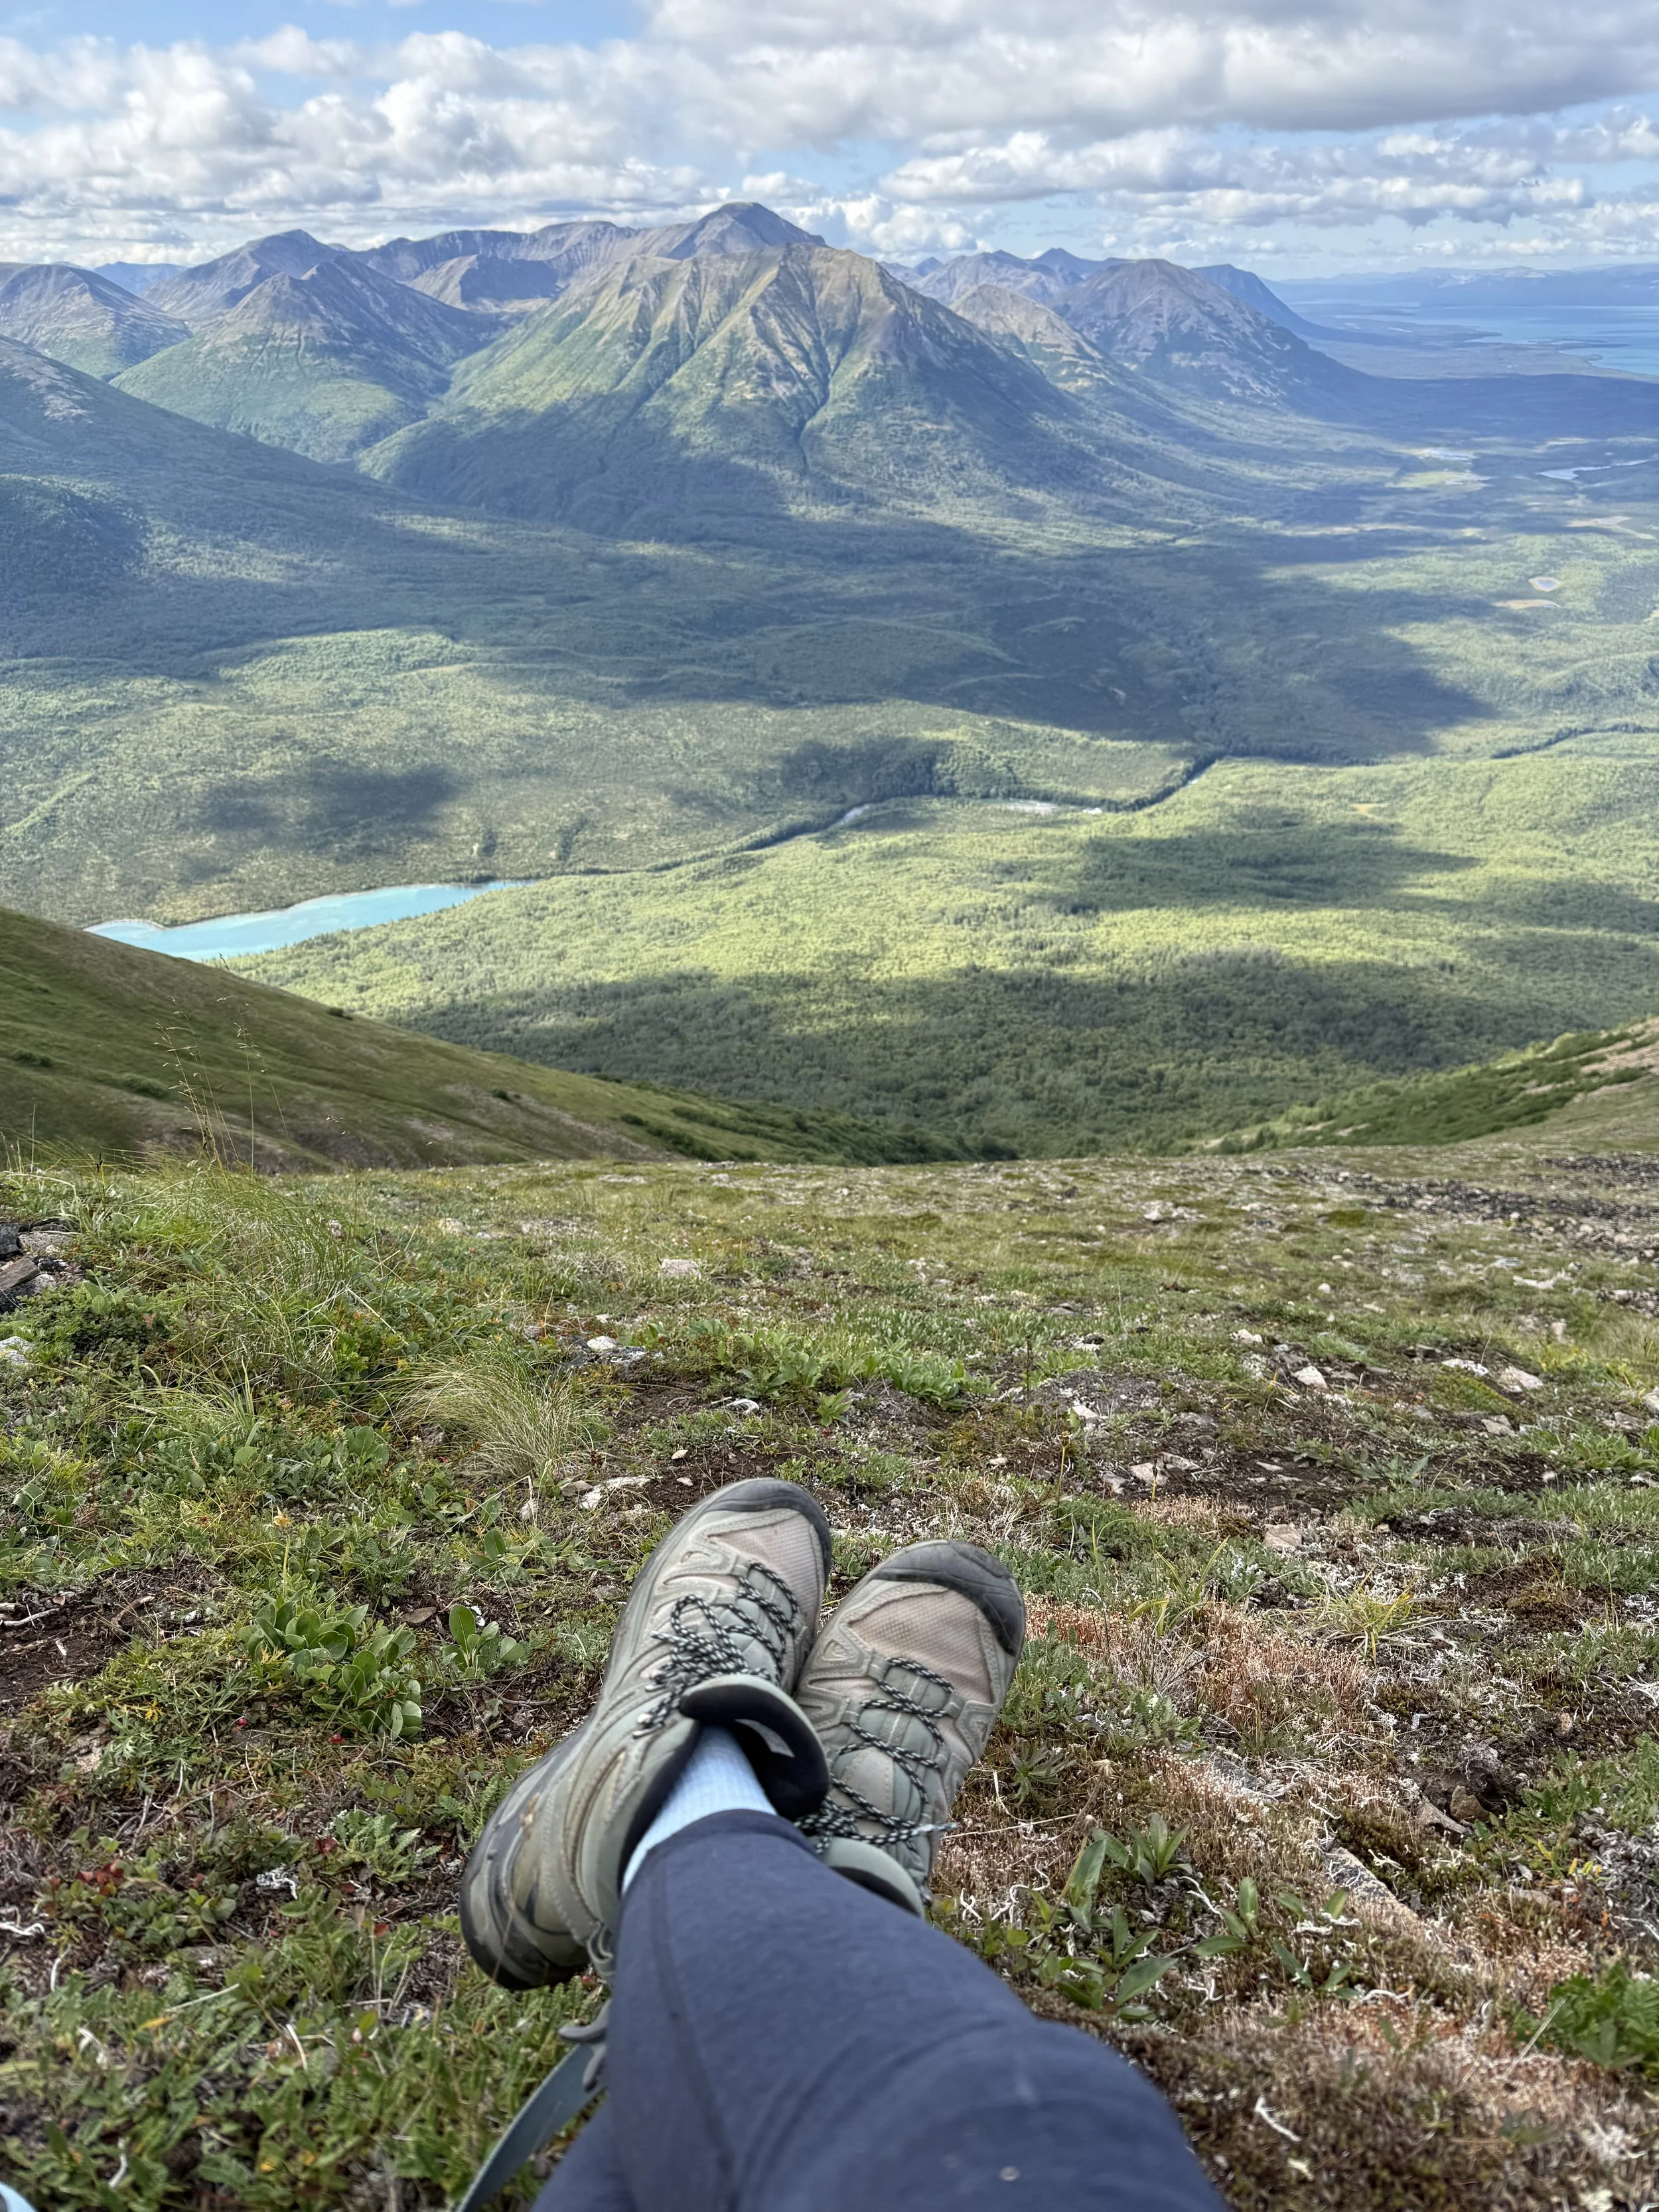
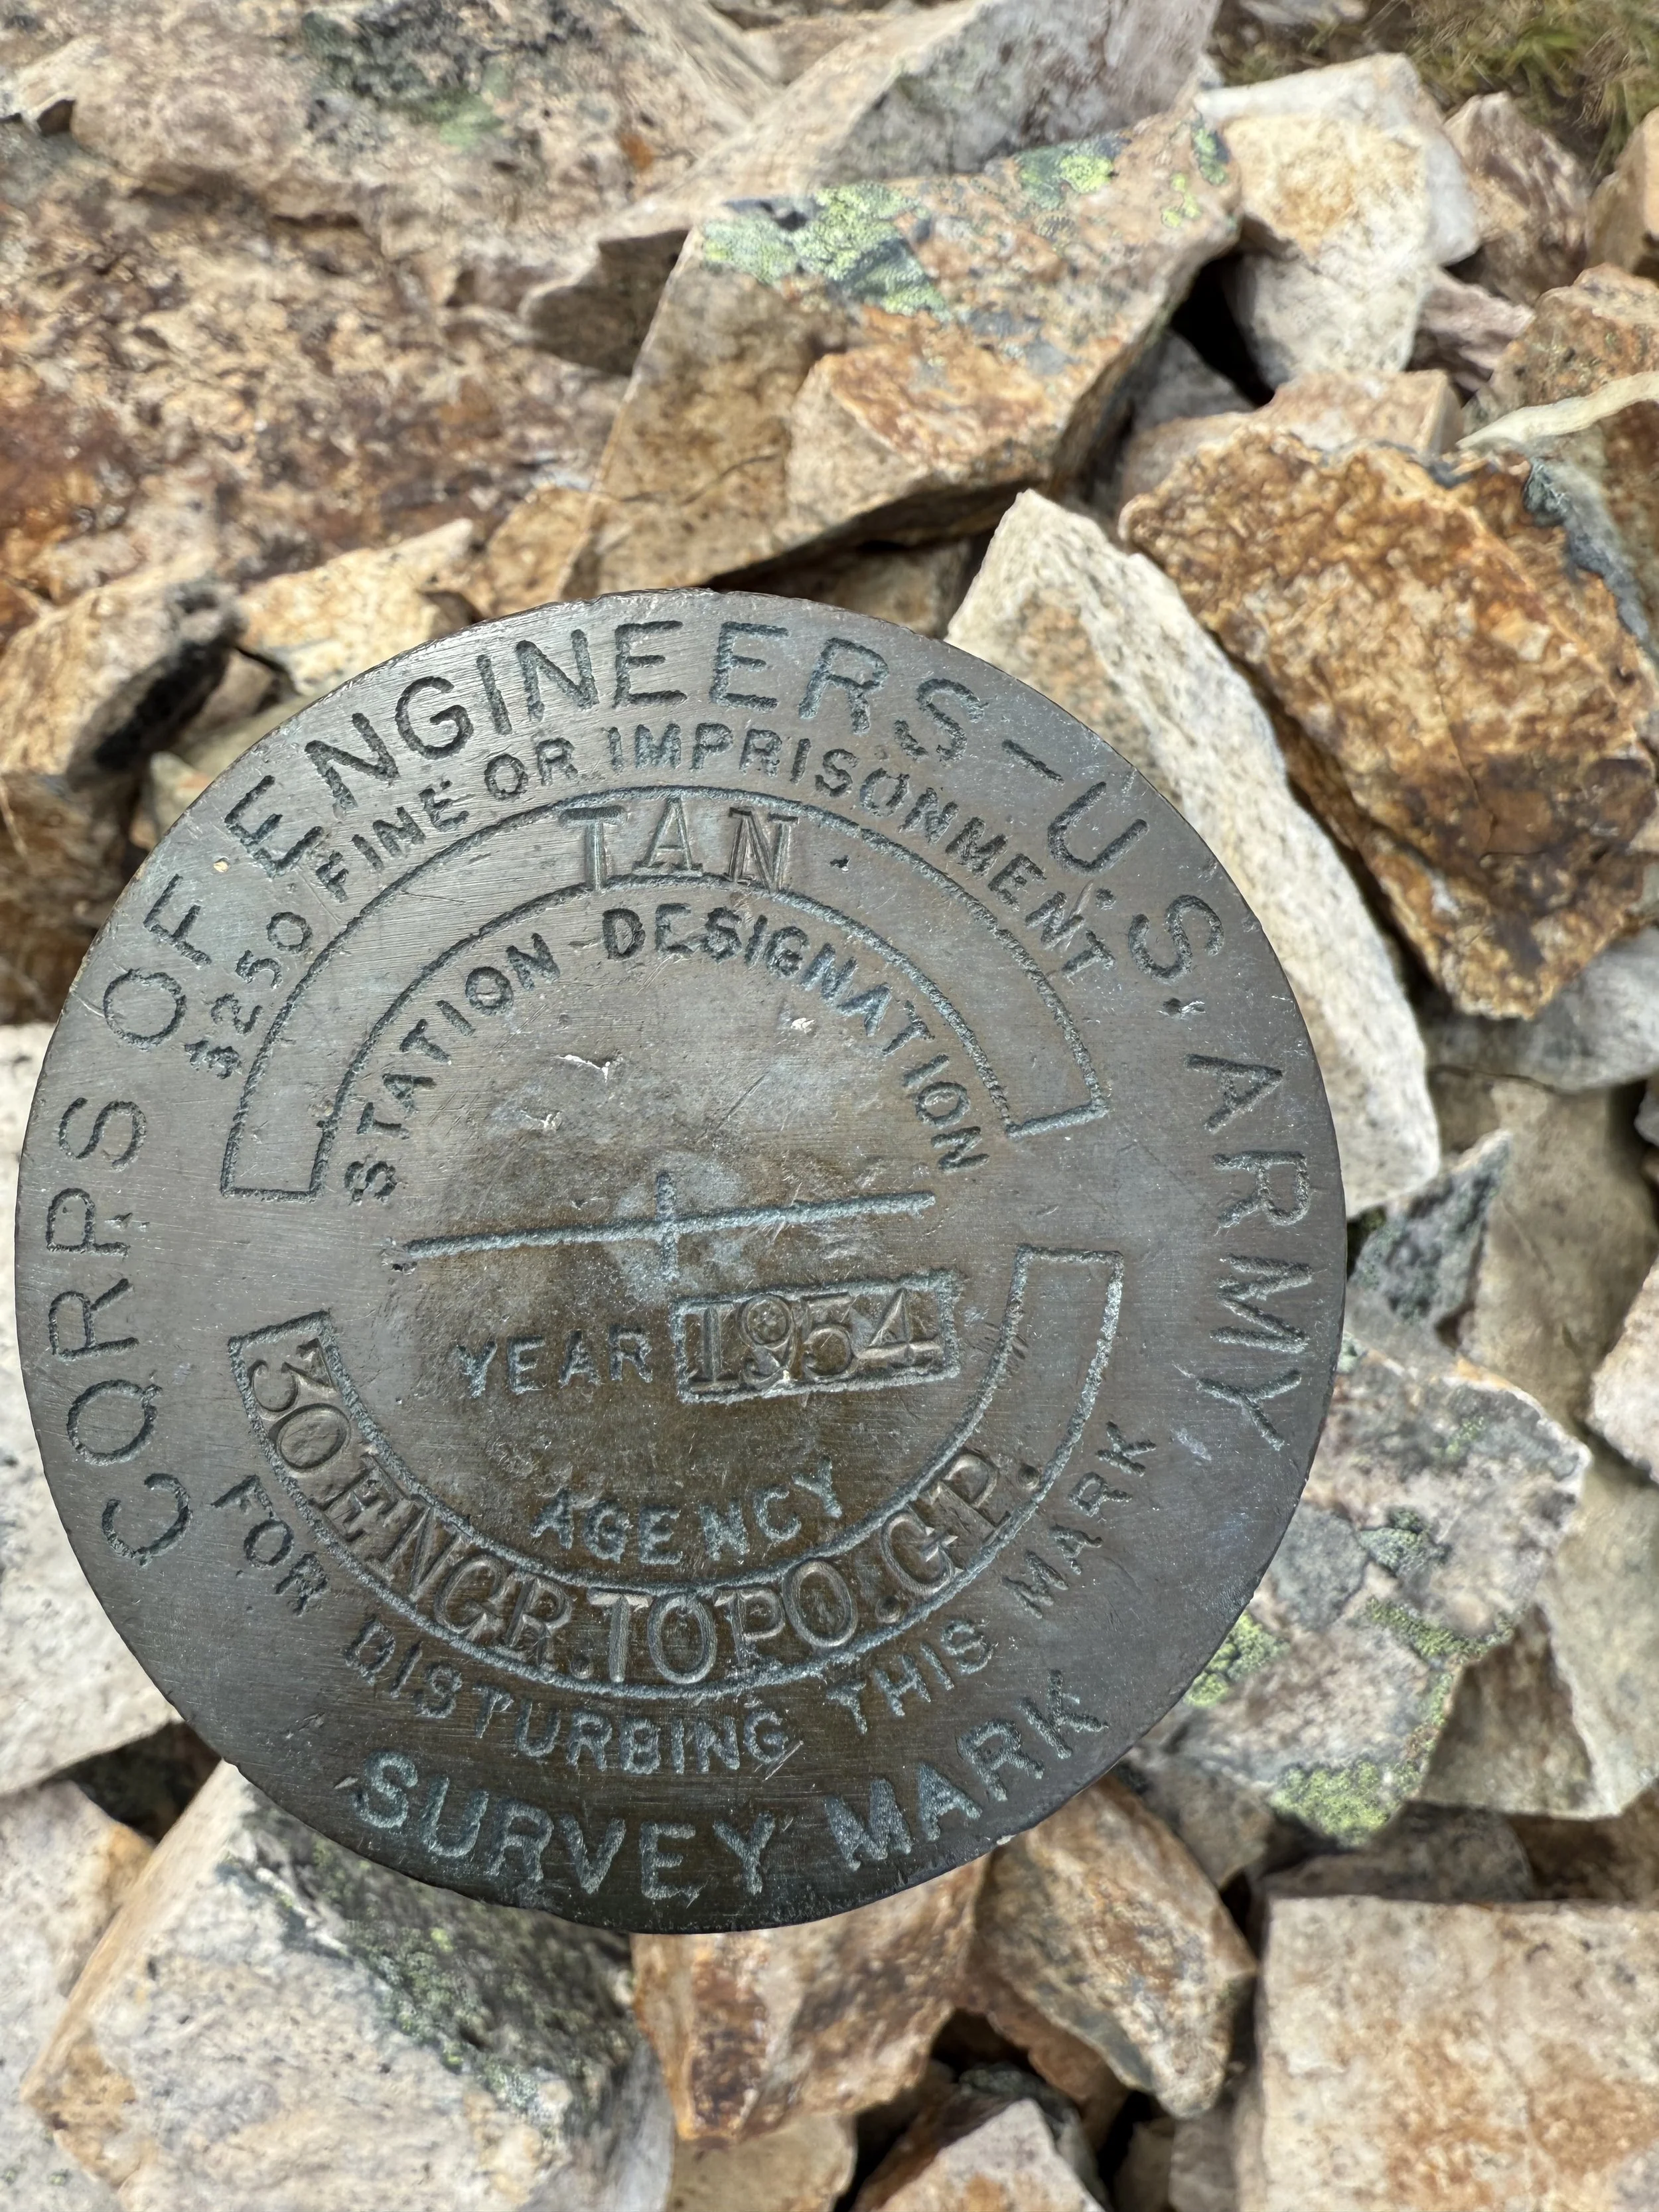
The next day, we set off on a self-guided hike up Tanalian Mountain. The trail was challenging but rewarding, leading through lush forests and rocky ridges before opening up to panoramic views of the lake and surrounding mountains. Reaching the top and looking out across the wild expanse of Lake Clark was amazing.
On the 17th, I said goodbye to Lake Clark, flying back through the mountains and landing in Anchorage before renting a car for the drive south to Homer.
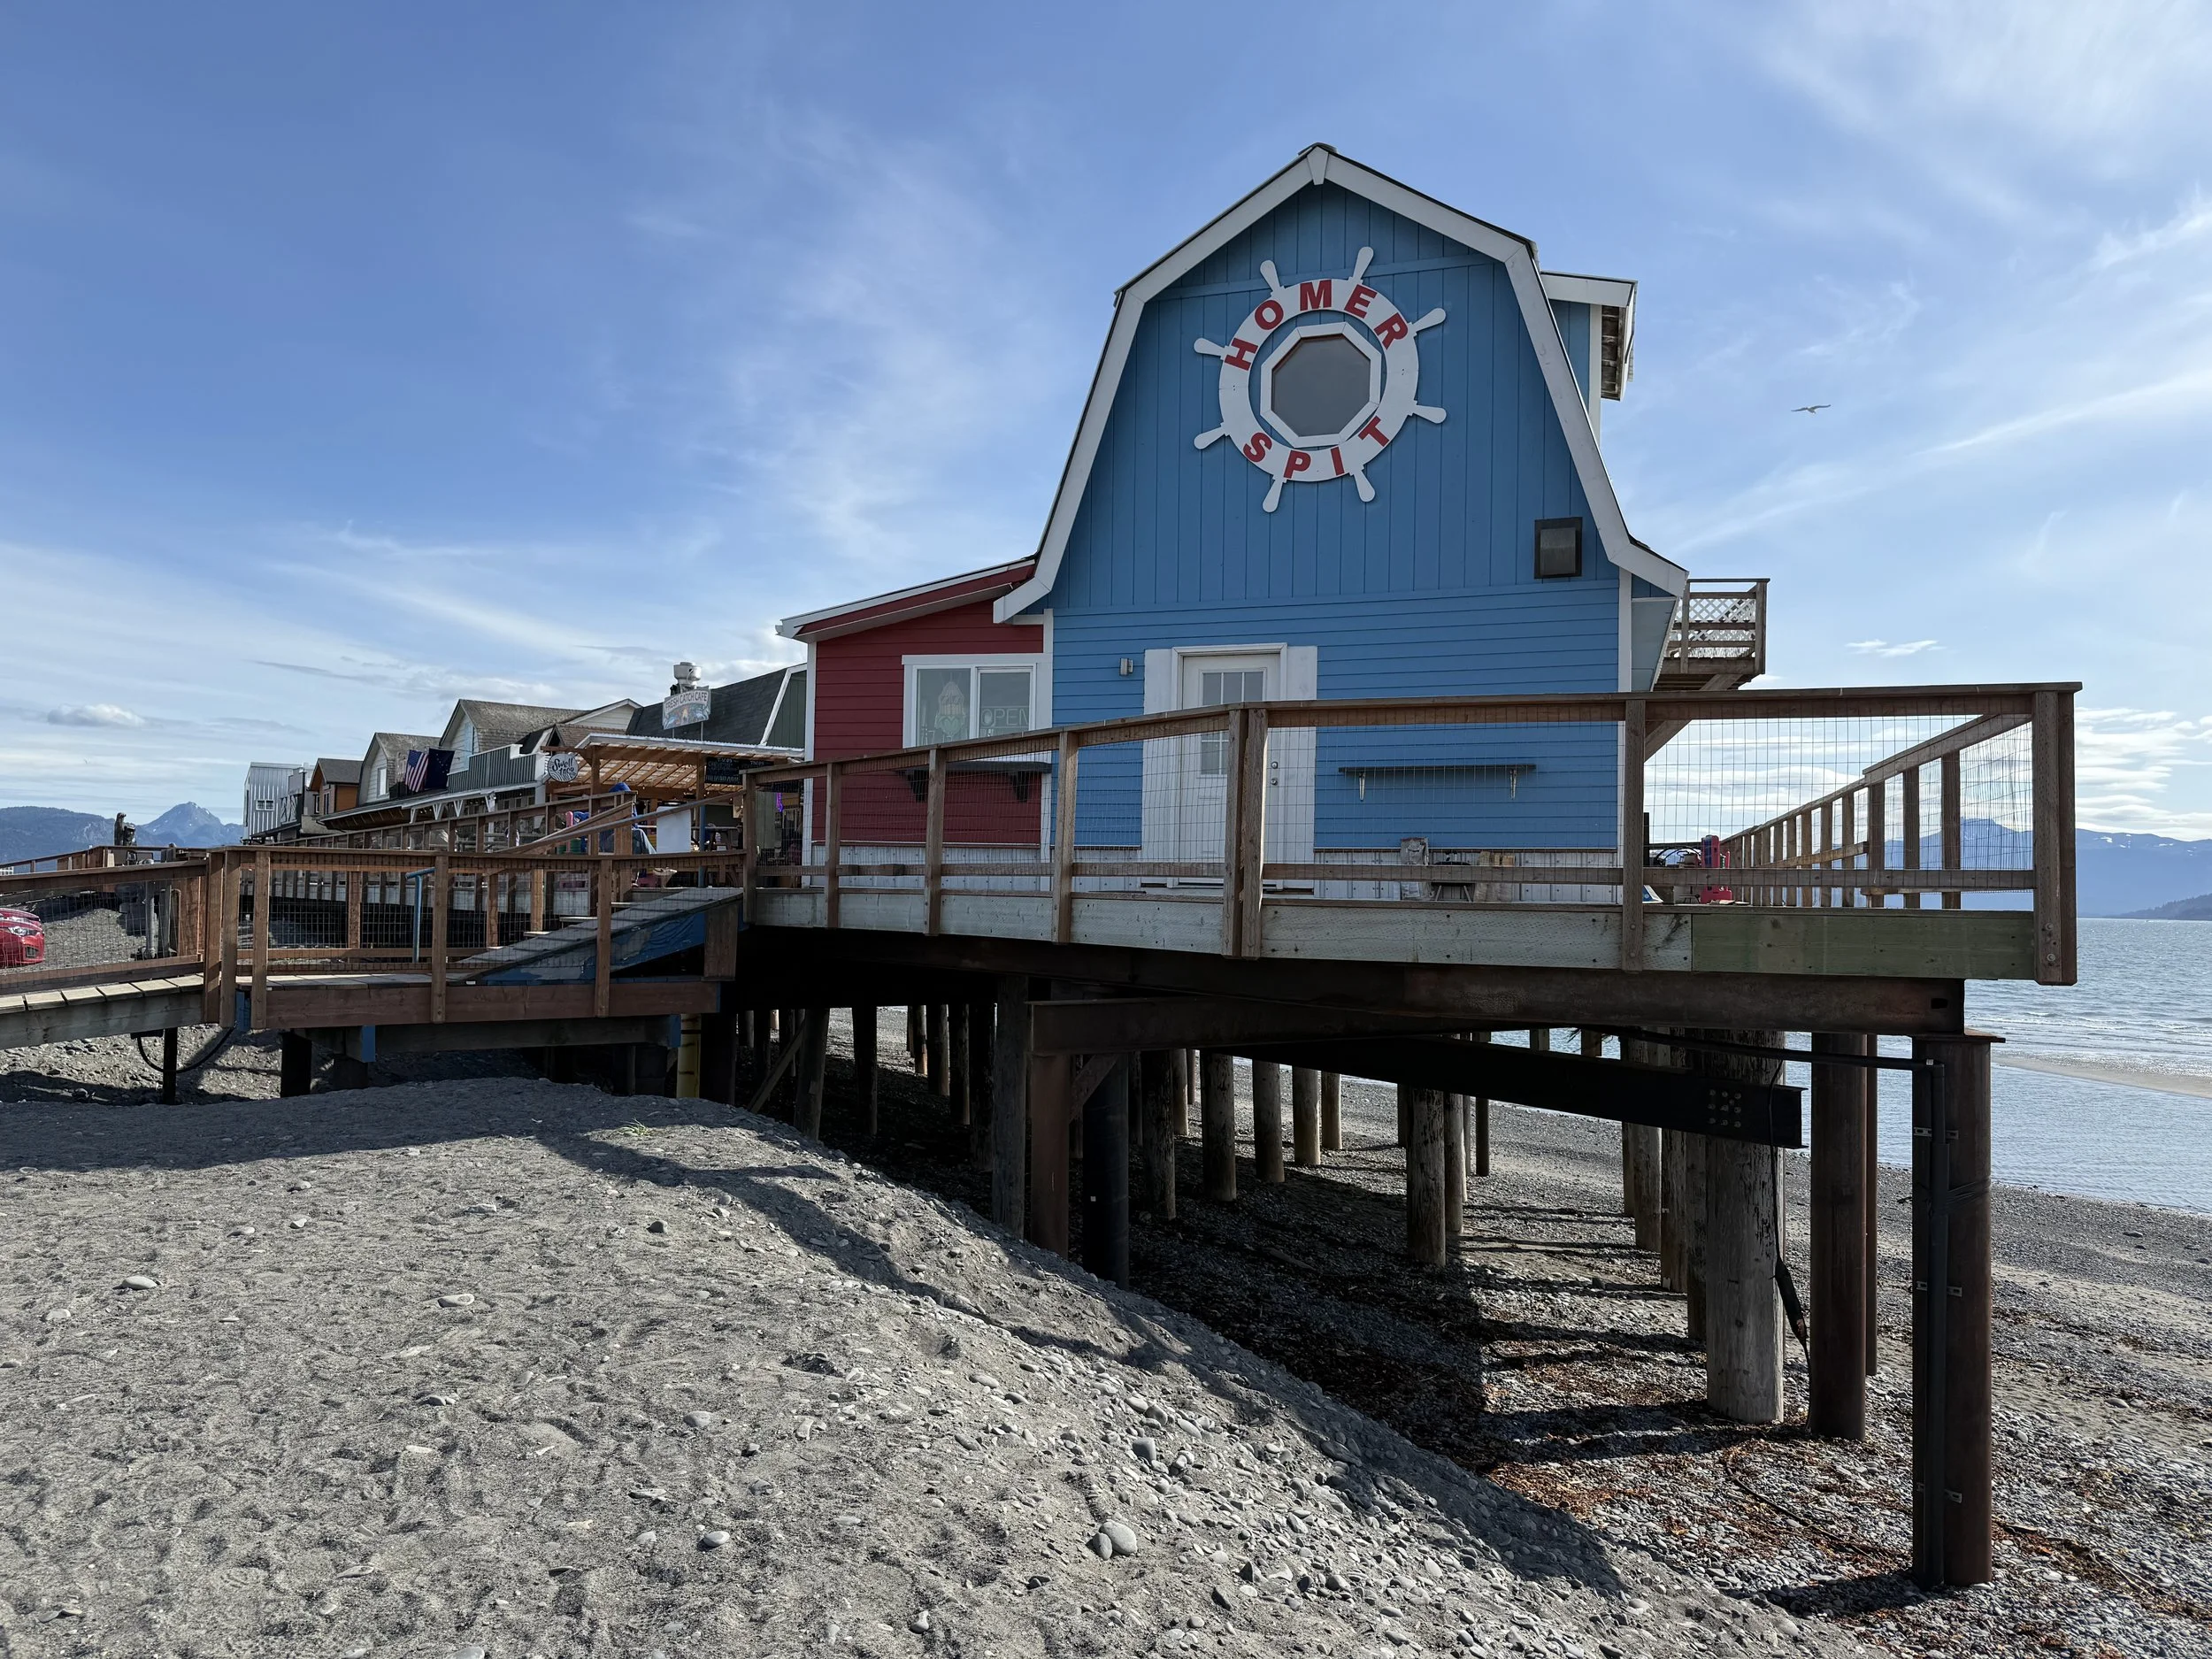
Days 4–5: Fishing and Exploring Homer
Homer quickly became one of my favorite stops. Known as the “Halibut Fishing Capital of the World,” it lived up to its name. On August 18th, I joined Homer Halibut Hunters for a halibut combo fishing trip. There’s nothing quite like the thrill of reeling in a fish from the deep, cold waters of Kachemak Bay.
The following day was slower-paced. I wandered Bishop’s Beach, explored the charming town, and later enjoyed dinner at Fresh Catch Café. The name says it all—the seafood was incredibly fresh, and the waterfront views made the meal even more memorable.
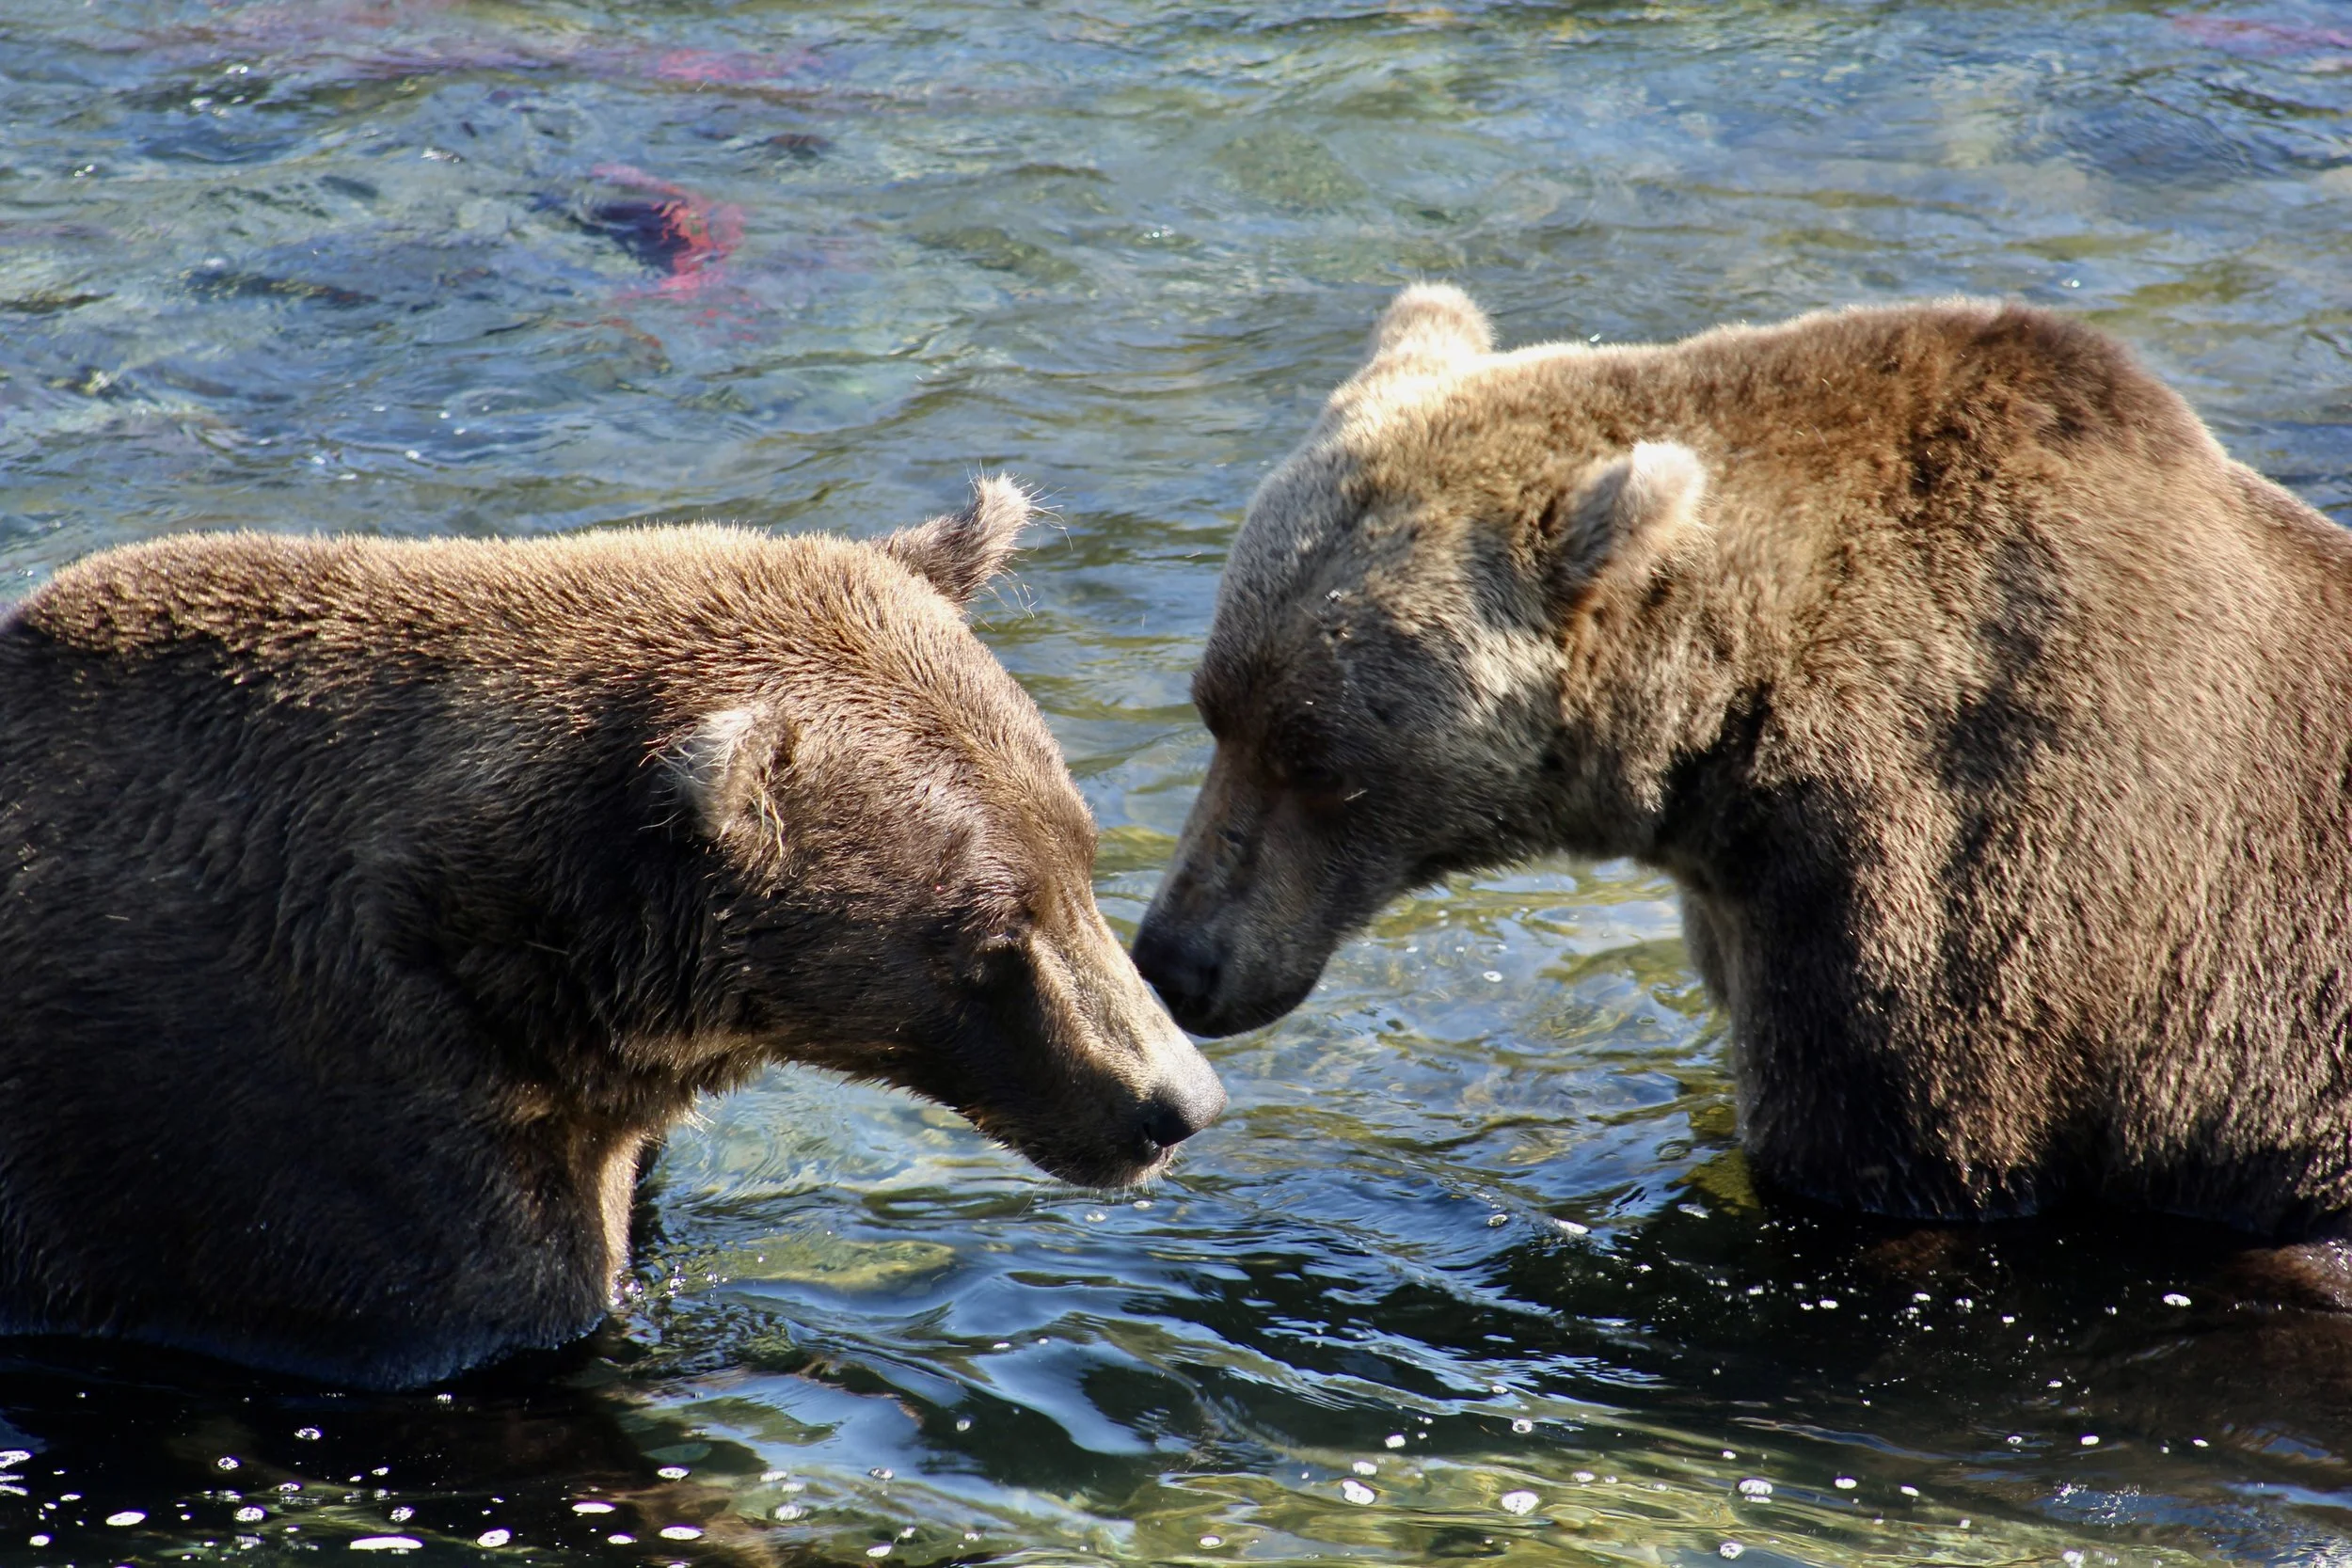
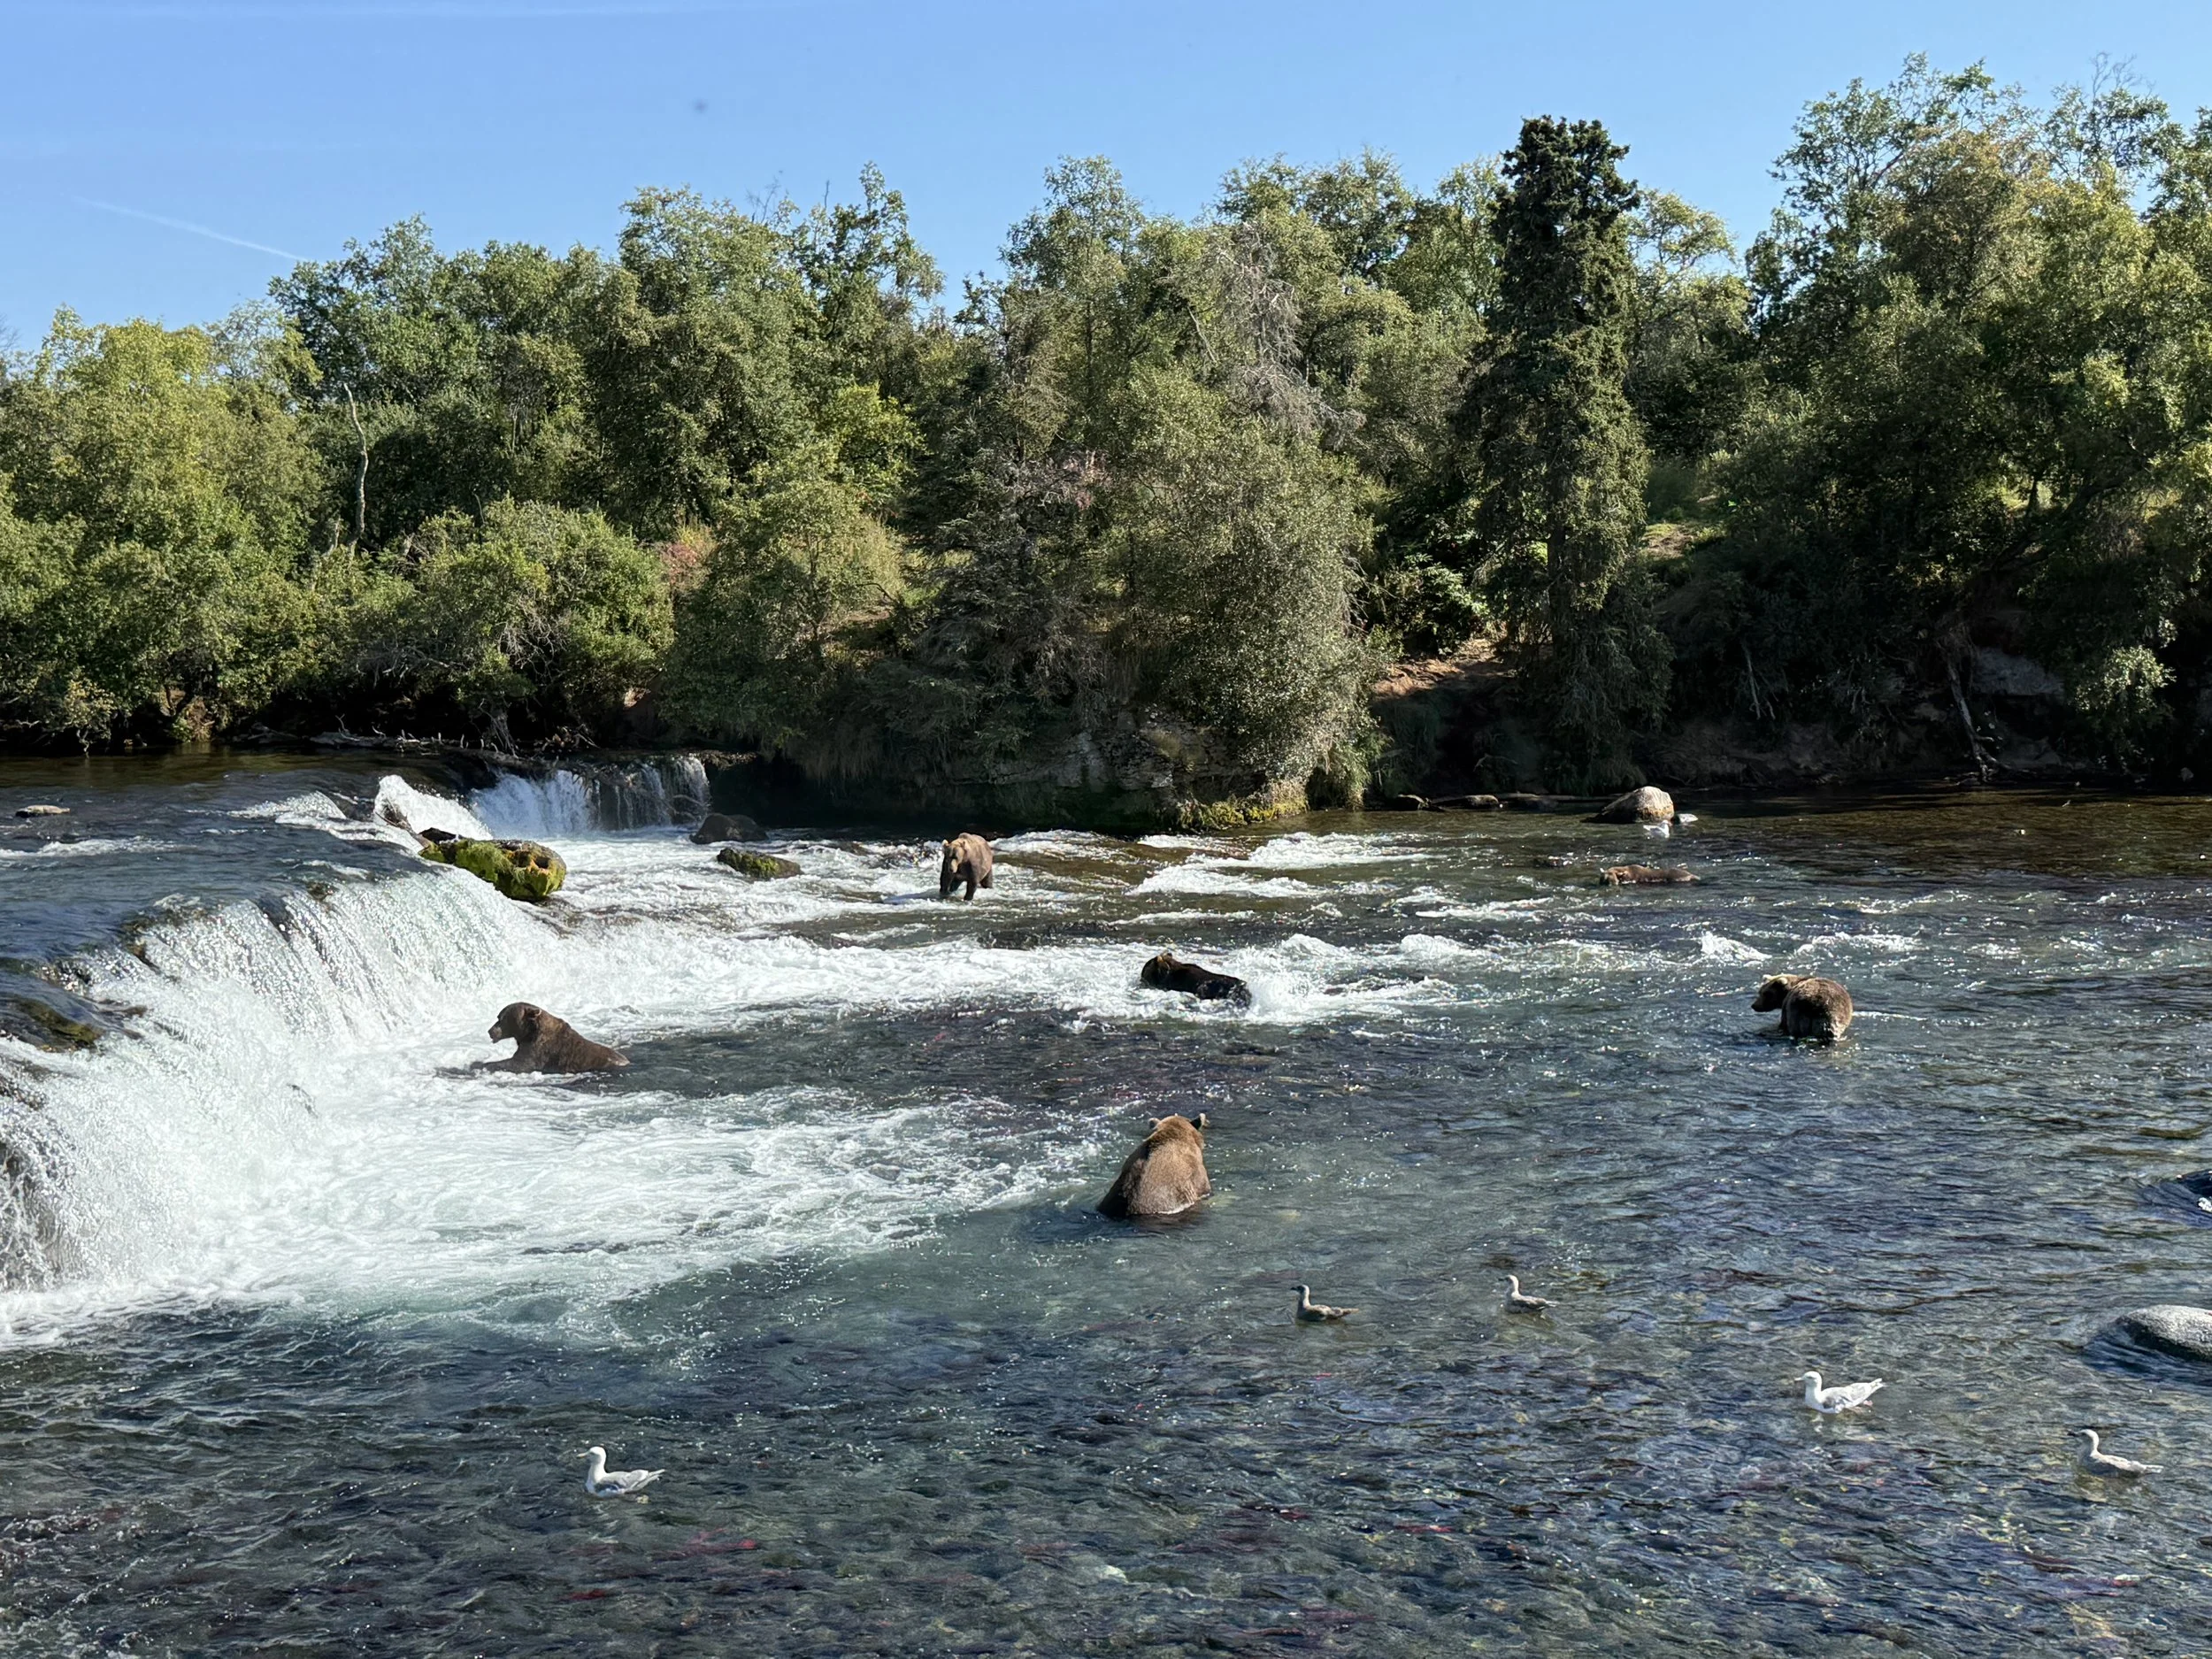
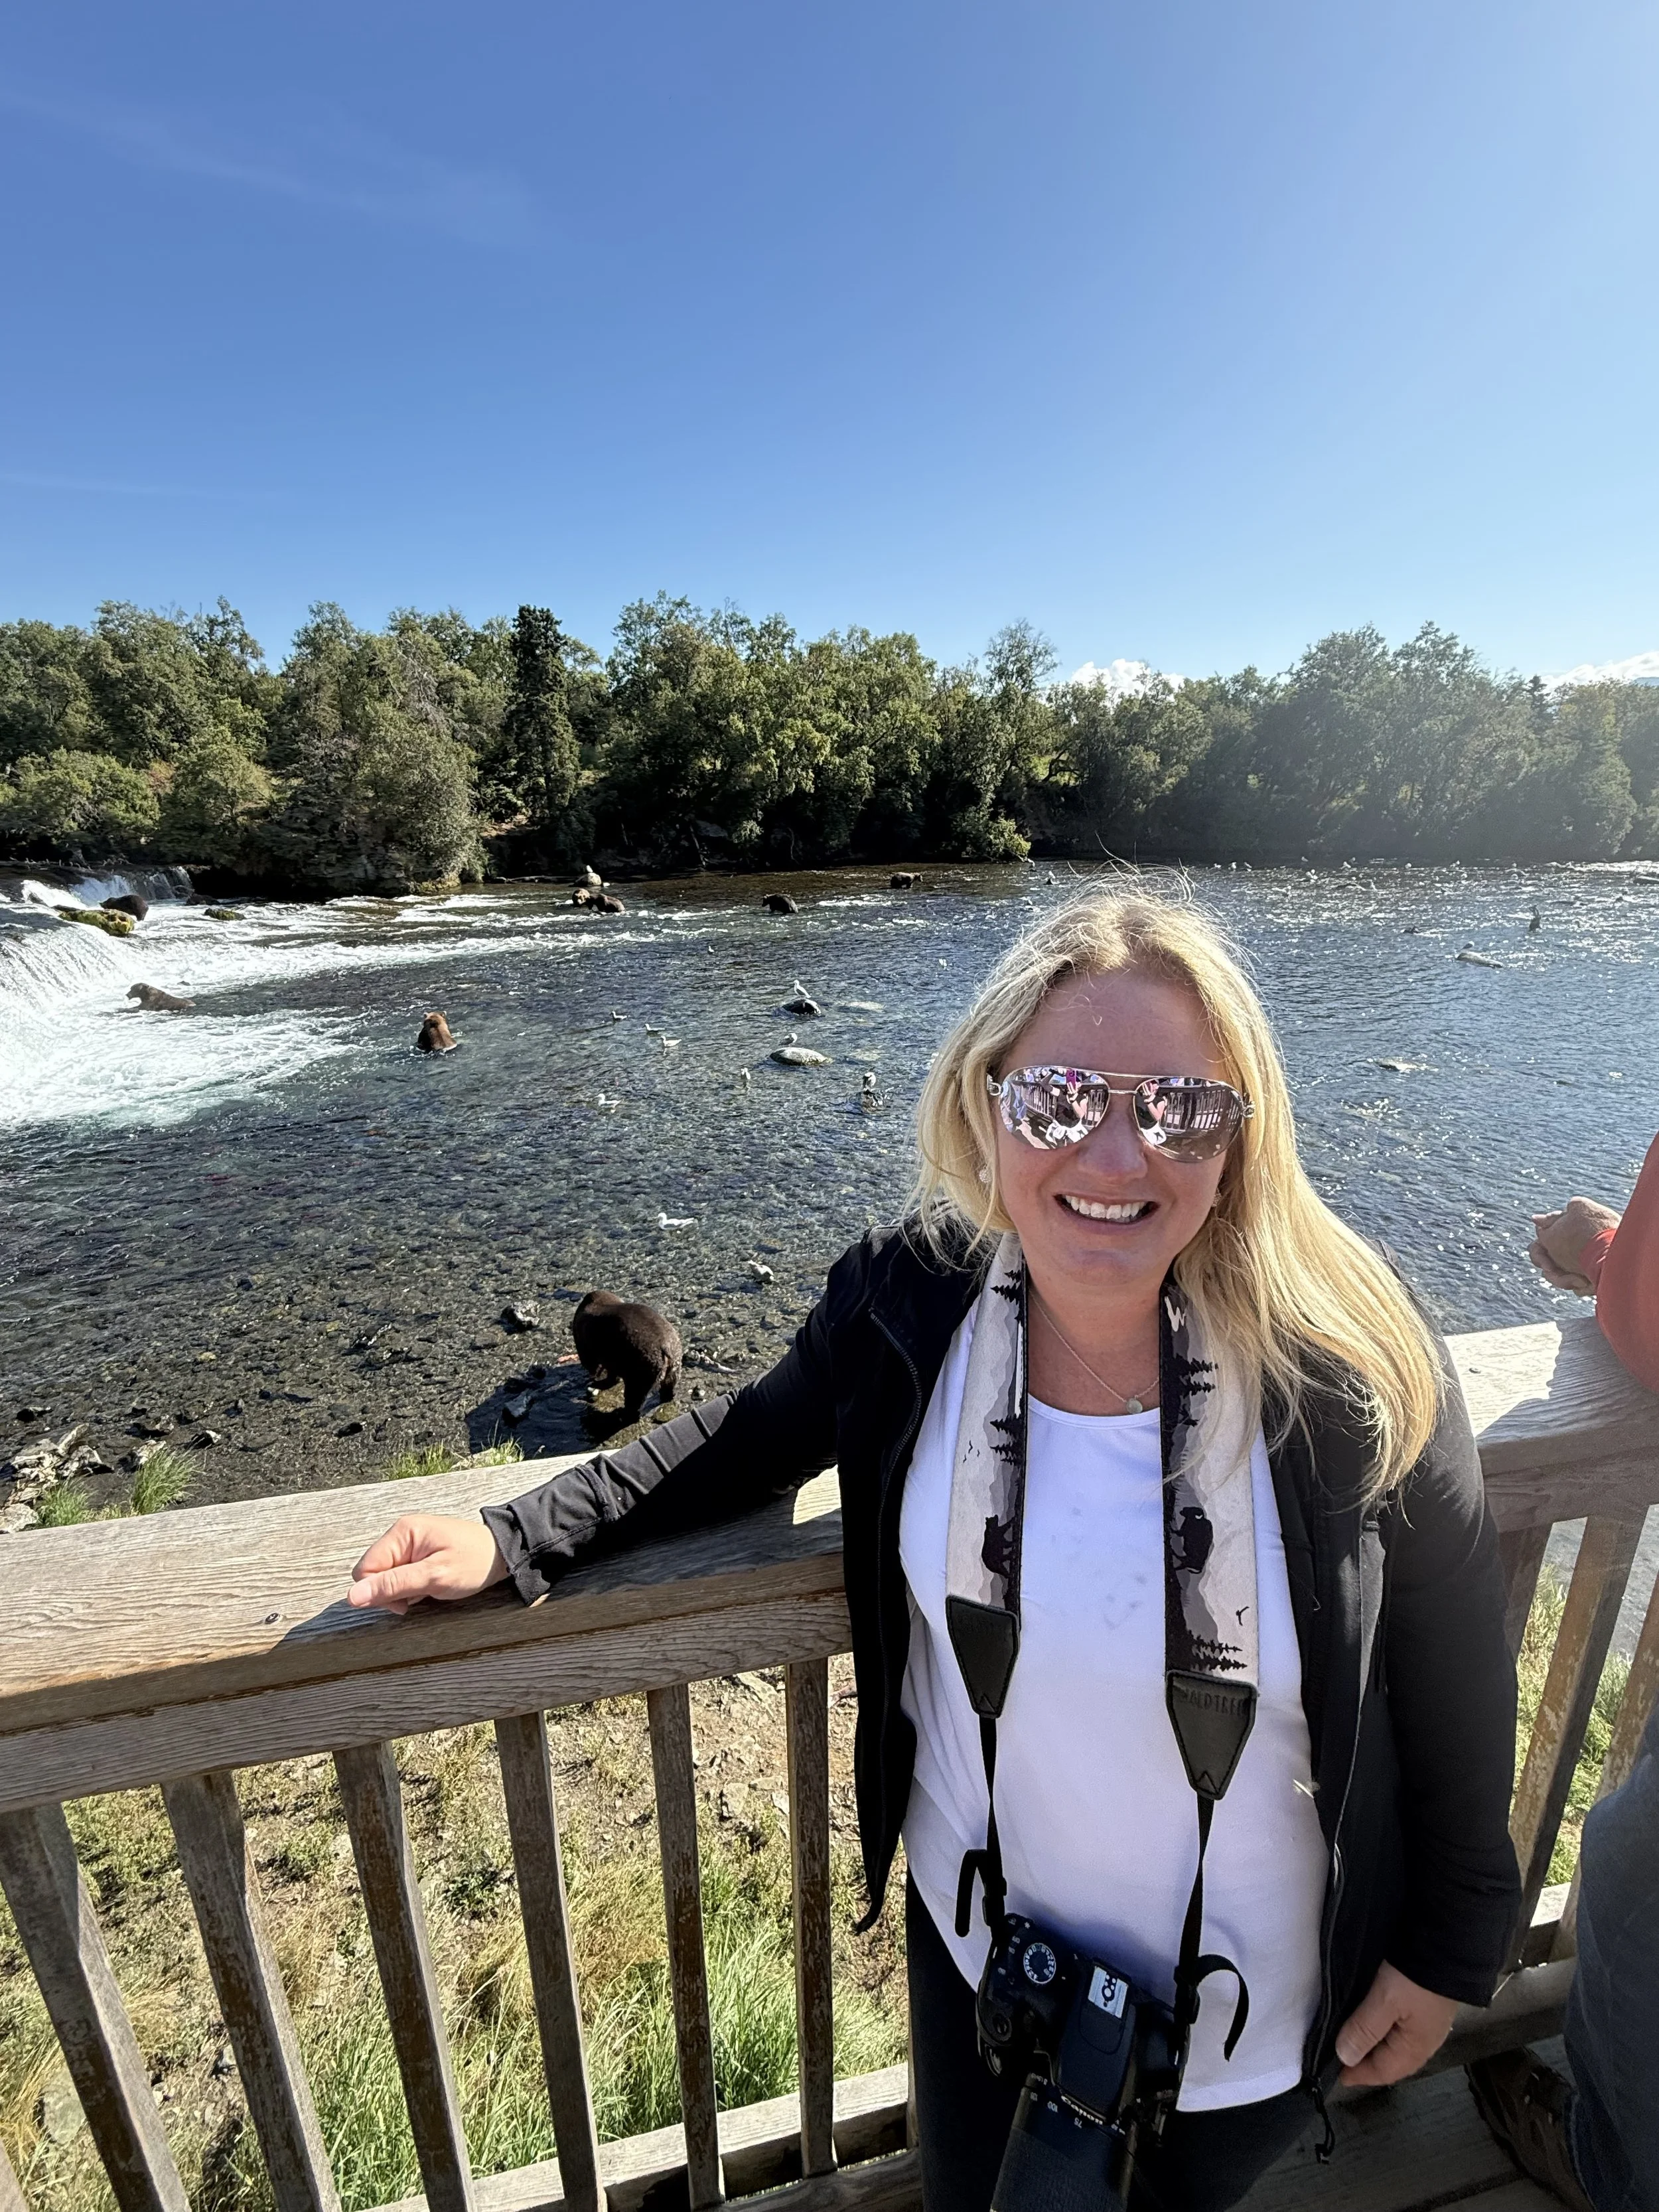
Day 6: Bears at Katmai National Park
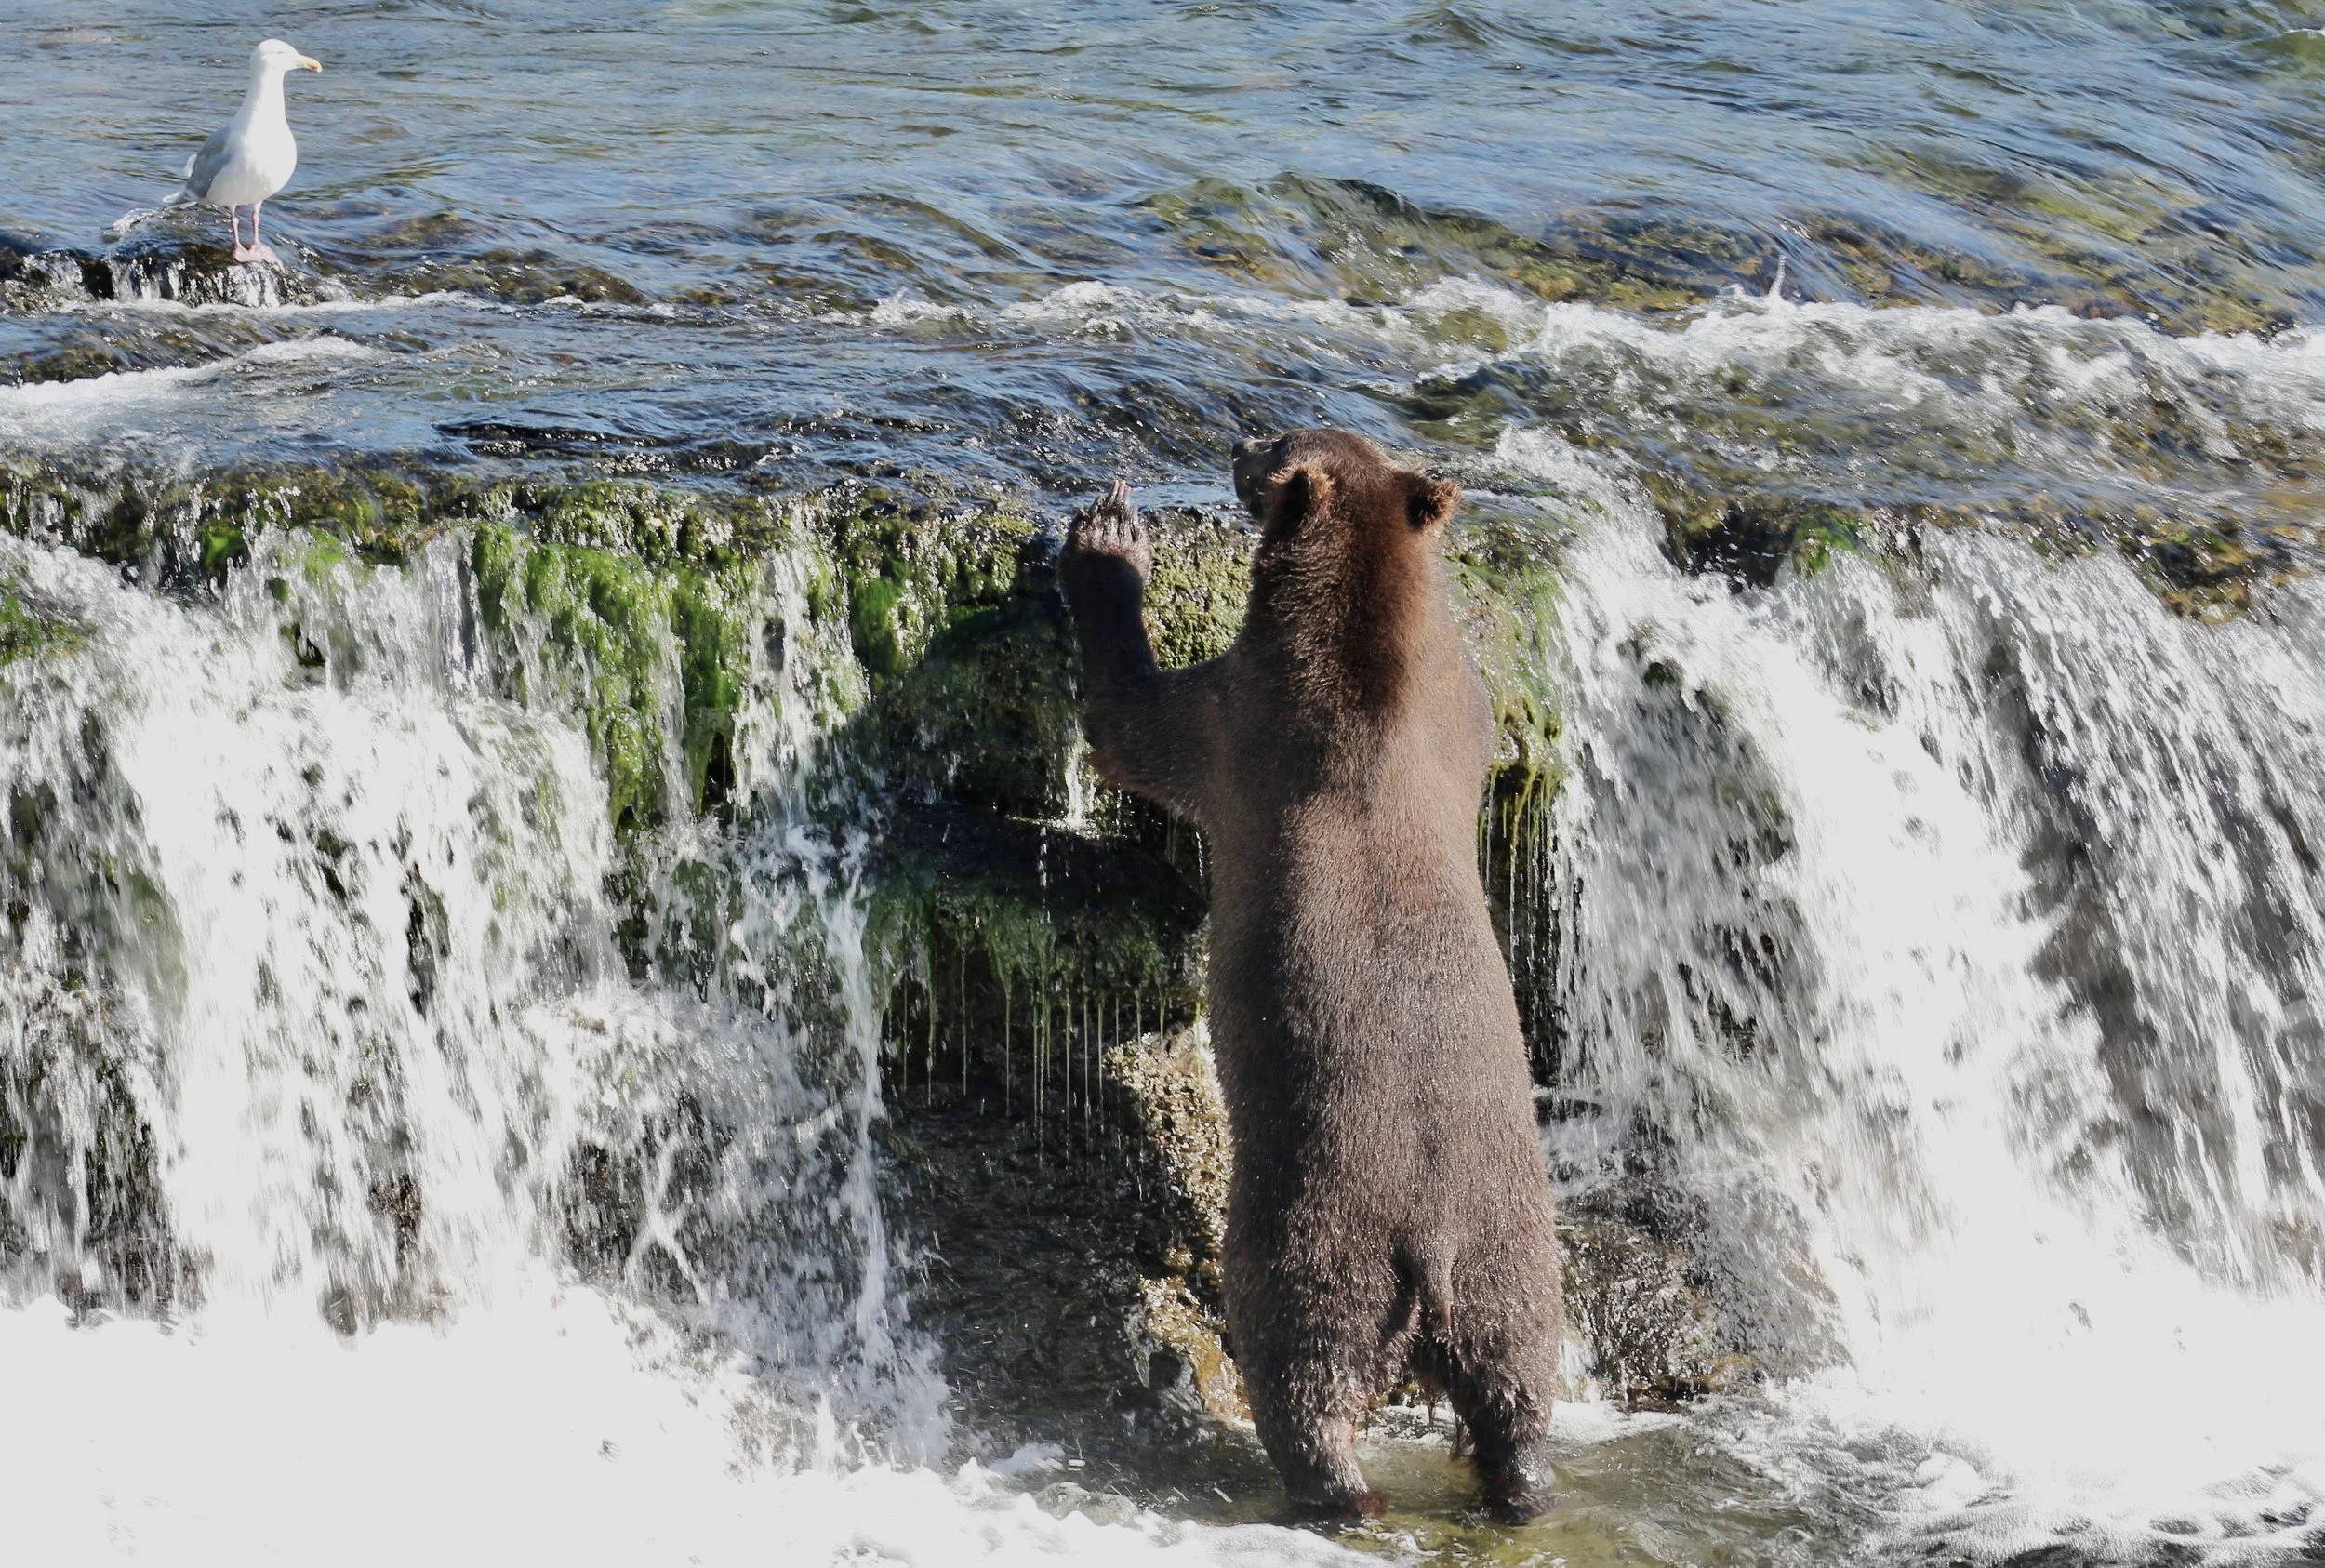
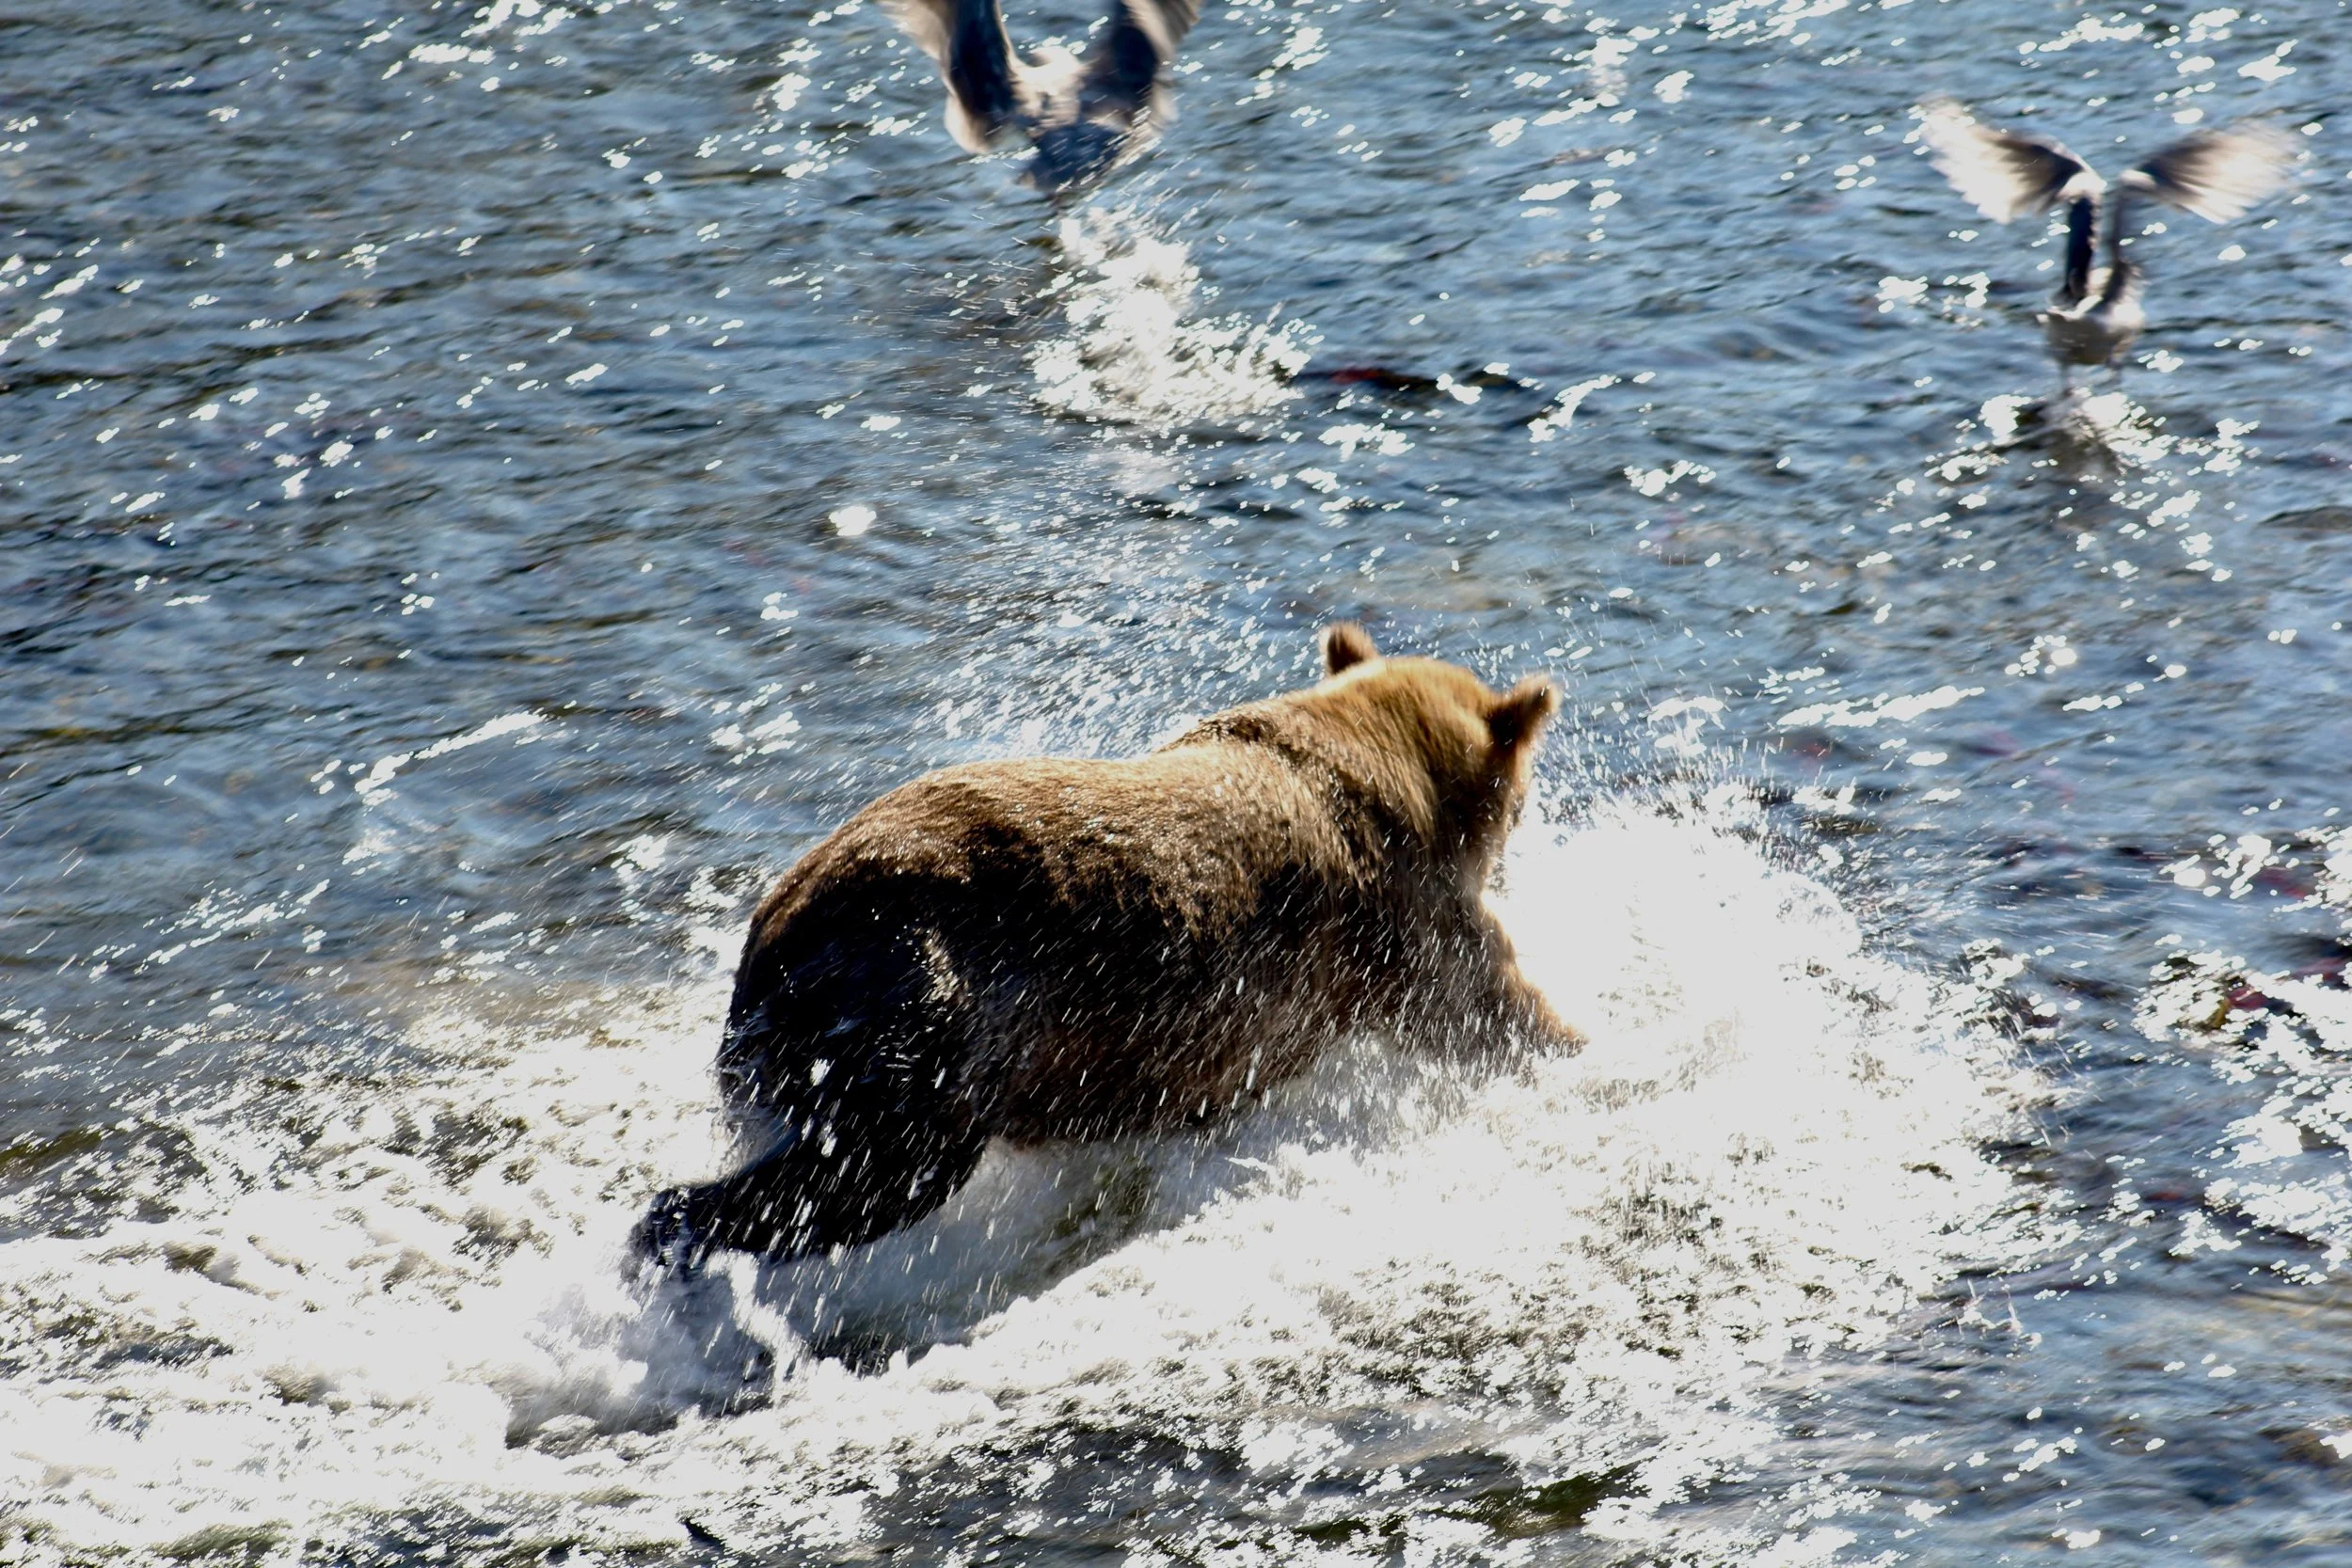
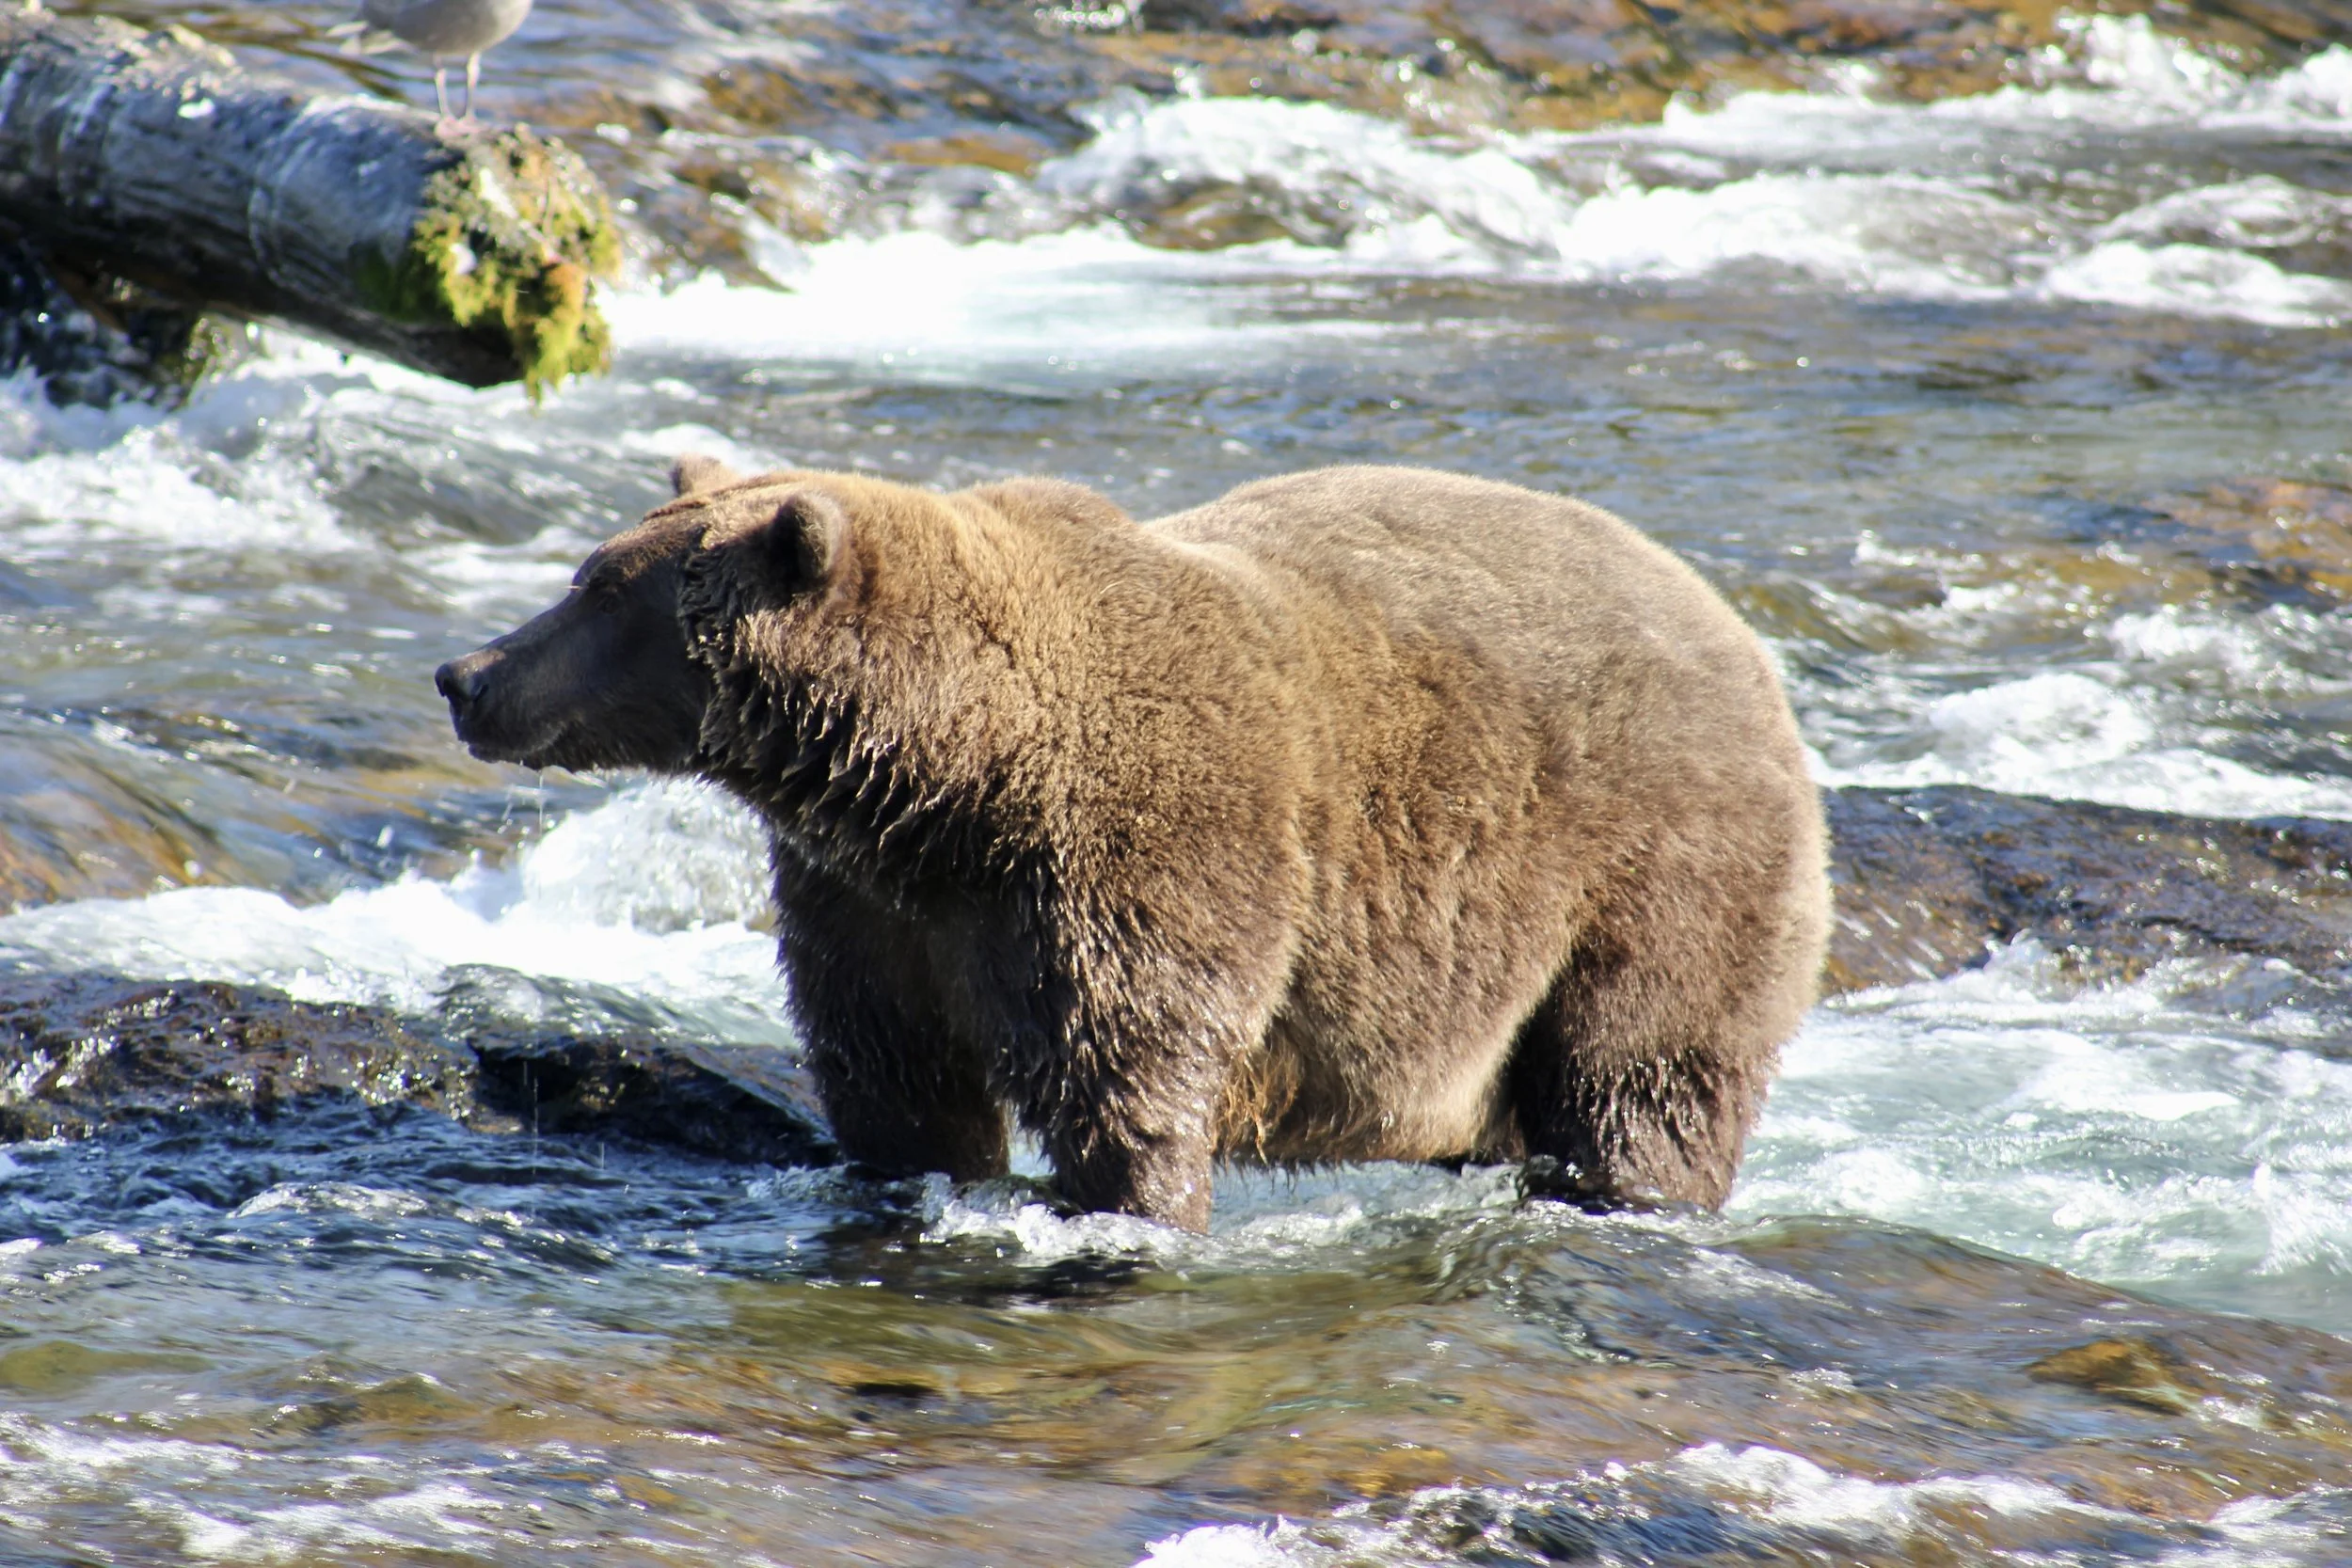
If there was one bucket-list moment, it was flying with Katmai Air to Katmai National Park’s Brooks Falls. This day was hands-down the best of our entire trip. Watching brown bears up close as they fished for salmon in the rushing falls was surreal. Dozens of them splashed through the water, jostling for position, showing off the raw, untamed power of Alaska.
Seeing these incredible animals in their natural habitat—not behind glass or a fence—was life-changing. This sounds totally corny, but it totally brought tears to my eyes to see these coastal brown bears on the waterfall. See the pics below in the gallery! Two bears actually crossed our paths on the hiking tail as well!!!!
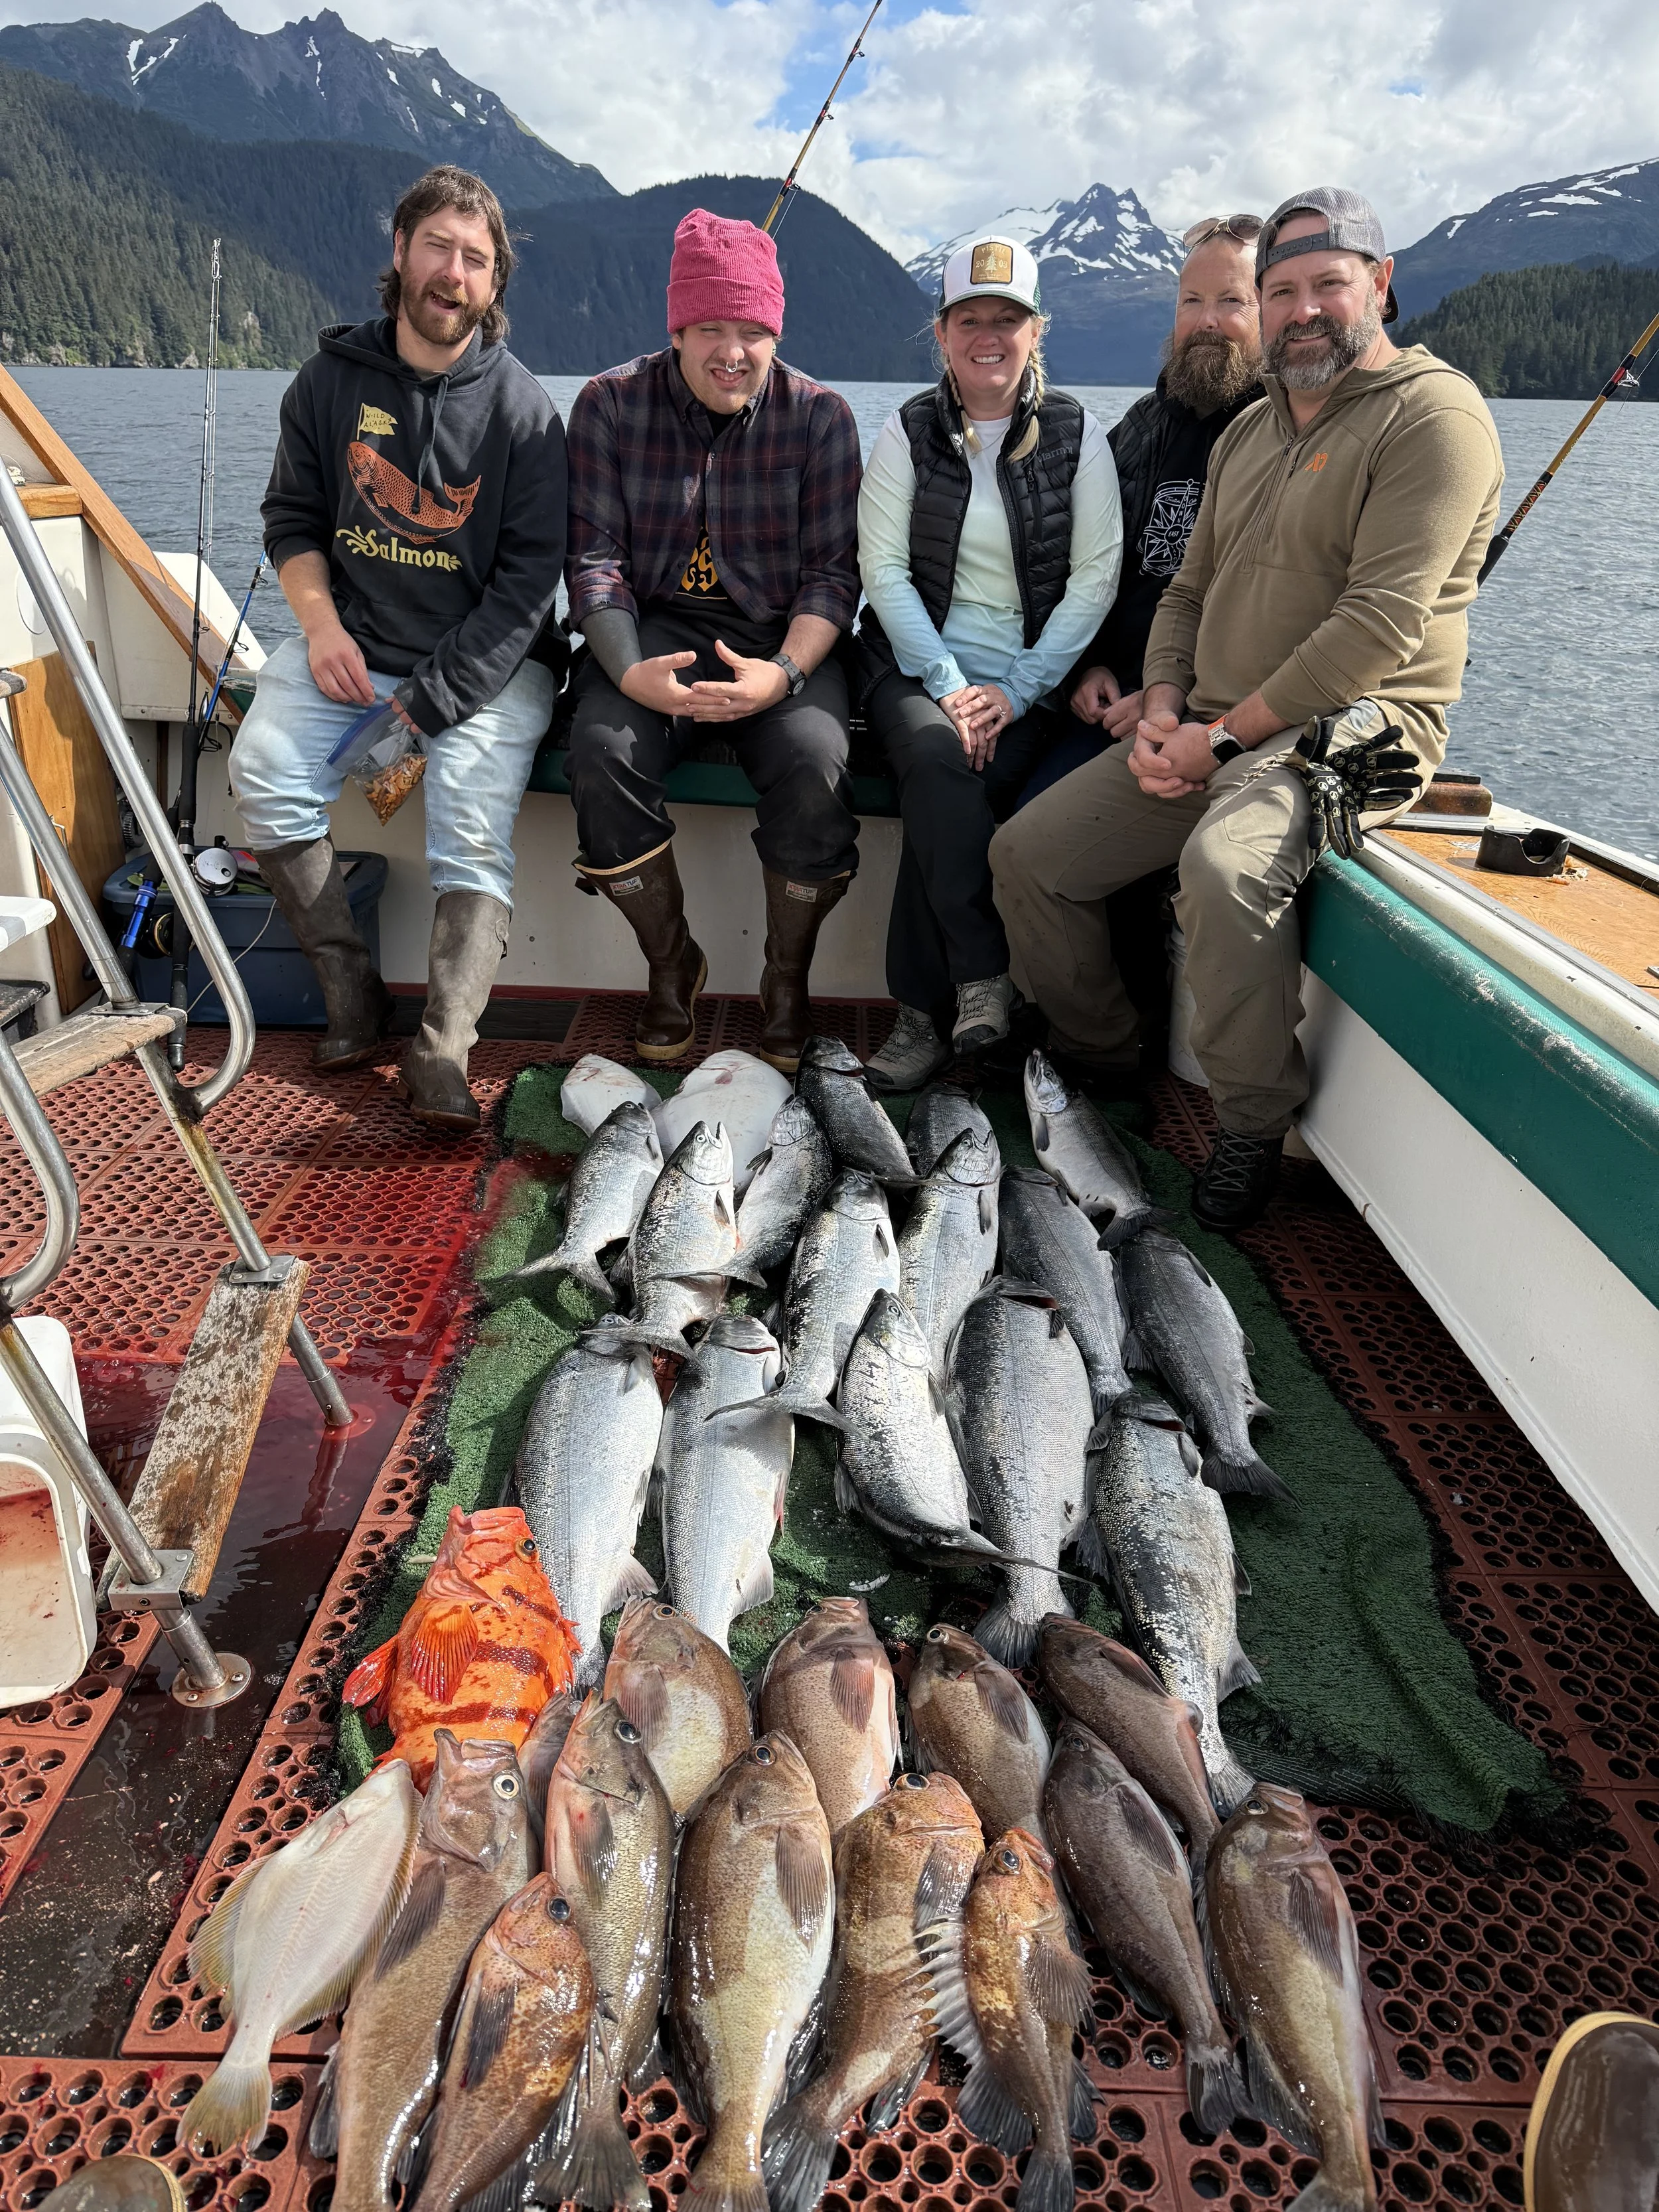
Days 7–8: Salmon Fishing & Wildlife Cruise
August 21st was another day on the water, this time with Captain B’s Alaskan C’s Adventure. I can’t rave enough about Captain B and his stellar crew—they made the trip unforgettable. I caught my first-ever fish, and it wasn’t just any fish—it was a King Salmon! Because it was such a prized catch, I even had to get a special Alaskan stamp for it. That moment—rod bent, fish on the line, and cheers from the crew—was one of the highlights of my entire trip.
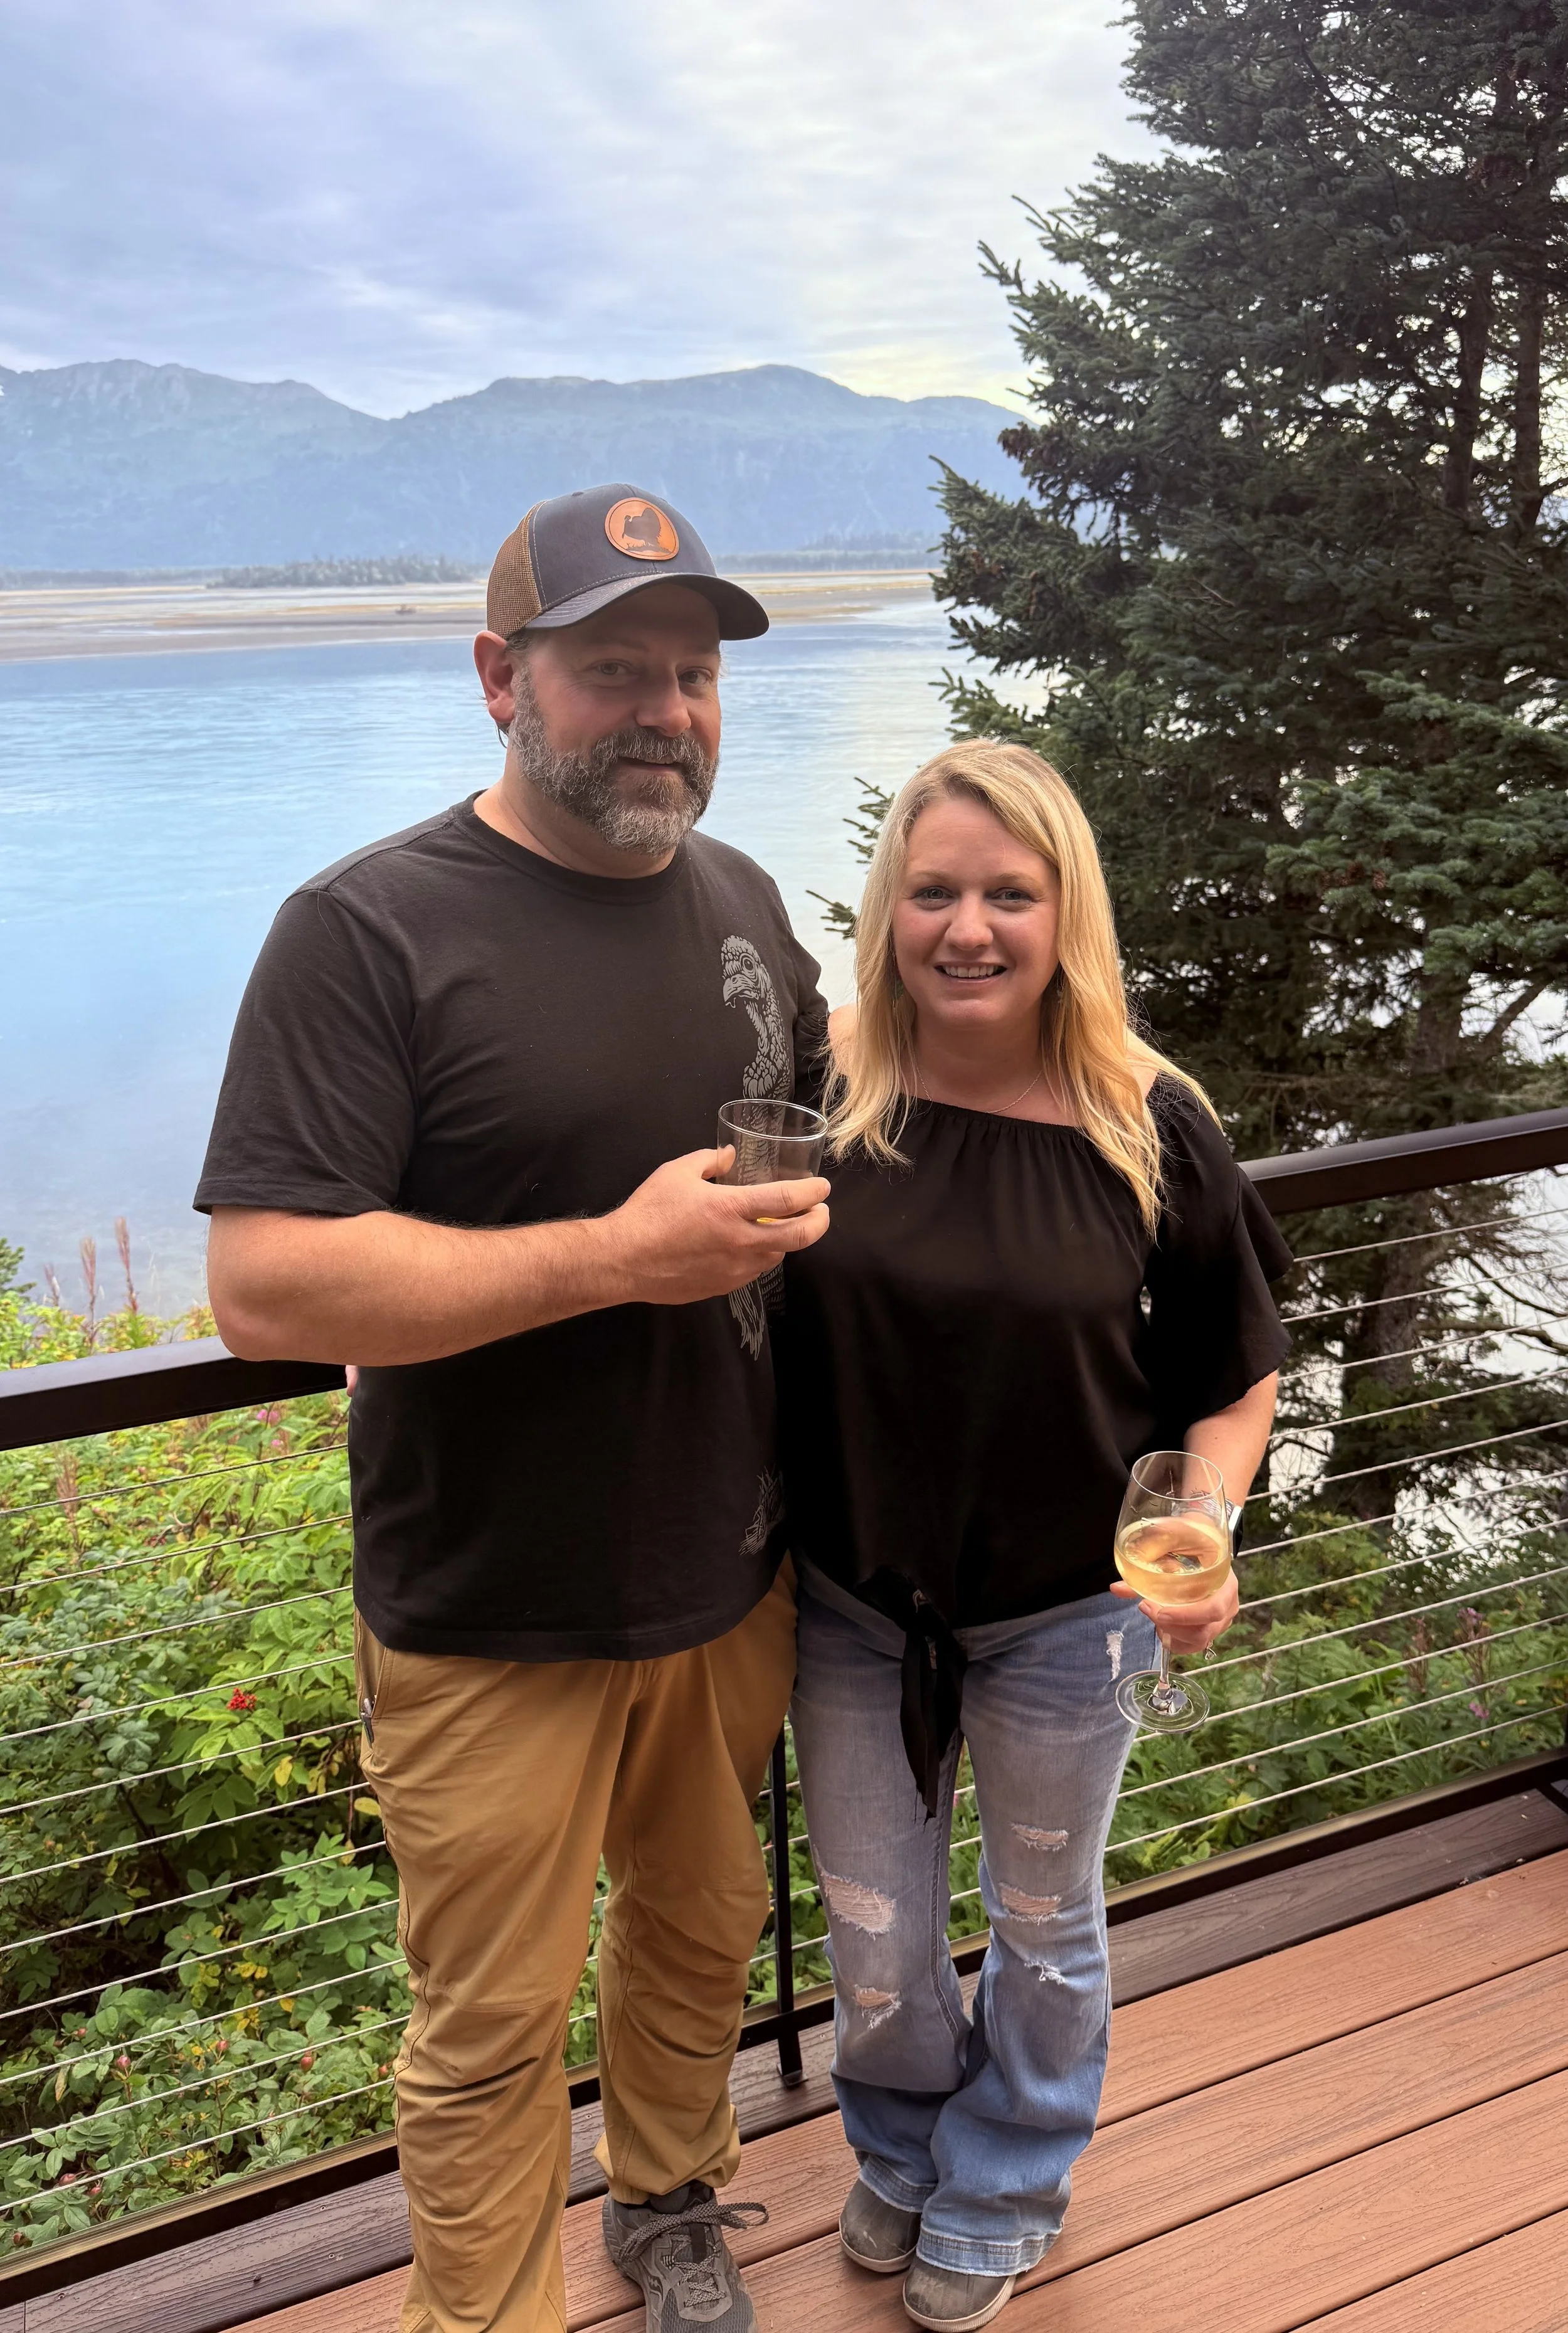
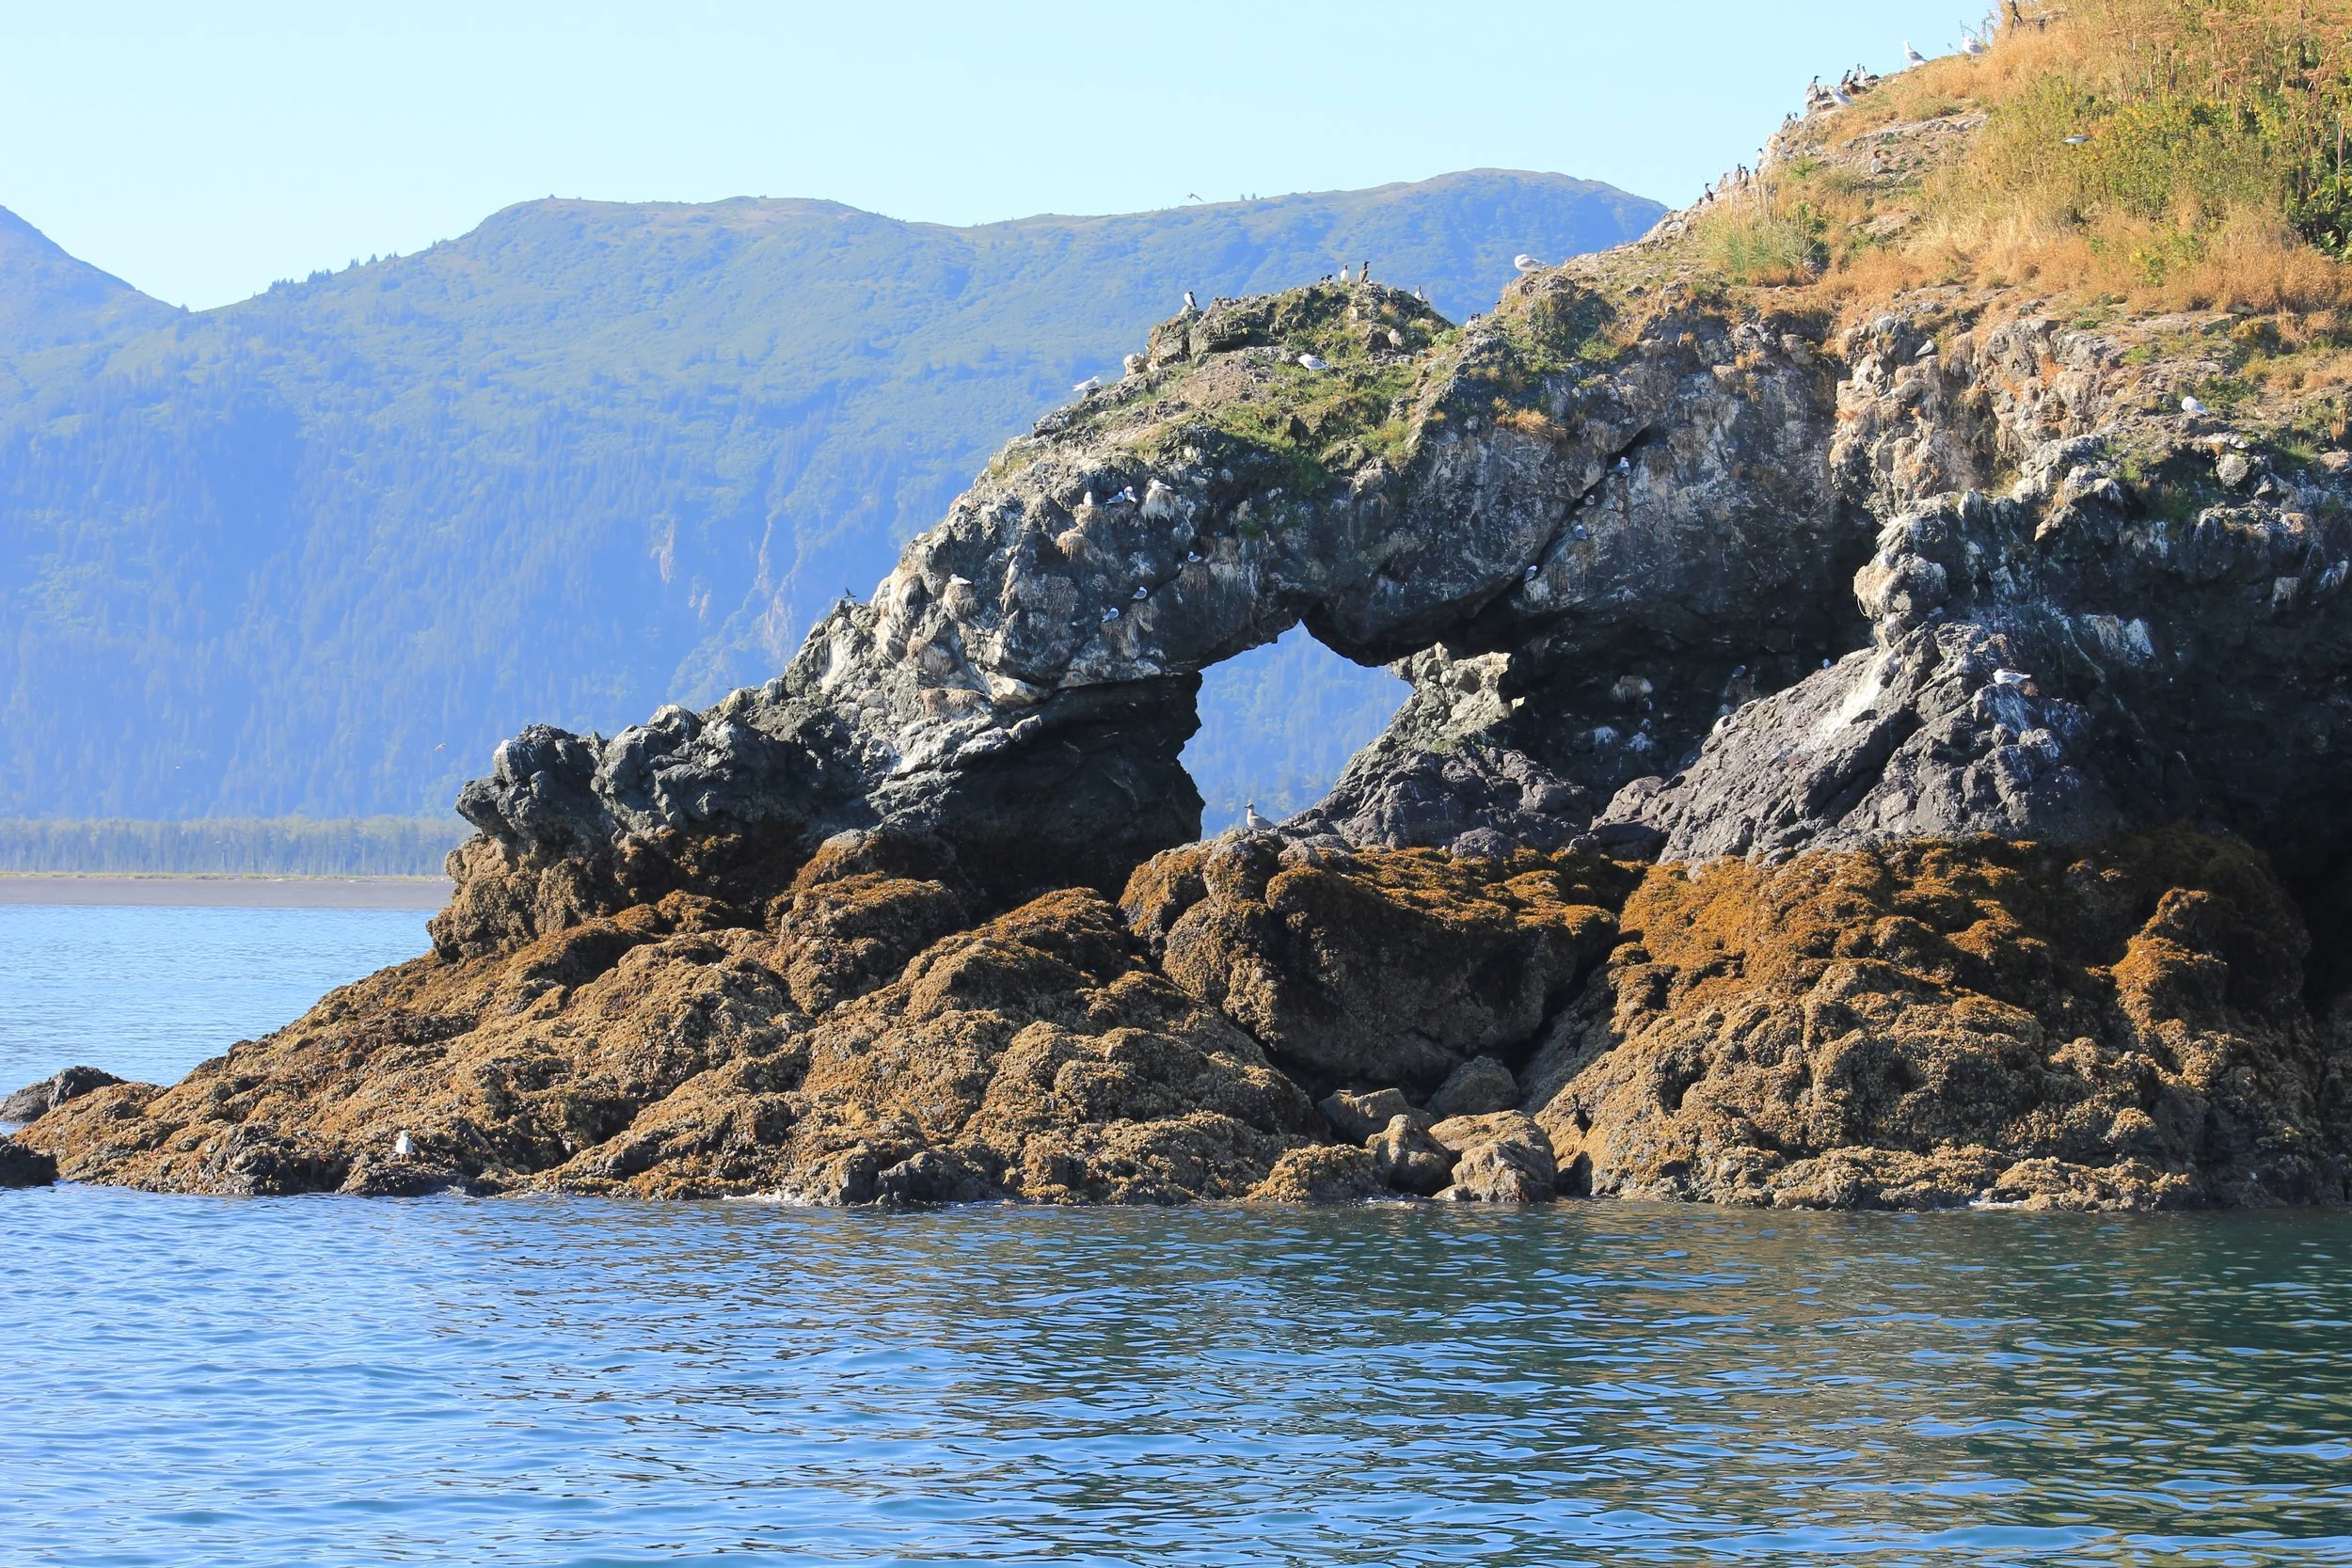
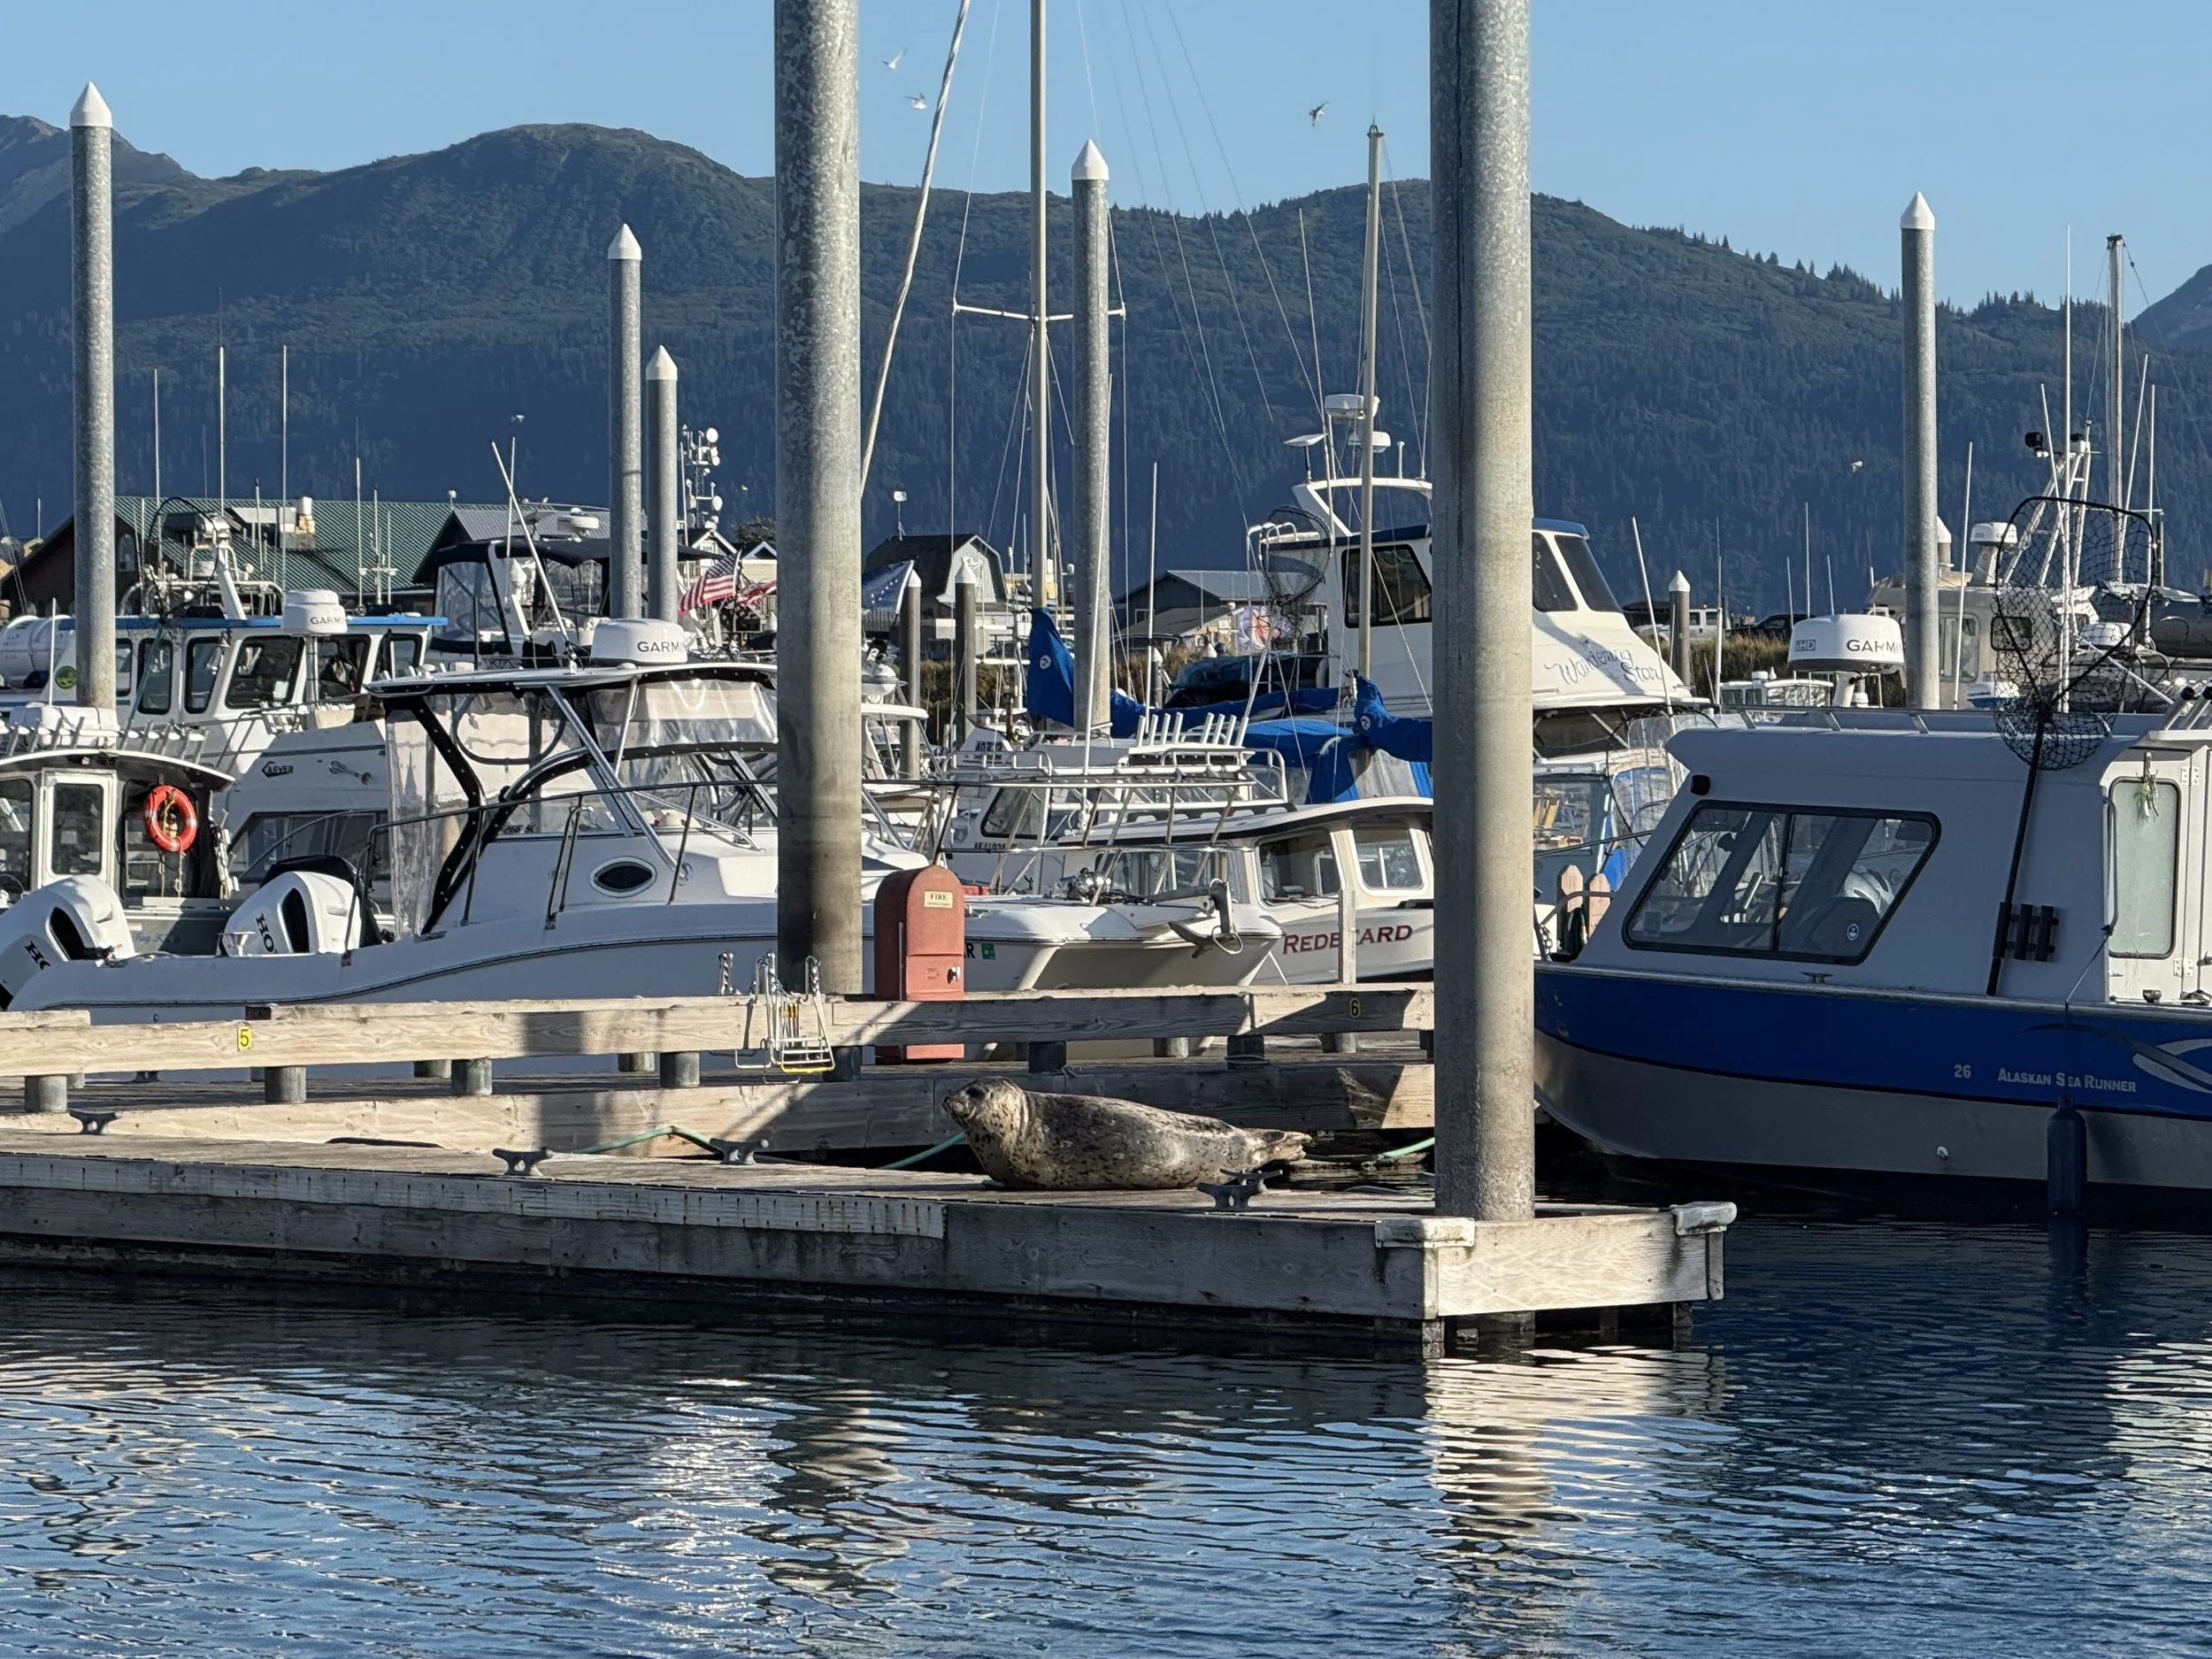
On the 22nd, I swapped rods for binoculars and joined Rainbow Tours for a wildlife cruise across Kachemak Bay to Seldovia. The scenery was breathtaking, with seabirds, seals, and the chance of spotting whales along the way. Once in Seldovia, my husband and I explored the quiet coastal town—and even looked at property there. The slower pace, small-town charm, and ocean views made it easy to imagine a life tucked away in this little slice of Alaskan paradise.
Day 9: A Farewell Dinner
On August 23rd, I wrapped up my time in Homer with a dinner at The Meandering Goat, a cozy spot that you can reach by cold water taxi or ferry. There’s something about a remote dinner destination, accessible only across the bay, that makes the evening feel like a secret shared with the sea.
Day 10: Back to Anchorage
On the 24th, we packed up not just our bags—but also 106 lbs of fish we had caught over the week, including halibut, salmon, and rockfish. A local fish packaging company handled everything perfectly, flash-freezing and boxing our catch for travel.
From there, we made the 3.5-hour drive back to Anchorage, returned the rental car, and boarded our flight home on United Airlines. Thanks to my United card, our checked bags—including all that fish—flew free! It felt like the perfect ending to an adventure filled with unforgettable memories and once-in-a-lifetime experiences.
Final Thoughts
Alaska isn’t just a destination—it’s an experience. From the glaciers of Lake Clark to the bears of Katmai (the highlight of the whole trip), and from halibut hauls to the thrill of catching my first King Salmon, every moment felt raw, real, and unforgettable. And who knows—maybe someday we’ll call Seldovia home. My thought on spending a lot of money like this are that life is never guaranteed. We don’t do these kinds of trip often, but maybe once every 5-10 years. If you are a lover of bears or want a truly thrilling adventure, add any of these things to your bucket list next summer!


Dry Tortugas: A paradise once known as a prison
Every year, I try to plan a few National Park Trips with friends and family. In the beginning, living in Denver, it was easy to plan little road trips that took 3-4 days and knock some trips of the bucket list. However now, after having been to 38 continental US parks, it is getting harder to reach the far out places!

Dry Tortugas is an outlier among the continental parks. It is NOT easy to get to I assure you, with 4 separate 3-4 hour long ferry rides, a stay in key west, and a flight to Florida ! I’m glad I got to do this, what an experience. I shared it with my best friend, Lexy, and two cousins who live in Cape Coral, Florida, Craig and Lizzy.
We visited in February, 2022, and it did not disappoint. We booked our boat tickets and reservations 3 months in advance, I can’t stress this enough. We took the Yankee Freedom Ferry for a day trip to Dry Tortugas that included lunch and free snorkel gear. https://www.drytortugas.com. The whole day was 7am-5pm and was around $200 per person. We got a refund for having a national parks pass once we checked in.

Ways to get to Key West: https://www.keywestexpress.net
Fly into Miami and rent a car (could pair this with Biscayne NP)
Key West Express Ferry from Ft. Myers (book early) 4 hour each way
Key West Express Ferry from Marco Island (book early) 3 hour each way
We did not need a car in Key West, we were able to walk everywhere. You will want at least 2 nights here, as you will have to be there the day before the Dry Tortugas Trip, and then you will be too late to take the ferry back once you return. Key West has some great food spots!

Dry Tortguas National Park: as taken from https://www.nps.gov/drto/index.htm:
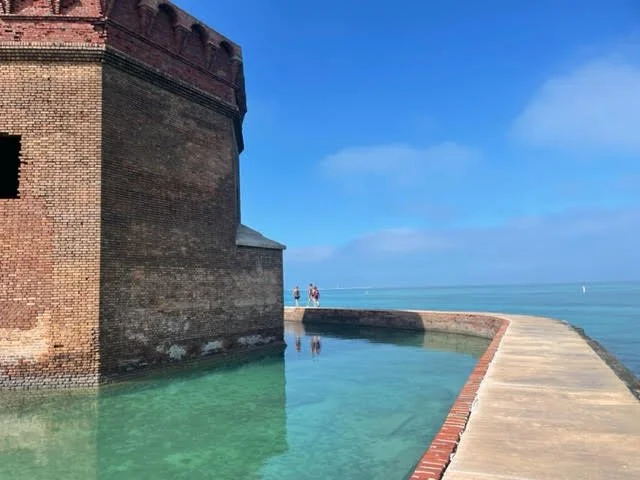
“Almost 70 miles (113 km) west of Key West lies the remote Dry Tortugas National Park. This 100-square mile park is mostly open water with seven small islands. Accessible only by boat or seaplane, the park is known the world over as the home of magnificent Fort Jefferson, picturesque blue waters, superlative coral reefs and marine life, and the vast assortment of bird life that frequents the area.”

Places to eat in Key West:
Brunch- a staple in Key West: Blue Heaven: https://blueheavenkw.com
Brunch or Lunch for Southern cuisine: Firefly: http://www.fireflykeywest.com
Bars: Classic Historical Tavern: The Green Parrot. https://www.greenparrot.com
Dinner: Bagatale for whole fried red snapper!: https://www.bagatellekeywest.com
Tapas: Tiger Bar for exotic eats and a fun time: https://tigerbarkw.com

Do not underestimate the Southern Charm on this little island, and if you can afford a few days, eat as many places as you can! I haven’t had such good food since I lived in Charleston. Now my landlocked self may be just a little deprived of good seafood. BUT…. Enjoy yourselves while there!!
I have been to Key West twice and highly recommend staying in a historical bed and breakfast. There are plenty of big hotels on the east side of the island, but I can promise it is worth the extra money to be able to walk everywhere and have a more authentic Key West experience.
Here’s where we stayed: https://www.keywesthospitalityinns.com/wickerguesthouse
This guest house was clean, comfortable, and the staff made us feel so welcome, they even remembered our names each time we came back. I would stay here again for sure, especially with the pool area in the back! This company had some other buildings in the downtown as well. You can tell it is owned as a small business and definitely made me feel that southern charm!

Money savings tips for Dry Tortugas: This is a hard one to save on…
Once you get to Dry Tortugas, Camp for a couple nights instead of staying in Key West. You have to book a campers permit ahead of time and also figure out how to fly with camping gear, but it could be amazing to see the night sky.
Go just for one evening (the night before your Dry Tortugas boat trip) and then once you return, drive back to Miami.
Pack your own meals and drinks. Everything on the island is expensive, think coffee $5, soda $4, beer $8. So if you really need to save cash, just pack a cooler! I’ve done it many times, but I wanted to eat seafood and southern cuisine while here this time!
No matter if you decide to go for just the park, or for the whole key west experience, you won’t be disappointed! I highly recommend swimming and snorkeling.
Insider tips for the boat rides:
Bring cards or board games, there is no cell service and the boat rides are 3 hours each way!
Bring your own towel and beach chair for chilling Oceanside once on the island!
Sunscreen and good walking shoes if you plan to your the fort extensively.
Don’t miss the snorkeling, as I went with some native Floridians, they said it was the clearest water they’d ever seen.
Take an underwater camera!
Plan on Dramamine for those that get motion sickness.
Go on the ranger tour.
Climb the spiral stairs and walk around the top level of Fort Jefferson.

Have fun and stay tuned for my next blog on national park visits !!
-Elaina

Hemingway cats frequent the island with an extra thumb! Yes cats with 6 toes!


You will be amazed at the color and clarity of the water!
How I Saw 3 National Parks For Under $300!
Carlsbad Caverns, Guadalupe Mountains, and White Sands National Parks
2 nights, 3 days, shared costs with 1 other friend
Day 1: Leave Denver at 5:30 am, drive 8 hours down to Carlsbad Caverns National Park.
Stop for gas once: $45
Ate food from our pantry, mostly snacks, veggies, fruits, crackers, canned tuna, and cliff bars.
Arrive at Carlsbad Caverns national park and use park pass to enter. Pay for a tour $15. https://www.nps.gov/cave/planyourvisit/tour_schedule.htm
Wait for the evening bat flight program and hope to see the bats nightly exit from the cavern! https://www.nps.gov/cave/planyourvisit/bat_flight_program.htm
Stay local at motel in Carlsbad, New Mexico *good reviews for cleanliness $79 per night divided by 2 = $39.50 per person. Eat soup and crackers at the hotel for dinner.
Day 2: Drive to Guadalupe Mountains National park at 7am, use park pass to get in.
Hiked Devil's Hallway trail, which took most of the morning. https://adventuremorefamily.com/devils-hall-trail-guadalupe-mountains/
Picnic lunch with snacks and sandwiches
Fill up gas tank: $45
Drive to Alamogordo, New Mexico stay in a motel * cleanliness and good reviews a must. $90 divided by 2 = $45 per person
Heat up dinner in microwave, could be soup, leftovers, TV dinners, etc.
Day 3: Drive to White Sands National Park for sunrise!
Park pass to enter: $0.
Most epic part of the trip was seeing the sunrise here; the sky was pink and the sand was sparkling! https://www.onlyinyourstate.com/new-mexico/sunrises-park-worth-waking-up-early-nm/
Drive back to Denver in the afternoon. $45 fill up gas tank.
Splurge on a good place for dinner $20 per person.
Total Cost: $254 per person.
I know many of you don't live nearby, however, if you can book flights to El Paso, TX for free using your southwest points, then rent a car on Turo.com, and make a well-planned trip to the grocery store, you too can do this trip cheaply and quickly!
10 Tips For Budget-Friendly Travel
A lot of people want to know how to travel on a budget and how I can do so many trips.
I would love to share some tips and tricks with you here, but I am fortunate to be a hospital-based nurse with lots of flexibility in scheduling, so that helps.
However, there are ways to do trips over long weekends and budget friendly if you are willing to make some simple sacrifices in luxury.
Tip #1: DRIVE!
I have driven 10 hours each way on a short 3-day trip, the only cost accruing here is gas, which I know can be a lot, but it's still cheaper then an alternative.
Driving allows you to pack your own food, and possibly car camp depending on weather and location.
Tip #2: Pack and plan your meals
Whether I am driving my own car, or renting a car and flying in, I meal plan and make budget friendly choices for the trip.
Some examples are:
Breakfast: toast and eggs, (if car camping try cereal or fruit).
Lunch: hummus wraps, peanut butter sandwiches, turkey, cheese, and crackers.
Snacks: fruit, veggies, chips, nuts.
Dinner: (this is where I splurge to experience the culture), However, I have also been known to eat tuna and crackers, or soup in a hotel room to save $$!
Tip #3: Credit Cards Perks!
Airlines: I have airline credit cards for everyday use. I use Southwest, United, and plan to apply for an Alaskan card to fly to Alaska for free.
I use my Southwest credit card for meals, gas, groceries, and everyday purchases. I often can fly at least one way for free using points this way. I just flew to Florida for free to see Dry Tortugas, and last year-round trip to California to see Redwoods and more!
Wait until they offer at least 60,000 points, and sometimes, they even offer 80,000! https://creditcards.chase.com/southwest/home
I use my United card for incidentals, miscellaneous, utilities, and other. https://www.united.com/ual/en/us/fly/products/chase.html
I don't fly United as often, but they go to more locations, for example, Missoula, Montana, I flew here for free to visit Glacier my savings up rewards points.
Alaskan Airlines now offering bonus points to sign up. They are great for the pacific northwest, Alaska. There are so many parks up here, Olympic, Mt. Rainier, Denali, etc. https://www.alaskaair.com/content/credit-card/visa-signature
If you prefer more flexibility in your credit card.
Hotels:
Hotels.com is usually cheaper than other sites and if you book 9 hotel rooms, you get 1 night free. https://www.hotels.com/
Marriott credit card offers great perks if you like staying in hotels as opposed to camping or motels.
I also look up southwest.com, hotels options because sometimes they offer 10-15,000 points to book a specific hotel in the area, that will pay for a flight for next time! (and you would have had to book the hotel anyways)
Don't be afraid to try a hostel, just be sure to look up reviews to make sure it's clean.
Tip #4: Go with groups! Don't be afraid to invite someone, people are often so excited to go, but just don't have the planning skills or ideas of where to go!
Going with a group of friends means you can split the cost. It is a win/win for everyone, as they will be able to split costs as well.
I realize this doesn't work with families, however I am doing a family reunion in Sleeping Bear Dunes area, and everyone in the family gets to stay at a big lake house since we're all sharing costs!
Examples: rental car in California for 7 days was $800, if you split between 2 people , it's still $400 each, but if you can find more friends and go with 4, now it's only $200 per person!
When you go with friends, you can often splurge a little more on a cool place because the costs are being shared, also it's more fun!!
Tip #5: Bring your own drinks
Refillable water bottles are a must, and if you must have filtered water, buy a big jug at the store!
Pack a collapsible cooler and buy local beers or beverages to enjoy as a picnic, or at your hotel/air bnb in the evening. If you are camping, it's a must!
Electrolyte packets are a great alternative to Gatorade or Powerade and are more eco-friendly! I mix mine with ice in my water bottle to get the day going.
Tipe #6: Buy a National Park pass
One-time fee will save you money in the long run, and sometimes get you a refund. For example, I booked a Dry Tortugas boat tour and got a $30 refund per person for having a pass.
Tip #7: Camp!
I didn't grow up camping, I never thought I could do it, yet here I am, camping with girlfriend on the road.
You will still need to make reservations many places, which is better to secure your spot in busy areas. Some are still first come, first serve, get there early if this is the case.
Go simple, all you need is a Tent, sleeping bag, sleeping pad, cooler with food and drinks, water, firewood (local only), and warm clothes!
What's in my "camp bin"?? A small plastic tote or bag with essentials for any camp adventure. Leave it ready like a go bag.
toilet paper
lighter
wine opener
can opener
coffee mugs and plastic cups
2 dish towels
fire starter cubes
hot hands warmers, or toe warmers
wireless charger for phones, etc
ear plugs
salt and pepper
tissues
cards
flashlight
headlamp
extra batteries
paper plates and bowls or better yet, reusable dishware
reusable utensils from a camp store, spoon, forks, knife
small cutting board and pocketknife
extra socks and gloves (it gets cold out west!! even in summer)
paper towel roll
Tip #8: Pair park trips with other necessary travel. You can't wait for "next time" because life is short!
Going on a work trip to Boston? Let work pay for part of it, then extend 2 more days, rent a car, and go see Acadia! ** bonus, can some of it be a tax write off?
Have to go see family in San Antonio? See if they are down for an adventure weekend in Big Bend instead of seeing the same city again. You may be surprised how into this family and friends are.
Going to a wedding in Portland? Stay an extra day or 2 and go see Crater Lake!
Family and Friends are more open than many realize! I have way more exciting memories when we do something together outdoor.
Tip #9: Travel in the off-season for your park.
Grand Teton in winter, Big Bend in summer, Badlands in March, and more!
You will save on hotels big time by going in the off season, and bonus is that there will be significantly less visitors.
Plan accordingly for weather. I live in Colorado, so I'm not afraid of the cold, wear thermal leggings under your pants, a good down coat is a must!
Tip #10: Rental Car Tips:
Always book a car that is eco-friendly to save on gas.
I have been trying Turo.com, which is like an air bnb service for cars. People use their own personal cars to make money on the side, and often is cheaper then rental car websites. https://turo.com/
Book early, don't wait to book your rental car, as prices go up as time goes on.
Invite more friends along to share on costs.